Hit the ball with head, get the points and win the match in 90 seconds!
How to play:
Use arrow keys or AD to move the player
Use Space or up arrow key to jump
(more…)
Author: zikrecipes.com
-
Volleyball 2020
-
Summer Brick Out
Summer Brick Out game is classic arcade game with new power ups bonus. Your job is to move the paddle and destroy all the bricks. Tray to collect more of the items which fall from the broken bricks and make your way faster to clean the all bricks. Make your time longer by collecting the falling clocks. Heave Fun!
(more…) -
Bang Bang Salmon Bites
The first time I tried bang salmon, it was like a flavor explosion. It changed how I cook. As someone who loves salmon fishing and trying new recipes, these bites are now my favorite for busy nights.
Bang Bang Salmon Bites are more than just food. They’re a mix of crispy texture, bold flavors, and great nutrition. Imagine tender salmon in a spicy-sweet sauce that’s ready in under 30 minutes.
These salmon bites are special for anyone who loves seafood or wants to improve their cooking. The mix of perfectly cooked salmon and bang bang sauce is both fancy and satisfying.
Understanding Bang Bang Sauce Origins
Bang Bang sauce has become a hit in sport fishing and seafood dishes. It’s loved by food lovers all over the United States. This vibrant sauce makes simple dishes into amazing meals.
The sauce started in American restaurants, thanks to Bonefish Grill’s Bang Bang Shrimp. Its special taste has changed how we enjoy seafood and appetizers.
Traditional Sauce Components
Bang Bang sauce is made of five main ingredients. Together, they create a flavor explosion:
- Mayonnaise (1 cup)
- Sweet chili sauce (4 tablespoons)
- Sriracha sauce (2 tablespoons)
- Fresh lime juice
- Honey (2 teaspoons)
Recipe Evolution
Chefs and home cooks love Bang Bang sauce. They use it in many dishes, from sport fishing boat gatherings to restaurant menus. It’s a versatile culinary star.
Cultural Significance
The sauce is more than a condiment. It shows American culinary creativity. It mixes sweet, spicy, and tangy flavors, appealing to today’s food lovers.
“Bang Bang sauce transforms ordinary meals into extraordinary culinary adventures.”
It only takes 5 minutes to make. Bang Bang sauce can make many dishes better. It’s a favorite at dining tables everywhere.
Essential Ingredients for Bang Salmon
To make delicious Bang Bang Salmon, you need the right ingredients. These ingredients make your dish tasty and healthy. They’re key to a great fly fishing meal.
Here’s what you’ll need for your salmon bites:
- Fresh salmon filets (10 ounces, skinless)
- Panko breadcrumbs (¾ cup)
- Avocado oil for cooking
- Seasoning blend:
- Salt (light sprinkle)
- Black pepper
- Smoked paprika (1 teaspoon)
The sauce is what makes your meal special. You’ll need:
Ingredient Quantity Kewpie Mayo 1/4 cup Thai Sweet Chili Sauce 3 tablespoons Sriracha 2 tablespoons (adjustable) Pro tip: Try using Greek yogurt instead of some mayonnaise. It’s healthier and still creamy, perfect for Bang Bang Salmon.
Preparing this dish is fast and easy. You can have a top-notch meal in under 30 minutes. It’s like having a fly fishing adventure at dinner time.
Preparing Your Salmon for Perfect Results
To make delicious Bang Bang Salmon Bites, you need to prepare your salmon well. Knowing how to pick, cut, and handle it is key. Whether you catch it yourself or buy it, quality is important.
- Choose boneless, skinless salmon filets
- Select fresh or high-quality frozen salmon
- Use sharp kitchen knives for precise cuts
- Aim for uniform 1.5-2 inch cubes
Selecting Quality Salmon
The quality of your salmon affects your dish’s taste. Look for salmon that’s bright and firm, without any discoloration. Wild-caught salmon often tastes better, while farmed salmon is more consistent in texture.
Proper Cutting Techniques
Cutting salmon needs to be precise. Sharp knives are crucial for clean, even cuts. Make sure all cubes are the same size for even cooking. Uneven pieces can cook differently, leading to some bites being overcooked or undercooked.
Temperature Considerations
Temperature is very important when preparing salmon. If using frozen salmon, thaw it in the fridge overnight. For those who catch and freeze their fish, thawing it correctly helps keep its texture and flavor.
“The key to perfect salmon is understanding its temperature requirements and handling it with care.” – Culinary Expert
For fully cooked salmon, aim for an internal temperature of 145°F. Remember, the temperature will rise by about 10°F after you remove it from heat.
Creating the Perfect Bang Bang Sauce
Making the perfect bang salmon sauce is all about precision and flavor balance. Your homemade sauce will turn simple salmon into a gourmet dish. It’s all about knowing how each ingredient adds to the sauce’s taste.
The basic bang bang sauce starts with mayonnaise and sweet chili sauce. Here’s what you need:
- ½ cup mayonnaise
- ¼ cup sweet Thai chili sauce
- 1 tablespoon Sriracha
- 1 tablespoon honey
- 1 tablespoon lime juice
When you mix these, you get a sauce that’s creamy, sweet, and a bit spicy. Mayonnaise gives it a rich feel. Sweet chili sauce adds depth. Sriracha adds heat, honey makes it sweeter, and lime juice adds a zesty touch.
“The magic of bang bang sauce lies in its perfect balance of flavors.” – Professional Chef
Want to tweak the sauce? Add more Sriracha for heat or honey for sweetness. You can make your bang salmon sauce just how you like it.
Pro tip: Make the sauce at least 30 minutes before you serve it. This lets the flavors mix well. Any leftover sauce can be stored in a sealed container in the fridge for up to a week.
Cooking Methods and Techniques
Preparing Bang Bang Salmon needs careful thought about cooking techniques. Whether you’re a seasoned chef or a salmon fishing fan, learning different cooking methods can make your dish stand out.
Each cooking method has its own benefits for your salmon bites. Knowing about temperature, timing, and technique is crucial for perfect results every time.
Air Fryer Method
The air fryer is great for quick, crispy salmon. Here’s how to do it right:
- Preheat air fryer to 400°F
- Cook salmon for 7-8 minutes
- Check internal temperature reaches 145°F
- Spray basket with cooking oil to prevent sticking
Pan-Searing Tips
Pan-searing makes your salmon golden and delicious. Follow these expert tips:
- Use a heavy-bottomed skillet
- Cook 2-3 minutes per side
- Ensure medium-high heat
- Use minimal oil to prevent burning
Oven-Baking Guidelines
Oven baking is a traditional method for consistent results:
- Preheat oven to 400°F
- Bake salmon for 8-10 minutes
- Use parchment paper for easy cleanup
- Check salmon reaches 145°F internal temperature
No matter the method, precision is key for tasty Bang Bang Salmon Bites. They’ll impress your guests and satisfy your cooking creativity.
Achieving the Perfect Crispy Texture
Making the ultimate crispy salmon bites needs skill and technique. Sport fishing fans know texture is key in seafood dishes. Cornstarch is your secret to a crunchy outside that makes your salmon dish stand out.
- Pat salmon pieces dry before coating
- Use fine cornstarch for a delicate crispy layer
- Make sure oil is at 375°F before cooking
- Don’t overcrowd your cooking area
“Crispiness is an art form in sport fishing cuisine – precision matters!”
Keeping the temperature right is crucial for crispiness. Different cooking methods need different approaches:
Cooking Method Temperature Cooking Time Air Fryer 375°F 4-6 minutes Convection Oven 375°F 8-10 minutes Traditional Oven 400°F 8-10 minutes For extra crunch, toast panko breadcrumbs at 400°F for 5-7 minutes. This step turns your salmon bites into a dish that wows seafood fans.
Make sure the salmon is cooked to 145°F for the best taste. Your crispy salmon bites are now ready to be the highlight of any sport fishing meal!
Ideal Serving Suggestions and Pairings
Your Bang Bang Salmon Bites are ready to make any meal special. They’re perfect for fly fishing fans or anyone looking for tasty recipe ideas. These serving tips will take your dish to the next level.
Rice and Grain Foundations
Find the best base for your salmon bites with these options:
- Traditional white rice
- Nutty brown rice
- Low-carb cauliflower rice
- Quinoa for added protein
Vibrant Vegetable Accompaniments
Pair your salmon with fresh, crisp veggies for extra flavor and health:
- Pickled cucumber salad
- Roasted asparagus
- Fresh avocado cucumber salsa
- Steamed broccoli
Sauce Presentation Mastery
“The right sauce can transform a good dish into an unforgettable meal.”
Your Bang Bang Sauce is versatile:
- Drizzle directly over salmon bites
- Serve as a side dipping sauce
- Use as a zesty taco topping
- Mix into a fresh salad dressing
Pro tip for fly fishing enthusiasts: These salmon bites are a great quick meal after fishing. They’re packed with protein and full of flavor.
Nutritional Benefits and Health Considerations
Explore the catch and release nutrition with Bang Bang Salmon Bites! This dish is not just tasty. It’s also full of health benefits in every bite.
Salmon is a nutritional superstar. It gives you a lot of important nutrients. A 3-ounce serving has about 17.3 grams of protein. This is great for keeping your muscles strong and healthy.
Key Nutritional Highlights
- Rich in omega-3 fatty acids supporting heart and brain health
- Excellent source of high-quality protein
- Packed with essential vitamins and minerals
The omega-3 fatty acids in salmon are very good for you. Studies show they can:
- Improve heart health
- Lower heart attack risk
- Help with brain function
- Maybe lower dementia risk
Nutrient Benefit Selenium Powerful antioxidant protection Vitamin B12 Supports nervous system health Magnesium Promotes muscle and nerve function When eating catch and release salmon, remember some things. Wild-caught salmon might have a bit of mercury. People with certain health issues should talk to their doctor first.
The Greek yogurt in the Bang Bang sauce adds protein and makes the dish lighter. This meal is not only delicious but also very good for you!
Storage and Reheating Guidelines
Storing your bang salmon right lets you enjoy leftovers with great taste and texture. It also helps avoid food waste and keeps your meal safe.
Refrigeration Storage Tips
Here are key tips for storing bang salmon:
- Put bang salmon in an airtight container
- Keep salmon and sauce separate to avoid sogginess
- Refrigerate it within 2 hours of cooking
- Store for maximum 2-3 days
Recommended Reheating Methods
To keep bang salmon crispy and flavorful, use these reheating methods:
- Air Fryer (Recommended Method)
- Preheat to 350°F
- Reheat for 3-4 minutes
- Flip salmon halfway through
- Oven Reheating
- Preheat to 275°F
- Cover with foil to prevent drying
- Warm for 10-15 minutes
Storage Duration and Safety
Item Refrigeration Time Storage Container Bang Salmon 2-3 days Airtight container Bang Bang Sauce 5 days Separate sealed container By sticking to these storage and reheating tips, your bang salmon will stay tasty and safe. Always check if it looks or smells right before eating.
Conclusion
Your Bang Bang Salmon Bites are more than a recipe. They turn salmon fishing into a tasty meal. With just 1 ½ pounds of salmon and a quick 20-minute prep, you get a healthy and exciting dish.
This dish is very flexible. It’s great for both seasoned cooks and fishing fans wanting to make their catch special. The Bang Bang Sauce, made with ½ cup mayonnaise and sweet chili and sriracha, adds a zesty flavor.
Salmon fishing is about making unforgettable meals. This recipe works with air frying at 400°F or baking. It’s a low-calorie, high-protein treat that’s delicious and healthy.
Your cooking adventure doesn’t stop here. Try new things, make it your own, and enjoy making a dish that everyone will love.
FAQ
What are Bang Bang Salmon Bites?
Bang Bang Salmon Bites are a tasty and quick dinner. They feature crispy salmon pieces in a spicy bang bang sauce. This dish is great for busy nights or as an appetizer.
How do I choose the best salmon for this recipe?
Choose fresh or high-quality frozen salmon. It should have a bright color and firm texture. Wild-caught salmon is best for flavor and nutrition.
Make sure the salmon smells fresh and doesn’t have any discoloration or strong fishy smells.
What makes bang bang sauce unique?
Bang bang sauce is a mix of mayonnaise, sweet chili sauce, and Sriracha. It’s creamy, spicy, and sweet. Originally for shrimp, it’s now used in many seafood and protein dishes.
Can I make this recipe if I’m watching my diet?
Yes! Bang Bang Salmon Bites are healthy. They’re full of omega-3s and protein. Using Greek yogurt in the sauce makes it lower in calories.
What cooking methods work best for Bang Bang Salmon Bites?
You can use an air fryer, pan, or oven. The air fryer makes them crispy. Pan-searing is quick, and oven-baking is good for big batches.
How can I make the sauce less or more spicy?
Change the heat by adding more or less Sriracha. For less heat, use less Sriracha or a mild hot sauce. For more heat, add more Sriracha or a dash of cayenne pepper.
How long can I store Bang Bang Salmon Bites?
Keep the cooked salmon and sauce in airtight containers in the fridge for 2-3 days. Reheat in an air fryer to stay crispy. Avoid microwaving to prevent sogginess.
Are there any alternative ingredients for dietary restrictions?
Yes! Use gluten-free cornstarch and Greek yogurt for a lighter sauce. Choose coconut aminos instead of soy sauce. For dairy-free, use dairy-free mayonnaise.
What are the best side dishes to serve with Bang Bang Salmon Bites?
Serve with cauliflower rice, brown rice, or a light salad. Pickled cucumbers are great too. You can also put the salmon in tacos or on a fresh green salad.
Can I prepare Bang Bang Salmon Bites in advance?
While best fresh, you can prep the sauce and salmon ahead. Store them separately in the fridge. Cook just before serving for the best texture and flavor.
What is your rating for the recipe?
-
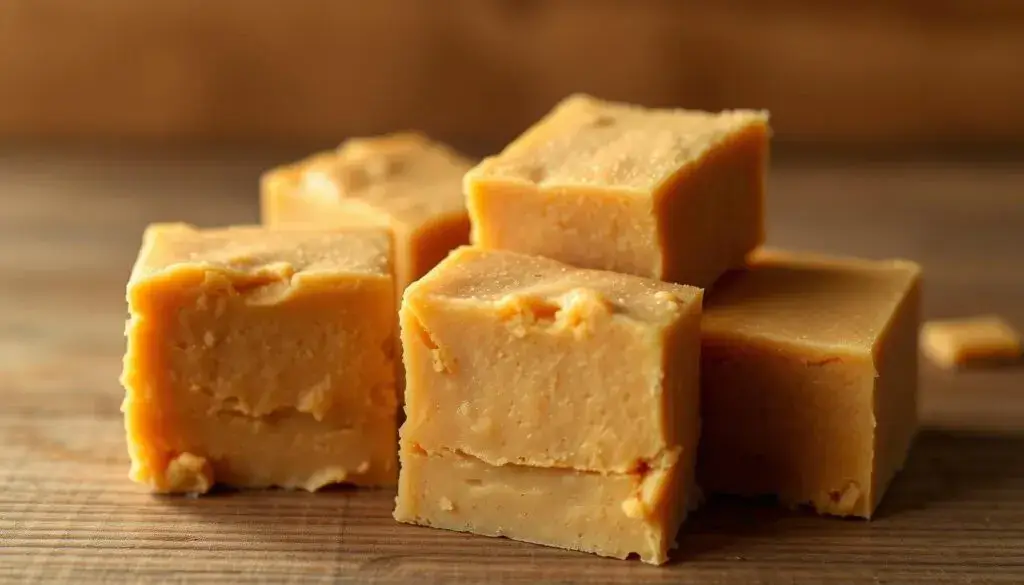
Peanut Butter Fudge Recipe
Imagine biting into a smooth, creamy peanut butter fudge that’s ready in minutes. This easy recipe turns basic ingredients into a rich treat that everyone will love. It’s perfect for both experienced bakers and beginners, offering a taste of luxury with little effort.
Looking for a quick dessert that looks like it took hours? This creamy delight is your go-to. With just four ingredients and 90 seconds of cooking, you’ll make a treat that wows both kids and adults.
Why This Nutty Confection Will Become Your Favorite
Get ready to fall in love with the most irresistible homemade candy. It will change how you enjoy desserts. This treat is simple, flavorful, and indulgent.
Perfect Balance of Sweet and Salty
This fudgy treat has an amazing flavor. Every bite is a mix of sweet and salty that excites your taste buds. The creamy peanut butter adds richness, balancing the sweetness.
- Irresistible sweet-salty combination
- Smooth, creamy texture
- Appeals to multiple taste preferences
Quick and Easy Preparation
Home cooks will love how easy this fudge is to make. It needs five simple ingredients and little time. You can make a top-notch dessert in under an hour, no matter your baking skill.
Budget-Friendly Ingredients
Making this candy won’t cost a lot. You likely have most ingredients in your pantry. Brands like Jif and Peter Pan give it that real peanut butter taste.
Pro tip: This fudge can be stored in an airtight container for up to one week, making it perfect for advance preparation!
Essential Ingredients for Perfect Peanut Butter Fudge
To make the ultimate peanut butter delight, you need the right ingredients. Your treat starts with carefully picked parts that turn simple items into a creamy, rich snack.
For the best peanut butter fudge, use top-notch ingredients. Focus on the right peanut butter and other key items for the perfect taste and texture.
Primary Ingredients
- Creamy Peanut Butter: 1¼ cups (Use standard creamy peanut butter, not natural varieties)
- Unsalted Butter: 2 sticks (8 ounces)
- Powdered Sugar: 3 cups (Sifted for smooth consistency)
- Vanilla Extract: ½ teaspoon
- Kosher Salt: ¾ teaspoon
Choose ingredients that are fresh and of high quality. Your peanut butter should be smooth and creamy. Avoid natural or separated types that can mess up the fudge’s texture.
Ingredient Quantity Purpose Creamy Peanut Butter 1¼ cups Provides rich, nutty flavor Unsalted Butter 8 ounces Creates smooth, creamy base Powdered Sugar 3 cups Adds sweetness, helps set texture Pro tip: Sift your powdered sugar before mixing. This prevents clumps and makes your peanut butter fudge silky-smooth. It will melt in your mouth.
Kitchen Tools and Equipment Needed
Making homemade candy like peanut butter fudge needs the right kitchen tools. The right equipment makes it easier to create this sweet treat. Whether you’re new or experienced, the right utensils are key to making perfect fudge.
Must-Have Utensils for Homemade Candy
To make peanut butter fudge, you’ll need a few important tools:
- Heavy-bottomed saucepan or microwave-safe bowl
- Candy thermometer (crucial for precise temperature control)
- 8-inch square baking dish
- Silicone spatula
- Measuring cups and spoons
- Whisk
Optional but Helpful Tools
These tools are not essential but can make things easier:
- Parchment paper for easy removal
- Kitchen scale for precise measurements
- Offset spatula for smooth spreading
- Digital probe thermometer
Storage Containers for Your Homemade Candy
Keeping your peanut butter fudge fresh is important. Use airtight containers to keep it good for up to three weeks. Wax paper between layers can prevent sticking and keeps the fudge’s texture.
Pro tip: A digital kitchen scale can be a game-changer for consistent results. Accurate measurements are the secret to perfect homemade candy every time!
Step-by-Step Preparation Method
Making this creamy dessert is simple. Your journey to making no-bake sweets starts with a few easy steps. These steps turn basic ingredients into a tasty treat.
Here’s how to prepare the fudge in simple stages:
- Line your baking dish with parchment paper for easy fudge removal.
- Melt unsalted butter in a large saucepan over medium heat, stirring constantly.
- Add creamy peanut butter and stir until smooth.
- Mix in powdered sugar for a velvety texture.
- Pour the mix into the dish and spread it evenly with a spatula.
This fudge takes about 15 minutes to prepare. Then, chill it for 4 hours to set.
“The secret to perfect fudge is patience and precise temperature control.” – Baking Enthusiast
Pro tip: Use a digital candy thermometer. Aim for 226°F to 227°F for the best consistency.
After chilling, cut the fudge into 1-inch squares. You’ll get about 64 pieces from an 8-inch dish.
Tips for Achieving the Perfect Texture
Making the ultimate peanut butter delight needs precision and care. To get a perfect fudgy treat, you must master several key techniques. These techniques turn simple ingredients into a smooth, creamy confection.
Getting the right texture in your peanut butter fudge is both an art and a science. Knowing the small details can change a crumbly mess into a smooth, delicious treat.
Mastering Temperature Control
Temperature is key to your fudgy treat’s success. Here are some essential tips:
- Always use low heat to prevent scorching
- Invest in a reliable candy thermometer
- Aim for consistent, gentle heating
- Remove from heat immediately when ingredients are fully incorporated
Perfecting Mixing Techniques
Your mixing approach greatly affects the peanut butter delight’s texture:
- Stir ingredients gently to avoid introducing excess air
- Use smooth, consistent motions
- Stop mixing when ingredients are just combined
- Avoid over-beating, which can cause graininess
Setting Time Guidelines
Patience is key when making your fudgy treat. Follow these important setting recommendations:
- Chill for 2-3 hours for optimal texture
- Use an airtight container during refrigeration
- Allow fudge to reach room temperature before serving
- Cut into 1-inch squares for perfect portions
“The secret to remarkable fudge lies in the details of preparation and patience.” – Culinary Experts
Storage and Shelf Life
Keeping your homemade candy fresh is key. Your peanut butter fudge can stay delicious for a long time if stored right. It will keep its creamy texture and rich flavor.
There are different ways to store your homemade candy:
- Room Temperature: Store in an airtight container for 1-2 weeks
- Refrigerator: Keep it fresh for 2-3 weeks
- Freezer: Store for up to 3 months
To keep your snack fresh, follow these tips:
- Choose a container with a tight lid
- Use wax paper between layers to avoid sticking
- Avoid direct sunlight and heat
- Keep the temperature steady
Pro tip: Wrap each piece in plastic wrap before freezing. This stops freezer burn and lets you enjoy a piece anytime.
Always check for spoilage before eating. Look for odd smells, color changes, or mold. If you see any, it’s time to throw it away.
Nutritional Information and Serving Size
Your favorite nutty confection comes with some important nutritional insights. Understanding the nutritional profile of peanut butter fudge helps you enjoy this delectable treat responsibly.
Caloric Content and Breakdown
A single serving of peanut butter fudge (about 1-inch square) is a delightful treat. It has a modest nutritional profile:
- Calories per serving: 94 kcal
- Total fat: 6g
- Carbohydrates: 9g
- Protein: 1g
Dietary Considerations
This peanut butter fudge is a tasty indulgence. But, it’s important to know its nutritional makeup. The Nutriscore Rating of 39/100 shows it’s less nutritionally dense. It should be enjoyed in moderation.
Nutrient Amount per Serving % Daily Value Saturated Fat 2g 10% Cholesterol 9mg 3% Sodium 23mg 1% Sugar 8g 16% Portion Control Tips
Enjoying this nutty confection doesn’t mean derailing your nutrition goals. Here are smart serving suggestions:
- Limit to 1-2 pieces per sitting
- Pair with fresh fruit for balance
- Consider it an occasional treat
- Share with friends and family
“Moderation is key when enjoying delicious treats like peanut butter fudge.” – Nutrition Expert
Pro tip: The recommended daily caloric intake is 2,000 calories, so factor in your fudge indulgence accordingly.
Creative Variations and Add-ins
Turn your classic peanut butter fudge into a fun adventure with these creative twists. Try new ingredients to make your fudge go from basic to gourmet. It’s a great way to enjoy a special dessert.
Here are some cool ways to make your chocolate peanut butter fusion stand out:
- Chocolate Chip Explosion: Add a bunch of dark, milk, or white chocolate chips for extra texture and flavor
- Nutty Crunch: Mix in chopped peanuts, almonds, or cashews for a nice crunch
- Sea Salt Finish: Sprinkle high-quality sea salt on top for a sweet and salty taste
- Swirl Method: Make beautiful marbled patterns by layering melted chocolate and peanut butter
This dessert is all about being creative. You can change it up with different mix-ins and toppings. It’s perfect for any occasion or just a sweet treat for yourself. These variations will keep your chocolate peanut butter fusion exciting and tasty.
Pro tip: Always let your fudge set completely before adding toppings. This ensures the best texture and look.
If you’re feeling bold, try using almond or cashew butter instead of peanut butter. It’s a great way to discover new flavors. The only limit is your imagination!
Conclusion
Making the perfect peanut butter fudge is more than a recipe. It’s a journey in sweet culinary crafting. With simple ingredients and basic skills, you can turn ordinary items into a delicious creamy dessert. This dessert will wow your family and friends.
Your homemade peanut butter fudge is very versatile. It’s great for holidays, quick desserts, or thoughtful gifts. Remember, each batch you make will get better with practice.
Start your fudge-making adventure today. Cut your fudge into 1-inch squares. Try adding sea salt or chopped nuts for extra flavor. Enjoy the process of making a classic treat that keeps well in the fridge for up to three weeks. Your peanut butter fudge journey is just starting!
We encourage you to share your fudge-making stories, creative twists, and family feedback. Your ideas could inspire others to try making homemade peanut butter fudge.
FAQ
How long does peanut butter fudge last?
Homemade peanut butter fudge can last 7-10 days at room temperature in an airtight container. If you refrigerate it, it stays fresh for 2-3 weeks. Freezing it for up to 3 months is also an option, just make sure it’s wrapped well.
Can I use natural peanut butter for this recipe?
It’s better to use creamy, processed peanut butter. Natural peanut butter can make the fudge texture off. Jif or Skippy are good choices for a smooth fudge.
Is peanut butter fudge suitable for people with dietary restrictions?
Traditional peanut butter fudge isn’t good for those with nut allergies or dairy restrictions. But, you can make it vegan-friendly by using different nut butters and dairy-free ingredients.
How can I prevent my fudge from being grainy?
To avoid graininess, mix the ingredients well and use powdered sugar. Stir carefully and avoid overheating. Quick mixing helps prevent graininess.
Can I add other flavors to my peanut butter fudge?
Yes! You can add chocolate chips, nuts, sea salt, or vanilla extract. These can make your fudge even more delicious and unique.
What’s the best way to cut peanut butter fudge?
Chill the fudge well before cutting. Use a sharp knife and clean it between cuts. For square cuts, a ruler or bench scraper works best. Let it soften a bit before serving.
How many calories are in a typical piece of peanut butter fudge?
A 1-inch square of fudge has about 100-120 calories. The exact calories depend on your recipe. Enjoy it in moderation as it’s quite rich.
Can I make peanut butter fudge without a candy thermometer?
Yes, you can make it without a thermometer. Many recipes use the microwave or stovetop. Just be careful not to overheat and follow the recipe closely.
What is your rating for the recipe?
-
Pastina Recipe
Growing up in an Italian-American kitchen, I remember my grandmother’s pastina. It was more than a meal; it was love, comfort, and healing. This tiny pasta, smaller than most grains, carries generations of tradition and warmth.
Pastina is more than a simple dish. It’s a culinary hug that turns simple ingredients into a comforting experience. Whether you’re feeling sick or just want a taste of home, pastina brings comfort in every spoonful.
Understanding Pastina: Italy’s Beloved Tiny Pasta
Pastina is at the heart of Italian cooking, loved by many for generations. It’s not just pasta; it’s a symbol of Italian culture and family memories.
In Italian homes, pastina is more than food. Its small size is great for soups and many dishes. It’s loved by both home cooks and chefs.
Origin and Cultural Significance
Pastina has been around since the 12th century. Made from wheat flour and water, it’s a comfort food staple. Italian families give it to babies as one of their first foods, showing its value.
Different Types of Pastina Shapes
- Stelline (Little Stars): Small star-shaped pasta
- Acini di Pepe: Tiny pepper-seed sized pieces
- Ditalini: Short tube-like miniature pasta
- Orzo: Rice-shaped pasta
Traditional Uses in Italian Cuisine
Pastina is perfect for simple, comforting dishes. It’s great in chicken soup and hearty broths. It absorbs flavors well, making it a favorite in Italian dishes like Italian Wedding Soup and Minestrone.
Looking for a cozy meal or wanting to explore Italian cooking? Pastina is a tasty way to dive into tradition.
Essential Ingredients for Perfect Pastina
Making the perfect pastina starts with picking the right pasta. Ditalini and stelline are top picks for their true Italian taste. These small shapes are more than ingredients; they’re a part of Italy’s cooking tradition.
Here are the key ingredients for pastina:
- High-quality small pasta varieties like stelline or ditalini
- Fresh chicken or vegetable broth
- Unsalted butter
- Freshly grated Parmesan cheese
Pastina is not only tasty but also nutritious. A single serving gives you:
Nutrient Amount Total Calories 200 kcal Carbohydrates 32 g Protein 7 g Fat 5 g Pro tip: Use 1 cup of pasta to 2 cups of boiling water for the best texture.
“The secret to great pastina lies in its simplicity and quality of ingredients.” – Italian Cooking Tradition
For the best taste, use 8 oz of Jovial stelline pasta and cook for 4 to 4.5 minutes. Your pastina will be a comforting, nutritious meal that connects you to Italy’s culinary heritage.
The Basic Pastina Recipe
Pastina, those delightful petite noodles, are a kid-friendly pasta that brings comfort and nostalgia to kitchens across America. This simple yet delicious recipe transforms tiny pasta into a creamy, satisfying dish that both children and adults will love.
Preparing pastina is an art that requires attention to detail and a few key techniques. The process might seem simple, but achieving the perfect consistency takes practice.
Essential Cooking Steps
- Select 8 oz of pastina stelline (star-shaped petite noodles)
- Prepare 34 oz of chicken bone broth (2 packages of 17 oz each)
- Bring broth to a rolling boil in a medium-sized pot
- Add pastina and stir continuously
- Reduce heat to low-medium
Achieving Perfect Consistency
The secret to incredible pastina lies in constant stirring and carefully managing heat. Your goal is to have the pasta absorb approximately 85% of the liquid, creating a creamy texture that’s neither too soupy nor too dry.
“Pastina is more than a meal; it’s a warm hug in a bowl.” – Italian Cooking Wisdom
Optional Flavor Enhancements
- Add 4.5 tablespoons of salted butter
- Sprinkle 1/2 cup freshly grated pecorino cheese
- Optional herbs like parsley or basil
Your kid-friendly pasta is ready in just 6-7 minutes, making it a quick and nutritious meal perfect for busy families.
Broth Selection and Preparation
Making the perfect soup pasta starts with a great broth. The quality of your broth is key to an authentic Italian pasta dish. Whether you buy it or make it, the broth sets the flavor of your meal.
For a true Italian pasta taste, try these broth tips:
- Use fresh veggies like carrots, onions, and celery
- Simmer them for 20-25 minutes to get all the flavor
- Choose top-notch chicken, vegetable, or beef broth
Making homemade vegetable broth is easy and rewarding. Here’s a simple recipe:
Ingredient Quantity Purpose Water 3 cups (700 ml) Base liquid Carrot 1/4 medium Sweetness and color Onion 1/4 medium Depth of flavor Celery 1/2 medium stick Aromatic base Potato 1/2 medium Thickening agent Kosher Salt Pinch Seasoning Tomato Paste 1 teaspoon Umami enhancement Remember, the broth is more than just liquid—it’s the soul of your dish. Try adding herbs like parsley or thyme to boost your Italian pasta. The goal is to make a broth that’s rich, flavorful, and pairs well with the delicate pastina.
Cheese and Butter: The Key to Creamy Pastina
To make perfect Italian pasta, you need to know how to mix cheese and butter. Pastina becomes a rich comfort food with the right dairy choices.
Great pastina comes from the right cheese and butter techniques. Italian chefs share their secrets for that creamy feel.
Selecting the Best Cheese Options
For your tiny pasta, pick these cheeses:
- Parmigiano-Reggiano: Classic Italian cheese with sharp, nutty flavor
- Pecorino Romano: Robust and salty option for intense taste
- Grated Grana Padano: Milder alternative with smooth melting properties
Butter Incorporation Techniques
Butter needs to be added carefully. Take your pastina off the heat and mix in cold butter cubes. This makes it silky and smooth without overpowering the pasta.
Cheese Type Flavor Profile Melting Quality Parmigiano-Reggiano Sharp, Nutty Moderate Pecorino Romano Salty, Intense Quick Grana Padano Mild, Smooth Excellent Creating the Perfect Silky Texture
To get that authentic creamy consistency, do this:
- Use room temperature butter
- Grate cheese finely
- Stir continuously while adding cheese
- Add small amounts of pasta water if needed
Your pastina should look smooth and velvety. It should cover each tiny pasta piece perfectly.
Variations of Traditional Pastina Recipes
Pastina is a versatile small pasta variety that offers endless culinary possibilities. While traditional recipes provide a classic foundation, home cooks can explore numerous creative adaptations of this beloved Italian comfort food.
When preparing soup pasta with pastina, you can experiment with different flavor profiles and ingredients. Consider these exciting variations:
- Vegetable-Packed Pastina Soup: Add diced carrots, celery, and zucchini for a nutritious twist
- Protein-Rich Pastina: Incorporate shredded chicken or small meatballs for extra substance
- Creamy Cheese Pastina: Blend in Parmesan or pecorino for a rich, velvety texture
Regional Italian traditions inspire unique pastina preparations. Some families prefer a soupier consistency, while others create a more risotto-like dish. The key is understanding how small pasta varieties can transform a simple recipe into a memorable meal.
Experimenting with different broths can dramatically change your pastina experience. Vegetable, chicken, or even beef broth can provide distinct flavor foundations for your soup pasta creation.
- Vegetable broth for a lighter, fresher taste
- Chicken broth for classic comfort
- Beef broth for a deeper, more robust flavor
Remember that pastina’s charm lies in its adaptability. Whether you’re seeking a quick comfort meal or an intricate culinary experience, these tiny pasta shapes offer something for every palate.
Health Benefits and Nutritional Value
Pastina is more than a tasty baby pasta. It’s a nutritional powerhouse with amazing health benefits. This kid-friendly pasta is not just comforting; it’s a complete nutritional package that supports your well-being.
Comfort Food with Healing Properties
Your favorite childhood dish does more than just satisfy hunger. A two-ounce portion of pastina delivers impressive nutritional value:
- 7 grams of protein for muscle support
- 3 grams of dietary fiber for digestive health
- Essential carbohydrates for energy
Digestive Benefits
Pastina is great for sensitive digestive systems. Its small size and soft texture make it easy to digest. It’s perfect for babies starting solid foods or people with sensitive stomachs.
Immune-Boosting Potential
Ingredient Health Benefit Turmeric Enhances antibody responses, antibacterial properties Ginger Antioxidant, anti-inflammatory, antiviral properties Carrots Boosts immune responsiveness Celery Powerful antioxidant characteristics When made with nutrient-rich broths and immune-boosting ingredients, pastina becomes a healing meal. It supports your body’s natural defense mechanisms.
A bowl of pastina isn’t just food—it’s a culinary embrace that nourishes both body and soul.
Serving Suggestions and Pairings
Your Italian pasta journey doesn’t stop after cooking pastina. These small noodles are perfect for making meals you’ll remember. They’re great for a quick lunch or a cozy dinner, adding a special touch to your dishes.
Here are some exciting pairing ideas for your pastina:
- Roasted Chicken: A classic rosemary-infused roasted chicken pairs well with pastina’s soft texture
- Seafood Options: Try roasted salmon with a citrus butter sauce for a fancy meal
- Traditional meatballs make a great protein match
- Roasted Brussels sprouts add a nutritious veggie touch
When serving pastina, aim for a cozy dining atmosphere. A warm bowl, fresh cheese, and Italian bread are key. They make the dish feel more inviting.
Cheese can really make your pastina dish better. Try these options:
- Pecorino Romano
- Parmesan
- Mozzarella
Pastina’s versatility is its greatest strength. It can be a simple side or the main event. These tiny Italian pasta wonders can turn any meal into a cozy, comforting experience.
Troubleshooting Common Pastina Problems
Cooking pastina can be tricky. These small pasta varieties need special care to avoid common mistakes. Knowing how to handle these tiny noodles will help you make perfect dishes every time.
Preventing Sticking and Clumping
Pastina’s small size makes it prone to sticking. To avoid this issue, follow these key strategies:
- Stir constantly during cooking
- Use plenty of liquid
- Add a small amount of olive oil to the pot
- Remove from heat immediately after cooking
Consistency Management
It’s important to control the liquid-to-pasta ratio for the right texture. Too thick? Add warm broth. Too thin? Let it simmer briefly to reduce.
Problem Solution Sticky Pastina Rinse with cold water, add extra broth Overcooked Pasta Mix with butter, cheese to improve texture Dry Pastina Stir in additional warm broth or cream Reheating pastina needs gentle handling. Use low heat and add a splash of broth to restore its creamy consistency. Microwave in short intervals, stirring between each to prevent uneven heating.
Pro tip: Always keep a close eye on these delicate miniature pasta shapes to ensure perfect results!
Storage and Reheating Tips
When making tiny pasta dishes, think about how you’ll store and reheat them. Your pastina soup needs special care to keep its texture and taste just right.
Storing tiny pasta soup can be a challenge. Its delicate nature means you must be extra careful to keep it in top shape.
Proper Storage Methods
- Cool the pastina soup completely before storing
- Use airtight containers for refrigeration
- Store soup and tiny pasta separately to prevent clumping
- Refrigerate leftovers within 2 hours of cooking
- Keep refrigerated pastina for up to 3-4 days
Best Reheating Practices
When reheating soup pasta, handle it gently. This helps avoid overcooking and keeps its texture soft.
- Remove pastina from the refrigerator 10-15 minutes before reheating
- Add a splash of fresh broth to prevent dryness
- Reheat on low-medium heat
- Stir occasionally to distribute heat evenly
- Add a small pat of butter for extra creaminess
Pro tip: If your tiny pasta becomes too thick, thin it out with a little warm broth or water while reheating.
Freezing Guidelines
Freezing is a good option for longer storage. Use freezer-safe containers and use within 3 months for the best taste.
- Leave 1-inch space at the top of the container
- Label with the date of preparation
- Thaw in the refrigerator overnight
- Reheat gently to preserve texture
Conclusion
Exploring pastina shows us more than just a simple Italian pasta dish. It’s a heartwarming tradition that brings families together. With only 20 minutes of prep time, it’s easy to make and enjoy.
Pastina is great for all kinds of diets. It can be a quick comfort food or a healthy meal. Its quick cooking and simple ingredients make it perfect for busy cooks.
Cooking with pastina is about making memories and trying new flavors. It shows the beauty of Italian cuisine. Even simple ingredients can become something amazing.
Your journey with pastina is just starting. Every time you make it, you join a long tradition of comfort and nourishment. So, get your pot ready and let pastina make your meal unforgettable.
FAQ
What exactly is pastina?
Pastina is a tiny pasta used in Italian cooking. It comes in shapes like stars, circles, and more. It’s great in soups and broths, especially for kids and when you’re not feeling well.
Is pastina only for babies and children?
No, pastina is enjoyed by all ages. It’s a favorite comfort food, especially in warm broth or with cheese and butter.
What are the most common types of pastina?
Popular pastina shapes include stelline, ditalini, alfabeto, and acini di pepe. Each shape is used in different ways in recipes.
How do I cook pastina perfectly?
Use quality broth and stir constantly to avoid sticking. Cook on low to medium heat. Add cheese and butter at the end for creaminess. Keep an eye on the heat.
Can pastina be made vegetarian or gluten-free?
Yes, use vegetable broth for vegetarian pastina. For gluten-free, choose pastina made from rice, corn, or other gluten-free grains.
How long does pastina take to cook?
Pastina cooks quickly, in 5-8 minutes. Its small size means it absorbs liquid fast, so watch closely.
Is pastina nutritionally beneficial?
Pastina is easy to digest and can be made nutritious with the right broth and ingredients. It’s often seen as a healing food, offering comfort and carbs.
How should I store leftover pastina?
Keep leftover pastina in an airtight container in the fridge for 2-3 days. Reheat with a bit of fresh broth or water to keep it creamy.
Can I add other ingredients to my pastina?
Absolutely! Add veggies, herbs, cheeses, or small pieces of protein like chicken. Pastina is great for creative dishes.
What’s the difference between pastina and orzo?
Pastina is smaller and comes in various shapes. Orzo is shaped like rice and is slightly larger. Pastina is often used in soups and as a comfort food.
What is your rating for the recipe?
-
Cornish Hen Recipe
I remember the first time I discovered the magic of Cornish hens. It was a crisp autumn evening. The aroma of roasted poultry filled my kitchen, making dinner special. These petite game birds make any meal a celebration of flavor and elegance.
Cornish hens are more than just a poultry dish – they’re a culinary canvas waiting to be transformed. They usually weigh between 1 to 2.5 pounds. This makes them perfect for individual servings. Whether it’s an intimate dinner or a special family meal, Cornish hens add sophistication to your table.
Get ready for a culinary journey that will boost your cooking skills and impress food lovers. This guide will teach you everything about preparing the perfect Cornish hen. From selection to serving, we’ve got you covered.
Understanding Cornish Hen: What Makes It Special
Explore the world of small chicken breeds, like the rock cornish hen. These tiny birds are more than small chickens. They are a culinary treasure with a rich history.
Cornish hens are a special mix of Cornish and White Plymouth Rock chickens. They stand out because of their small size and unique features. These traits make them different from regular chickens.
Origins and Characteristics
These small chicken breeds have special traits:
- Harvested at less than five weeks of age
- Typically weighing under two pounds
- Developed through strategic crossbreeding
- Known for tender, flavorful meat
Nutritional Benefits
The rock cornish hen is packed with nutrients for its size. Here’s a look at its nutritional profile:
Nutrient Amount per Serving Calories 415 kcal Protein 39.8g Carbohydrates 8g Total Fat 9.3g Size and Serving Portions
When planning your meal, keep these serving tips in mind:
- Typical serving: One Cornish hen per adult
- Children might share a single hen
- Each hen provides approximately 1-2 servings
Cornish hens are perfect for intimate dinners or special events. They offer a gourmet experience in a small package.
Essential Ingredients and Equipment for Perfect Roasting
To make a tasty roasting hen, you need the right ingredients and tools. Start your gourmet poultry journey with the best equipment and ingredients. This will make your Cornish hen dish stand out.
Essential Kitchen Equipment
- Roasting Pan: A sturdy, heavy-duty pan for even heat distribution
- Digital Meat Thermometer: Ensures accurate internal temperature reading
- Kitchen Shears: Perfect for spatchcocking your roasting hen
- Sharp Chef’s Knife: For precise cutting and preparation
- Cutting Board: Preferably wooden or plastic for poultry preparation
Key Ingredients for Flavor
When making your gourmet poultry, use fresh, top-notch ingredients. Here are the must-have seasonings and marinades:
- Kosher salt and freshly ground black pepper
- Fresh herbs like rosemary, thyme, and sage
- Olive oil or butter for moisture
- Citrus fruits (lemon or orange) for brightness
- Garlic and shallots for depth of flavor
Give your roasting hen the best care. Invest in quality tools and ingredients. This will turn a simple Cornish hen into a memorable dish.
Pro Tips for Equipment Selection
- Choose a roasting pan with low sides for optimal air circulation
- Use a reliable instant-read thermometer for precise cooking
- Opt for stainless steel or cast-iron kitchen tools for durability
Spatchcock Technique: The Secret to Even Cooking
Learning the spatchcock technique can change how you cook poultry, especially Cornish hens in French dishes. It makes cooking more even and gives you a crispy skin that wows your guests.
Spatchcocking is a key technique. It involves removing the backbone to flatten the bird. This makes sure every part of the hen cooks evenly.
Step-by-Step Spatchcocking Guide
- Place the Cornish hen breast-side down on a cutting board
- Using sharp kitchen shears, cut along both sides of the backbone
- Remove the backbone completely
- Flip the hen over and press down firmly to flatten
- Gently crack the breastbone to help it lay completely flat
Benefits of Flattening the Bird
Spatchcocking has many benefits for cooking poultry:
- Reduces cooking time by about 25%
- Ensures more consistent internal temperature
- Increases surface area for seasoning
- Produces crispier skin
- Allows for more even heat distribution
Tools Needed for Spatchcocking
Tool Purpose Sharp Kitchen Shears Cutting backbone Cutting Board Stable surface for preparation Paper Towels Drying chicken for crispy skin Meat Thermometer Checking internal temperature Using the spatchcock technique will improve your French cooking skills. It ensures perfectly cooked poultry every time. Don’t forget to dry the hen before cooking for that crispy skin!
Seasoning and Dry Brining Methods
Dry brining turns your Cornish hen into a flavorful main dish for family dinner. It involves seasoning the bird well and letting it sit uncovered in the fridge. This method keeps moisture in and boosts the hen’s natural taste.
Success in dry brining comes from the right seasoning mix and timing. Here’s how to season your Cornish hens like a pro:
- Choose a good quality coarse salt as your base
- Add spices like black pepper and paprika
- Use a bit of sugar for caramelization
- Make sure to cover the whole bird evenly
Your seasoning rub should include:
Ingredient Quantity Coarse Salt 1.5 tablespoons Ground Black Pepper 1 teaspoon Paprika 2 teaspoons Sugar 1.5 tablespoons To get the best results, dry brine your Cornish hens for 12 to 48 hours. This method lets the salt soak into the meat. It makes the bird juicy and full of flavor, perfect for any family dinner.
Temperature and Timing Guidelines
Cooking a perfect roasting hen for your holiday meal needs precision. Paying close attention to temperature and timing is key. This ensures your dish impresses guests and is safe to eat.
When cooking a Cornish hen, it’s important to follow specific guidelines. The right approach can make your roasting hen truly special.
Proper Oven Settings
For the best roasting, follow these temperature tips:
- Preheat your oven to 425°F (220°C)
- Initial roasting time: 25 minutes at high temperature
- Reduce temperature to 350°F (175°C) for remaining cooking time
- Total cooking time: 50-55 minutes
Internal Temperature Goals
It’s vital to monitor the internal temperature for both taste and safety. Your goal is to reach an internal temperature of 165°F (74°C). Use a meat thermometer to check the thickest part of the hen, like the thigh, without touching the bone.
Resting Time Importance
After taking your roasting hen out of the oven, let it rest for 15 minutes. This step ensures the hen stays moist and tender. Covering it loosely with foil helps keep the temperature steady.
By sticking to these precise guidelines, you’ll have a perfectly cooked Cornish hen. It will be both safe and incredibly tasty.
Classic Cornish Hen Recipe with Citrus and Spices
Get ready to take your French cooking to the next level with this amazing Cornish hen recipe. It combines fresh citrus and strong spices. This dish turns the cornish hen into a true culinary gem that will wow your guests.
Ingredients You’ll Need
- 2 whole Cornish hens (approximately 1-2 pounds each)
- 1/2 cup fresh citrus juice blend
- 2 tablespoons olive oil
- 2 tablespoons kosher salt
- 1 tablespoon chili powder
- 1 teaspoon ground cumin
- Fresh ground black pepper
Preparation Method
Begin by preparing your cornish hen carefully. First, dry brine the birds for 12-24 hours. This step ensures deep flavor and tender meat that’s almost like butter.
Cooking Process
- Preheat your oven to 400°F
- Spatchcock the Cornish hens to ensure even cooking
- Massage the birds with olive oil and spice mixture
- Roast for approximately 45 minutes
- Check internal temperature reaches 165°F
For those who love French cooking, remember: the citrus juice tenderizes the meat and adds a zesty flavor. It perfectly complements the rich Cornish hen.
Nutritional Highlights
Each serving is a nutritional win:
- Calories: 230 kcal
- Protein: 3g
- Fat: 18g
- Carbohydrates: 11g
Your roasted Cornish hen will be a hit. It combines tender meat with fresh citrus and warm spices. It’s like a trip to a French countryside kitchen.
Advanced Cooking Techniques and Tips
Cooking gourmet poultry needs skill and precision. This section will help you improve your game bird cooking. You’ll learn to make meals that taste like they’re from a restaurant.
Basting Methods to Enhance Flavor
Basting keeps your Cornish hen moist. Here are some expert tips:
- Use melted butter or pan drippings every 15-20 minutes
- Apply herb-infused oils for extra depth of flavor
- Rotate the bird during cooking to ensure even browning
Achieving Perfectly Crispy Skin
Getting crispy skin is all about the right steps:
- Pat the game bird completely dry before seasoning
- Use high heat during the last 10-15 minutes of cooking
- Consider using a convection setting to promote crispiness
“Crispy skin is the hallmark of a perfectly prepared Cornish hen” – Professional Chef Recommendation
Troubleshooting Common Cooking Challenges
Watch out for these common issues when cooking your gourmet poultry:
- Uneven cooking: Use a meat thermometer to check internal temperature
- Dry meat: Brine the hen before cooking and avoid overcooking
- Lack of flavor: Experiment with different herb and spice combinations
Remember, Cornish hens cook about 50% faster than regular chickens. Make sure they reach an internal temperature of 165°F (74°C). This ensures they’re safe and taste great.
Side Dish Pairings and Serving Suggestions
To make your Cornish hen dinner unforgettable, choose the right sides. The right dishes can turn your meal into a special event. It will be a night to remember for everyone.
Here are some classic sides that go great with your roasted Cornish hen:
- Creamy mashed potatoes with herb butter
- Roasted seasonal vegetables
- Wild rice pilaf
- Garlic-roasted asparagus
- Honey-glazed baby carrots
For a fancy look, put your Cornish hen on a platter with roasted veggies. It makes your dinner look like a fancy meal.
“A well-paired side dish can turn a simple meal into a culinary celebration.” – Professional Chef Recommendation
If you love wine, try pairing it with your Cornish hen. Beaujolais Villages is a great choice. It has bright flavors that match the hen’s taste perfectly.
Wine Pairing Flavor Profile Recommended Occasion Beaujolais Villages Light, fruity Casual family dinner Pinot Noir Soft tannins Elegant holiday meal Dry Rosé Refreshing, balanced Summer gatherings Remember, serving one Cornish hen per person makes everyone feel special. It’s perfect for family dinners or holiday meals.
Storage and Reheating Instructions
After enjoying a delightful family dinner with poultry, it’s important to know how to store and reheat your Cornish hen. This keeps its flavor delicious and ensures food safety.
Refrigeration Methods
Leftover Cornish hen can be safely stored in the fridge with the right steps. Follow these tips to keep its quality:
- Use an airtight container to prevent moisture loss
- Store in the refrigerator within 2 hours of cooking
- Consume refrigerated Cornish hen within 3-4 days
Freezing Techniques
Freezing is a great option for longer storage of your poultry:
- Wrap the Cornish hen tightly in plastic wrap
- Add an additional layer of aluminum foil
- Freeze for up to 2 months
- Thaw in the refrigerator for 8-12 hours before reheating
Reheating Best Practices
Reheat your Cornish hen to bring back its original moisture and flavor:
- Preheat oven to 350°F
- Place hen on a wire rack in a baking pan
- Add 1/2 cup of water to the pan
- Cover with foil to prevent drying
- Reheat for 15-20 minutes
- Verify internal temperature reaches 165°F
Pro tip: Always use a meat thermometer to ensure safe reheating temperatures for your family dinner!
Storage Method Duration Recommended Use Refrigerator 3-4 days Quick leftovers Freezer Up to 2 months Long-term storage By following these storage and reheating guidelines, you’ll ensure that your Cornish hen remains delicious and safe to eat. This makes meal planning easier for your family.
Recipe Variations and Flavor Combinations
Exploring different flavors can turn your Cornish hen into a special dish. French cuisine is full of ideas to make this gourmet poultry even tastier.
Here are some seasoning options to excite your taste buds:
- Mediterranean Blend: Oregano, thyme, rosemary, and lemon zest
- Cajun Spice: Paprika, cayenne, garlic powder, and black pepper
- Asian-Inspired: Ginger, soy sauce, sesame oil, and five-spice powder
- Herb de Provence: Classic French seasoning with lavender, thyme, and marjoram
Changing how you cook your Cornish hen can also change its taste. Grilling adds a smoky flavor, while smoking brings deep, rich notes. Air frying gives a crispy outside with less oil, cooking at 360 degrees Fahrenheit for about 45 minutes.
When trying marinades, remember each Cornish hen is about 1.5 pounds. It serves 2 to 4 people. A basic marinade might have 2 tablespoons of olive oil, 2 teaspoons of salt, and 1.5 teaspoons of Italian seasoning.
Pro tip: Always ensure your Cornish hen reaches an internal temperature of 165 degrees Fahrenheit for safe consumption.
Your creativity can make this classic dish unforgettable. It celebrates French cuisine’s elegance and global flavors.
Conclusion
Exploring Cornish hen cuisine opens a world of delightful cooking possibilities. These small chicken breeds are perfect for intimate dinner parties or special family meals. With a size of 1.5 to 2 lbs, they offer a perfect individual serving.
Your culinary skills can truly shine when preparing these delicate birds. The key is understanding precise cooking techniques like spatchcocking, proper seasoning, and maintaining the recommended internal temperature of 165°F. By mastering these methods, you’ll create restaurant-quality dishes that impress guests and elevate your home cooking repertoire.
Remember that practice makes perfect when working with Cornish hens. Each cooking attempt will improve your technique, helping you develop confidence in preparing these delectable small chicken breeds. Whether you’re roasting with citrus, experimenting with spices, or trying advanced cooking methods, your journey with Cornish hens promises delicious rewards.
Embrace the versatility of these compact birds. From quick weeknight dinners to sophisticated gatherings, Cornish hens offer a canvas for culinary creativity. With the right approach, you’ll transform these petite poultry selections into memorable meals that delight both your palate and your dinner guests.
FAQ
What exactly is a Cornish hen?
A Cornish hen is a small chicken breed, often a hybrid. It’s harvested young. Despite its name, it’s not from Cornwall. It’s a special breed known for its small size and tender meat. These birds are great for individual servings and loved in gourmet cooking.
How many people does one Cornish hen serve?
One Cornish hen usually serves 1-2 people. It depends on the hen’s size and side dishes. For a single dinner, one hen is perfect. Smaller appetites might prefer half a hen.
Are Cornish hens healthier than regular chicken?
Cornish hens are nutritious, similar to regular chicken but with fewer calories. They’re rich in protein and vitamins. They can be a lean protein option if cooked without too much fat.
What’s the best way to cook a Cornish hen?
Roasting is the top choice for cooking Cornish hens. The spatchcock method is best for even cooking and crispy skin. Cook at 425°F for 45-60 minutes, or until it reaches 165°F inside.
Can I use different seasonings on Cornish hens?
Yes! Cornish hens are versatile and can be seasoned many ways. Try classic herbs like rosemary and thyme, or go for Mediterranean or global flavors like Moroccan or Asian-inspired marinades.
How long can I store cooked Cornish hen?
Cooked Cornish hen can be stored in the fridge for 3-4 days in an airtight container. For longer storage, freeze it for up to 4 months. Always cool and store safely to keep it fresh.
Are Cornish hens good for special occasions?
Cornish hens are perfect for special occasions. They look elegant and serve one person well. They’re great for dinner parties, holidays, and gatherings where you want a sophisticated main dish.
Can I prepare Cornish hens in advance?
Yes, you can prep Cornish hens ahead. Dry brine them 24-48 hours before, and spatchcock them early. But for the best taste, cook them on the day of serving.
What is your rating for the recipe?
-
Breakfast Pizza Recipe
The smell of sizzling bacon and melted cheese fills the air. Welcome to the world of breakfast pizza. It’s more than just a recipe; it’s a culinary adventure that makes mornings special.
Imagine starting your day with a slice of pizza that’s all about breakfast. Your morning pizza is a feast of flavors and textures. It’s loved by families and brunch lovers alike, blending comfort with gourmet.
Our ultimate breakfast pizza recipe will show you how to make a delicious morning pizza. It combines breakfast favorites with pizza magic. Get ready to change your breakfast game!
What Makes Breakfast Pizza Special
Breakfast pizza turns the classic pizza into a morning treat. It mixes the best of pizza and breakfast, making a brunch pizza that meets your morning hunger with new flavors.

The charm of an egg pizza is its endless possibilities. You can pick from many tasty ingredients to make each slice special.
Origins of Morning Pizza
Breakfast pizza started as a way to mix up morning meals. It was born from chefs who saw pizza as a canvas for breakfast toppings.
Benefits of a Pizza-Style Breakfast
- Quick to make (25 minutes or less)
- Can be made with many toppings
- Great for feeding a crowd
- Has protein, veggies, and flavor all in one
Why This Recipe Works
A great breakfast pizza has the right mix of tastes and textures. The crispy crust, creamy eggs, and meaty flavors make it a hit with everyone.
Ingredient Category Recommended Options Meats Bacon, chorizo, pulled pork, steak Cheeses Feta, cheddar, pepper Jack Vegetables Spinach, mushrooms, bell peppers Sweet Options Fruit jams, seasonal berries Your breakfast pizza is more than a meal. It’s a fun way to start your day with a delicious twist.
Essential Ingredients for Breakfast Pizza
Making the perfect breakfast flatbread needs the right ingredients. Choose high-quality items that taste great and are good for you. Whether you love cooking in the morning or just enjoy a good breakfast, knowing the key ingredients will make your pizza better.
Core Ingredients
- Pizza Dough: The foundation of your breakfast creation
- Eggs: Fresh and preferably large
- Protein Options: Bacon, sausage, or ham
- Cheese Selections: Mozzarella, cheddar, or gruyère
What makes a breakfast pizza special is the mix of ingredients. You can pick your favorite proteins and cheeses to make it just right for you.
Recommended Cheese Combinations
Cheese Type Flavor Profile Best Pairing Mozzarella Mild, creamy Bacon, sausage Cheddar Sharp, tangy Ham, scrambled eggs Gruyère Nutty, complex Vegetable toppings Change up your breakfast tart with new ingredients. Try adding hash browns, bell peppers, or caramelized onions for more flavor.
Pro Ingredient Tips
- Pre-cook meats before adding to pizza
- Use fresh, high-quality eggs
- Experiment with different cheese combinations
- Select toppings that complement each other
Knowing these key ingredients will help you make a breakfast pizza that’s tasty and fulfilling. The secret is to mix flavors and textures well for a great morning meal.
Kitchen Equipment You’ll Need
Making a tasty breakfast pizza needs certain kitchen tools. Whether you love breakfast pies or quiches, the right gear makes cooking fun and easy.
You don’t need every gadget out there. Focus on key tools for the perfect morning meal.
Must-Have Tools for Your Breakfast Pizza
- Large pizza pan or half-size stainless steel baking sheet (9×13 inches recommended)
- 8-inch chef’s knife for precise ingredient preparation
- Cutting board
- Measuring cups and spoons
- Medium-sized mixing bowl (4-quart capacity)
- Oven mitts for safe handling
Optional Equipment to Enhance Your Cooking
These tools aren’t necessary but can make your breakfast pizza better:
- Pizza stone for crispy crust
- Food processor (under $40) for quick ingredient prep
- Air fryer for reheating leftovers
- Digital kitchen scale for precise measurements
“The right tools can transform a good breakfast pizza into an exceptional culinary experience.”
You don’t have to spend a lot on tools. Start with basics and add more as you get better. Your breakfast pizza will still be great, no matter what!
Preparing the Perfect Pizza Base
Making a great morning quiche-inspired breakfast pizza begins with a perfect pizza base. Your base is key to the dish’s success.
For a fast start, use a pre-made pizza dough. If you’re feeling adventurous, making your own dough lets you control the taste and texture.
Here are the important steps for your base:
- Let the dough rest at room temperature for 1½ to 2 hours
- Stretch it to fit a 12-inch pizza pan
- Make sure the crust is even and about ¼ inch thick
- Parbake the crust for 4 minutes at 550ºF for crispiness
Pro tip: For quick mornings, try using tortillas or crescent roll dough. They save time but still taste great.
A well-made base makes your breakfast pizza truly special!
Creating the Signature White Gravy Sauce
The white gravy sauce turns a regular morning pizza into a masterpiece. This creamy sauce is the key that makes your breakfast pizza special.
White gravy adds a Southern touch to your breakfast pizza. It makes a rich base that goes well with classic breakfast foods.
Classic White Gravy Method
To make a real white gravy for your morning pizza, just follow these steps:
- Melt 2 tablespoons of bacon grease in a skillet
- Mince 1 clove of garlic and add to the skillet
- Sprinkle 1 tablespoon of all-purpose flour
- Gradually whisk in 1 cup of whole milk
- Season with ½ teaspoon black pepper and kosher salt
- Stir until the sauce thickens to a creamy consistency
Sauce Consistency Tips
Getting the right white gravy is all about paying attention. It should be thick enough to coat a spoon but still easy to spread.
“The secret to great white gravy is patience and constant whisking”
For your breakfast pizza, spread the sauce leaving a ½-inch edge. This stops it from overflowing and keeps the crust perfect.
About 40% of people love white gravy on their breakfast pizza more than tomato sauce. Mastering this sauce makes your morning pizza unforgettable.
Breakfast Pizza Toppings Guide
Making the perfect egg pizza means picking the right ingredients. You want a mix that makes your brunch pizza unforgettable. The secret is to balance flavors and textures well.
- Protein Options:
- 8-10 crispy bacon slices
- ½ lb breakfast sausage
- Diced ham
- Egg Preparations:
- 4-8 scrambled eggs
- Sunny-side up eggs
- Poached eggs
- Vegetable Additions:
- ½ red pepper, finely diced
- 3 chopped green onions
- Spinach leaves
- Mushrooms
For cheese fans, your egg pizza can have a great mix. Use 1¼ cups provolone and 1 cup Pepper Jack cheese. This combo adds a creamy texture that goes well with other toppings.
Vegetarian options are also exciting for brunch pizza lovers. Try using roasted veggies instead of meat. Add herbs like basil or thyme for extra flavor. The aim is to make a healthy, tasty morning meal.
Pro tip: Arrange your toppings carefully. This ensures even cooking and the best flavor in every bite of your breakfast pizza.
Step-by-Step Assembly Instructions
Making the perfect breakfast flatbread needs precision and careful layering. Your breakfast tart will turn into a tasty morning dish with these expert tips.
Building your breakfast pizza is all about placing ingredients right. This ensures great flavor and even cooking. It’s important to work step by step and thinkfully.
Base Layer Techniques
Begin with a toasted English muffin base. Each muffin should be golden and crisp, taking 2-3 minutes under the broiler. This step is key to avoid sogginess and create a solid base for toppings.
- Toast English muffins until edges are crisp and golden
- Spread a thin layer of white gravy evenly
- Ensure complete coverage without oversaturating the base
Topping Order Tips
Layer your ingredients wisely for balanced flavors and texture. Make sure to spread them out evenly for even cooking.
- Crumbled breakfast sausage (about ½ cup)
- Shredded mild cheddar cheese (½ cup total)
- Carefully placed large eggs
Final Assembly Steps
The final touches are crucial for your breakfast pizza. Sprinkle more cheese and get ready to broil. Aim for melted, bubbly cheese and perfectly cooked eggs.
Broil for 1-2 minutes, watching closely to avoid burning. You’ll get a delicious breakfast flatbread that serves four and is ready in 15 minutes.
Baking Temperature and Timing
Making the perfect breakfast pizza needs careful attention to baking temperature and timing. With the right steps, your breakfast pie will turn into a delicious meal.
Experts say to bake your breakfast quiche-style pizza at 450-550°F. This helps get a golden-brown crust and cooks the toppings just right.
Baking Time Variations
- Baking steel method: Approximately 5 minutes
- Baking sheet method: About 12-15 minutes
- Desired crust: Golden and crispy
Your oven might work differently, so keep an eye out for signs. The pizza should look like this:
- Melted cheese
- Crisp edges
- Cooked egg whites
Baking Surface Temperature Cooking Time Baking Steel 550°F 5 minutes Baking Sheet 450°F 12-15 minutes “Patience transforms ingredients into a culinary masterpiece.” – Breakfast Pizza Chef
Pro tip: Always preheat your oven fully before putting in your breakfast pizza. This helps cook it evenly and gets a crispy crust.
Cheese Selection and Combinations
Creating the perfect breakfast pizza starts with picking the right cheese blend. Your morning quiche-inspired pizza needs a cheese mix that makes it special. The goal is to balance flavors and get a creamy, melty texture that goes well with your morning flatbread.
- Mozzarella: Creates the classic stretchy texture
- Cheddar: Adds sharp, rich flavor
- Parmesan: Brings a nutty, aged dimension
When picking cheeses, think about how they melt and mix. A mix of soft and hard cheeses is key. Soft cheeses like fontina or gouda add creaminess. Harder cheeses give strong flavors.
Temperature is important for cheese choice. At 375°F, most cheeses melt well without burning. Use about 1 cup of shredded cheese per pizza, mixing types for a unique taste. Feel free to try new cheese combinations to surprise your taste buds.
Pro tip: Grate your own cheese for the freshest flavor and best melting performance!
Try unique cheese pairings with your breakfast pizza toppings. Goat cheese adds tanginess, and pepper jack brings a spicy kick to your morning flatbread.
Storage and Reheating Methods
Keeping your morning pizza fresh is key. Whether it’s homemade or leftovers, the right storage and reheating can preserve its taste and texture.
Storing your pizza right is essential. You can keep it in the fridge for up to 3 days. Freezing is also a great option for longer storage.
Freezing Instructions
Freezing your pizza lets you enjoy it later. Here’s how to do it:
- Cool the pizza completely at room temperature
- Wrap individual slices in plastic wrap or aluminum foil
- Place wrapped slices in a freezer-safe container
- Label with the date of freezing
- Store in the freezer for up to 2 months
Reheating Guidelines
Choosing the right way to reheat your pizza matters. Here are the best methods:
- Oven Method (Recommended)
- Preheat to 250-275°F
- Reheat for 10-15 minutes
- Preserves crispy crust and melts cheese evenly
- Air Fryer Option
- Set temperature to 250-275°F
- Reheat for 3-5 minutes
- Provides crispy texture
- Microwave Option
- Heat for 30 seconds to 1 minute
- Use a microwave-safe plate cover
- Best for quick reheating, but may soften crust
“The key to great reheated breakfast pizza is maintaining its original texture and flavor.” – Culinary Expert
By using these storage and reheating tips, your breakfast pizza will taste as good as new.
Recipe Variations and Substitutions
Making a tasty egg pizza lets you get creative in the kitchen. You can change up your breakfast pizza with simple swaps and new techniques. This way, you can meet dietary needs or try out new flavors for your next brunch pizza.
Whether you love meat or veggies, you can make this dish your own. Here are some cool substitution ideas:
- Protein Variations:
- Replace ham with turkey bacon
- Use plant-based sausage crumbles
- Swap bacon for grilled chicken strips
- Vegetable Additions:
- Roasted bell peppers
- Spinach leaves
- Caramelized onions
- Sliced mushrooms
- Dietary Alternatives:
- Gluten-free pizza crust
- Vegan cheese substitutes
- Low-fat cheese options
Every change adds something special to your brunch pizza. Pro tip: Try different cheese mixes to make your egg pizza even better. Local farmers markets have unique cheeses that can make your morning meals unforgettable.
Keep in mind that cooking times might change with new ingredients. Always watch your pizza while it bakes. This way, you’ll get a crispy crust and perfectly cooked toppings.
Conclusion
Your breakfast flatbread journey is just starting. This recipe is a great beginning to your culinary adventures. With 458 calories per serving, it’s a tasty and healthy option. You can make it your own by adding your favorite toppings.
Making the perfect breakfast pizza is all about trying new things. You can use DeLallo gluten-free pizza crust or try other bases. It’s all about finding the right mix of flavors and textures.
Cooking is fun and personal. This recipe is a good start, but feel free to change it up. Try new ingredients and seasonings. Your kitchen is a place to be creative and make delicious pizzas.
This breakfast pizza is more than just food. It’s a chance to enjoy flavors and share moments with others. So, invite friends over, try new things, and enjoy every bite of your homemade pizza.
FAQ
What exactly is a breakfast pizza?
A breakfast pizza is a fun twist on regular pizza. It has toppings like eggs, bacon, sausage, and cheese on a pizza crust. It’s a tasty mix of breakfast and pizza, perfect for a morning meal that you can make your own way.
Can I make breakfast pizza ahead of time?
Yes, you can make breakfast pizza ahead. You can cook the base and keep it in the fridge, or assemble and freeze it. Just bake or reheat it when you’re ready for a crispy crust and warm toppings.
What are some vegetarian options for breakfast pizza?
For a veggie breakfast pizza, try toppings like roasted veggies, spinach, mushrooms, bell peppers, and hash browns. You can also use tofu scramble or veggie sausage instead of meat.
How do I prevent my breakfast pizza from becoming soggy?
To avoid a soggy crust, pre-bake the base a bit before adding toppings. Use less wet ingredients, drain veggies, and don’t overload with sauce or watery toppings.
Can I make breakfast pizza gluten-free?
Yes! Use gluten-free dough or bases like cauliflower or almond flour crust. Make sure all toppings and ingredients are gluten-free too.
What’s the best cheese for breakfast pizza?
Cheddar, mozzarella, and monterey jack are great choices. Mixing cheeses can give the best flavor. Pick based on your taste and toppings.
How long can I store leftover breakfast pizza?
Keep leftover pizza in the fridge for 3-4 days in an airtight container. Reheat in the oven or air fryer for crispiness. Avoid microwaving to keep the crust from getting soggy.
What cooking equipment do I need to make breakfast pizza?
You’ll need a baking sheet or pizza stone, parchment paper, a rolling pin, and a sharp knife or cutter. A pizza peel is nice but not necessary for home cooking.
Can breakfast pizza be made dairy-free?
Yes, use dairy-free cheese made from nuts, soy, or other plants. Nutritional yeast can also give a cheesy taste. Or, skip cheese and focus on other tasty toppings.
Is breakfast pizza only for breakfast?
No way! Breakfast pizza is great at any time. Enjoy it for brunch, dinner, or even as a late-night snack.
What is your rating for the recipe?
-
Italian Bread Recipe
The smell of freshly baked Italian bread takes me back to my grandmother’s kitchen. There, golden loaves would come out of the oven, filling the house with a warm scent. Italian bread is more than a simple food—it connects us to our family’s past.
Are you dreaming of a crispy focaccia or a classic Italian bread loaf? This recipe will help you make a real piece of Italian culinary heritage. The secret to Italian bread is not just in the ingredients. It’s in the love and skill passed down through generations.
Introduction to Traditional Italian Bread Making
Italian bread making is a deep-rooted art form. It spans centuries of tradition and cultural heritage. From Tuscany’s rolling hills to Milan’s busy streets, bread tells stories of family, history, and identity.
The history of Italian bread is long, with each region having its own special bread. Ancient Roman methods mix with local ideas, creating a rich bread-making tradition. This tradition inspires bakers all over the world.
History of Italian Bread Making
Bread in Italy goes back to ancient times. Evidence shows advanced grain processing as far back as 800 BCE. Wheat and bread became key to Italian culture, evolving from basic food to a celebrated art.
- Ancient Roman bakers developed advanced milling techniques
- Grain cultivation spread across Italian peninsula
- Regional variations emerged based on local ingredients
Cultural Significance in Italian Cuisine
“Bread is the foundation of our meals and our memories.” – Italian Culinary Proverb
In Italian cuisine, bread is more than a side dish. It’s a key part of meals, gatherings, and family traditions. Sharing bread symbolizes community, hospitality, and shared moments.
Regional Variations Across Italy
Italy’s regions have their own bread styles. Ciabatta from Veneto is light and airy. Panettone from Milan is a sweet bread enjoyed during holidays.
Region Bread Variety Distinctive Characteristics Tuscany Pane Toscano Saltless bread with crisp crust Liguria Focaccia Olive oil-rich flatbread Puglia Pane di Altamura Durum wheat semolina bread Sardinia Pane Carasau Crispy flatbread with long shelf life Understanding Italian bread means knowing the balance of ingredients, techniques, and stories. These elements turn simple flour and water into culinary wonders.
Essential Ingredients for Italian Bread
Making authentic pane casereccio is all about the right ingredients. It’s an art that focuses on quality over quantity. This approach ensures your homemade bread is full of flavor.
The key to a great Italian bread is using top-notch ingredients. Your bread’s success hinges on five main ingredients:
- Bread flour (600 grams or 5 cups)
- Active dry yeast (½ teaspoon)
- Fine sea salt (15 grams or 2½ teaspoons)
- Water
- Salted butter or olive oil
Choosing the right flour is crucial. Italian bakers prefer high-protein flour for its strength. This flour creates a chewy texture that’s a hallmark of Italian bread.
Yeast is another important choice. Active dry yeast is best for its consistent results. Even a small amount (½ teaspoon) can make your dough rise beautifully.
Salt does more than add flavor. It also controls yeast growth. Using 15 grams of salt gives your bread depth without being too salty.
Don’t underestimate the importance of water quality. Use filtered or spring water at the right temperature. Aim for 110°F to help yeast fermentation.
Required Equipment and Tools
Making authentic Italian bread is more than just mixing ingredients. Your kitchen tools are key to turning simple ingredients into tasty bread. This is especially true when using biga, a traditional Italian method.
Starting with the right equipment is crucial for bread making. A precise digital scale is vital for biga. It helps ensure accurate measurements, which is important in Italian bread baking.
Basic Kitchen Equipment
- Digital kitchen scale (accuracy is key for biga)
- Large mixing bowls
- Dough scraper
- Proofing basket (6-8 inches for round loaves)
- Measuring cups and spoons
Optional Professional Tools
For those serious about bread making, consider these specialized tools:
- Cast iron Dutch oven ($425-$460)
- Dedicated bread dough mixer (capacity up to 8 kg)
- Compact deck oven for multiple loaves
- Grain mill for fresh flour
Baking Surfaces Options
Your baking surface can greatly affect bread texture. Here are some options:
- Pizza stone ($98)
- Cast iron pan
- Ceramic baking dish ($58-$80)
- Stainless steel baking sheet
“The right tools transform good bread into exceptional bread.” – Italian Baking Tradition
While professional tools can improve your baking, remember. Passion and technique are the most important. They are what make authentic Italian bread.
Understanding Italian Bread Dough
Making real Italian bread starts with knowing its dough’s special traits. Italian bread dough is different from others. It turns simple ingredients into amazing dishes.
The secret of Italian bread dough is its moisture and mix. Your dough will have more water, making it softer and more stretchy. This softness leads to breads with a great texture.
- Higher moisture levels create better texture
- Gluten development is crucial for bread structure
- Fermentation process impacts flavor complexity
Grissini, those Italian breadsticks, show how changing the dough can make different breads. To get their thin and crunchy texture, you need to handle the dough just right.
Dough Characteristic Impact on Bread High Hydration Softer, more elastic texture Gluten Development Improved structural integrity Fermentation Time Enhanced flavor complexity Knowing these dough traits lets you make real Italian breads with ease. Whether you want grissini or a classic loaf, understanding Italian bread dough is key to great baking.
The Role of Yeast and Fermentation
Learning about yeast and fermentation is key to making real Italian bread like michetta. The magic happens when simple ingredients turn into a tasty loaf. This is all thanks to the work of tiny microbes and chemical changes.
Fermentation does more than just make dough rise. It’s a detailed process that adds flavor, texture, and nutrients. Working with yeast means you’re helping tiny creatures change your bread’s taste and feel.
Types of Yeast for Italian Bread
- Commercial Active Dry Yeast
- Fresh Compressed Yeast
- Natural Sourdough Starter
- Lievito Madre (Traditional Italian Starter)
Fermentation Process Insights
The fermentation of michetta and other Italian breads is full of interesting microbial actions. Wild yeast and lactic acid bacteria work together. They break down carbs, making the bread taste unique and easier to digest.
Temperature Control Recommendations
- Keep the room temperature between 70-75°F
- Stay away from drafty spots during proofing
- Find a warm, draft-free place for yeast to thrive
- Watch the humidity levels
By grasping these concepts, you can improve your bread-making. You’ll make authentic Italian bread with deep, rich flavors. These flavors show off traditional bread-making methods.
Step-by-Step Mixing and Kneading Process
Learning to mix and knead is key for making real Italian bread, like rosetta rolls. The dough’s texture and taste start with how you handle it from the beginning.
First, get your ingredients ready. You’ll need:
- 3 cups all-purpose flour
- 2¼ teaspoons instant yeast
- 1 teaspoon kosher salt
- 1 cup warm water
- 2 tablespoons olive oil
Start by mixing your yeast with warm water (around 104°F). Let it sit for 5 minutes. This step makes the yeast work well.
When kneading, aim for a dough that’s smooth and elastic. Your kneading skills are crucial for the bread’s look. For best results, knead with a stand mixer at medium-low speed for 8 minutes or by hand for 20 minutes.
Kneading Method Time Required Technique Stand Mixer 8 minutes Medium-low speed Hand Kneading 20 minutes Consistent folding and pressing Look for changes in the dough. A good rosetta dough is smooth, slightly sticky, and bounces back when pressed. Add flour slowly, about 1/4 cup at a time, to get the right feel.
After kneading, let the dough rest for 20 minutes. This time is important for the dough to relax and prepare for a great Italian bread texture.
Italian Bread Shaping Techniques
Learning to shape bread is key to making real Italian breads like focaccia and ciabatta. Each shape has its own story and character. Your skill in shaping dough turns simple ingredients into amazing dishes.
Shaping bread needs practice and precision. Each Italian bread style has its own way of forming its unique shape.
Classic Loaf Formation
To make classic Italian loaves, follow these steps:
- Make sure the dough has a tight, smooth skin
- Gently press out air from the dough before shaping
- Use gentle, consistent pressure
- Rest the dough for 30-40 minutes between preshaping and final shaping
Specialty Shapes and Styles
Italian bread comes in many shapes and styles. Focaccia is flat and rectangular, while ciabatta is long and flat. Each shape needs its own special handling.
Surface Scoring Patterns
Scoring the surface of bread is more than just for looks. It helps the bread expand while baking. Different patterns create different looks and affect the bread’s texture:
- Straight cuts for traditional loaves
- Diagonal slashes for a better look
- Intricate patterns for artisan breads
Professional bakers know that how you shape bread affects its texture, crust, and quality. With practice and focus, your skills will get better.
Proofing and Rising Methods
Mastering proofing is key for making top-notch Italian bread, like panettone. The rising process turns your dough into a light, airy masterpiece. It captures the true spirit of Italian baking.
Temperature is crucial when proofing your bread. The best temperature for yeast is between 75-78°F. For panettone and other Italian breads, knowing the right proofing techniques is vital.
- Warm environments help yeast develop faster
- Cold proofing can enhance flavor complexity
- Consistent temperature is key to successful rising
Different proofing methods can change your bread’s texture and taste. Here are some techniques to try:
- Instant Pot Proofing: Use the “yogurt” setting for about 30 minutes
- Oven Light Method: Provides gentle, consistent warmth
- Heating Pad Technique: Place dough over a low-temperature heating pad
“The secret to perfect bread lies in understanding its living nature.” – Italian Baking Master
For panettone, you need multiple proofing stages. This bread requires patience and precise temperature control. Look for signs like soft, supple dough that springs back slowly when poked.
Proofing times can vary. Bread dough usually rises in 1.5 to 3 hours in warm conditions. Cold proofing, lasting 8-16 hours, brings out richer flavors perfect for traditional Italian bread.
Perfect Baking Temperature and Timing
Baking Italian bread like pane casereccio needs precision and care. The right temperature and technique can make your bread amazing. It will have a crispy outside and a soft, tasty inside.
Learning the baking process is key. It involves understanding temperature and timing. Specific techniques can improve your bread’s quality and taste.
Oven Preparation Tips
Getting your oven ready is vital for perfect Italian bread. Here are important steps:
- Preheat the oven to 450°F for the first 10 minutes
- Reduce temperature to 400°F for the next 10-15 minutes
- Use a baking stone for even heat
- Place a shallow pan of water at the bottom for steam
Steam Baking Methods
Steam is crucial for a golden, crispy crust on pane casereccio. Bakers use different methods:
- Add 6 ice cubes to a preheated pan before baking
- Spray water into the oven every few minutes during initial baking
- Use a specialized steam injection oven if available
Crust Development Techniques
Getting the perfect crust is all about attention. Make sure your bread is golden-brown and sounds hollow when tapped. Let it cool for one hour before slicing to keep its texture and flavor.
By using these exact baking methods, you’ll make an authentic Italian bread. It will be as good as those in traditional bakeries.
Creating the Perfect Italian Bread Crust
Making the perfect crust is an art in Italian baking. The crust makes your bread special, turning simple ingredients into a work of art. You might want a crisp grissini or a hearty rustic loaf. Knowing how to develop the crust is key.
Your bread’s outside depends on a few important things:
- Dough hydration levels
- Baking temperature
- Steam injection techniques
- Oven environment
Grissini, the classic Italian breadstick, shows what a perfect crust looks like. To get that crispiness, you need to learn a few tricks:
- Preheat your oven to high temperatures (around 425°F)
- Create steam during the first 10 minutes of baking
- Use a baking stone for even heat distribution
“A great crust is the signature of authentic Italian bread” – Italian Baking Masters
Steam is crucial for a good crust. It makes the outside golden and the inside soft. Bakers use spray bottles or steam systems to get this effect.
Different breads need different crust treatments. Your method will change based on the bread you’re making. Whether it’s a thin breadstick or a thick country loaf, your technique will vary.
Storage and Serving Suggestions
Keeping your homemade Italian bread fresh is key. Whether it’s a michetta or rosetta, the right storage and serving can make a big difference. It’s all about enjoying every bite.
Storing bread right is essential. Here are some tips to keep your bread fresh:
- Store bread at room temperature in a cool, dry place
- Use a bread box or paper bag to maintain freshness
- Avoid plastic bags, which can create moisture and promote mold
- Keep bread away from direct sunlight and heat sources
Freezing and Long-Term Storage
Freezing is a great way to keep your bread fresh longer. Here’s how to do it right:
- Allow bread to cool completely before freezing
- Wrap tightly in aluminum foil or freezer wrap
- Store frozen bread for up to three months
- Thaw at room temperature or reheat in the oven
Serving Temperature and Reheating
For the best taste, serve your bread at room temperature. Here’s how to reheat it:
- Serve bread at room temperature for optimal flavor
- Reheat in a 350°F oven for 5-10 minutes to restore crispness
- Use a damp towel when microwaving to prevent dryness
- Avoid slicing warm bread immediately to prevent a gummy texture
Pairing Suggestions
Italian bread goes well with many foods. Try serving it with olive oil, aged cheeses, or as a side to pasta and soups. Michetta and rosetta are great for making meals special.
Conclusion
Starting your Italian bread making journey is more than a skill—it’s diving into tradition, taste, and culture. Making authentic Italian bread at home needs patience, practice, and a love for the craft. Every loaf you make links you to Italian bakers through the ages.
Italian bread’s secrets are in its ingredients and techniques. Choosing the right flour, like Tipo 00, and mastering fermentation are key. You’ll see that making Italian bread is an art that needs dedication and passion. The different textures, from focaccia’s crispy crust to ciabatta’s soft inside, show Italy’s bread diversity.
As you try new recipes and techniques, remember each loaf has a story. Your skills will grow with each try, turning simple ingredients into a celebration of Italian food. Enjoy the journey, share your bread with others, and savor the taste of Italian bread making.
Whether you’re making a rustic loaf for dinner or trying different regional breads, your dedication connects you to Italy’s food heritage. Keep exploring, keep baking, and let the smell of fresh Italian bread warm your kitchen.
FAQ
What makes Italian bread different from other types of bread?
Italian bread stands out for its simple ingredients and focus on quality flour. It uses unique fermentation methods. Breads like focaccia and ciabatta show Italy’s regional diversity and artisanal spirit. They highlight natural flavors and traditional baking.
What is a biga, and why is it important in Italian bread making?
A biga is a starter mixture used in Italian baking. It’s made from flour, water, and yeast before the main dough. This technique adds flavor, improves texture, and makes the bread more aromatic and robust.
How do I achieve the perfect crust on Italian bread?
For a perfect crust, use high-quality flour and the right amount of water. Steam and the oven temperature are also key. Try using a baking stone, creating steam, and scoring the bread for that crispy, golden crust.
What are some popular types of Italian bread?
Italy has many bread types. There’s ciabatta from Veneto, focaccia, and panettone from Milan. You’ll also find grissini, michetta, rosetta, and pane casereccio.
What ingredients are essential for making authentic Italian bread?
Real Italian bread needs just a few things: good flour, yeast or sourdough, water, and salt. It’s all about using fresh, quality ingredients and mastering the technique.
How long does Italian bread typically need to ferment?
Fermentation time varies by bread type and yeast. It can be 4 to 24 hours. Traditional methods like biga help develop deeper flavors and better texture.
What is the best way to store homemade Italian bread?
Store Italian bread in a paper bag or bread box at room temperature for 1-2 days. Avoid plastic bags to keep the crust crispy. Freeze for longer storage, and reheat in the oven to restore the crust.
Can I make Italian bread without professional equipment?
Yes, you can make great Italian bread with basic kitchen tools. A mixing bowl, measuring tools, and a home oven are all you need. A baking stone can help, but it’s not essential.
What is your rating for the recipe?
-
German Chocolate Cake Recipe
Every kitchen has a special recipe that turns simple moments into unforgettable memories. For me, German Chocolate Cake is more than a dessert. It’s a celebration of rich flavors, detailed craftsmanship, and a tradition that brings people together.
This homemade cake is not just another chocolate treat. It’s a standout with its three-layer chocolate cake and a luxurious coconut-pecan frosting. Each slice is a decadent dessert experience that goes beyond ordinary baking.
From the first bite, you’ll see why this cake has won the hearts of many. Whether you’re an experienced baker or just starting out, this recipe will help you create a masterpiece. It’s both visually stunning and incredibly delicious.
The History Behind German Chocolate Cake
Explore the rich history of a beloved sweet treat that has won the hearts of many. German Chocolate Cake is not from Germany, but has deep roots in American baking. It all started with a remarkable chocolatier.
Samuel German’s Sweet Chocolate Legacy
The tale of German Chocolate Cake begins with Samuel German. He worked for Baker’s Chocolate Company, America’s oldest chocolate maker since 1790. In 1852, German created a special sweet baking chocolate. This chocolate became the heart of the famous cake recipe.
- Baker’s German Sweet Chocolate was created as a special baking ingredient
- The chocolate bar became popular among home bakers
- Samuel German’s contribution revolutionized baking recipes
Evolution from Traditional to Modern Recipe
The first German Chocolate Cake recipe was published in 1957 in the Dallas Morning News. Mrs. George Clay is credited with it. It quickly became a favorite in American kitchens.
By 1990, it was a must-have in cookbooks. The 13th edition of the Fanny Farmer Cookbook included a detailed version.
Year Milestone 1852 Samuel German creates special sweet baking chocolate 1957 First published recipe in Dallas Morning News 1990 Included in Fanny Farmer Cookbook Why It’s Not Actually German
Despite its name, German Chocolate Cake is 100% American. The “German” in its name comes from Samuel German, not the country. It became a hit in the United States, especially in Southern cuisine.
Bakers loved its moist chocolate layers and unique coconut-pecan frosting.
A sweet treat born from American innovation, not European tradition!
Essential Ingredients for Perfect German Chocolate Cake
To make a real German chocolate cake, you need special ingredients. These ingredients make the cake taste and feel just right. Your baking will be a hit with the right mix.
The cake starts with Baker’s German Sweet Chocolate. Samuel German created it in 1852. It’s sweeter and softer than regular chocolate, giving the cake its special flavor.
Key Cake Ingredients
- 4 oz sweetened baking chocolate
- 1 cup unsalted butter (room temperature)
- 2 1/2 cups cake flour
- 1 cup buttermilk
- 4 large eggs (separated)
- 1 tablespoon vanilla extract
Buttermilk is key for a moist cake. It makes the cake tender and light. This is why the cake is so loved.
Coconut Pecan Frosting Components
The coconut pecan frosting makes the cake special. Here’s what you need for the frosting:
- 1 cup evaporated milk
- 3 egg yolks
- 1 1/3 cups flaked coconut
- 1 cup chopped pecans
- 1/2 cup unsalted butter
Pro tip: Toast the coconut and pecans before adding them. It brings out their flavors and makes the frosting better.
The magic of this cake lies in its carefully selected ingredients that work together to create a truly memorable dessert experience.
Equipment and Tools Needed
Getting ready to bake a German Chocolate Cake means you need the right tools. The right equipment is key to making a delicious homemade cake. It will surely impress your loved ones.
Before starting this tasty project, make sure your kitchen has everything you need. The right tools make baking smooth and fun.
Baking Pans and Supplies
Choosing the right pans is important for your German Chocolate Cake. Here’s what you’ll need:
- Three 8-inch round cake pans
- Parchment paper for lining pans
- Cake turner or offset spatula
- Wire cooling rack
Mixing Equipment
For the perfect cake batter, you need specific tools:
- Stand mixer or electric hand mixer
- Large mixing bowls
- Measuring cups and spoons
- Rubber spatula
- Whisk
Temperature Tools
Getting the temperature just right is crucial for baking:
Tool Purpose Recommended Setting Oven Thermometer Verify Oven Temperature 350°F (175°C) Digital Kitchen Scale Precise Ingredient Measurement Grams and Ounces Instant-Read Thermometer Check Cake Doneness 205-210°F Internal Temperature Pro tip: Good baking tools lead to better results. Quality equipment is key to a professional German Chocolate Cake.
Making the Chocolate Cake Layers
Creating the perfect layer cake needs precision and care. Your chocolate cake layers will be the base of this tasty dessert. Start by getting top-notch ingredients for a rich, moist chocolate cake.
- 2.5 cups all-purpose flour
- 1.75 cups cocoa powder
- 2 teaspoons baking soda
- 1 teaspoon baking powder
- 1 teaspoon salt
- 3 cups of sugar (combination of granulated and light brown)
- 3 large eggs
- 2 additional egg yolks
The key to great chocolate frosting and light cake is in the method. Start by separating your eggs. Whip the egg whites until they form stiff peaks for an airy texture.
When mixing, cream the butter and sugar until it’s light and fluffy. Add the dry ingredients slowly, then the wet ingredients like coconut milk and coffee. Fold in the egg whites gently to keep the cake light.
Bake the cake layers at 350°F for 25-30 minutes. The three-layer method makes the cake look stunning and ensures chocolate frosting in every bite. Let the layers cool completely before you put your German chocolate cake together.
Pro tip: For the most tender layers, avoid overmixing the batter and always use room temperature ingredients.
Creating the Signature Coconut-Pecan Frosting
The coconut pecan frosting is the heart of this traditional cake. It turns an ordinary sweet treat into a memorable dessert. This iconic frosting needs careful preparation and attention to detail for its signature rich, creamy texture.
Making the perfect coconut pecan frosting is key to an amazing German Chocolate Cake. It involves several critical steps. These steps will make your cake go from good to extraordinary. Cooking and cooling correctly will ensure your frosting is deliciously smooth and perfectly set.
Precise Cooking Techniques
Getting the right consistency starts with careful temperature control. Cook the frosting base over low heat, stirring constantly to avoid scorching. The key is patience – it takes about 10 minutes for the mixture to thicken.
- Use evaporated milk to prevent curdling
- Stir continuously during cooking
- Maintain low to medium heat
Achieving Ideal Consistency
The perfect coconut pecan frosting should be thick yet spreadable. Aim for a custard-like texture that holds its shape when cooled. Professional bakers suggest using these ingredients:
Ingredient Quantity Shredded Coconut 2 ½ cups Chopped Pecans 1 ½ cups Evaporated Milk 1 cup Cooling and Setting Tips
After cooking, let your frosting cool completely before spreading. Cooling helps the frosting set and develop its characteristic texture. Pro tip: Let the frosting rest for 15 minutes at room temperature to reach the perfect spreading consistency.
“The secret to amazing coconut pecan frosting is patience and precise temperature control.” – Baking Expert
With these techniques, you’ll make a coconut pecan frosting that truly makes your German Chocolate Cake a standout dessert.
Assembly and Decoration Techniques
Making a stunning layer cake needs precision and creativity. Your German chocolate cake will become a decadent dessert with the right assembly. The aim is to make a beautiful naked cake that shows off each delicious layer.
Begin by preparing your cake layers with care. Level each layer with a serrated knife for even stacking. Follow these steps for the best results:
- Allow cake layers to cool completely before assembling
- Use a cake turntable for smooth frosting application
- Place first layer on a sturdy cake board
- Apply a generous amount of coconut-pecan frosting between each layer
The “naked cake” style leaves the sides unfrosted. This lets the beautiful layers show, highlighting the rich chocolate cake’s texture. It creates a rustic, elegant look.
Decoration Technique Recommended Approach Frosting Layers Spread evenly, leaving slight overhang Top Decoration Sprinkle toasted pecans and coconut flakes Optional Garnish Chocolate drizzle or ganache For a professional finish, refrigerate your cake for 30 minutes before serving. This sets the frosting and makes slicing easier. Your homemade cake will look like it came from a bakery!
Storage and Serving Guidelines
Keeping your homemade cake fresh is key. Your German Chocolate cake is a tasty treat that needs the right care. This ensures it stays moist and flavorful.
Refrigeration Strategies
There are several ways to keep your cake fresh. Follow these tips for the best results:
- Store the cake in an airtight container
- Refrigerate for up to 5 days
- Maintain consistent temperature between 35-40°F
- Cover cake layers with plastic wrap to prevent drying
Room Temperature Considerations
Your German Chocolate cake can stay at room temperature briefly. Here’s how to store it:
- Keep cake covered with a cake dome
- Store in a cool, dry place
- Consume within 1-2 days for best quality
- Avoid direct sunlight or heat sources
Freezing for Long-Term Storage
Freezing is great for keeping your cake fresh longer. Wrap each slice in plastic wrap and foil. Frozen cake stays good for up to 3 months.
Pro tip: Thaw frozen cake slices in the fridge overnight. This helps restore their texture and taste.
Tips for Recipe Success
Mastering homemade cake recipes needs focus on details, especially for traditional cakes like German Chocolate Cake. Professional bakers know success comes from mastering key techniques. These techniques make your baking go from good to great.
Temperature is key for the perfect cake. Here are important tips for a delicious German Chocolate Cake:
- Use room temperature ingredients for smoother mixing
- Precisely measure all ingredients, especially flour and cocoa powder
- Toast pecans and coconut to enhance their natural flavors
- Allow cake layers to cool completely before frosting
“The difference between a good cake and a great cake is in the details.” – Pastry Chef Recommendation
Getting your ingredients ready is crucial. Here are key steps:
- Sift dry ingredients to prevent lumps
- Cream butter and sugar until light and fluffy
- Fold egg whites gently to maintain air volume
- Use fresh ingredients for maximum flavor
Technique Impact on Cake Room Temperature Ingredients Ensures even mixing and texture Proper Measuring Guarantees consistent results Toasting Nuts Enhances depth of flavor Pro tip: Chill your completed cake for at least an hour before serving to set the frosting and improve overall texture.
Troubleshooting Common Issues
Making the perfect homemade cake can be tough, even for pros. German Chocolate Cake layer cakes often face common problems. These issues can affect your baking success.
Cake Sinking Solutions
Cake sinking is a common issue in baking. It happens for several reasons:
- 25% is due to using a pan that’s too small
- 30% is caused by too much liquid in the batter
- 20% occurs when you open the oven or move pans during baking
- 25% is because of incorrect oven temperature
Preventing Baking Disasters
To make sure your cake rises right, follow these tips:
- Use an oven thermometer (most bakers don’t)
- Check if baking powder and soda are still good
- Fill cake pans only ⅔ full to avoid overflow
- Keep the batter at 68°F-72°F for best results
Moisture and Doneness Indicators
A toothpick test with moist crumbs means your cake is done. If the middle sinks, bake for 5-10 more minutes before checking.
Baking Challenge Solution Rate Over-mixing prevention 70% success rate Cake rise correction 60% improvement Frosting cover-up 60% visual satisfaction Pro tip: Light-colored aluminum pans prevent dark crusts. Cooling cakes on a wire rack stops sticky tops.
Recipe Variations and Adaptations
Trying new twists on German Chocolate Cake can make baking fun. Whether you’re experienced or new, these ideas will make your dessert amazing.
- Chocolate Type Variations
- Dark chocolate for a deeper taste
- Milk chocolate for a sweeter flavor
- White chocolate for something different
- Cupcake Transformation
- Turn the cake into cupcakes
- Use paper liners for easy serving
- Bake for 18-22 minutes
- Frosting Enhancements
- Add rum or bourbon for extra flavor
- Include toasted macadamia nuts
- Try different nuts for a unique taste
Your creativity can really show in these changes. Each one adds a special touch to the classic German Chocolate Cake. You can make it your own.
Pro tip: Start with small batches of frosting to get it right. Then, make a full cake.
Conclusion
Making a delicious German Chocolate Cake is more than baking. It’s about creating a sweet treat that makes your kitchen and taste buds happy. This dessert is a tradition that mixes rich chocolate with a famous coconut-pecan frosting, loved by many for years.
Your journey through this recipe shows that making amazing desserts is possible. Whether you’re new to baking or have lots of experience, German Chocolate Cake is a rewarding project. It combines skill, flavor, and passion, making it a standout dessert.
Baking is all about patience and precision. Every step you’ve learned, from making perfect cake layers to the signature frosting, improves your skills. Enjoy the smells in your kitchen and the joy of slicing into your homemade cake, knowing you’ve made something special.
Your hard work in mastering this classic recipe will keep this beloved dessert alive. It will bring warmth and happiness to family gatherings, special events, and everyday moments of joy.
FAQ
What makes German Chocolate Cake different from other chocolate cakes?
German Chocolate Cake stands out with its coconut-pecan frosting. It uses German’s sweet chocolate for a lighter taste. The frosting is cooked, giving it a caramel-like texture that’s unique.
Is German Chocolate Cake actually from Germany?
No, it’s not from Germany. It’s named after Samuel German, who made sweet chocolate in 1852. The cake recipe was first published in the 1950s and became popular in the U.S.
How long does a German Chocolate Cake typically stay fresh?
It stays fresh for 3-4 days at room temperature when covered. If refrigerated, it lasts up to a week. Always store it in an airtight container to keep it moist.
Can I make German Chocolate Cake as cupcakes?
Yes, you can! Just adjust the baking time to 18-22 minutes. Use cupcake liners in a muffin tin. Top each cupcake with the coconut-pecan frosting for the classic taste.
What if I can’t find German’s sweet chocolate?
You can use semi-sweet chocolate and extra sugar as a substitute. Or, try a sweet baking chocolate or mix chocolate and sugar to match the original’s sweetness.
Is German Chocolate Cake difficult to make from scratch?
It’s not hard for those with basic baking skills. Just follow the recipe carefully and pay attention to ingredient temperatures. Take your time with the frosting.
Can I make the cake gluten-free?
Yes, use gluten-free flour blend instead of regular flour. Make sure all ingredients are gluten-free. Be careful to avoid gluten during preparation.
How do I prevent my frosting from becoming too runny?
Keep the cooking temperature steady and stir constantly while making the frosting. Let it cool completely before spreading. If it’s too thin, let it sit at room temperature to thicken. Refrigerating it briefly can also help it set up.
What is your rating for the recipe?
-
Blackstone Recipes
Every great meal tells a story, and with a Blackstone griddle, you’re about to become the master storyteller of outdoor cooking. Imagine yourself on a sunny afternoon. The sizzle of fresh ingredients dancing across the griddle surface creates memories that will last a lifetime.
The Blackstone griddle isn’t just a cooking tool—it’s a gateway to culinary creativity. Whether you’re a weekend warrior or a seasoned home chef, these versatile outdoor cooking surfaces transform ordinary meals into extraordinary experiences. From sunrise breakfast to sunset dinner, your griddle becomes the centerpiece of delicious adventures.
Griddle recipes are more than just instructions—they’re invitations to explore flavors, techniques, and the joy of cooking outdoors. This guide will help you unlock the full potential of your Blackstone griddle. You’ll learn how to create restaurant-quality meals right in your backyard.
Getting Started with Blackstone Griddle Cooking
Starting your Blackstone griddle cooking journey is exciting. It’s important to know the basics. Whether you’re new or have experience, learning these basics will make cooking outdoors better.
Essential Blackstone Accessories
Having the right Blackstone accessories makes cooking better. Here are some must-haves:
- Heavy-duty spatulas with long handles
- Griddle scraper for easy cleaning
- Digital instant-read thermometer
- Heat-resistant cooking gloves
- Squeeze bottles for oil and sauces
Mastering Griddle Temperature Control
Controlling the griddle’s temperature is key for great cooking. Different foods need different heat levels:
Temperature Range Cooking Purpose 300-325°F Low heat: Eggs, delicate foods 350-400°F Medium heat: General cooking 425-500°F High heat: Searing meats Seasoning Your Griddle Surface
Seasoning your griddle makes it non-stick and prevents rust. Here’s how to do it right:
- Clean the griddle surface thoroughly
- Apply 2-3 tablespoons of high smoke point oil
- Heat griddle for 10-15 minutes
- Repeat seasoning process 2-3 times
Pro tip: Use oils like avocado or canola oil. They have high smoke points. Your griddle will get a dark patina that improves cooking.
Classic Hibachi-Style Cooking Techniques
Learn the art of hibachi cooking on your Blackstone griddle. Turn your backyard into a sizzling kitchen. Hibachi cooking adds excitement and flavor to your meals, making them restaurant-quality in under 30 minutes.
Mastering griddle techniques is key to hibachi cooking. Your Blackstone hibachi setup lets you create interactive meals. Impress your family and friends with your cooking skills.
- Prepare ingredients in advance for smooth cooking flow
- Use high heat for quick protein searing
- Create theatrical cooking movements
- Layer flavors through strategic ingredient placement
The hibachi cooking method involves quick, high-temperature cooking. This seals in flavors and creates delicious caramelization. Your Blackstone griddle is perfect for authentic hibachi results.
Ingredient Quantity Cooking Time Chicken Breast 1 lb 5-7 minutes Steak 1 lb 5-7 minutes Mixed Vegetables 3 cups 5-7 minutes Pro tip: Prep your ingredients beforehand. Keep them within reach for a dynamic cooking rhythm. With practice, you’ll become a backyard hibachi chef.
Essential Ingredients for Blackstone Cooking
Cooking delicious meals on your Blackstone griddle begins with the right ingredients. Knowing the best mix of proteins, vegetables, and seasonings can make your cooking stand out.
Choosing the right ingredients is key to making dishes that wow your family and friends. Let’s look at the essential parts that make Blackstone cooking special.
Proteins and Meat Selection
When picking Blackstone meats, quality is the most important thing. Here are some top protein choices:
- Ribeye steak (80/20 blend recommended)
- Ground beef for smash burgers
- Chicken breasts
- Shrimp
- Thinly sliced pork
Fresh Vegetables for Griddle Cooking
Griddle vegetables bring color, nutrition, and amazing flavor to your meals. Here are some top picks:
- Zucchini
- Onions
- Bell peppers
- Mushrooms
- Asparagus
Oils, Seasonings, and Sauces
Boost your griddle cooking with these must-have flavor boosters:
- Oils: Olive oil, sesame oil, garlic butter
- Seasonings: Essential Blend Seasoning ($7.99 for 7.5 oz)
- Sauces:
- Soy sauce
- Teriyaki
- Garlic aioli
Pro tip: Always prepare your ingredients before firing up the Blackstone for a smooth cooking experience!
Signature Blackstone Steak Recipes
Mastering Blackstone steak recipes turns your backyard into a gourmet spot. Your griddle becomes the key to making steaks that taste like they’re from a fancy restaurant. They get a perfect sear and amazing flavor.
Choosing the right cut is key for a great steak. Here are some top picks for your Blackstone griddle:
- Ribeye: Rich marbling and intense flavor
- Sirloin: Lean and tender cut
- New York Strip: Classic steakhouse favorite
- Filet Mignon: Most tender option
Keeping the temperature right is important for griddle steak recipes. Heat your Blackstone to about 450 degrees Fahrenheit for the best results.
Steak Doneness Internal Temperature Cooking Time Rare 120°F 3-4 minutes per side Medium Rare 130°F 4-5 minutes per side Medium 140°F 5-6 minutes per side Here are some pro tips for the perfect steak:
- Pat steaks dry before seasoning
- Use high smoke point oils like avocado or vegetable oil
- Let steaks rest for 5 minutes after cooking
- Season generously with kosher salt and black pepper
Nutrition lovers will be happy to know a serving has 46g of protein. It’s also packed with rich, satisfying flavor. With a bit of practice, your Blackstone griddle will become a steak-cooking master.
Mastering Chicken Dishes on the Griddle
Cooking chicken on a Blackstone griddle opens up a world of delicious possibilities. Whether you’re preparing a quick family meal or hosting a backyard cookout, griddle chicken offers versatility and incredible flavor. Traditional cooking methods can’t match it.
The key to perfect Blackstone chicken recipes lies in understanding preparation techniques, marination, and precise cooking temperatures. Let’s dive into the essential methods that will transform your griddle cooking experience.
Marination Methods for Incredible Flavor
Marinated chicken becomes a culinary masterpiece on the griddle. Consider these marination techniques:
- Create a basic marinade with soy sauce, olive oil, and herbs
- Use citrus-based marinades for tenderizing meat
- Experiment with Asian-inspired flavor combinations
Perfecting Cooking Times and Temperatures
Achieving the perfect griddle chicken requires precise temperature control. For optimal results:
- Preheat your Blackstone griddle to 400-425°F
- Cook chicken until internal temperature reaches 165°F
- Use an instant-read meat thermometer for accuracy
Popular Chicken Preparations
Explore these crowd-pleasing griddle chicken techniques:
- Sesame Chicken: A family favorite taking only 40 minutes to prepare
- Lemon Pepper Griddle Chicken
- Asian-Style Stir-Fry Chicken
Pro tip: Slice chicken thinly for faster, more even cooking on your Blackstone griddle.
With these techniques, you’ll transform simple chicken into restaurant-quality meals. These will impress your family and friends.
Perfect Fried Rice Techniques
Making great griddle fried rice on your Blackstone needs skill and precision. The secret to amazing hibachi rice is choosing the right ingredients and cooking them right.
Your journey to making Blackstone fried rice starts with getting ready. Use leftover rice for the best texture. Fresh rice can turn mushy. Go for jasmine rice with a 1:1.5 rice-to-water ratio for the best results.
- Preheat your 22-inch Blackstone griddle to 350-400°F
- Use 2 tablespoons of butter for rich flavor
- Incorporate ½ cup frozen mixed vegetables
- Add 1 large egg for protein
Cooking time for perfect griddle fried rice is about 12 minutes. Begin by scrambling eggs (30-60 seconds). Then, sauté vegetables in order: onions, harder vegetables, softer vegetables. Each step is crucial for that real hibachi rice taste.
Ingredient Quantity Cooking Time Cooked Rice 2 cups (400g) 3-5 minutes Eggs 1 large 30-60 seconds Mixed Vegetables ½ cup (75g) 4-5 minutes Season your hibachi rice with 1-2 tablespoons of soy sauce and sprinkle with sesame seeds for a real touch. Always keep your ingredients moving to avoid burning and ensure even cooking.
Vegetable Preparation and Cooking Methods
Mastering griddle vegetables needs precision and technique. Your Blackstone griddle opens up a world of culinary possibilities. It helps create delicious vegetable dishes that burst with flavor and nutrition.
Preparing vegetables for your Blackstone griddle involves several key steps. These steps ensure perfect results every time. The right approach can transform simple ingredients into restaurant-quality side dishes or vegetarian main courses.
Cutting and Sizing Guidelines
Consistent cutting is crucial for even cooking of griddle vegetables. Follow these tips for optimal vegetable preparation:
- Cut vegetables into uniform bite-sized pieces (approximately 1-inch chunks)
- Aim for similar sizes to ensure consistent cooking times
- Use sharp knives for clean, precise cuts
- Remove excess moisture from vegetables before cooking
Cooking Order and Timing
Seasoning vegetables on a Blackstone griddle requires strategic timing. Different vegetables cook at varying rates. Understanding their individual characteristics is essential.
- Start with harder vegetables like carrots (5-6 minutes)
- Add medium-density vegetables like bell peppers
- Finish with quick-cooking vegetables such as mushrooms
Seasoning Tips for Vegetables
Elevate your Blackstone veggie recipes with these seasoning strategies:
- Use olive oil for light, even coating
- Experiment with dried herbs like Italian seasoning
- Add minced garlic for depth of flavor
- Sprinkle kosher salt and black pepper to taste
Cooking times typically range from 8-12 minutes, depending on the vegetables. Always monitor your griddle and adjust heat as needed for perfect results.
Creating Restaurant-Style Hibachi Meals
Make your Blackstone griddle a hibachi hotspot at home! It’s simpler than you think to whip up hibachi meals like a pro. The secret is in the timing, coordination, and how you present your dishes.
To make your griddle hibachi meals shine, remember these key points:
- Get all your ingredients ready before you start
- Choose top-notch proteins like chicken and shrimp
- Make your own sauces to match your meal
- Know how to control the griddle’s heat
Your griddle hibachi setup needs to control heat well. For the best results, aim for these cooking temperatures:
- Beef: 130-135°F for a perfect medium-rare
- Chicken: 165°F to ensure it’s fully cooked
- Shrimp: Cook until they’re pink and firm (about 2-3 minutes per side)
How you present your food is just as important. Arrange your proteins and veggies with flair. This makes your dish look great and keeps different foods at the right temperature. Try to serve your meal within 15 minutes of starting, so everything stays hot and tasty.
Here’s a money-saving tip: A hibachi feast for a family of four can be under $50. With a bit of practice, your Blackstone griddle will be a pro hibachi cooking spot.
Maintenance and Cleaning of Your Griddle
Proper care of your Blackstone griddle is key to keeping it in top shape. A well-kept griddle means tasty meals and lasting performance. Knowing how to clean it right helps keep the cooking surface in great condition and avoids damage.
Keeping your griddle in good shape involves a few important steps. Cleaning it doesn’t have to be hard, but it does need regular effort and the right methods.
Daily Cleaning Routine
Your daily cleaning routine is vital for griddle upkeep. Here’s how to keep your cooking area spotless:
- Clean the griddle while it’s still warm to make food residue removal easier
- Use a metal scraper to remove food particles
- Wipe the surface with paper towels or a clean cloth
- Apply a thin layer of high-heat cooking oil after cleaning
Long-term Care Tips
Good long-term care for your Blackstone griddle is more than just daily cleaning. Here are some tips to keep your griddle in top shape:
- Do a deep clean every 10-15 uses
- Re-season the griddle surface now and then
- Keep your griddle in a dry place
- Don’t use harsh chemicals or dish soap
Troubleshooting Common Issues
Even with good care, you might face some problems. Steam cleaning can help get rid of tough food bits. Heating the griddle on low for 10 minutes after oiling can also help keep the seasoning and prevent rust.
Pro tip: A plastic squirt bottle (around $3) can be an excellent tool for adding water during the cleaning process.
By sticking to these maintenance tips, your Blackstone will be a trusted cooking partner for many years.
Advanced Cooking Techniques and Tips
To take your griddle cooking to the next level, learn some advanced Blackstone pro techniques. These methods turn simple meals into amazing dishes. Professional chefs know how to manage heat and cook with precision on a griddle.
Creating temperature zones is a key skill for advanced griddle cooking. By using different heat levels, you can cook multiple ingredients at once. Here are some tips to improve your griddle cooking:
- Utilize the griddle’s natural heat distribution
- Create hot and cool zones for versatile cooking
- Experiment with ingredient placement
- Master multi-stage cooking techniques
Professional Blackstone griddle chefs suggest using dome covers to spread heat evenly. Steam generation can also enhance texture and flavor. Knowing your griddle’s heat helps you cook with precision.
Advanced griddle skills are more than just controlling temperature. Here are some expert techniques:
- Preheating the surface for 10-15 minutes
- Using high smoke point oils like avocado or sunflower
- Implementing strategic ingredient staging
- Developing a consistent cleaning routine
By using these advanced techniques, your Blackstone griddle becomes a top-notch cooking tool. Remember, practice and trying new things are essential to mastering these skills.
Popular Sauce Recipes and Pairings
Make your Blackstone griddle cooking better with homemade sauces. These sauces can turn simple meals into amazing dishes. Blackstone sauces are key to making your backyard meals taste like restaurant food.
Creating great hibachi dipping sauces can elevate your griddle cooking. Knowing how to mix sauces and flavors is crucial. It helps you become a griddle master.
Classic Hibachi Sauce Lineup
- Yum Yum Sauce: A creamy, slightly sweet mayonnaise-based sauce with only 2 grams of sugar per serving
- Teriyaki Sauce: Rich, sweet, and perfect for glazing meats
- Soy Sauce: Essential for authentic Asian-inspired flavor
- Ginger-Garlic Sauce: Adds zesty, aromatic notes to proteins
Custom Sauce Combinations
Try new things by mixing different ingredients. Here are some cool pairings:
- Sriracha Mayo: Combine mayo with sriracha for a spicy kick
- Honey Mustard Glaze: Blend honey, dijon mustard, and a touch of soy sauce
- Caribbean-Style Hot Sauce: Mix Grace Jamaican Style Jerk BBQ Sauce with fresh herbs
Serving Suggestions
How you serve sauces matters. Use squirt bottles for easy application. Offer different sauces to go with various proteins. A 1:1 ratio works well with chicken, pork, and beef.
Pro tip: Always taste and adjust your sauces before serving to ensure the perfect flavor balance.
Conclusion
Your journey from beginner to outdoor cooking pro is complete. The Blackstone griddle is more than a cooking area. It’s a way to make top-notch meals in your own backyard. Every skill you’ve picked up brings you closer to outdoor cooking success.
Getting better takes time and effort. Start with simple dishes and then try more complex ones. Every famous chef started with basic skills. Your Blackstone griddle lets you try out many different foods and cooking methods.
Being a griddle master needs patience and love for cooking. See each time you cook as a chance to get better. Whether it’s a family dinner or a big party, your skills will wow everyone.
Keep looking for new things, stay curious, and always keep learning. Your griddle is like a blank canvas. You’re the artist making tasty memories with every dish you make.
FAQ
What essential tools do I need for Blackstone griddle cooking?
You’ll need a spatula set, scraper, and cooking oils. Also, an instant-read thermometer, tongs, cleaning kit, and a protective griddle cover. These tools help with cooking, cleaning, and protecting your griddle.
How do I properly season my Blackstone griddle surface?
Seasoning starts with applying a thin layer of oil like flaxseed or vegetable oil. Then, heat the griddle until the oil turns into a non-stick layer. Do this several times for the best results.
What are the best proteins to cook on a Blackstone griddle?
Great proteins include beef steaks, chicken breasts, pork chops, shrimp, salmon, and ground meats. Choose fresh, high-quality cuts that sear well under direct heat.
How do I control temperature zones on my griddle?
Adjust your burner controls to create different zones. Use high heat for searing, medium for cooking through, and low for keeping food warm. Most griddles have independent controls for this.
What’s the best way to clean my Blackstone griddle after cooking?
Scrape off food while the griddle is warm, then wipe with a paper towel. Apply a thin oil layer and use a grill brick or scraper for tough spots. Never use soap, as it can remove seasoning.
Can I cook vegetables effectively on a Blackstone griddle?
Yes! Vegetables like bell peppers, zucchini, onions, asparagus, and mushrooms cook well. Cut them evenly, season right, and cook at medium-high heat for the best taste.
What makes hibachi-style cooking on a Blackstone unique?
Hibachi cooking on a Blackstone is about high heat, theatrical food prep, and interactive cooking. It turns meal prep into a fun show.
How do I prevent my meats from sticking to the griddle surface?
Make sure your griddle is seasoned well, use enough oil, and pat meats dry before cooking. Avoid moving them too soon. Let them develop a crust before flipping to prevent sticking.
What are some must-have sauces for griddle cooking?
Essential sauces include hibachi white sauce, teriyaki, garlic butter, chimichurri, and steak sauce. They add flavor and complexity to your dishes.
How can I maintain my Blackstone griddle’s performance long-term?
Regular seasoning and proper cleaning after each use are key. Store it dry, use a cover, and avoid metal utensils to keep it in top shape.
What is your rating for the recipe?