Author: zikrecipes.com

  • Shaking Beef Recipe

    The first time I tasted shaking beef, or “bò lúc lắc,” it was like a flavor explosion. It changed how I saw Vietnamese cuisine. The tender beef cubes sizzling in the pan filled my kitchen with a scent that took me to Saigon’s busy streets.

    This Vietnamese stir-fry is more than just a meal. It’s a celebration of bold flavors, precise cooking, and cultural heritage. Whether you’re an experienced cook or just starting out, learning to make shaking beef will boost your skills and excite your taste buds.

    Get ready for a tasty adventure that brings Vietnamese cooking into your home. With only 25 minutes of prep time, you’ll make a dish that rivals any restaurant.

    Understanding Vietnamese Shaking Beef Origins

    Vietnamese stir-fry cuisine has a rich story of cultural fusion and culinary innovation. Shaking beef, or bò lúc lắc, is a delicious example of Vietnam’s complex food history. It blends traditional Viet cooking with French colonial influences.

    French Colonial Culinary Impact

    During French colonization, Vietnam’s food scene changed a lot. The French brought in key ingredients that changed local cooking:

    • Beef as a main protein
    • Butter for cooking
    • Advanced meat preparation methods

    Cultural Significance

    Before the French came, beef was a luxury in Vietnamese food. Cows were mainly used for farm work, not food. This makes shaking beef a big step in culinary history.

    Culinary AspectTraditional PracticeColonial Influence
    Beef UsageRare, seen as expensiveIntroduced as a common protein
    Cooking TechniqueLimited meat preparation methodsAdvanced searing and stir-fry techniques

    Traditional Preparation Methods

    The “shaking” technique in shaking beef came from Vietnamese chefs’ creativity. They quickly moved the pan to cook the beef evenly. This created a unique texture that’s now a hallmark of the dish.

    “Shaking beef is more than a recipe—it’s a culinary narrative of cultural exchange and creativity.” – Vietnamese Culinary Historian

    Today, shaking beef shows the perfect mix of Vietnamese creativity and French cooking techniques. It’s a symbol of cultural adaptation through food.

    Essential Ingredients for Perfect Shaking Beef

    Making authentic shaking beef starts with picking the right ingredients. This Vietnamese dish is all about the mix of flavors. Your lemongrass marinade is key to making the beef taste amazing.

    Here are the main ingredients for your shaking beef:

    • Beef tenderloin or ribeye (12 oz recommended)
    • Fresh garlic (3 cloves, finely chopped)
    • Savory soy sauce (1 tablespoon)
    • Oyster sauce (2 tablespoons)
    • Fish sauce (1 teaspoon)
    • Brown sugar (1 tablespoon)
    • Fresh black pepper (1/4 teaspoon)

    The marinade is what makes shaking beef special. It adds a bright, citrusy taste that goes well with the savory soy sauce. This mix of flavors makes the dish stand out.

    Choose well-marbled cuts like ribeye or tenderloin for your beef. These cuts make the meat tender and flavorful. Using fresh garlic, quality sauces, and premium beef will make your shaking beef unforgettable.

    Selecting and Preparing the Right Cut of Beef

    Choosing the right cut of meat is key to tender beef cubes. The perfect cut can make your wok-tossed beef truly special.

    Best Beef Cuts for Shaking Beef

    For tender and flavorful shaking beef, pick the best cuts. Here are the top choices:

    • Beef tenderloin
    • New York strip steak
    • Ribeye
    • Top sirloin

    Proper Cutting Techniques

    To get uniform beef cubes, cut with precision. Cut your beef into 1-inch cubes against the grain. This ensures even cooking and tenderness.

    “The key to perfect wok-tossed beef is consistent cube size and proper cutting technique.”

    Meat Temperature Guidelines

    DonenessInternal TemperatureCooking Time
    Rare125°F1-2 minutes per side
    Medium-Rare135°F2-3 minutes per side
    Medium145°F3-4 minutes per side

    Pro tip: Let your beef rest at room temperature for 15-20 minutes before cutting. This helps for even cooking and tenderness.

    Mastering the Marinade

    Starting a flavorful beef dish begins with mastering the marinade. Your lemongrass marinade will turn regular beef into a culinary masterpiece. It’s all about finding the right mix to tenderize and boost the meat’s taste.

    Here are the must-haves for your lemongrass marinade:

    • 2 tablespoons soy sauce
    • 2 tablespoons oyster sauce
    • 1 tablespoon brown sugar
    • 2 minced garlic cloves
    • 1/2 teaspoon black pepper
    • Fresh lemongrass (finely chopped)

    Timing is everything when making your marinade. A 30-minute soak lets the beef soak up all the flavors without getting too salty. The lemongrass brings a zesty, citrusy touch that makes the dish pop.

    IngredientQuantityPurpose
    Soy Sauce2 tablespoonsAdds umami depth
    Oyster Sauce2 tablespoonsProvides rich, savory flavor
    Lemongrass2 tablespoonsIntroduces bright, citrus notes

    Pro tip: Choose fresh ingredients for the best lemongrass marinade. Your beef will be tender and full of flavor, bringing a taste of Vietnam to your kitchen.

    The Art of Wok Cooking Techniques

    Mastering the Vietnamese stir-fry is all about heat, motion, and precision. Wok cooking turns simple ingredients into amazing dishes, especially with wok-tossed beef.

    The traditional wok is more than a cooking tool. It has a history of over 2,000 years. It’s used to make dishes like Vietnamese shaking beef.

    Proper Heat Management

    Getting the perfect sear needs careful heat control. Your wok should be between 400-500 degrees Fahrenheit. This ensures quick and intense cooking.

    • Use carbon steel or cast iron woks for best heat retention
    • Preheat the wok for 2-3 minutes before adding ingredients
    • Maintain high, consistent heat throughout cooking

    Shaking Motion Explained

    The “shaking” technique is key. It involves quick, controlled movements. This method tosses beef cubes for even searing and keeps them tender inside. It takes practice and confidence.

    Timing and Temperature Control

    Cooking StageTemperatureDuration
    Beef Searing425-450°F3-4 minutes
    Vegetable Stir-Frying375-400°F2-3 minutes

    Your goal is to make a Vietnamese stir-fry with crispy beef outside and juicy inside. Practice these wok-tossed beef techniques to get it right.

    Step-by-Step Shaking Beef Preparation

    Making a real Vietnamese stir-fry needs focus and skill. This beef dish must be prepared with care to taste like it’s from a restaurant.

    Ingredient Preparation

    Choose a top-quality ribeye for the best flavor and tenderness. Begin by measuring each ingredient carefully:

    • 1 lb ribeye steak, cut into 1-inch cubes
    • 5 minced garlic cloves
    • 2 tablespoons neutral cooking oil
    • Salt and black pepper to taste

    Marinating Process

    Marinating is key to bringing out the dish’s flavors. Mix the marinade ingredients:

    1. 1½ tablespoons oyster sauce
    2. 1 tablespoon soy sauce
    3. 2 teaspoons fish sauce
    4. 1 tablespoon brown sugar

    Cooking Technique

    The “shaking” method is what makes this dish special. Heat your wok or skillet until it’s very hot. Add oil and quickly sear the beef cubes, shaking the pan to cook evenly.

    Cooking StageDurationTemperature
    Marinating30-120 minutesRefrigerated
    Searing5-7 seconds per sideHigh heat
    Vegetable Sauté2-3 minutesMedium-high heat

    Add red onions and green onions just before serving. Serve over fresh watercress or lettuce for a true Vietnamese touch.

    Pro tip: Never overcrowd the pan to maintain high heat and achieve perfect caramelization.

    Sauce and Seasoning Combinations

    Making the perfect sauce for shaking beef is an art. It turns a simple dish into a masterpiece. Your sauce will be the flavor base that makes the meal special, mixing savory soy sauce with complex tastes.

    The traditional Vietnamese sauce has key ingredients for a balanced flavor. Here’s what you need:

    • Rice wine vinegar for brightness
    • Savory soy sauce for depth
    • Fish sauce for umami complexity
    • Sugar to balance fiery pepper notes

    Traditional Sauce Components

    Your sauce should have a balance of salty, sweet, and tangy. The traditional recipe uses 2 parts soy sauce, 1 part rice vinegar, and a bit of sugar to balance the flavors.

    Balancing Flavors

    When making your sauce, think about how strong each ingredient is. Start with small amounts and taste as you go. You want a sauce that enhances the beef without overpowering it.

    Customization Options

    If you like spicy, add some fiery pepper notes with:

    • Freshly ground black pepper
    • Crushed red pepper flakes
    • Minced fresh chili peppers
    • A dash of sriracha sauce

    Remember, the sauce is the heart of your shaking beef. It brings all the flavors together for a memorable meal.

    Serving Suggestions and Accompaniments

    When you serve your shaking beef, follow the true Viet culinary tradition. Arrange the beef on a bed of fresh watercress or crisp lettuce. This adds a refreshing contrast to the rich meat.

    • Use a culantro garnish to add a distinctive Vietnamese herb flavor
    • Serve with lime wedges for a bright citrus accent
    • Prepare a simple salt-pepper mixture on the side for additional seasoning
    • Offer steamed white rice or French baguette as traditional accompaniments

    For a modern twist, try pairing your shaking beef with roasted vegetables or light pasta. The goal is to keep the dish’s core flavors while adding new touches that enhance the beef’s marinade.

    A beautifully presented plate not only fills your belly but also tells a story of Vietnamese culinary art. Your aim is to make a dish that looks great and captures the essence of traditional shaking beef. It should also encourage diners to enjoy its complex flavors.

    Storage and Reheating Guidelines

    Keeping your tender beef cubes tasty means using the right storage and reheating methods. When you make a dish like shaking beef, it’s important to store and reheat leftovers correctly. This helps keep the flavor and texture just right.

    Optimal Storage Techniques

    Proper storage is key for your shaking beef. Here are some tips:

    • Use airtight containers for refrigeration
    • Store cooked beef and sides separately
    • Refrigerate within 2 hours of cooking

    Storage Duration and Safety

    Food ComponentStorage TimeStorage Location
    Cooked Beef3-4 daysRefrigerator
    Sautéed Vegetables2-3 daysRefrigerator
    Tomato Shallot Rice3 daysRefrigerator

    Reheating Best Practices

    Reheating your beef cubes needs care to avoid drying them out. Quick, controlled heating keeps the meat juicy and flavorful.

    1. Remove beef from fridge 15 minutes before reheating
    2. Use low to medium heat
    3. Add 1-2 tablespoons of water to prevent dryness
    4. Heat until internal temperature reaches 165°F

    By sticking to these guidelines, your shaking beef will stay delicious from start to finish.

    Common Cooking Mistakes to Avoid

    Learning to make Vietnamese stir-fry at home can be tough. When cooking wok-tossed beef, a few big mistakes can ruin your dish.

    Here are the most common mistakes in making Vietnamese stir-fry:

    • Overcrowding the wok or pan
    • Using the wrong meat temperature
    • Failing to achieve proper meat sear
    • Incorrect heat management

    One big mistake is overcrowding the pan. Fill only 50% of your cooking surface to ensure each piece of meat gets direct heat. This helps in caramelizing the meat and prevents it from becoming soggy.

    Getting the temperature right is key for a great stir-fry. Aim for high heat, around 400-450°F. Make sure your beef reaches 130-140°F for medium-rare. Use a meat thermometer for accurate cooking and avoid overcooking, which can make the meat tough.

    Here are some tips for searing beef:

    1. Pat meat dry before cooking
    2. Use a cast-iron skillet for best heat distribution
    3. Cook 2-3 minutes per side
    4. Let meat rest 5-10 minutes after cooking

    By avoiding these mistakes, you’ll make a Vietnamese stir-fry that’s as good as a restaurant’s. It’s sure to impress your family and friends.

    Conclusion

    Learning about shaking beef is more than just a recipe. It’s a dive into a lively Viet culinary tradition. This tradition connects food lovers with deep cultural roots. By mastering the techniques, you’ve turned an ordinary meal into an extraordinary experience.

    Shaking beef is more than a dish; it’s a celebration of flavor, technique, and heritage. The skills you’ve learned open a window into Vietnamese cooking philosophy. Whether you’re a home cook or a food enthusiast, this recipe is a gateway to Southeast Asian cuisine’s complexity and elegance.

    As you keep practicing and improving your shaking beef technique, remember each dish is a chance to honor a culinary tradition. Your newfound knowledge lets you make dishes that capture the essence of Vietnamese cooking. These dishes are bold, balanced, and deeply satisfying.

    Embrace the journey, try new ingredients, and enjoy the delicious results. Your skills in making shaking beef will surely impress family and friends. They will also connect you to a rich and flavorful gastronomic heritage.

    FAQ

    What exactly is shaking beef?

    Shaking beef, or Bò Lúc Lắc, is a Vietnamese dish. It’s made with tender beef cubes, a tasty marinade, and a special wok-tossing method. This method gives the beef a perfect sear.

    What cut of beef works best for this recipe?

    Choose tender cuts like filet mignon, sirloin, or ribeye for shaking beef. These cuts are tender and flavorful. They also have enough fat for a delicious caramelized exterior.

    How long should I marinate the beef?

    Marinate the beef for 30 minutes to 2 hours. This lets the marinade flavor the meat well without making it too salty.

    What makes the “shaking” technique unique?

    The shaking technique quickly tosses the beef in a hot wok. This creates a crispy exterior and a juicy interior. It’s key to the dish’s flavor and texture.

    What traditional herbs are used in serving shaking beef?

    Culantro and watercress are traditional herbs used. Culantro adds a fresh flavor, while watercress provides a peppery contrast.

    Can I make shaking beef spicy?

    Yes! Add heat with fresh chili peppers, red pepper flakes, or a spicy dipping sauce. This lets you adjust the spice level to your liking.

    How do I store leftover shaking beef?

    Keep leftover beef in an airtight container in the fridge for 3-4 days. Reheat it quickly in a hot skillet to keep it tender.

    What should I serve with shaking beef?

    Serve it with steamed rice, watercress salad, and lime dipping sauce. You can also try it with pasta or roasted veggies for a modern twist.

    Is shaking beef difficult to prepare at home?

    It’s not hard, but it does need some technique. Keep the heat high, use the right beef, and master the quick toss for a great sear and flavor.

    What’s the origin of shaking beef?

    Shaking beef combines Vietnamese and French cooking styles, influenced by the French colonial period in Vietnam. It shows the rich cultural mix in Vietnamese cuisine.

    What is your rating for the recipe?

  • Beef Recipes

    Growing up, my family loved home-cooked meals. Beef recipes made our dinners special. My grandmother’s stews and my father’s steaks were unforgettable.

    Beef is a favorite in many American kitchens. It’s great for both new cooks and seasoned chefs. This guide will show you how to cook beef like a pro.

    Cooking with beef is fun and rewarding. It’s perfect for quick meals or big Sunday dinners. We’ll explore how to make delicious and healthy beef dishes.

    Understanding Different Cuts of Beef for Cooking

    Exploring the world of beef cuts can make your cooking amazing. Knowing the traits of various cuts helps you pick the best meat for any dish. This ensures your meals are always a hit.

    Premium Cuts for Special Occasions

    For special moments, some beef cuts are unmatched. Beef tenderloin, the cow’s most tender muscle, offers a top-notch dining experience. Often sold as filet mignon, it’s ideal for fancy dinners.

    • Ribeye: Rich in marbling and flavor
    • Tomahawk steaks: Impressive 2-inch thick cuts
    • New York strip: Balanced tenderness and taste

    Budget-Friendly Beef Options

    Not all tasty beef cuts cost a lot. Chuck and round cuts offer great flavor at lower prices. They need careful cooking but can make incredible meals when done right.

    • Chuck eye steaks: Similar to rib steaks
    • Top sirloin: Great value with good tenderness
    • Flank steak: Flavorful and versatile

    Best Cuts for Specific Cooking Methods

    Choosing the right beef cut for your cooking method is key. Tender cuts do well with quick, high-heat cooking. But tougher cuts need slow cooking to be tender.

    Cooking MethodRecommended Cuts
    GrillingRibeye, Strip Steak, Flank Steak
    BraisingChuck Roast, Short Ribs, Brisket
    RoastingPrime Rib, Top Round, Tenderloin

    By learning about these beef cuts, you’ll improve your cooking. You’ll make meals that impress your family and guests.

    Classic Beef Stroganoff Recipe

    Discover the ultimate comfort food that has delighted home cooks for generations. Beef stroganoff is a rich, creamy dish that turns simple red meat into a luxurious meal. It combines tender beef with a velvety sauce that’s sure to impress.

    Essential Ingredients and Preparation

    Gathering the right ingredients is key for an authentic beef stroganoff. Here’s what you’ll need:

    • 1.5 pounds of top sirloin or beef tenderloin
    • 12 ounces of fresh mushrooms
    • 1 large yellow onion
    • 2 garlic cloves
    • 3 tablespoons all-purpose flour
    • 3/4 teaspoon hot paprika

    Step-by-Step Cooking Instructions

    Preparing this delicious beef dish requires precision and care. Follow these steps for a perfect stroganoff:

    1. Slice beef into thin strips against the grain
    2. Season meat with salt and hot paprika
    3. Sear beef quickly – about 1 minute per side
    4. Remove beef and sauté mushrooms and onions
    5. Create a rich sauce using beef broth and sour cream

    Sauce Making Tips and Techniques

    The secret to an exceptional beef stroganoff lies in its creamy sauce. Use low-sodium beef broth and high-quality sour cream for the best results. Whisk in Dijon mustard and Worcestershire sauce to add depth of flavor.

    Pro tip: Serve your beef stroganoff over egg noodles, mashed potatoes, or polenta. Leftovers can be stored in an airtight container for up to 4 days, making it a convenient meal for busy families.

    Quick and Easy Beef Stir-Fry Dishes

    Stir-frying is a fast cooking method that turns beef into a tasty meal in minutes. The livestock industry has many cuts great for making dishes like those in restaurants at home.

    Choosing the right beef is key for a great stir-fry. Flank steak is the top pick, with beef chuck steak a cheaper option. Pro tip: Slice beef when partially frozen for easier cutting!

    • Recommended beef cuts:
      • Flank steak (most popular)
      • Sirloin steak
      • Beef chuck steak (budget-friendly)

    Getting ready is important for a perfect stir-fry. Here are some tips to make your beef dish better:

    1. Slice beef against the grain for maximum tenderness
    2. Use high smoke point oils like canola or peanut oil
    3. Cook beef quickly (2-3 minutes) until browned
    4. Stir-fry vegetables for 4-5 minutes until tender-crisp

    With just 25 minutes of prep time, you can make a healthy meal full of flavor. A stir-fry serves 4 and has about 423 calories per serving. It’s a great choice for busy families looking for quick, tasty beef dishes.

    One-Pot Beef Pasta Creations

    Busy home cooks, rejoice! One-pot beef pasta dishes are the ultimate solution for quick meals with minimal cleanup. These clever recipes combine tender beef, perfectly cooked pasta, and rich flavors in a single pan. This makes dinner preparation fast and easy.

    When making one-pot beef pasta, picking the right ingredients is key. Your choice of beef and pasta can make or break the dish. Ground beef with at least 20% fat content works best. It provides rich flavor and keeps the meat juicy during cooking.

    Perfect Pasta and Beef Combinations

    Here are some ideal beef and pasta pairings:

    • Ground beef with fusilli or rotini for maximum sauce coverage
    • Lean ground beef with short pasta shapes like penne
    • Seasoned beef with spiral pasta for enhanced texture

    Sauce and Seasoning Guidelines

    To make a mouthwatering sauce, mix beef stock (1.5-2 cups), crushed tomatoes, and selected seasonings. A blend of Italian seasoning, salt, and black pepper can turn your dish into a restaurant-quality meal.

    Time-Saving Cooking Methods

    Master the art of one-pot cooking with these efficient techniques:

    1. Brown beef first for deep flavor development
    2. Add pasta and liquids simultaneously
    3. Cook for 9-12 minutes until pasta is al dente
    4. Let the dish rest for 5 minutes before serving

    Pro tip for cattle farming enthusiasts: Using high-quality, locally sourced ground beef can elevate your one-pot pasta. Your family will love the taste and texture difference.

    Essential Beef Cooking Techniques

    Learning how to cook beef can turn simple meals into amazing dishes. Whether you’re cooking at home or dreaming of being a chef, knowing different cooking methods can boost your skills. It helps you make delicious meals that everyone will love.

    Cooking beef needs care and knowledge. High-quality beef, like prime cuts, is rare. It makes up only 2-3% of meat in the U.S. So, it’s important to handle it carefully to keep its quality.

    “Great cooking is about technique, not just ingredients.”

    Key Cooking Methods

    • Grilling: Perfect for creating delicious char and sealing in flavors
    • Roasting: Ideal for larger cuts with even heat distribution
    • Braising: Best for tougher meat cuts that require slow cooking
    • Pan-searing: Quick method for achieving beautiful caramelization

    Temperature and Doneness Guide

    DonenessInternal TemperatureCooking Time
    Medium-Rare130-135°F2 hours
    Medium145°F2 hours 10 minutes
    Medium-Well150-155°F2 hours 15 minutes

    Professional chefs say to let beef rest for 5-10 minutes after cooking. This step helps juices spread evenly. It makes the meat more flavorful and tender.

    Don’t forget to use 1 teaspoon of kosher salt per pound of beef. Also, avoid overcrowding your cooking area. These tips can make a big difference in your beef cooking skills.

    Beef Marinades and Seasonings

    Turning simple red meat into a culinary masterpiece starts with the right marinade. Marinades are magical mixtures that can make beef go from simple to spectacular. They add deep flavors and tenderize tough cuts of meat.

    Knowing how to marinate beef is an art. It involves timing, ingredients, and techniques. Different cuts of beef soak up flavors in unique ways. This makes marinades key in preparing tasty dishes.

    Traditional Flavor Combinations

    Classic beef marinades mix key ingredients to boost the meat’s natural flavors:

    • Olive oil for moisture
    • Garlic for depth
    • Worcestershire sauce for umami
    • Fresh herbs like rosemary and thyme
    • Acidic components such as vinegar or lemon juice

    International Seasoning Profiles

    Discover global flavors that turn beef into an international culinary adventure:

    CuisineKey Marinade IngredientsTypical Marinating Time
    KoreanSoy sauce, sesame oil, ginger2-4 hours
    MediterraneanOlive oil, lemon, oregano4-6 hours
    MexicanLime, cilantro, chili peppers1-2 hours

    Marinating Times and Tips

    Marinating beef needs careful timing to get the most flavor without overdoing it. Tougher cuts like top round benefit most from longer marination. Meanwhile, premium cuts need just a little touch:

    1. Tough cuts: Marinate up to 8 hours
    2. Medium cuts: 2-4 hours recommended
    3. Tender cuts: 30-60 minutes maximum

    Pro tip: Always marinate in the fridge and toss the used marinade to avoid bacterial issues. If you want to reuse it, boil it for 5 minutes to make a sauce.

    Nutritional Benefits of Beef Dishes

    Beef is packed with essential nutrients that boost your health when eaten right. It’s a key protein source from the livestock industry, offering many health benefits.

    A three-ounce serving of beef has a great nutritional profile:

    • Protein: 25 grams per serving (51% Daily Value)
    • Calories: Approximately 170 calories
    • Vitamin B12: 101% Daily Value
    • Zinc: 53% Daily Value

    Beef’s unique mix of nutrients is good for your body. It helps keep muscles strong, especially for those over 55. Its heme iron is better absorbed than plant-based iron, fighting iron deficiency anemia.

    Beef also offers:

    1. Essential minerals like zinc for immune system support
    2. B vitamins critical for energy production
    3. Selenium for cellular protection
    4. Choline for brain function

    To get the most health benefits, choose lean cuts labeled “extra lean.” They have less saturated fat. Grass-fed beef also has better fatty acids and more antioxidants.

    Moderation is key: experts suggest balancing red meat consumption with a varied diet to optimize nutritional intake.

    Tips for Selecting and Storing Beef

    Choosing and keeping beef quality high needs knowledge and care. Knowing how to pick beef can make your cooking better and keep your family safe.

    Quality Indicators When Buying Beef

    When picking beef, look for these key factors:

    • Choose beef with consistent marbling for tenderness and flavor
    • Know the USDA beef grades: Prime, Choice, and Select
    • Look for a bright red color without too much brown
    • Check the packaging dates and storage

    The USDA grading system is key to understanding beef quality. Prime beef is the highest grade, with lots of marbling and found in top steakhouses. Choice and Select grades are great alternatives with different fat levels.

    Proper Storage Methods

    Keeping beef quality up starts with right storage:

    1. Keep beef refrigerated at 40°F or below
    2. Store in sealed, airtight containers
    3. Use fresh beef within 3-5 days of buying
    4. Keep raw beef away from other foods to avoid cross-contamination

    Freezing and Thawing Guidelines

    Beef CutRefrigerator StorageFreezer Storage
    Ground Beef1-2 days3-4 months
    Steaks3-5 days6-12 months
    Roasts3-5 days4-12 months

    When thawing beef, always use the fridge to keep it safe. Take meat out 30 minutes before cooking for even temperature and best flavor in your dishes.

    Conclusion

    Your journey through beef recipes and meat production has given you great insights. The United States is a top beef producer, with 12.22 million tons in 2018. This shows how important beef is in American food.

    As you keep exploring beef dishes, remember cooking is both art and science. Knowing about different cuts, cooking methods, and nutrition can improve your skills. With 80% of people wanting to eat more beef, you’re joining a tradition that values taste, protein, and convenience.

    Whether you cook at home or dream of being a chef, this guide has prepared you. You now know how to pick quality meat and cook it well. This will help you make meals that are not only tasty but also good for you.

    Keep trying new things, learning, and enjoying the many ways beef can be used in cooking. Your new skills will surely impress everyone at your table.

    FAQ

    What are the best cuts of beef for grilling?

    Top choices for grilling include ribeye, tenderloin, and New York strip steak. These cuts are tender and well-marbled. They taste great when cooked over high heat.

    How long should I marinate beef?

    Marinating times depend on the cut and ingredients. Thin cuts like flank steak marinate for 2-4 hours. Thicker cuts need 8-24 hours. Don’t marinate too long to avoid mushy meat.

    What internal temperature indicates beef is fully cooked?

    Use these guidelines for cooking beef: – Rare: 125°F – Medium Rare: 135°F – Medium: 145°F – Medium Well: 150°F – Well Done: 160°F Always check with a meat thermometer for safe and perfect doneness.

    How can I tenderize tough cuts of beef?

    Try these methods to tenderize tough beef: – Slow cooking or braising – Marinating with acidic ingredients – Mechanical tenderizing (using a meat mallet) – Cutting against the grain – Using enzyme-based meat tenderizers These techniques help soften tough meat.

    What are the most nutritious cuts of beef?

    Lean cuts like sirloin, top round, and eye of round are nutritious. They have lots of protein and less fat. These cuts also offer iron, zinc, and B vitamins, with fewer calories than fattier cuts.

    How long can I store beef in the refrigerator?

    Raw beef can stay in the fridge for: – Ground beef: 1-2 days – Steaks and roasts: 3-5 days – Cooked beef: 3-4 days Keep beef in the coldest part of the fridge in sealed containers. This keeps it fresh and prevents bacterial growth.

    What’s the best method for cooking beef for a large group?

    For big groups, slow-cooking is best. Methods like braising or roasting: – Cook evenly – Work with large cuts – Are hands-off – Can be made ahead – Keep meat tender and flavorful Great options include pot roasts, beef brisket, and prime rib.

    How can I prevent beef from becoming tough when cooking?

    To avoid tough beef, follow these tips: – Don’t overcook – Let meat rest after cooking – Cut against the grain – Choose the right cooking method for each cut – Keep cooking temperatures steady – Use marinades for tougher cuts Knowing each cut’s characteristics ensures tender, juicy results.

    What is your rating for the recipe?

  • Tinis Mac And Cheese Recipe

    Imagine a mac and cheese so good, it wins the hearts of millions online. Tini’s viral mac and cheese did just that. It turned a simple comfort food into a big hit on social media.

    This mac and cheese has over 60 million views on TikTok. It’s more than just a dish; it’s a big moment in culture. The creamy, cheesy goodness has started a cooking trend. It shows that simple recipes can lead to amazing food experiences.

    Looking for the ultimate comfort food? This viral recipe is it. It’s not just another mac and cheese. It’s a new way to make a classic dish that will impress everyone.

    The Story Behind Tini’s Viral Mac and Cheese

    When a simple cheese casserole goes viral, it’s clear something special has happened. Tini’s mac and cheese recipe exploded on TikTok, winning over millions with its cheesy goodness.

    How TikTok Transformed a Comfort Food Recipe

    A TikTok video started it all, getting 69 million views. Tini’s account, with nearly 10 million followers, became the heart of a mac and cheese movement. The recipe’s fame grew so fast, Tini had trouble finding ingredients before Thanksgiving.

    What Makes This Recipe Unique

    Tini’s mac and cheese is different because of its extraordinary cheese blend. It uses an amazing 2.5 pounds of cheese, including:

    • 16 ounces of mozzarella
    • 16 ounces of Colby Jack
    • 8 ounces of sharp cheddar

    The Creator Behind the Sensation

    The recipe sparked talks about creativity and cultural representation in the Black TikTok community. Despite some mixed feelings, it became a huge hit, changing how we see classic comfort foods.

    Recipe MetricDetails
    Total Views69 Million
    Total Cheese2.5 Pounds
    Pasta TypeCavatappi
    Baking Temperature350°F

    Essential Ingredients for Perfect Mac and Cheese

    Creating a delicious cheddar pasta bake starts with the right ingredients. The key to a great creamy pasta dish is using high-quality parts that blend well together.

    Your classic dish needs special ingredients to go from good to great. Here are the main things you’ll need:

    • Pasta Selection: Cavatappi is better than traditional elbow macaroni. Its shape lets more cheese sauce cover it
    • Cheese Blend: Mix mozzarella, Colby Jack, and sharp cheddar for rich flavors
    • Seasonings: Use garlic powder, smoked paprika, kosher salt, and black pepper

    Professional chefs say to use fresh cheese for the best melt. Pre-shredded cheese has additives that can mess up the sauce.

    Your cheese sauce needs the right ingredients:

    • Unsalted butter
    • All-purpose flour
    • Evaporated milk
    • Heavy cream
    • Dijon mustard

    The secret to amazing mac and cheese is mixing flavors and textures right. Kosher salt helps season better. The right mix turns a simple pasta dish into a memorable meal.

    The Secret Cheese Blend

    Creating the perfect baked pasta starts with choosing the right cheese blend. Your mac and cheese will become extraordinary with the right cheese selection and preparation.

    Freshly grated cheese is the key to a great cheese sauce. Pre-shredded cheese has additives that make it grainy. Grating your own cheese gives you a creamy sauce that covers every pasta surface.

    Why Fresh Grated Cheese Matters

    • Provides superior melting quality
    • Eliminates anti-caking agent interference
    • Delivers richer, more authentic flavor
    • Ensures smoother sauce consistency

    Optimal Cheese Combinations

    For the ultimate baked pasta, mix these cheeses:

    1. Medium Cheddar: Sharp flavor backbone
    2. Colby Jack: Creamy melting properties
    3. Mozzarella: Stretchy, smooth texture

    “The right cheese blend transforms mac and cheese from good to unforgettable.”

    Avoiding Common Cheese Mistakes

    When making your cheese sauce, avoid overheating. Slow, steady melting keeps it smooth. Grate cheese at room temperature and add it slowly to your sauce.

    Your goal is a rich, creamy sauce that sticks to every pasta shell. This will make your baked pasta dish a hit with everyone at the table.

    Choosing the Right Pasta Shape

    Choosing the right pasta shape can make your mac and cheese amazing. Not all pasta shapes are the same when it comes to holding creamy, cheesy goodness.

    When making the best macaroni and cheese, the pasta shape is crucial. Cavatappi, or corkscrew pasta, is a favorite among mac and cheese lovers. It has several benefits:

    • Its curved shape lets more cheese sauce cling to it
    • The hollow tubes keep sauce inside each piece
    • It’s bigger than regular elbow pasta
    • It offers a perfect balance of cheese and pasta

    Elbow pasta is still a classic for mac and cheese. But other shapes add fun textures and help hold sauce better. Here are some alternatives:

    1. Lumache: Shell-shaped pasta with ridges that hold thick cheese sauces well
    2. Medium and Large Shells: Their pocket-like design traps cheese sauce
    3. Gemelli: Its corkscrew design works with different sauce thicknesses

    Experts suggest using De Cecco, Kroger’s Private Selection, or Barilla cavatappi for mac and cheese. The goal is to find pasta that cooks just right and holds sauce well.

    Creating the Ultimate Cheese Sauce

    Making the perfect cheese sauce is an art. It turns a simple creamy pasta dish into a masterpiece. Your mac and cheese adventure starts with creating a rich, velvety sauce that will make everyone want more.

    Mastering the Roux Foundation

    The secret to a great cheese sauce is a well-made roux. You’ll need:

    • 4 tablespoons of butter
    • 1/3 cup all-purpose flour
    • 3 cups of 2% milk

    Start by heating the butter in a large skillet. Whisk in flour for 4-6 minutes until it’s golden and thick. This step is key for a smooth, velvety sauce without lumps.

    Incorporating Dairy Components

    The magic of a rich cheese sauce comes from its dairy. Slowly add milk while whisking to make a silky base. For even more richness, try adding heavy cream or evaporated milk.

    Achieving the Perfect Consistency

    Your goal is a sauce that sticks perfectly to pasta. Mix in 3 cups of shredded cheddar cheese, 1/2 teaspoon of salt, and 1/4 teaspoon of garlic powder. For a tangy twist, add 1-2 tablespoons of buffalo hot sauce.

    Pro tip: Grate your cheese fresh for the best creamy pasta experience. Pre-shredded cheese may have anti-caking agents that mess with your sauce’s smoothness.

    Step-by-Step Assembly Process

    To make the perfect cheese casserole, layering is key. Start by getting your baking dish ready. It should be about 31 cm x 21 cm. This size is great for stacking layers of cheesy pasta.

    Transforming simple ingredients into a delicious dish is easy. Here’s how to make your mac and cheese:

    1. Preheat your oven to 350°F (180°C)
    2. Cook macaroni pasta until slightly underdone (about 2-3 minutes less than package instructions)
    3. Drain pasta and rinse with cold water to stop cooking
    4. Prepare your cheese mixture using 300 grams of cheese:
      • 175 grams aged Gouda
      • 125 grams cheddar
    5. Grate cheeses freshly for maximum flavor

    Layering is crucial for a great cheesy pasta experience. Start with a thin layer of cheese sauce, then pasta, more sauce, and grated cheese. Keep adding layers until your dish is full.

    For a perfect golden topping, mix 1.5 cups panko breadcrumbs with 60 grams melted butter and 20 grams finely grated parmesan. Sprinkle this over the top for a crispy finish.

    Bake for 20-25 minutes until the top is golden brown. Let it rest for 5 minutes before serving. This allows the cheesy layers to set perfectly.

    Baking Tips and Techniques

    To make your mac and cheese golden and bubbly, you need to be precise. The baking process is key to a delicious baked pasta that will wow your guests.

    Temperature and Timing Guidelines

    For the best cheddar pasta bake, remember these baking tips:

    • Preheat your oven to 425°F for the best results
    • Bake the pasta casserole for 20-25 minutes
    • Make sure the cheese is bubbling and the top is golden brown

    Achieving the Perfect Golden Crust

    To get a crispy, golden crust, try these techniques:

    1. Sprinkle additional breadcrumbs on top before baking
    2. Drizzle extra-virgin olive oil over the breadcrumb layer
    3. Use the broiler for 1-3 minutes to enhance browning

    Keep an eye on your baked pasta during the final broiling. You want a crisp, golden-brown top that adds amazing texture to your mac and cheese.

    Pro tip: Let your cheddar pasta bake rest for 10 minutes after removing from the oven. This allows the cheese to set and the flavors to meld.

    By following these baking tips, you’ll make a delicious baked pasta dish. It will be crispy on the outside and creamy on the inside.

    Make-Ahead and Storage Instructions

    Preparing Tini’s mac and cheese ahead of time is a lifesaver for busy cooks. It’s a comfort food that fits into your busy schedule. You can plan your meals better with this flexibility.

    Start by preparing the mac and cheese up to two days before baking. This gives you time to manage your cooking schedule. Here are some important storage tips to keep it fresh:

    • Cool the prepared mac and cheese completely (approximately 30 minutes)
    • Cover tightly with aluminum foil or plastic wrap
    • Refrigerate for up to 2-4 days before baking
    • Remove from refrigerator 30-60 minutes before baking to reach room temperature

    When baking time comes, preheat your oven to 400°F. If it’s cold from the fridge, bake for 25-35 minutes. This ensures it’s hot and delicious.

    Leftover mac and cheese can be stored in an airtight container for 3-4 days. For the best taste, reheat it in the oven. This keeps the top crispy and the inside creamy.

    Pro tip: Always let the mac and cheese rest for 5 minutes after baking. This lets the cheese sauce set and become more stable.

    Nutrition-wise, a single serving has about 525 calories. It’s a filling meal for family dinners or potluck events.

    Recipe Variations and Substitutions

    Creating your perfect mac and cheese doesn’t mean sticking to one rigid recipe. Tini’s viral macaroni and cheese offers incredible flexibility for culinary creativity. You can transform this classic dish by experimenting with different ingredients and techniques.

    • Cheese Variations:
      • Swap sharp cheddar with smoked gouda
      • Mix in blue cheese for a tangy twist
      • Use parmesan for a nutty flavor profile
    • Protein Add-Ins:
      • Crispy bacon bits
      • Shredded chicken
      • Pulled pork
    • Vegetable Enhancements:
      • Roasted broccoli
      • Caramelized onions
      • Sautéed mushrooms

    For dietary restrictions, you can easily adapt this mac and cheese recipe. Gluten-free pasta works wonderfully, and dairy-free cheese alternatives can create a similar creamy texture. Pro tip: Nutritional yeast can add a cheesy flavor for vegan versions.

    “The beauty of mac and cheese is its versatility – there’s no single ‘right’ way to make it!” – Culinary Experts

    When selecting substitutions, remember to maintain similar moisture and fat content. This helps preserve the dish’s signature creamy consistency. Your mac and cheese can be a canvas for culinary innovation!

    Pairing and Serving Suggestions

    Tini’s mac and cheese is more than just a classic dish. It’s a comfort food that can make any meal special. Whether it’s a holiday feast or a casual dinner, this recipe offers endless pairing options.

    Finding the right accompaniments can take your mac and cheese to the next level. The right pairings can balance flavors, add nutrition, and make your meal unforgettable.

    Holiday Meal Combinations

    At holiday gatherings, your mac and cheese can be the star or a supporting role. Here are some festive pairings to try:

    • Roasted turkey with herb garnish
    • Honey-glazed ham
    • Grilled chicken drumsticks
    • Baked salmon with lemon

    Side Dish Recommendations

    Pair your creamy mac and cheese with sides that add texture and nutrition:

    Vegetable SidesProtein Pairings
    Roasted Brussels sproutsPulled pork
    Mixed green saladGrilled chicken
    Roasted carrotsBaked halibut

    For an extra kick, top your mac and cheese with crispy bacon bits, fresh herbs, or a dash of hot sauce. The beauty of this comfort food is its incredible versatility.

    Remember, mac and cheese can be a star on its own or a perfect sidekick. Try different pairings to find your favorite!

    Conclusion

    Your journey through this mac and cheese recipe is more than just cooking. It’s a viral sensation that has changed the game for comfort food lovers. It connects home cooks with a new level of culinary excellence.

    TikTok users love this mac and cheese method. They say it’s a game-changer that makes a classic dish even better. The special cheese mix, precise cooking, and focus on detail set it apart from store-bought mac and cheese.

    Learning these techniques means you’re part of a culinary movement. It’s not just about making a side dish. It’s about reimagining a beloved classic. Whether you’re experienced or new to cooking, this recipe makes it easy to create top-notch comfort food at home.

    Next time you’re hosting a family dinner or attending a potluck, try this amazing mac and cheese. Every bite will show you why so many people adore this dish.

    FAQ

    What makes Tini’s mac and cheese recipe different from traditional recipes?

    Tini’s mac and cheese is special because of its unique cheese mix and careful sauce making. It uses cavatappi pasta, which makes every bite cheesy. It became famous on TikTok for its creamy texture and golden crust.

    Why is freshly grated cheese important for this mac and cheese recipe?

    Freshly grated cheese melts better and tastes richer than pre-shredded cheese. Pre-shredded cheese often has additives that stop it from melting well. Grating your own cheese makes the sauce velvety and luxurious.

    Can I make Tini’s mac and cheese ahead of time?

    Yes, you can make it ahead. Keep it in an airtight container in the fridge for 3-4 days. To reheat, add a bit of milk and bake at 350°F until it’s warm and bubbly.

    What pasta shape works best for this recipe?

    Cavatappi pasta is the best choice. Its corkscrew shape traps cheese sauce, making each bite cheesy. It’s perfect for mac and cheese.

    How can I customize this mac and cheese recipe?

    You can try different cheeses, add bacon or chicken, or add veggies like broccoli. You can also use gluten-free pasta. The basic method stays the same, but you can get creative.

    What are the key ingredients for Tini’s mac and cheese?

    You’ll need good pasta, like cavatappi, and a mix of grated cheeses, like sharp cheddar and gruyère. You’ll also need butter, flour, milk, and seasonings like salt, pepper, and maybe garlic or mustard powder.

    What temperature should I bake the mac and cheese?

    Bake it at 375°F for 25-30 minutes. This makes the top golden and the inside creamy.

    Can this recipe be made vegetarian or gluten-free?

    Yes! Use gluten-free flour and pasta. For a veggie version, pick vegetarian cheese and skip the meat. The basic recipe stays the same with these changes.

    What is your rating for the recipe?

  • Star Bread

    Imagine a golden, intricately twisted star bread coming out of the oven. Its layers shine with buttery goodness. This pull-apart bread is more than a recipe; it’s a way to make baking special. It turns family gatherings and special events into unforgettable moments of tasty connection.

    Star bread is perfect for both seasoned bakers and kitchen explorers. It combines stunning looks with delicious taste. As a pull-apart bread, it encourages sharing and becomes a hit at any gathering. Whether it’s for a weekend brunch or a festive celebration, this bread will wow everyone with your baking skills.

    What is Star Bread

    Star-shaped bread is a delightful culinary creation that turns ordinary bread into a festive centerpiece. It captivates both bakers and food enthusiasts with its intricate design and mouthwatering appeal.

    At its core, star bread is a pull-apart style sweet bread. It combines visual artistry with delectable flavors. The bread features multiple layers of soft, pillowy dough twisted into a stunning star-like pattern.

    Origins and Traditions

    The tradition of creating star-shaped bread spans multiple cultures, with roots in European baking techniques. Home bakers and professional pastry chefs alike have embraced this decorative bread as a centerpiece for special occasions.

    • Originated in Eastern European baking traditions
    • Popularized through social media and baking communities
    • Often prepared for holidays and family gatherings

    Basic Components

    Creating the perfect star bread requires a few essential ingredients:

    1. Soft, enriched bread dough
    2. Flavorful filling (typically cinnamon-sugar)
    3. Precise layering technique
    4. Careful shaping and twisting

    Visual Appeal

    The true magic of star bread lies in its visual presentation. When baked, the caramelized filling peeks through intricate twists, creating a golden-brown masterpiece that looks almost too beautiful to eat.

    Your star-shaped bread becomes more than just a dish—it’s an edible work of art. It promises to impress guests and delight taste buds with every pull-apart bite.

    Essential Ingredients for Perfect Star Bread

    Making a delicious star bread starts with choosing the right ingredients. You’ll need to pick high-quality items to make a flaky bread that’s a real treat.

    The base of your star bread is built on top ingredients. These ingredients combine to give your bread a magical texture and taste. Here are the must-haves:

    • All-purpose flour (3 ¾ cups)
    • Active dry yeast (2 ¼ teaspoons)
    • Unsalted butter (6 tablespoons melted)
    • Large eggs (1 room temperature)
    • Granulated sugar
    • Kosher salt

    For the filling that makes your star bread stand out, you’ll need:

    • Softened unsalted butter (½ cup)
    • Granulated sugar (½ cup)
    • Ground cinnamon (2 teaspoons)
    Ingredient CategoryPurpose in Star BreadQuantity
    FlourProvides structure3 ¾ cups
    YeastEnables rising2 ¼ teaspoons
    ButterAdds richness6 tablespoons
    EggsBinds ingredients1 large

    Professional bakers know that quality ingredients are key. Your bread will be amazing with fresh, measured ingredients. The right mix makes your bread flaky and delicious.

    Don’t forget, the temperature of your ingredients matters. Use room temperature eggs and warm milk (around 110°F) for the best yeast action. Your star bread will be light and airy, impressing everyone.

    Equipment and Tools Needed

    To make perfect puff pastry bread, you need the right tools. Whether it’s a traditional braided bread or a star-shaped one, the right kitchen tools make baking fun and easy.

    Essential Baking Tools

    For making star bread, you’ll need a few important tools:

    • Large mixing bowl
    • Stand mixer or hand mixer
    • Wooden spoon
    • Rolling pin
    • Parchment paper
    • Baking sheet
    • Sharp knife or pizza cutter

    Precise Measuring Equipment

    When making puff pastry bread, being accurate is key. You’ll need good measuring tools:

    • Digital kitchen scale
    • Measuring cups (dry and liquid)
    • Measuring spoons
    • Instant-read thermometer

    Optional Accessories

    These accessories can make baking braided bread even better:

    • Silicone baking mat
    • Pastry brush
    • Dough scraper
    • Kitchen ruler
    Tool CategoryEssential ItemsPurpose
    MixingStand mixerPrepare and knead dough
    MeasuringDigital scaleEnsure ingredient precision
    ShapingRolling pinCreate even dough layers
    BakingParchment-lined baking sheetPrevent sticking and ensure even baking

    With these tools, you’re set to make a beautiful star bread that’s as tasty as it looks!

    Step-by-Step Dough Preparation

    Making the perfect star bread starts with preparing the dough. You need quality ingredients and the right techniques. These steps turn simple parts into a delicious dish.

    To make your star bread dough, you’ll need:

    • 450 grams (3¾ cups) unbleached all-purpose flour
    • 150 grams active sourdough starter
    • 1 cup whole milk (warmed to 100-110°F)
    • 1 egg plus 1 egg yolk
    • ¼ cup granulated sugar
    • 4 tablespoons soft butter

    Start by activating your yeast in warm milk. Temperature is crucial – make sure the milk is between 100-110°F. This helps yeast grow well. Mix the wet ingredients well, making a smooth base for your star bread.

    Slowly add the dry ingredients. Knead until the dough is smooth and elastic. This step is key for a flaky texture. Knead for 10-12 minutes, until it’s soft and bounces back.

    Let your dough ferment at room temperature for about 4 hours. It’s ready when it’s doubled in size and looks light and puffy.

    Pro tip: For better flavor, chill the dough for up to 24 hours before shaping. This allows for deeper flavor.

    Your dough is now ready for the next steps. You’ll create a star bread that will wow everyone!

    Making the Perfect Filling

    Creating the perfect filling makes your pull-apart bread truly special. The right mix of ingredients can turn simple buttery bread into something amazing. Whether you prefer classic flavors or like to try new ones, getting the filling right is key.

    Classic Cinnamon Sugar Filling

    The cinnamon sugar filling is a timeless favorite. It’s loved by everyone. Here’s what you need:

    • 3 tbsp granulated sugar
    • 1 tbsp dark brown sugar
    • 2 tbsp ground cinnamon
    • 3 tbsp unsalted butter, softened

    Alternative Filling Options

    Try these exciting alternatives to spice up your pull-apart bread:

    • Chocolate Nutella
    • Raspberry jam
    • Savory herb and cheese blend
    • Apple and caramel

    Proper Spreading Techniques

    Getting the filling evenly spread is important. Use a small offset spatula for this. Make sure to leave a little room around the edges to avoid spills.

    Filling TypePreparation TimeDifficulty Level
    Classic Cinnamon Sugar5 minutesEasy
    Nutella3 minutesVery Easy
    Savory Cheese10 minutesModerate

    Pro tip: Make sure your butter is at room temperature. Cold butter can ruin the dough’s texture.

    Shaping Your Star Bread

    Making a stunning star-shaped bread needs precision and creativity. Your bread will be a showstopper at any table. The secret to perfect star bread is in the dough and how you shape it.

    Start by dividing your dough into four equal circles. Roll each circle to the same size, about 10-12 inches. This makes sure your bread looks like a classic star.

    1. Roll out each dough circle to about 10-12 inches in diameter
    2. Place the first circle on parchment paper
    3. Spread your chosen filling evenly, leaving a small border around the edges
    4. Layer subsequent dough circles, repeating the filling process

    To get the star shape, use a special cutting method. Place a bowl or plate in the dough’s center. Cut the dough into 16 strips, keeping the middle untouched.

    Now, the magic happens with twisting. Take two strips and twist them away from each other. This creates a beautiful spiral. Pinch the ends to seal the bread’s shape.

    Shaping StepKey Considerations
    Dough PreparationRoll to uniform thickness
    Filling ApplicationEven spread, minimal border
    Cutting16 equal strips from center
    TwistingAlternate strip directions

    With careful shaping and attention to detail, your star-shaped bread will turn into a culinary masterpiece.

    Tips for Perfect Layering and Twisting

    Making a beautiful braided bread takes skill and patience. Your festive bread will impress everyone once you get the hang of layering and twisting. It’s all about being systematic and confident in your steps.

    Even layers are key for a stunning braided bread. Here are some tips to help your festive bread look amazing:

    • Roll out dough to consistent thickness (about 1/8 inch)
    • Use a ruler or measuring tape for precision
    • Trim edges to create perfect circular shapes
    • Ensure each layer is slightly smaller than the previous one

    Mastering Twisting Techniques

    The twisting method is crucial for your braided bread’s look. Start by cutting equal sections from the center outward. Gentle but firm twists create the most appealing star-like pattern.

    1. Cut dough into 16 equal sections
    2. Twist each section twice away from the center
    3. Pinch ends together to seal
    4. Ensure consistent twist direction for uniform look

    Troubleshooting Common Issues

    Don’t worry if your first tries aren’t perfect. Common problems include uneven twisting, filling leakage, and structural instability. Here are some solutions:

    • Chill dough if it becomes too soft
    • Use a light touch when stretching dough
    • Seal filling edges to prevent leaking
    • Allow proper resting time between steps

    With practice, you’ll make stunning braided bread that looks like it’s from a pro bakery. Remember, each try makes you better!

    Baking Instructions and Temperature Guide

    To make perfect star bread, you need to pay close attention to temperature and technique. Your holiday bread should have a golden, crispy outside and a soft inside.

    Here are the key steps to make your star bread perfect:

    • Preheat your oven to 350°F (175°C)
    • Place the rack in the oven’s middle for even heat
    • Let the star bread rest at room temperature for 20-30 minutes before baking
    • Brush the surface with egg wash for a beautiful golden sheen

    The baking time can change based on your filling and oven. Usually, it takes about 20-25 minutes for the bread to get golden brown.

    Pro Tip: Check your star bread around the 18-minute mark to prevent over-browning.

    Look for these signs that your star bread is done:

    1. Deep golden-brown color across the entire surface
    2. Slight puffing and expansion of the dough layers
    3. Firm texture when gently pressed

    After baking, let your star bread cool on a wire rack for 10-15 minutes. This helps the bread set and makes it easier to slice. It also keeps the star shape intact.

    Make-Ahead and Storage Options

    Making a tasty pull-apart bread needs smart planning. You can make your festive bread ahead of time. This is great for holiday parties and when you’re busy. Knowing how to store it right will help you enjoy it at its best.

    Dough Preparation and Refrigeration

    You can make the star bread dough up to 3 days early. Just wrap it tightly and put it in the fridge. This lets the flavors grow and makes baking easier.

    Storage Guidelines

    • Room temperature storage: Up to 3 days in a sealed container
    • Freezing: Store for up to 3 months in an airtight container
    • Thawing: Let frozen bread come to room temperature before serving

    Reheating Tips

    To warm up your festive bread, heat it in the oven at 350°F for 10 minutes. This brings back its fresh taste and smell.

    Freezing Recommendations

    To store it long-term, wrap your pull-apart bread in aluminum foil before freezing. When you want to eat it, thaw it at room temperature and warm it in the oven.

    Pro tip: Always let refrigerated or frozen dough come to room temperature before baking for the best results.

    Remember, proper storage keeps your star bread delicious and fresh for days after baking!

    Decorative Variations and Seasonal Adaptations

    Turn your star-shaped bread into a festive centerpiece with creative decorations for all seasons and celebrations. Decorative bread lets you match your baking to any holiday or special event.

    For winter, try these fun adaptations:

    • Sprinkle crushed peppermint candies on top for a festive Christmas look
    • Use white sugar glaze to create a snow-like effect
    • Add cranberry filling for a vibrant red and white color scheme

    Summer star-shaped bread can have bright and fresh flavors. Try these new ideas:

    • Incorporate tropical fruit fillings like mango or passion fruit
    • Decorate with edible flower petals
    • Create a light citrus glaze for a refreshing twist

    Halloween is a great time for spooky bread designs. Get creative with spooky designs by:

    • Using black sesame seeds for a dark, dramatic appearance
    • Shaping the star bread into a web-like pattern
    • Adding orange-colored sugar sprinkles

    Your star-shaped bread can become a true culinary art form with these seasonal adaptations. Each variation tells a different story, making a simple recipe into a memorable centerpiece for any gathering.

    Conclusion

    Creating star bread turns baking into a fun adventure. It’s more than a recipe; it’s a chance to make a beautiful pull-apart bread. This bread is a hit with family and friends, thanks to its four delicious layers and special techniques.

    You now know how to make dough, layer it, and shape it perfectly. You’ve learned about yeast proofing and making a 10-inch circle. This makes your baking better. Each slice of this bread is golden and soft, with a sweet taste.

    Star bread is not just a recipe; it’s a way to be creative in the kitchen. It’s perfect for any special occasion or a cozy weekend treat. Baking brings joy and connects us with those we love.

    We encourage you to share your star bread on social media. Try new fillings and keep improving your baking. Your kitchen is a place to create, and star bread is your masterpiece.

    FAQ

    What exactly is star bread?

    Star bread is a pull-apart pastry with a star shape. It’s made of soft dough and a tasty filling. This makes it perfect for holidays and special meals.

    Is star bread difficult to make for beginners?

    Star bread might look hard, but it’s doable with the right steps. Just follow the instructions and take your time. Soon, you’ll make a beautiful star bread.

    People love cinnamon sugar in star bread. But you can try chocolate, Nutella, or even savory mixtures. It’s a great way to add your favorite flavors.

    Can I make star bread ahead of time?

    Yes, you can! Make the dough ahead and chill it overnight. Or shape the bread and chill it before baking. It keeps well for days or months in the freezer.

    What type of dough works best for star bread?

    Use a soft, enriched dough for star bread. This means dough with butter, eggs, and milk. Puff pastry or brioche dough are great choices for a flaky texture.

    Are there gluten-free or vegan options for star bread?

    Yes! You can make star bread gluten-free or vegan. Just use gluten-free flour and plant-based butter and milk. It’s all about getting the right dough.

    How long does it take to make star bread?

    Making star bread takes 2-3 hours. This includes dough prep, rising, shaping, and baking. Hands-on time is about 45-60 minutes.

    Can star bread be frozen?

    Yes, star bread freezes well. You can freeze it before or after baking. Wrap it well and thaw at room temperature before reheating.

    What is your rating for the recipe?

  • Cheesecake Bars Recipe

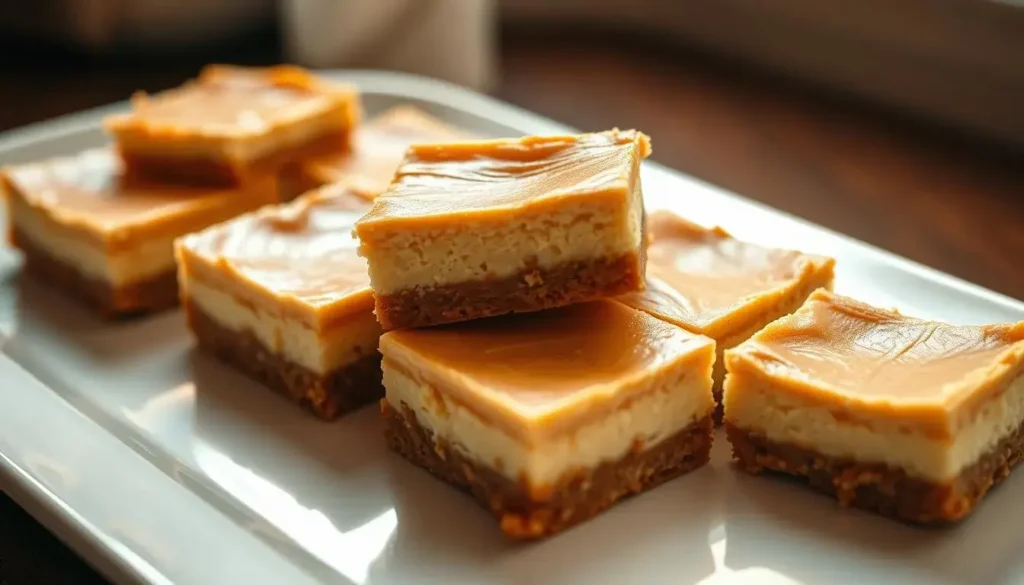
    Every home baker faces the challenge of making a perfect dessert. Cheesecake bars are the answer for those who want a tasty treat without the hassle. These recipes turn a classic into easy-to-eat bites that everyone will love.

    Imagine a dessert that looks like it took hours to make, but really didn’t. Cheesecake bars are your go-to for easy entertaining. They offer all the creamy goodness of cheesecake in a format that’s easy to share.

    Why You’ll Love These Cheesecake Bars

    Cream cheese treats have never been more exciting than with these delightful baked cheesecake squares. If you’re looking for a hassle-free dessert that will impress your friends and family, these cheesecake bars are your perfect solution.

    Time-Saving Alternative to Traditional Cheesecake

    Forget spending hours in the kitchen with complex cheesecake recipes. These bars are a game-changer for busy home bakers. You’ll save significant time during preparation and baking compared to traditional cheesecake methods.

    • Prep time reduced to just 20 minutes
    • Baking takes only 45-50 minutes
    • Perfect for potluck dessert ideas

    No Water Bath Required

    Say goodbye to the complicated water bath technique. These cheesecake bars eliminate the need for complex baking methods, making them accessible for bakers of all skill levels. You’ll achieve a creamy, smooth texture without the extra hassle.

    Perfect for Parties and Gatherings

    These versatile bars are ideal for any social event. Cut into neat squares, they’re easy to serve and transport. Whether you’re hosting a potluck or bringing a dessert to a friend’s gathering, these baked cheesecake squares will be the star of the show.

    • Serves 12 people
    • Each bar contains approximately 455 calories
    • Simple to slice and share

    Pro tip: Chill the bars overnight for the best texture and flavor!

    Essential Ingredients for Perfect Cheesecake Bars

    Making delicious philadelphia cream cheese recipes begins with choosing top-notch ingredients. Your graham cracker crust bars need the right parts for that creamy texture and rich taste.

    • 2 cups graham cracker crumbs
    • 1/3 cup granulated sugar
    • 4 ounces unsalted butter (preferably Danish Creamery with 85% butterfat)

    The cheesecake filling needs premium ingredients for a luxurious taste:

    • 3 packages (8 ounces each) full-fat Philadelphia cream cheese
    • 1 cup full-fat sour cream
    • 1 1/4 cups granulated sugar
    • 3 large eggs
    • 2 teaspoons pure vanilla extract
    • 1 teaspoon lemon juice
    Ingredient CategoryKey ComponentsRecommended Quantity
    Crust IngredientsGraham Cracker Crumbs2 cups
    Filling BasePhiladelphia Cream Cheese24 ounces
    SweetenersGranulated Sugar1 1/4 cups

    Pro tip: Always use room temperature ingredients for smooth mixing and a creamy texture in your cheesecake bars.

    The secret to perfect cheesecake bars lies in using full-fat, high-quality ingredients.

    Creating the Perfect Graham Cracker Crust

    Making a great graham cracker crust is key to tasty desserts. Your graham cracker crust bars will stand out with a well-made base. This base adds texture and flavor to every bite.

    To make graham cracker crust bars, you need some important ingredients. The right crust needs precision and care.

    Achieving the Ideal Crust Texture

    The secret to a great graham cracker crust is the right mix of ingredients. You’ll need:

    • 9 whole graham crackers (about 1¼ cups or 125g crumbs)
    • 2 tablespoons of sugar
    • 4 tablespoons of melted butter
    • 1 teaspoon of lemon zest (optional)

    Tips for Even Crust Distribution

    To get a uniform crust, you need some technique. Press the mixture firmly and evenly into your 8×8 square pan. Use the bottom of a measuring cup or your fingers to pack the crumbs tightly. This makes a solid base for your cheesecake bars.

    “A well-prepared crust is the foundation of any great dessert recipe.” – Baking Professionals

    Pre-Baking Instructions

    Pre-baking your graham cracker crust makes it crisp and stable. Follow these steps:

    1. Preheat your oven to 325°F
    2. Combine graham cracker crumbs, sugar, and melted butter
    3. Press mixture into the pan
    4. Bake for 8-10 minutes until golden brown
    5. Allow to cool completely before adding filling

    Pro tip: Using a food processor can help you get the most consistent graham cracker crumbs. This makes your desserts look even more professional.

    Step-by-Step Mixing Instructions

    Making the perfect philadelphia cream cheese recipes needs precision and care. Your cheesecake bars will be amazing with these detailed mixing techniques. They ensure a smooth, creamy texture every time.

    Begin by getting your ingredients ready at room temperature. Cold cream cheese can make the filling lumpy. So, let it sit out for about 30 minutes before you start. Here’s how to mix:

    1. Beat cream cheese in a large bowl using an electric mixer
    2. Cream until light and fluffy (about 2-3 minutes)
    3. Gradually add granulated sugar while mixing
    4. Incorporate sour cream, ensuring smooth consistency

    The secret to perfect cream cheese treats is gentle mixing. Overmixing can introduce air bubbles that cause cracking during baking. When adding eggs, mix on low speed just until combined. This prevents overworking the batter.

    “Gentle folding is the secret to restaurant-quality cheesecake bars” – Professional Pastry Chef

    Your philadelphia cream cheese recipes will become a silky-smooth filling by following these precise mixing instructions. Remember to keep an eye on ingredient temperature and mixing speed for the best results.

    • Use room temperature ingredients
    • Mix cream cheese until smooth
    • Add sugar gradually
    • Incorporate eggs gently

    Pro tip: Scrape down the sides of the bowl periodically. This ensures all ingredients are evenly mixed. It guarantees a consistent texture in your cheesecake bars.

    Baking Tips and Techniques

    Making perfect dessert recipes like baked cheesecake squares needs precision and detail. The baking process is key to a delicious treat. Knowing the right techniques is essential.

    Mastering baking cheesecake bars involves several important steps. These steps will make your dessert go from good to great.

    Temperature Guidelines for Perfect Results

    When baking your cheesecake squares, follow these temperature tips:

    • Preheat your oven to 325°F
    • Bake for 30-35 minutes
    • Ensure even heat distribution

    Visual Cues for Knowing When Your Cheesecake is Done

    Knowing when to take your dessert out of the oven is an art. Look for these signs:

    • Edges are slightly puffed
    • Center has a subtle wobble
    • Surface appears set but not completely firm

    The Cooling Process: Patience is Key

    Cooling properly is key for the perfect texture in your cheesecake squares. Follow these steps:

    1. Allow bars to cool at room temperature for 2 hours
    2. Refrigerate for at least 4 hours before serving
    3. Use a sharp knife dipped in hot water for clean cuts

    Pro tip: Avoid sudden temperature changes to prevent cracking in your cheesecake bars.

    By using these baking techniques, you’ll make dessert recipes that impress. Your friends and family will love your professional-quality baked cheesecake squares.

    Creative Topping Ideas and Variations

    Turn your cheesecake bars into a masterpiece with creative toppings and flavors. Whether you’re making lemon cheesecake bars or no-bake bites, the right topping makes all the difference. It can take your dessert from good to amazing.

    Here are some exciting topping options to spice up your cheesecake bars:

    • Fresh Fruit Toppings
      • Sliced strawberries
      • Blueberry compote
      • Raspberry coulis
    • Decadent Sauce Drizzles
      • Caramel sauce
      • Chocolate ganache
      • Passion fruit reduction
    • Crunchy Garnishes
      • Toasted almond slivers
      • Crushed graham crackers
      • Candied pecans

    For lemon cheesecake bars, try a zesty lemon curd or lemon zest on top. No-bake bites can get a boost from powdered sugar or white chocolate drizzle.

    Pro tip: Always let your cheesecake bars cool completely before adding toppings. This ensures the best look and feel. Try different combinations to find your favorite!

    Storage and Make-Ahead Instructions

    Making desserts like these cheesecake bars is great for potluck ideas and planning ahead. You can prepare them early, saving you stress on the day of the event.

    Refrigeration Guidelines

    Storing your cheesecake bars right keeps their taste and texture perfect. Store them in an airtight container in the fridge for up to 5 days. Here are some storage tips:

    • Cool bars completely before storing
    • Use a container with a tight-fitting lid
    • Place parchment paper between layers to prevent sticking
    • Keep refrigerated at 40°F or below

    Freezing Methods

    Freezing is a good choice for longer storage of these desserts. Your cheesecake bars can be frozen for up to 3 months if prepared right.

    1. Wrap individual bars in plastic wrap
    2. Place wrapped bars in a freezer-safe container
    3. Label container with date of freezing
    4. Thaw in refrigerator for 6-8 hours before serving

    “Preparation is the key to stress-free entertaining!”

    Learning how to store these desserts makes entertaining easy. You’ll always have a tasty treat ready for any event.

    Troubleshooting Common Issues

    Making perfect cheesecake bars can be tricky. Even experienced bakers face challenges. Knowing common problems helps you make flawless cheesecake bars every time.

    Preventing Surface Cracks

    Cracks in your cheesecake bars often come from temperature changes. To avoid this:

    • Bake at a consistent temperature
    • Avoid opening the oven door during baking
    • Use room temperature ingredients
    • Don’t overmix the cheesecake batter

    Dealing with Texture Problems

    Getting the right texture for cheesecake bars needs precision. Overmixing can make them dense and heavy. Mix ingredients gently and avoid too much air.

    IssuePotential CauseSolution
    Cracked SurfaceHigh Oven TemperatureLower temperature, use water bath
    Uneven BakingIncorrect Pan SizeUse recommended pan, spread batter evenly
    Soggy CrustExcess MoisturePre-bake crust, drain wet ingredients

    Temperature and Timing Tips

    Right baking techniques are key for delicious cheesecake bars. Start checking for doneness around 35-40 minutes. The center should jiggle slightly but not be liquid.

    • Use an oven thermometer for accuracy
    • Allow bars to cool gradually
    • Refrigerate for at least 4 hours before serving

    By following these tips, you’ll make professional-quality cheesecake bars. They’ll impress your family and friends.

    Conclusion

    Now you can make delicious cheesecake bars easily. These treats are simple yet packed with flavor. Follow the recipe and techniques to make top-notch cheesecake bars at home.

    These cheesecake bars are perfect for any occasion. They’re great for family gatherings or a quick weekend dessert. They’re easy to make, thanks to simple ingredients and quick prep.

    Feel free to get creative with toppings and flavors. Try caramel, fresh fruit, or more. Each batch you make will improve your baking skills.

    Keep baking and share your creations. Try new flavors and share your cheesecake bars stories. We’d love to hear about your baking adventures!

    FAQ

    Can I make cheesecake bars ahead of time?

    Absolutely! Cheesecake bars are perfect for making ahead. You can prepare them 3-4 days before and keep them in the fridge. They taste even better after the flavors mix together. Just remember to cover them well and store in an airtight container.

    How do I prevent cracks in my cheesecake bars?

    To avoid cracks, make sure your cream cheese is room temperature. Don’t overmix the batter and bake at the right temperature. After baking, cool the bars slowly by leaving the oven door open for an hour. This helps prevent sudden temperature changes that can cause cracks.

    Can I freeze cheesecake bars?

    Yes, you can freeze them! Wrap each bar in plastic wrap and then in a freezer-safe container. They can stay frozen for 2-3 months. Thaw them in the fridge overnight for the best taste and texture.

    There are many tasty variations! You can try lemon, chocolate swirl, strawberry, or Oreo cheesecake bars. Feel free to add different extracts or mix-ins to make your own special version.

    Can I make these bars gluten-free?

    Definitely! Use gluten-free graham crackers or cookie crumbs for the crust. Make sure all other ingredients are gluten-free. This way, you’ll have a delicious gluten-free dessert for everyone to enjoy.

    How long should I bake cheesecake bars?

    Bake them for 25-35 minutes at 325°F (165°C). The edges should be set, but the center should still jiggle a bit. They will set more as they cool, so don’t overbake.

    What’s the best way to cut clean, neat bars?

    Use a sharp knife dipped in hot water and wiped dry for clean cuts. Chill the bars completely before cutting. Use a ruler or guide for even bars. Wipe the knife clean between cuts for smooth edges.

    Can I use low-fat cream cheese?

    You can use low-fat cream cheese, but full-fat is better for texture and flavor. Low-fat versions might make the bars less creamy. If you want to cut calories, consider using a mix of both.

    What is your rating for the recipe?

  • Rice Paper Recipes

    The first time I tried rice paper, it was magical. It turned simple cooking into an art. Its delicate look and versatility amazed me. Rice paper opens the door to Asian cuisines.

    Rice paper is more than a wrapper. It’s a canvas for creativity. You can make everything from Vietnamese spring rolls to new dishes. It’s perfect for both experienced chefs and curious home cooks. It makes meals healthy and fun.

    Understanding Rice Paper Fundamentals

    Rice paper is a popular choice in modern cooking. It’s a gluten-free option that’s different from traditional wrappers. These thin sheets come from Vietnamese cuisine and are loved worldwide for their texture and versatility.

    Exploring rice paper reveals some amazing traits. These traits make rice paper stand out in cooking:

    • Naturally gluten-free option for sensitive diners
    • Thin and translucent rice noodle sheets
    • Quick to prepare and easy to work with
    • Versatile for multiple cooking techniques

    Types of Rice Paper Available

    Rice paper comes in various types, each for different uses. You’ll find:

    1. Traditional round rice paper
    2. Square-shaped wrappers
    3. Varying thickness levels
    4. Plain and seasoned options

    Essential Characteristics and Uses

    Rice paper is made from rice flour, water, and salt. It becomes soft and pliable when soaked in warm water. Its neutral taste is great for both savory and sweet dishes.

    Storage and Handling Tips

    To keep rice paper in good condition, store it in a cool, dry place. Keep the packages sealed and away from moisture. When using, handle the sheets gently to avoid tears. Work fast once they’re soft.

    Traditional Vietnamese Spring Roll Preparation

    Making authentic Vietnamese spring rolls is an art. It combines fresh ingredients with delicate techniques. These dishes are loved for their perfect mix of flavors and textures.

    To make these special dishes, focus on a few key things:

    • Select fresh, high-quality ingredients
    • Prepare thin, even vegetable cuts
    • Master the rice paper handling technique
    • Create a balanced filling mixture

    The process of making spring rolls is detailed. It turns simple ingredients into tasty spring rolls. Fresh spring rolls are great for those who watch their health, offering a lighter choice than fried ones.

    IngredientQuantityPreparation
    Shrimp15 mediumCook for 2 minutes in boiling salted water, slice horizontally
    Rice Noodles1 cupSoak for 3 minutes, add sesame oil to prevent clumping
    VegetablesMixedJulienne carrots, cucumber, cabbage, red pepper
    Rice Paper10 wrappersSoak for 1 second in warm water

    Pro tip: The secret to great spring rolls is how you layer them. Start with visible items like shrimp and mint leaves for a nice look.

    Your spring rolls will be both healthy and tasty. Each roll has about 103 calories, 17 grams of carbs, and 2 grams of protein. You can make them in under 30 minutes, making them a quick and healthy meal.

    Essential Ingredients for Rice Paper Dishes

    Making tasty rice paper dishes needs the right mix of ingredients. You’ll want fresh produce, proteins, and seasonings. These elements turn simple wraps into amazing meals that excite your taste buds.

    Fresh Vegetables and Herbs

    Bringing your rice paper dishes to life are crisp and fragrant ingredients. Key vegetables that make pho accompaniments better include:

    • Shredded cabbage (1 cup)
    • Grated carrots (1 cup)
    • Fresh bean sprouts
    • Mint leaves
    • Cilantro

    Protein Options

    Adding protein makes rice paper rolls more filling and flavorful. Here are some tasty options:

    Protein TypeQuantityPreparation
    Crumbled Paneer200gLightly sautéed
    Ground Beef150gSeasoned and cooked
    Shrimp100gPeeled and deveined

    Sauces and Seasonings

    Enhance your rice paper dishes with these flavorful ingredients:

    • Soy Sauce: 1 teaspoon for umami depth
    • Minced garlic (2 cloves)
    • Grated ginger (1-inch piece)
    • Chili flakes (1 teaspoon for heat)

    Remember, balance is crucial when picking ingredients. Each one should work well with the others. This creates a balanced and enjoyable meal.

    Step-by-Step Rolling Techniques

    Learning to roll wrappers is key for making perfect summer rolls. These rice paper wraps need precision and practice. This will help you get that professional look and taste.

    First, get your ingredients ready. Also, make sure you have a clean, damp surface for rolling. Rice paper sheets are about 22 cm (8.5 inches) in diameter. This gives you enough room for your fillings.

    Essential Rolling Steps

    1. Soften the rice paper in warm water for about 10-15 seconds
    2. Carefully transfer the softened wrapper to a clean, flat surface
    3. Add a spoonful of filling to the center of the wrapper
    4. Fold the bottom edge towards the center, covering the filling
    5. Gently fold the sides inward
    6. Roll from the bottom up, creating a tight, compact summer roll

    Pro tip: Don’t overstuff your summer rolls. This can make the wrappers tear or hard to roll.

    Rolling Tips for Perfect Results

    • Use slightly damp hands to prevent sticking
    • Work quickly to prevent the rice paper from becoming too soft
    • Keep fillings evenly distributed
    • Practice consistent rolling technique

    “The key to great summer rolls is patience and practice” – Vietnamese Culinary Expert

    Rolling TechniqueKey Considerations
    Wrapper Softening10-15 seconds in warm water
    Filling Quantity1-2 tablespoons per roll
    Rolling SpeedQuick but gentle movements
    Recommended Serving2-3 summer rolls per person

    Creating beautiful summer rolls takes time. Don’t worry if your first tries aren’t perfect. With practice, you’ll soon be rolling like a pro!

    Crispy Rice Paper Applications

    Turning edible papers into crispy treats opens up new culinary possibilities. Spring rolls can be made in various ways to improve their texture and taste. Whether you want a healthier option or a classic crispy snack, these methods will help you make perfect rice paper dishes.

    The secret to the perfect crunch is knowing the right cooking methods. Let’s look at three main ways to make crispy rice paper creations:

    Air Fryer Method

    Air frying is a healthier way to make crispy spring rolls. Here’s how to do it right:

    • Preheat the air fryer to 375°F
    • Arrange spring rolls without touching
    • Cook for 8-10 minutes
    • Flip halfway through for even browning

    Deep Frying Techniques

    Deep frying gives a traditional crispy texture. Here are some expert tips for using edible papers:

    • Use oil heated to 350-375°F
    • Ensure rice paper is completely sealed
    • Fry in small batches
    • Drain on paper towels to remove excess oil

    Baking Alternative

    Baking is a less oily option. Lightly brush your spring rolls with oil and bake at 425°F for 12-15 minutes. Turn once for an even golden color.

    Pro tip: Experiment with different cooking methods to find your perfect crispy texture!

    Rice Paper Dumpling Innovations

    Take your cooking to the next level with rice paper dumplings. They turn traditional Asian ingredients into exciting dishes. These wrappers add a crispy, chewy texture that will amaze your taste buds.

    Start by picking the right ingredients. Here are the key ones for amazing rice paper dumplings:

    • Mixed mushrooms (1 lb)
    • Firm tofu (1 lb)
    • Soy sauce (2 Tbsp)
    • Rice vinegar (1 Tbsp)
    • Vegetable oil for brushing

    These dumplings are super versatile. You can try different fillings, from savory veggies to meat. Chefs say it’s all about finding the right mix for great taste and texture.

    “Rice paper dumplings are a canvas for culinary creativity” – Chef Mai Nguyen

    There are cool ways to cook these wrappers. Try these:

    1. Baking at 400°F for 10-15 minutes
    2. Air frying until golden brown
    3. Pan-frying for a crispy outside

    These dumplings are great for groups or a fun dinner. They take about 42 minutes to make and serve 5. Each serving has about 225 calories, so they’re light but filling.

    Sauce Pairings and Dips

    Make your rice paper dishes shine with the perfect sauce. Dipping sauces are key in Vietnamese cuisine. They turn simple rice paper rolls into amazing dishes. Whether you’re making traditional pho accompaniments or trying new flavors, the right sauce is crucial.

    Traditional Asian Dipping Sauces

    Classic Vietnamese dipping sauces add real flavor to your meals. Here are some must-try ones:

    • Nuoc Cham: A tangy fish sauce-based dip
    • Peanut sauce with a hint of ginger
    • Sweet chili sauce
    • Hoisin-based dipping sauce

    Modern Fusion Options

    Modern cooks are mixing up traditional sauces with new twists. These modern options mix global flavors:

    • Avocado cilantro sauce (yields 1/2 to 1 cup)
    • Mango sweet chili dip
    • Sriracha-lime fusion sauce
    • Wasabi-mayo blend

    Homemade Sauce Recipes

    Make your own special dips with easy ingredients. Most homemade sauces are quick to make and last 3-4 days in the fridge. Try fresh herbs like lemongrass, ginger, and coriander for unique tastes.

    Pro tip: Serve rice paper rolls with different dipping sauces. This lets your guests enjoy a variety of flavors. The right sauce can turn a simple dish into a memorable experience.

    Common Mistakes to Avoid

    Working with rice paper wrappers can be tricky, even for experienced home cooks. Knowing the common mistakes helps you make perfect spring rolls and other tasty dishes every time.

    Timing is key when handling rice paper. You need to soak them in room temperature water for just 8-10 seconds. This makes them soft but not too soft to tear.

    • Avoid over-soaking rice paper wrappers
    • Use a clean, flat surface for rolling
    • Prep ingredients before handling wrappers
    • Work quickly to prevent drying out

    Temperature and moisture control are crucial. Keep your work surface slightly damp but not wet. If wrappers stick together, separate them gently.

    Common MistakePotential ConsequenceSolution
    Over-soakingWrapper tears easilySoak 8-10 seconds only
    OverfillingDifficult to rollUse moderate amount of filling
    Dry workspaceWrappers crackKeep surface slightly damp

    Practice makes perfect with rice paper wrappers. Start slow, be patient, and remember even pros face challenges.

    Vegetarian and Vegan Adaptations

    Rice paper is a great choice for making gluten-free summer rolls. It’s perfect for those who follow a plant-based diet. This makes it easy to create tasty and healthy meals.

    When making vegan rice paper dishes, you can try different protein sources. Here are some tasty options:

    • Extra firm tofu, crumbled and marinated
    • Tempeh strips with Asian-inspired seasonings
    • Roasted vegetables like bell peppers and carrots
    • Crispy mushroom “meat” crumbles

    For real flavors, use vegan sauces instead of traditional ones. Vegan oyster sauce and hoisin sauce are great substitutes. They keep the flavors rich and complex.

    Pro tip: Experiment with plant-based proteins to create satisfying textures in your gluten-free summer rolls!

    It’s important to balance nutrition in vegetarian rice paper dishes. Add whole food plant-based ingredients like quinoa, lentils, and colorful veggies. This way, your meals will be both tasty and good for you.

    Creative Rice Paper Fusion Dishes

    Culinary creativity soars when you try new dishes with rice paper. These Asian ingredients turn simple cooking into exciting adventures. They push the limits of what we think recipes can be.

    Let’s explore some amazing fusion ideas to boost your cooking:

    • Vietnamese-Korean Hybrid Pancakes: Mix rice paper with Korean pancake methods
    • Sushi-Style Rice Paper Rolls: Make Japanese-style wraps with rice paper
    • Mediterranean Fusion Dumplings: Mix Mediterranean flavors with rice paper
    • Dessert Rice Paper Creations: Try sweet fillings and unique presentations

    Start your culinary journey with ingredients like zucchini, scallions, cabbage, and tofu. The trick is to mix flavors well and keep rice paper soft. Here are some tips:

    1. Dip rice paper in warm water for 2-3 seconds
    2. Use fresh, quality fillings
    3. Try different cooking ways
    4. Season with sauces that match your dish

    Think about nutrition too. Each rice paper dish has about 80 calories. They also have 4 grams of protein and 1 gram of fiber.

    Rice paper breaks through old recipe limits, encouraging chefs to think differently.

    Conclusion

    Exploring rice paper is more than just learning a cooking method. It’s a journey into the world of Asian ingredients. This journey turns simple meals into unforgettable experiences. Rice paper is a blank canvas for your creativity in the kitchen.

    Rice paper is not just for cooking. It’s also a choice for those who care about the environment. Its light and flexible nature makes it great for trying out different cuisines and cooking styles.

    As you try out more rice paper recipes, remember that practice is key. Every roll and wrap is a chance to get better and find your own cooking style. The world of Asian ingredients is full of possibilities, and rice paper is your entry point.

    Whether you’re cooking at home or dreaming of becoming a chef, rice paper is your ticket to culinary adventure. It lets you explore new flavors, connect with old traditions, and make dishes that look and taste amazing. Your kitchen is now a place where you can try new things and have fun.

    FAQ

    What exactly is rice paper?

    Rice paper is a thin, clear wrapper made from rice flour, water, and sometimes tapioca flour. It’s a key ingredient in Vietnamese and Southeast Asian cooking. People use it to make spring and summer rolls, and for wrapping food. It’s gluten-free and can be used to make both soft and crispy dishes.

    How do I properly soften rice paper for rolling?

    To soften rice paper, dip it in warm water for 2-3 seconds. Then, place it on a damp towel for 30 seconds. This makes it soft and ready to roll. Be careful not to soak it too much, or it might tear.

    Are rice paper rolls healthy?

    Yes, rice paper rolls can be very healthy. They’re low in calories and gluten-free. You can fill them with fresh veggies, lean proteins, and herbs. They’re great for making light, nutritious meals, especially for vegetarians and vegans.

    Can I make crispy rice paper rolls at home?

    Yes, you can make crispy rice paper rolls at home. You can air fry, deep fry, or bake them. Just make sure the oil is hot and don’t overcrowd the pan. This way, you’ll get a crispy, golden texture.

    How long can I store rice paper?

    Unopened rice paper can last up to a year in a cool, dry place. Once opened, store the sheets in an airtight container or plastic bag. Keep it away from moisture. Use it within 1-2 months for the best taste and texture.

    What are some traditional fillings for spring rolls?

    Traditional spring rolls have rice noodles, fresh herbs like mint and cilantro, lettuce, and proteins like shrimp or tofu. Cucumber, carrots, and bean sprouts add crunch and flavor.

    Are rice paper rolls suitable for special diets?

    Yes, rice paper is gluten-free and can be adapted for different diets. You can make vegetarian or vegan versions with tofu and lots of veggies. They’re also low in carbs when filled with veggies.

    What sauces pair well with rice paper rolls?

    Try nuoc cham, peanut sauce, hoisin sauce, or sweet chili sauce with rice paper rolls. These sauces enhance the rolls’ delicate flavors and add depth to your dish.

    Can I use rice paper for something other than rolls?

    Absolutely! Rice paper is great for making crispy dumplings, fusion “ravioli”, baked appetizers, and even desserts. Its versatility lets you get creative with your cooking.

    How do I prevent rice paper from tearing?

    To avoid tears, use warm water and handle the paper gently. Don’t overfill and work on a smooth, damp surface. Practice makes perfect when working with rice paper.

    What is your rating for the recipe?

  • Fried Squash Recipe

    Summer in the South isn’t complete without fried squash. I remember my grandmother making it special. She turned simple squash into a delicious side dish.

    Fried squash is more than a recipe; it’s a tradition that connects us. It’s perfect for any cook, bringing warmth and flavor to your table. It’s a celebration of fresh, seasonal food.

    The Perfect Southern Fried Squash: An Introduction

    Southern cuisine loves summer’s bounty, especially zucchini fries and squash fritters. These dishes turn simple veggies into crispy, golden treats. Yellow squash is at the center of this tradition, loved by both home cooks and chefs.

    Understanding Yellow Squash Varieties

    Not all squash is good for frying. In Southern kitchens, yellow crookneck and straightneck squash are the stars. They have special qualities that make them perfect for crispy squash fritters:

    • Crookneck: Curved shape with bumpy skin
    • Straightneck: Smoother exterior with uniform color
    • Ideal for quick cooking and absorbing seasonings

    Health Benefits of Summer Squash

    Summer squash is more than tasty. Packed with nutrients, it’s great for your health:

    NutrientAmount per Serving
    Calories171 kcal
    Vitamin A519 IU
    Vitamin C30 mg
    Fiber3 g

    Why This Recipe Works

    Making perfect zucchini fries or squash fritters is all about balance. Southern cooks know how to turn yellow squash into crispy, golden treats. These dishes are a hit, celebrating Southern culinary traditions.

    Essential Ingredients for Fried Squash

    To make the perfect fried squash, you need the right ingredients. They turn simple yellow squash into a crispy, tasty dish. Start by picking fresh, vibrant squash blooms. Then, prepare a coating that’s as delicate as vegetable tempura.

    Here are the key ingredients you’ll need:

    • Fresh yellow squash (1 pound)
    • All-purpose flour (2 tablespoons)
    • Cornmeal
    • Large eggs
    • Milk
    • Kosher salt (1 teaspoon)
    • Black pepper (¼ teaspoon)
    • Garlic powder (1 teaspoon)
    • Butter or oil for frying (2 tablespoons)

    The secret to great fried squash is in the ingredients and how you prepare them. Choose firm, bright yellow squash without blemishes. Fresh squash blooms add elegance and a delicate flavor.

    For a lighter coating like vegetable tempura, adjust the flour and cornmeal mix. A thinner batter makes the squash’s natural sweetness shine through.

    Pro tip: If you’re gluten-free, try almond flour (¼ cup) or gluten-free panko. They make a delicious version of this classic southern recipe.

    Kitchen Tools and Equipment Needed

    Creating tasty cornmeal crusted squash needs more than just the right ingredients. The right kitchen tools can make your fried yellow squash truly special. Choosing the right equipment ensures your cooking is consistent and the results are top-notch.

    To cook your yellow squash perfectly, you’ll need a few key tools. These tools will take your cooking to the next level:

    Temperature Control Essentials

    • Digital kitchen thermometer for precise oil temperature
    • Heavy-bottomed cast iron skillet or deep fryer
    • Heat-resistant gloves for safety

    Preparation Tools

    For your cornmeal crusted squash, you’ll need specific tools. They help with slicing and breading evenly:

    1. Sharp chef’s knife for precise cutting
    2. Cutting board with non-slip surface
    3. Large mixing bowls for breading station
    4. Measuring cups and spoons
    5. Whisk for mixing egg wash

    Safety Equipment

    When frying yellow squash, safety is crucial:

    • Fire extinguisher rated for kitchen fires
    • Splatter screen to prevent oil burns
    • Long-handled cooking utensils
    • Kitchen towels or paper towels

    “The right tools can make the difference between a good meal and a great one.” – Professional Chef

    Investing in quality kitchen equipment is worth it. It helps you make delicious cornmeal crusted squash every time. Your family and friends will love it.

    How to Select and Prepare Your Squash

    Choosing the right squash is key for tasty summer squash recipes. Look for firm, glossy squash with smooth skin and few blemishes. Smaller squash, about 6 inches long, are tender and mild, perfect for fritters.

    Here are key tips for choosing the perfect squash:

    • Select squash that feels heavy for its size
    • Choose squash with vibrant, unblemished skin
    • Avoid squash with soft spots or wrinkled surfaces
    • Pick medium-sized squash between 4-6 inches long

    Preparation is crucial for crispy summer squash recipes. Wash your squash well under cool water. Then, pat it dry with paper towels to remove moisture. This helps achieve crispiness when frying.

    “The secret to great squash fritters is in the preparation and slice consistency.” – Southern Cooking Experts

    When slicing your squash, keep the slices 1/4-inch thick. This ensures even cooking and creates crispy, golden-brown pieces.

    Squash VarietyBest UseFlavor Profile
    Yellow StraightneckFrying, SautéingMild, Tender
    ZephyrFritters, GrillingSlightly Sweet
    CrookneckRoasting, BakingButtery Texture

    Pro tip: For the best summer squash recipes, store your prepared squash in the refrigerator’s crisper drawer. It will stay fresh for 3-4 days, giving you ample time to create delicious squash fritters whenever you’re ready.

    Basic Fried Squash Recipe Steps

    Making delicious fried squash needs care and some cooking skills. Whether you want crispy zucchini fries or traditional fried squash, learning the right technique will boost your cooking.

    Creating the Perfect Coating

    Begin by making a tasty dredging mix that turns your squash into a crispy treat. Mix together:

    • 1 cup all-purpose flour
    • 1 teaspoon salt
    • 1/2 teaspoon black pepper
    • Optional: 1/4 cup cornmeal for extra crunch

    Proper Frying Technique

    The secret to great fried squash is keeping the oil at the right temperature and using the right technique. Heat vegetable oil to 350°F in a deep skillet. Cut your squash into 1/4 to 1/2-inch thick rounds for the best frying.

    Frying StepDetails
    Oil Temperature350-375°F
    Cooking Time2-3 minutes per side
    Batch Size4-5 squash slices at a time

    Achieving Golden Brown Results

    To get that golden-brown color, follow these tips:

    1. Dredge squash slices thoroughly in seasoned flour
    2. Shake off excess coating
    3. Gently place in hot oil
    4. Flip once to ensure even browning

    Pro tip: Let your fried squash drain on a wire rack or paper towels to keep it crispy. Serve right away for the best taste and texture.

    Alternative Coating Options

    Take your vegetable tempura to the next level with exciting coating options. The right coating can turn a simple side dish into a crispy, flavorful delight. It will wow even the pickiest eaters.

    Your cornmeal crusted squash can become many different dishes with these creative coatings:

    • Classic Cornmeal Coating: A Southern favorite that provides a satisfying crunch and rustic texture
    • Panko Bread Crumb Variation: Delivers an extra-light, crispy exterior
    • Japanese-Inspired Vegetable Tempura Batter: Creates a delicate, almost translucent crisp
    • Gluten-Free Alternatives: Perfect for those with dietary restrictions

    Think about the texture and flavor you want when choosing a coating. Panko bread crumbs give a lighter crunch than regular bread crumbs. A light vegetable tempura batter adds a delicate, crisp finish.

    “The secret to perfect fried squash is all in the coating!” – Southern Cooking Experts

    Gluten-free options are easy to find, so everyone can enjoy these tasty squash dishes. If you’re watching your diet, try air frying. It cuts down on oil but keeps the squash crispy.

    Pro tip: Add unique seasoning blends to your coating for special flavors. These can enhance the natural sweetness of summer squash.

    Delicious Dipping Sauces

    Dipping sauces can make your squash fritters amazing. The right sauce adds depth, tanginess, and excitement. It turns your air fried zucchini or crispy squash into a treat.

    Making the perfect dipping sauce is an art. It enhances your meal by adding flavor. These sauces make your squash fritters even better.

    Classic Marinara Sauce

    A timeless favorite that pairs beautifully with squash fritters. Here’s a quick recipe to bring this sauce to life:

    • Fresh tomatoes, diced
    • Garlic, minced
    • Fresh basil leaves
    • Olive oil
    • Salt and pepper to taste

    Creamy Garlic Aioli

    This rich and creamy sauce adds a luxurious touch to your air fried zucchini:

    • Mayonnaise
    • Fresh garlic, crushed
    • Lemon juice
    • Dijon mustard
    • Salt and pepper

    Quick Sauce Variations

    For those looking to experiment, try these exciting alternatives:

    1. Spicy Sriracha Mayo: Mix mayonnaise with Sriracha sauce
    2. Herb Ranch: Blend ranch dressing with fresh herbs
    3. Honey Mustard: Combine honey and Dijon mustard

    Pro tip: Experiment with different sauces to find your perfect pairing. Whether you’re serving squash fritters as an appetizer or a side dish, the right dipping sauce can elevate your entire meal.

    Storage and Reheating Tips

    Keeping your battered squash crispy is key. The right storage and reheating can make leftovers just as tasty as the first time. Follow these tips to enjoy your fried yellow squash to the fullest.

    Here’s how to store your squash:

    • Refrigerate fried yellow squash within 2 hours of cooking
    • Store in an airtight container to prevent moisture buildup
    • Keep refrigerated for up to 3 days maximum
    • Avoid storing in plastic wrap, which can make the battered squash soggy

    Reheating your squash needs some care to get it crispy again. Try these methods:

    1. Air Fryer Method:
      • Preheat to 375°F
      • Reheat for 2-3 minutes
      • Shake basket midway for even heating
    2. Oven Technique:
      • Preheat to 375°F
      • Place on a wire rack
      • Bake for 10 minutes

    Freezing is also an option for longer storage. Wrap your squash in freezer-safe containers for up to 2 months. Thaw in the fridge and reheat in the air fryer or oven to keep it crispy.

    Conclusion

    Making the perfect fried squash is more than a cooking skill. It’s a celebration of Southern cooking traditions. Your journey through summer squash recipes shows how easy it is to turn fresh veggies into tasty dishes. With just 20 minutes of prep, you can make crispy, golden fritters that are perfect for the season.

    Fried squash is very versatile. You can use yellow squash from your garden or try different coatings. Each recipe lets you explore new flavors. Whether you air fry or pan-fry, these recipes offer endless ways to improve your side dishes.

    Cooking is a way to express yourself. You can make these fritters gluten-free or change the egg mix. This means everyone can enjoy them. With 18-20 fritters per batch and only 95 calories per bite, they’re a guilt-free treat.

    Now you can impress your family and friends with your fried squash skills. Don’t be afraid to try new flavors. And most importantly, enjoy the delicious results of your cooking journey. Southern cooking is about love, tradition, and sharing. These squash fritters perfectly capture that spirit.

    FAQ

    What type of squash works best for frying?

    Yellow squash, like crookneck and straightneck, is perfect for frying. It’s mild in flavor and tender, turning crispy when fried. Summer squash is the top pick for this recipe.

    Can I use a different coating instead of cornmeal?

    Yes! Try flour, breadcrumbs, or a light tempura batter. Each will give your squash a unique taste and texture. Experiment to find your favorite.

    How do I prevent my fried squash from becoming soggy?

    Keep your oil hot (around 375°F), don’t overfill the pan, and drain on a wire rack or paper towels. Serve right away for the crispiest results.

    Are there healthier alternatives to deep-frying?

    Absolutely! Air frying or baking can make your squash crispy with less oil. An air fryer is great for a deep-fried taste without the extra oil.

    How long can I store leftover fried squash?

    Store it in the fridge in an airtight container for 2-3 days. Reheat in an oven or air fryer to keep it crispy. Microwaves make it soggy.

    Can I freeze fried squash?

    Freezing is possible, but reheating might change the texture. Freeze on a baking sheet, then bag it. Reheat in an oven or air fryer for the best taste.

    What are some good dipping sauces for fried squash?

    Try marinara, garlic aioli, ranch, or spicy remoulade. You can also mix mayonnaise with herbs, hot sauce, or other seasonings for a custom sauce.

    Are squash blossoms good for frying too?

    Squash blossoms are fantastic for frying! Stuff them with cheese, dip in batter, and fry until crispy. They’re a tasty twist on regular squash.

    How thick should I slice the squash?

    Slice it to 1/4 to 1/2 inch thick. This ensures even cooking and a crispy outside with a soft inside.

    Is fried squash nutritionally beneficial?

    While frying adds calories, summer squash is low-calorie and full of vitamins and minerals. For a healthier option, use less oil or try different cooking methods.

    What is your rating for the recipe?

  • Coffee Cake Muffins

    Imagine waking up to the warm, inviting aroma of freshly baked coffee cake muffins. These treats are more than just breakfast. They turn an ordinary morning into something special.

    Coffee cake muffins are a mix of classic comfort and easy-to-eat delight. Unlike traditional coffee cake, these muffins are easy to hold and eat. Each bite has a tender crumb and a crumbly streusel that melts in your mouth.

    These muffins are great for busy mornings or a relaxed weekend breakfast. They’re not just a recipe. They’re a celebration of flavor, texture, and the joy of homemade baking.

    Introduction to Classic Coffee Cake Muffins

    Explore the world of coffee shop treats that make your morning better. Coffee cake muffins are more than breakfast. They have a rich history and a flavor that’s hard to resist.

    What Makes Coffee Cake Muffins Special

    These muffins are special for a few reasons:

    • Crumbly streusel topping that adds texture
    • Rich, moist interior perfect for morning enjoyment
    • Portable single-serving format
    • Versatile enough for breakfast or dessert

    Brief History of Coffee Cake

    Coffee cake has deep roots in Europe, especially Germany. The tradition of Kaffee kuchen started in the 17th century. Sweet yeast breads were made to go with coffee. By the 1870s, they were loved in New York, New Jersey, and Delaware.

    Why These Muffins Are Perfect for Breakfast

    Start your day with coffee cake muffins. They’re convenient, full of flavor, and great with your morning coffee. Their small size is perfect for quick breakfasts or weekend brunches.

    The tradition of coffee cake fosters a sense of community, making it perfect for family gatherings and casual get-togethers.

    Whether you’re in a hurry or taking it easy, these muffins add comfort to your breakfast.

    Essential Ingredients for Perfect Coffee Cake Muffins

    To make moist and tender coffee cake muffins, you need the right ingredients. These ingredients work together to give your muffins a crumbly texture. Choosing high-quality ingredients is key to making delicious breakfast treats.

    Now, let’s look at the main ingredients that make these muffins special:

    • All-Purpose Flour: The base of your muffins, adding structure and volume
    • Unsalted Butter: 10 tablespoons for a rich flavor and tender crumb
    • Greek Yogurt: One 5-oz container for moisture and tangy taste
    • Brown Sugar: ½ cup for deep caramel flavor and sweetness
    • Eggs: Two large eggs to hold the ingredients together and add richness
    • Baking Soda: ½ teaspoon for the right rise
    • Ground Cinnamon: Key for that classic coffee cake taste

    The secret to a moist and tender crumbly texture is in the balance of these ingredients. Using full-fat dairy like Greek yogurt makes the muffins richer. Dry ingredients are measured carefully to ensure the right rise and texture.

    Pro tip: Use room temperature ingredients for a smooth batter. This leads to more consistent muffins.

    The Secret to Making the Perfect Streusel Topping

    Making a delicious streusel topping is an art. It turns simple muffins into amazing treats. The secret is knowing how to mix the ingredients and use the right techniques.

    A great streusel topping needs three key things: the right ingredients, the perfect butter temperature, and the right mixing method. Your goal is to get that perfect crumbly texture that makes coffee cake muffins so tempting.

    Choosing the Right Brown Sugar

    Brown sugar is the heart of a great streusel topping. Use dark brown sugar for a richer flavor. Dark brown sugar has more molasses, which adds:

    • Rich caramel undertones
    • Deeper color
    • More moisture

    Butter Temperature Tips

    Cold butter is key for a crumbly texture. When making streusel topping:

    1. Use butter straight from the fridge
    2. Cut butter into small, uniform cubes
    3. Work quickly to keep the butter cold

    Proper Streusel Consistency

    Achieving the right streusel topping is all about finesse. It should look like coarse, pea-sized crumbs. These crumbs will add a crunchy texture to your muffins. When you squeeze the mixture, it should hold together but break apart easily.

    Pro tip: Use your fingertips to mix the ingredients. This keeps the butter cold and creates the perfect crumbly texture.

    With these tips, you’ll make a streusel topping that looks great and tastes amazing. It will take your coffee cake muffins to the next level.

    Step-by-Step Muffin Batter Preparation

    Making moist and tender coffee cake muffins begins with the right batter. It’s all about handling ingredients carefully and mixing them just right. This turns simple ingredients into tasty treats.

    First, collect your main ingredients for the coffee cake muffins. You’ll need:

    • ½ cup salted butter
    • 1 cup granulated sugar
    • 2 large eggs
    • 1 cup sour cream
    • 1 teaspoon vanilla extract
    • 1½ teaspoons baking soda
    • ¼ teaspoon salt
    • 2 cups all-purpose flour

    The secret to moist and tender muffins is in how you mix. Start by creaming the butter and sugar until it’s light and fluffy. This adds air, making the muffins softer.

    Then, add eggs one at a time, mixing well after each. Add vanilla extract for extra flavor. Mix dry ingredients with sour cream slowly to avoid overmixing.

    Mixing StageKey TechniqueDuration
    Butter & SugarCream until light3-4 minutes
    Add EggsMix individually1 minute each
    Combine Dry/WetAlternate gently2-3 minutes

    Pro tip: Stop mixing once everything is just combined. Overmixing makes muffins tough. Your batter should still look a bit lumpy – this is perfect!

    Fill muffin cups ¾ full for even rising and nice tops. Now, it’s time to bake your tasty coffee cake muffins!

    Creating the Signature Cinnamon Sugar Swirl

    Your coffee cake muffins are about to become a sweet morning treat. The cinnamon sugar swirl makes them special. It adds layers of flavor that will excite your taste buds.

    The secret to a great cinnamon sugar swirl is in the details. You need to mix your cinnamon sugar just right:

    • 8 grams (1 tablespoon) of ground cinnamon
    • 150 grams (¾ cup) of granulated sugar
    • Optional: 120 grams (1 cup) of chopped walnuts

    Layering Technique for Perfect Distribution

    To get a beautiful cinnamon sugar swirl, follow these steps:

    1. Fill muffin cups ⅓ full with base batter
    2. Sprinkle a generous layer of cinnamon sugar mixture
    3. Add another layer of batter
    4. Top with remaining cinnamon sugar
    5. Gently swirl with a toothpick to create beautiful marbling

    Measuring Perfect Proportions

    To get the swirl just right, measure carefully. Use a kitchen scale for accuracy. This ensures each muffin tastes great.

    Balance is key. Too little cinnamon sugar, and it’s not sweet enough. Too much, and it’s too strong.

    Pro tip: Let your creativity shine by experimenting with different nut additions or a touch of cocoa powder to enhance your cinnamon sugar swirl.

    Baking Tips and Temperature Guidelines

    Making perfect coffee cake muffins needs precision and care. It’s key to master the baking process. This way, you’ll create breakfast treats that wow everyone.

    Temperature is very important for muffin success. Your coffee cake muffins should bake at a certain temperature for the best results:

    • Initial baking temperature: 425°F for 8 minutes
    • Reduced baking temperature: 350°F for 12-14 minutes
    • Target internal temperature: 190-205°F

    Here are some top tips for baking success:

    1. Preheat your oven fully before baking
    2. Place muffins on the center rack for even heat
    3. Use a toothpick to check if they’re done
    4. Let muffins cool in the pan for 5-10 minutes
    Baking ParameterRecommended Setting
    Initial Baking Temperature425°F
    Final Baking Temperature350°F
    Total Baking Time20-22 minutes
    Recommended Cooling Time5-10 minutes in pan

    Look for golden-brown edges and a slightly springy top. Remember, every oven is different. You might need to tweak the baking time based on your oven.

    Fixing tip: If your streusel sinks, lightly flour it before adding it to the batter. This keeps it from sinking during baking.

    Making the Optional Vanilla Icing Drizzle

    Turn your coffee shop treats into a sweet morning delight with a tasty vanilla icing drizzle. This extra touch makes your homemade coffee cake muffins irresistible.

    To make the perfect vanilla icing, you need just a few things. You’ll need:

    • ½ cup powdered sugar
    • 1 tablespoon milk
    • ½ teaspoon vanilla extract

    Achieving the Perfect Consistency

    Getting the icing right is key. Too thin, and it will run off; too thick, and it won’t coat well. Mix the powdered sugar and milk slowly. Stir until it’s smooth and a bit runny, but still holds its shape.

    Application Techniques

    There are two ways to apply the icing:

    1. Spoon Drizzling: Gently pour the icing over the muffins with a spoon
    2. Piping Bag Method: Put the icing in a piping bag or a plastic bag with a corner cut off for neat drizzles

    Let the icing set for a few minutes before serving. This lets it harden a bit, giving it that bakery look. Now, your coffee cake muffins are perfect for a sweet morning treat!

    Storage and Make-Ahead Instructions

    Learning how to store your coffee cake muffins is key to enjoying them for days. The right storage keeps them fresh and soft.

    Here’s how to store your muffins:

    • Room Temperature Storage: Store in an airtight container for up to 1 day
    • Refrigerator Storage: Keep them fresh for up to 5 days in a sealed container
    • Freezer Storage: Freeze for up to 3 months

    For easy make-ahead options, wrap each muffin in plastic or foil. When freezing, put them on a baking sheet first. Then, move them to a freezer bag to avoid sticking.

    Reheating tip: Thaw frozen muffins at room temperature or warm them in the microwave for 15-20 seconds. Avoid overheating to keep them moist.

    Pro tip: Freeze unbaked muffin batter in muffin tins. Cover with plastic wrap and freeze. Bake them straight from the freezer for fresh muffins anytime!

    Variations and Add-In Options

    Make your coffee cake muffins more exciting by trying new add-ins. You can change them to fit your taste and make each batch special.

    Fruit Additions to Elevate Your Muffins

    Adding fresh fruits can make your coffee cake muffins even better. Here are some tasty options:

    • Blueberries: Fold 1 cup of fresh or frozen blueberries into the batter
    • Diced apples: Add 1 medium apple, peeled and chopped into small cubes
    • Raspberries: Gently incorporate 3/4 cup of fresh raspberries
    • Sliced strawberries: Mix in 1 cup of thinly sliced strawberries

    Nutty Streusel Topping Variations

    Try different nuts to make your streusel topping better. They add texture and flavor to your coffee cake muffins:

    Nut TypeQuantityFlavor Profile
    Walnuts1/4 cup, choppedRich, earthy taste
    Pecans1/4 cup, choppedSweet, buttery flavor
    Almonds1/4 cup, slicedMild, slightly sweet

    Toasting nuts before adding them to your streusel makes them taste better. Sprinkle the chopped nuts over the muffin batter before baking. This adds a nice crunch to your brunch pastries.

    Troubleshooting Common Coffee Cake Muffins Issues

    Baking perfect coffee cake muffins can be tricky. Even experienced bakers face challenges that stop them from getting that moist and tender texture. Knowing common problems helps you make delicious muffins with a crumbly texture every time.

    Common Baking Challenges

    • Dry and Tough Muffins
    • Sunken Streusel
    • Muffins Sticking to Liners
    • Uneven Baking

    Overmixing your batter can make muffins tough and dense. Mix ingredients just until combined for a light, tender crumb. The right mix is key for perfectly textured muffins.

    Prevention Strategies

    1. Use room temperature ingredients
    2. Measure flour precisely
    3. Avoid overbaking
    4. Let muffins cool completely

    Streusel topping might sink if it’s too heavy. Make a lighter streusel with cold butter and mix dry ingredients well. Sprinkle streusel gently on top for a beautiful, crumbly texture.

    Pro Tip: Always check your muffins 2-3 minutes before the recommended baking time to prevent dryness.

    When muffins stick to liners, try using parchment paper liners or lightly greasing standard paper liners. This trick ensures easy removal and keeps the muffins’ delicate structure.

    Serving Suggestions and Pairing Ideas

    Your coffee cake muffins need the perfect match to make them even better. These brunch pastries are great for any morning meal. The right pairings can make your homemade coffee shop treats even more special.

    Beverage Pairings That Complement

    Choosing the right drink can really make your coffee cake muffin experience better. Here are some great drink options:

    • Classic Drip Coffee: The traditional and most harmonious pairing
    • Cinnamon Dolce Latte: Enhances the muffin’s warm spice notes
    • Vanilla Latte: Provides a smooth, creamy complement
    • Chai Tea: Offers a spicy counterpoint to the sweet muffin

    Crafting the Perfect Breakfast Menu

    Your coffee cake muffins can be the highlight of a great breakfast. Here are some dishes that go well with them:

    Savory OptionFlavor Profile
    Herb Scrambled EggsLight and fresh
    Bacon and Cheese FrittataRich and protein-packed
    Greek Yogurt with HoneyCreamy and tangy

    When you serve these muffins at brunch, how you present them matters. Put them on a beautiful platter, dust with powdered sugar, and watch your guests’ faces light up.

    Pro tip: Warm the muffins a bit before serving. It makes their aroma stronger and the streusel topping crunchier. Your guests will love the extra effort you put into these delicious brunch pastries.

    Conclusion

    Coffee cake muffins are the perfect sweet start to your day. They turn simple breakfasts into special moments. With just 25 minutes of prep, you can make a batch of these tasty treats.

    Making these muffins is more than just baking. It’s about bringing joy to your mornings. Whether it’s for a quick family breakfast or a weekend brunch, these muffins are perfect. You can try different toppings and flavors to make each batch unique.

    Creating the perfect coffee cake muffin is an art. It’s about using the right ingredients and adding your own touch. The cinnamon swirl and streusel topping make every bite unforgettable. Your family will love them so much, they’ll ask for more.

    Homemade coffee cake muffins are easy and delicious. Your kitchen will smell amazing, and your taste buds will be happy. This treat is sure to become a favorite in your home.

    FAQ

    What makes coffee cake muffins different from regular muffins?

    Coffee cake muffins are special because they have a soft, moist texture. They also have a streusel topping that makes them stand out. These muffins are like a portable version of classic coffee cake, great for breakfast or brunch.

    Can I make coffee cake muffins ahead of time?

    Yes, you can make these muffins ahead. They keep well at room temperature for 2-3 days. You can also refrigerate them for up to a week or freeze for 3 months. Just wrap them well to keep them moist and fresh.

    Are there gluten-free options for coffee cake muffins?

    Yes, you can make gluten-free versions. Use gluten-free flour and make sure other ingredients are gluten-free too. Keep the same recipe and mixing method to get the right texture.

    How do I prevent my streusel topping from sinking into the muffins?

    To keep the streusel on top, make it crumbly but not too fine. Sprinkle it gently on the batter before baking. Avoid pressing it down. Cold butter and the right sugar ratio help keep it crisp.

    Can I add fresh fruits to my coffee cake muffins?

    Yes, you can add fresh fruits like blueberries, apples, or raspberries. Toss them in flour to prevent sinking. Fold them gently into the batter before baking.

    What’s the best way to store coffee cake muffins to keep them fresh?

    Store muffins in an airtight container at room temperature for 2-3 days. For longer storage, refrigerate for up to a week or freeze for 3 months. Wrap each muffin in plastic wrap and then in a freezer bag to keep them moist.

    How can I make my coffee cake muffins extra moist?

    For moist muffins, use sour cream or Greek yogurt. These add richness and tenderness. Avoid overmixing the batter to keep it tender.

    Can I make these muffins without eggs?

    Yes, you can replace eggs with mashed banana, applesauce, or egg replacers. Each will change the texture slightly. You might need to try a few to find the best one for you.

    What is your rating for the recipe?

  • Blackberry Cheesecake Recipe

    Every dessert has a story, and this blackberry cheesecake is no exception. It’s a mix of comfort, indulgence, and passion for cooking. Imagine a creamy dessert with a buttery graham cracker crust. It’s filled with vibrant blackberry sauce and a velvety cream cheese base.

    Making the perfect blackberry cheesecake is more than just a recipe. It’s about creating an experience. With nine hours of preparation, this dessert is sure to impress. It will leave your guests wanting more of every delicious bite.

    Whether you’re an experienced baker or a home cook, this recipe will help you make an unforgettable dessert. It’s not just tasty, but also a masterpiece.

    Understanding the Perfect Blackberry Cheesecake

    Making a stunning blackberry cheesecake needs precision, passion, and knowing key cooking techniques. Each slice is a story of chosen ingredients and careful preparation.

    Your journey to making the ultimate blackberry cheesecake starts with mastering key elements. These elements turn simple ingredients into a stunning dessert.

    What Makes a Great Cheesecake

    A great cheesecake has the right mix of texture and flavor. The graham cracker crust gives a crisp base. Fresh blackberries add vibrant color and a tangy sweetness. Key traits include:

    • Smooth, creamy filling without cracks
    • Rich cream cheese texture
    • Perfectly balanced sweetness
    • Harmonious blend of ingredients

    Essential Equipment and Tools

    For successful cheesecake making, you need specific tools. Professional bakers suggest:

    EquipmentPurpose
    Springform panEasy cake removal
    Electric mixerSmooth batter preparation
    Parchment paperPrevent sticking
    Offset spatulaEven batter spreading

    Key Ingredients Overview

    Choosing top-notch ingredients makes your blackberry cheesecake stand out. Fresh blackberries add natural sweetness. High-quality cream cheese gives a luxurious texture.

    The magic of a perfect cheesecake lies in the harmony of its ingredients.

    Your graham cracker crust is the delicious base. It holds the dessert together with its buttery, crisp taste.

    Ingredients for Graham Cracker Crust

    Making the perfect graham cracker crust is key for your blackberry cheesecake. You start with top-notch ingredients that will match the creamy philadelphia cream cheese filling.

    To make a delicious graham cracker crust, you’ll need:

    • 1 1/2 cups graham cracker crumbs (180 grams)
    • 1/4 cup brown sugar (55 grams)
    • 6 tablespoons unsalted butter, melted (85 grams)

    The secret to a great crust is choosing the right graham crackers. Fresh, crisp crackers ground into fine crumbs give the best texture and taste for your cheesecake base.

    “A great crust is the foundation of an unforgettable cheesecake” – Baking Enthusiasts

    When making your crust, make sure the graham cracker crumbs are evenly crushed. The melted butter will hold the crumbs together, making a strong base for your philadelphia cream cheese filling.

    Pro tip: Adding a pinch of ground cinnamon to your graham cracker crumb mixture can add a lot of flavor. This small spice can make your dessert even better.

    Creating the Blackberry Sauce

    Making the perfect blackberry sauce takes your cheesecake to the next level. It adds a fruity burst that matches the rich sweetened sour cream base. This makes your dessert truly special.

    To make a great blackberry sauce, pick the right ingredients. Your sauce will top your cheesecake, adding both beauty and flavor.

    Selecting the Best Blackberries

    Look for blackberries that are:

    • Plump and deeply colored
    • Free from bruises or mold
    • Firm but not hard
    • Fragrant with a sweet aroma

    Cooking and Straining Techniques

    To make your blackberry sauce, start by mixing 3 cups of fresh blackberries, 1/3 cup sugar, and 3 tablespoons of lemon juice in a saucepan. Gently cook the mixture for 3-5 minutes. This lets the berries break down and release their juices.

    Storage and Preservation Tips

    Once your sauce is ready, store it in an airtight container in the fridge for 7-10 days. It will pair perfectly with the sweetened sour cream base of your cheesecake. This creates a dessert that looks great and tastes amazing.

    Quick Sauce Details

    • Yield: 2 1/2 cups of sauce
    • Prep Time: 5 minutes
    • Cook Time: 5 minutes
    • Total Time: 10 minutes

    Making the Perfect Cheesecake Batter

    To make a smooth and tasty cheesecake batter, you need to be precise and skilled. Start by using room temperature ingredients. This makes them blend better and gives your cheesecake a luxurious feel. Cream cheese is the main ingredient, with three 8-ounce packages making up the base of your creamy dessert.

    The secret to a great cheesecake is in how you mix the ingredients. Here’s what you’ll need for the perfect batter:

    • 32 ounces of softened cream cheese
    • 1¼ cups granulated sugar
    • 4 large eggs at room temperature
    • 1 tablespoon vanilla extract
    • ½ cup sour cream
    • ½ teaspoon salt

    Egg yolks are key for a rich and smooth texture. Vanilla extract adds depth and warmth, turning a simple dessert into a memorable treat. Mix the ingredients until just combined. Overmixing can lead to air bubbles and cracking.

    Pro tip: For the smoothest batter, follow these steps:

    1. Start with softened cream cheese
    2. Beat on low speed
    3. Add sugar gradually
    4. Incorporate eggs one at a time
    5. Finish with vanilla extract and sour cream

    Your aim is a silky, lump-free batter that turns into a creamy cheesecake. The mix of egg yolks and vanilla extract adds a unique flavor that makes your dessert stand out.

    Step-by-Step Crust Preparation

    Making the perfect graham cracker crust is key for your blackberry cheesecake. A well-made crust adds a delicious base. It complements the creamy filling and blackberry compote topping.

    Mixing Techniques for an Ideal Crust

    Start by picking top-notch ingredients. Mix graham cracker crumbs with melted butter and a bit of sugar. This creates a smooth blend.

    • Crush graham crackers into fine, even crumbs
    • Mix crumbs with melted butter thoroughly
    • Add granulated sugar for subtle sweetness
    • Ensure ingredients are well-incorporated

    Pressing and Pre-Baking Instructions

    Use the right pressing method for a perfect crust. Press the mixture evenly into your springform pan with a measuring cup or your fingers.

    Crust Preparation StepDetails
    Pan Size8″ or 9″ springform pan
    Oven Temperature350°F
    Baking Time8-10 minutes
    Desired ResultLightly browned, set crust

    Keep an eye on the crust while it bakes to avoid burning. Aim for a light golden color. This will give your cheesecake a strong base. Let the crust cool fully before adding the filling.

    Blackberry Cheesecake Assembly Process

    Making a stunning blackberry cheesecake needs careful layering and a gentle touch. You aim for a beautiful swirled effect without mixing the ingredients too much.

    Begin by setting up your blackberry cheesecake with precision. Pour about one-third of the creamy cheesecake batter onto the cooled graham cracker crust. This step is crucial for a smooth base that supports your design.

    • Pour 1/3 of cheesecake batter onto crust
    • Add spoonfuls of blackberry sauce
    • Create gentle swirls with a knife
    • Avoid overmixing to maintain texture

    When adding the blackberry sauce, be gentle. Spoon about one-third of the sauce in small dollops across the batter’s surface. Use a thin knife or offset spatula to gently swirl the sauce through the batter. This creates beautiful marble-like patterns.

    StepActionTechnique Tips
    1Batter LayerSpread evenly, no air pockets
    2Sauce PlacementSmall, random spoonfuls
    3SwirlingLight zigzag motion, minimal mixing

    The beauty of your blackberry cheesecake comes from its delicate swirls and balanced flavors. Use gentle movements to make a dessert that looks as good as it tastes.

    Water Bath Techniques for Baking

    Making a perfect creamy dessert needs you to know the water bath technique. This method turns a simple cheesecake into a smooth, rich treat. Learning this technique can make your baking better and your desserts flawless every time.

    The water bath method is key for a smooth, crack-free cheesecake. It surrounds your baking pan with hot water. This creates a gentle heat that keeps your dessert’s delicate texture safe.

    Proper Wrapping Methods

    Getting your springform pan ready is a big step in the water bath technique. Here’s how to wrap it right:

    • Use heavy-duty aluminum foil for wrapping
    • For a 9″ pan, cut foil at least 14″ long
    • For a 10″ pan, cut foil at least 16″ long
    • Wrap the bottom and sides of the pan carefully to prevent water seepage

    Temperature Control Tips

    Controlling the temperature is crucial for the perfect creamy dessert. Here are some important temperature tips:

    • Preheat oven to 350°F
    • Use hot water (not boiling) for the water bath
    • Fill the larger pan with water halfway up the cheesecake pan sides
    • Use a pan at least 2-3 inches deep for optimal results

    Pro tip: The water bath’s maximum temperature is 212°F. This protects delicate egg proteins and ensures even baking. It also helps prevent your cheesecake from drying out or getting cracks.

    A water bath isn’t just for cheesecakes – it’s a versatile technique used in many delicate custard and egg-based recipes.

    Cooling and Setting Guidelines

    Your blackberry cheesecake needs careful cooling to keep its perfect texture. This is key to enjoying that smooth, creamy consistency we all love. The graham cracker crust is also preserved during this process.

    Here are the cooling steps to follow:

    • Let the cheesecake rest at room temperature for 10 minutes
    • Run a knife gently around the edges to prevent cracking
    • Allow the cheesecake to cool on a wire rack for one additional hour

    Pro tip: Avoid removing the springform pan ring immediately after baking. Cooling it slowly helps avoid cracks in the crust. This makes your dessert look professional and smooth.

    “Patience is key when cooling a cheesecake – rush it, and you’ll compromise its texture.” – Professional Pastry Chef

    Refrigeration is the last step in setting your cheesecake. Here are the chilling times:

    1. Minimum refrigeration: 4 hours
    2. Ideal refrigeration: Overnight (8-12 hours)

    When stored right, your cheesecake stays fresh for up to 5 days. You can freeze it for up to 2 months. This way, you always have a delicious dessert ready.

    Blackberry Whipped Cream Topping

    Elevate your blackberry cheesecake with a luxurious whipped cream topping. It brings fresh blackberries to the forefront of your dessert. The perfect topping can turn an already delicious cheesecake into a stunning masterpiece.

    Whipping Techniques for Perfect Cream

    Creating the ideal whipped cream requires precision and care. Start with cold heavy whipping cream chilled in the refrigerator. Use these key techniques to achieve a light and airy topping:

    • Chill your mixing bowl and whisk beforehand
    • Use heavy whipping cream with at least 36% fat content
    • Whip at medium-high speed to prevent over-beating
    • Add powdered sugar gradually for smooth sweetness

    Decorative Presentation Ideas

    Showcase your fresh blackberries with creative decoration techniques. They will impress your guests:

    1. Pipe swirls of whipped cream around the cheesecake edges
    2. Scatter fresh blackberries strategically on top
    3. Create a rustic pattern with cream and whole berries
    4. Dust lightly with powdered sugar for an elegant finish

    Pro tip: For the most vibrant flavor, use ripe, freshly picked blackberries that are deep purple and glossy.

    Ingredient Measurements

    IngredientQuantity
    Heavy Whipping Cream1 cup
    Powdered Sugar2 tablespoons
    Blackberry Sauce2 tablespoons

    Your blackberry cheesecake will become a showstopper. These professional whipped cream techniques and fresh blackberries are your secret weapon.

    Storage and Serving Recommendations

    Your Philadelphia cream cheese blackberry cheesecake needs careful storage to keep its amazing taste and texture. After making this dessert, you’ll want it to stay fresh and tasty for as long as you can.

    Keeping your cheesecake in the fridge is key. Store it in a container that seals well to stop flavors from other foods from getting in. The best fridge temperature is about 35 degrees Fahrenheit. This keeps your cheesecake both good and safe.

    • Refrigerate within 2 hours of baking
    • Use an airtight container for storage
    • Consume within 7 days for optimal taste

    Freezing is a great way to keep your cheesecake for a long time. When you freeze it, wrap it in at least two layers of plastic and foil. This stops freezer burn.

    Storage MethodDurationRecommended Approach
    RefrigerationUp to 7 daysAirtight container at 35°F
    FreezingUp to 3 monthsDouble-wrapped in plastic and foil

    Before serving, take the cheesecake out of the fridge 15-20 minutes early. This lets it get to the right creamy temperature. For clean slices, use a sharp knife and clean it between cuts.

    Pro tip: Always thaw frozen cheesecake overnight in the refrigerator for the best texture and flavor preservation.

    Recipe Variations and Substitutions

    Trying new twists on the classic blackberry cheesecake can change your dessert game. You can make this recipe your own by adding your favorite flavors and ingredients. This way, you keep the delicious taste of the original.

    Berry Alternatives

    Try using different fruits to mix up the taste:

    • Raspberries for a tart twist
    • Blueberries for a sweeter approach
    • Mixed berries for a complex flavor

    Flavor Enhancements

    Make your cheesecake even better with these easy tips:

    • Add 1-2 tablespoons of lemon zest to the batter
    • Incorporate sweetened sour cream as a topping
    • Drizzle with dark chocolate ganache

    Dietary Modifications

    Dietary NeedSubstitution
    Gluten-FreeUse gluten-free graham crackers
    VeganReplace cream cheese with plant-based alternative
    Low-FatUse reduced-fat cream cheese and sweetened sour cream

    Remember, trying new ingredients can create amazing flavors. Don’t be shy to experiment with your cheesecake recipe!

    Conclusion

    Making a delicious blackberry cheesecake is an art. It needs careful techniques and top-notch ingredients. Fresh blackberries, premium cream cheese, and rich vanilla extract are key. Egg yolks make the cheesecake smooth and creamy.

    Feel free to try new things with this recipe. It’s perfect for both beginners and experienced bakers. You can tweak the sweetness, mix berries, or make it gluten-free.

    If you liked this recipe, check out other desserts like raspberry white chocolate cheesecake or blueberry swirl cheesecake. You can also try a classic New York-style cheesecake with fruit compote. These recipes let you explore and impress your loved ones.

    Creating an amazing cheesecake takes patience, quality ingredients, and a love for baking. Your kitchen is where you create magic. This blackberry cheesecake is your masterpiece.

    FAQ

    How long does it take to make a blackberry cheesecake from start to finish?

    Making a blackberry cheesecake takes 4-6 hours. This includes prep, baking, cooling, and chilling. You’ll spend about 1 hour preparing, 1-1.5 hours baking, and 2-3 hours cooling and chilling. This ensures the cheesecake is creamy and perfect.

    Can I use frozen blackberries instead of fresh ones?

    Yes, frozen blackberries work well for sauce or topping. Just thaw and drain them to avoid extra moisture. Fresh blackberries are best for garnish and taste.

    How do I prevent cracks in my cheesecake?

    To avoid cracks, use room temperature ingredients and don’t overmix. Bake in a water bath and cool slowly. Avoid sudden temperature changes and overmixing to prevent cracks.

    How long can I store a blackberry cheesecake?

    Store a blackberry cheesecake in the fridge for up to 5 days. Keep it in an airtight container and away from strong smells. This helps preserve the flavors of blackberry and vanilla.

    Can I make this cheesecake ahead of time?

    Absolutely! Cheesecakes often taste better after a day in the fridge. This allows the crust and flavors to blend. Prepare it 1-2 days before for dinner parties or special events.

    Is a water bath really necessary for cheesecake?

    A water bath is highly recommended but not required. It ensures even cooking and prevents cracking. It’s key for a smooth, creamy texture.

    Can I substitute the graham cracker crust?

    Yes, you can try different crusts like chocolate cookie crumbs or digestive biscuits. Each adds a unique flavor. Feel free to experiment based on your taste preferences.

    How do I know when the cheesecake is fully baked?

    The cheesecake is done when the edges are set but the center jiggles slightly. The internal temperature should be about 150°F (65°C). It will set more as it cools, becoming perfectly creamy.

    What is your rating for the recipe?

  • Panera Tomato Soup Recipe

    There’s something magical about a bowl of creamy tomato soup. It takes you back to childhood kitchens. I remember the warmth of tomato soup on cold winter days. It was like a culinary hug that lifted my spirits.

    Panera Bread’s tomato soup is a comfort food favorite. But what if you could make it at home? This copycat recipe brings restaurant-quality flavor to your kitchen. It’s quick, with just 40 minutes of prep time and simple ingredients.

    The secret is using premium ingredients. It’s about finding the right balance of flavors. This makes the cream-based soup irresistible.

    Why This Copycat Panera Tomato Soup is Better Than the Original

    Making a homemade tomato soup that’s as good as Panera’s is easy and tasty. You can turn simple ingredients like tomato puree and vegetable broth into a meal that’s better in taste, convenience, and cost.

    Rich and Balanced Flavors

    When you make tomato soup at home, you control the ingredients. Choosing top-quality tomato puree and vegetable broth makes your soup richer and more flavorful than the restaurant version. Every spoonful is a special treat that mass-produced soups can’t offer.

    Quick 30-Minute Preparation

    No need to wait in line or spend a lot of money. This recipe is quick, ready in just 30 minutes. It’s fast, made with fresh ingredients, and you can adjust it to your liking.

    • Faster than restaurant pickup
    • Made with fresh ingredients
    • Customizable to your taste preferences

    Cost-Effective Homemade Version

    Homemade soup is much cheaper. A cup of Panera’s tomato soup costs $6.99, but you can make it for a lot less. Just a few dollars in tomato puree and vegetable broth can make a lot of soup. It’s both economical and gourmet.

    Essential Ingredients for Perfect Tomato Soup

    To make a tasty tomato soup, you need the right ingredients. Start with San Marzano tomatoes for a sweet and intense flavor. This is the base of your Panera-style tomato soup.

    Here are the key ingredients for a great tomato soup:

    • San Marzano whole peeled tomatoes (56 ounces)
    • Fresh garlic (6 medium cloves)
    • Yellow onions (3 medium, chopped)
    • Extra-virgin olive oil (4 tablespoons)
    • Unsalted butter (5 tablespoons)
    • Fresh basil leaves (1 cup)
    • Vegetable or chicken broth (2 cups)
    • Heavy cream (1/4 cup)

    The secret to a great tomato soup is balancing flavors. Garlic and onions give a strong base. Salt and pepper bring out the tomatoes’ sweetness. Fresh basil adds a bright, herbal taste.

    Think about nutrition too. Each serving has about 212 calories, with 13 grams of fat and 6 grams of protein. This makes the soup both healthy and filling.

    Pro tip: Add a pinch of red pepper flakes for a hint of heat. A bit of sugar can also balance the acidity, making the taste perfect.

    The Secret Behind San Marzano Tomatoes

    San Marzano tomatoes are the top choice for making the best tomato puree. They are more than just tomatoes. They turn simple dishes into amazing meals.

    These tomatoes are special. They grow in the volcanic soils between Naples and Salerno, Italy. This unique place gives them a flavor that’s hard to find elsewhere.

    Only tomatoes from the Agro Sarnese-Nocerino region can be called San Marzano. They have a special seal to prove it.

    Why Choose San Marzano

    • Sweeter and less acidic than typical tomatoes
    • Rich, intense flavor perfect for tomato puree
    • Fewer seeds and a meaty texture
    • Grown in exceptional volcanic soil conditions

    Proper Storage and Selection

    When buying San Marzano tomatoes, make sure they have the DOP label. Real cans will have a Consorzio San Marzano number. They must be sold whole or halved. Prices are between $5 and $10 per can, showing their high quality.

    Flavor Profile Benefits

    The tomatoes’ taste comes from the volcanic soil. They have lots of potassium and phosphorous. This makes them sweet and complex, making your tomato puree amazing.

    San Marzano tomatoes are perfect for any tomato soup or new recipe. They add a flavor that’s hard to beat.

    Pro tip: Always verify the authenticity of San Marzano tomatoes by checking for the official DOP certification.

    Step-by-Step Cooking Instructions

    Making Panera-style tomato soup is all about careful prep and detail. It turns simple stuff into a creamy, tasty dish that will wow your loved ones.

    • 4 tablespoons unsalted butter
    • 2 yellow onions, finely chopped (about 3 cups)
    • 3 garlic cloves, minced
    • 2 cans (28 oz each) of crushed tomatoes
    • 2 cups vegetable broth

    Melt the butter in a big pot over medium heat. Add the chopped onions and cook for 10-12 minutes. This makes them soft and sweet.

    Then, add the minced garlic and cook for a minute. This lets the garlic’s oils add to the soup’s taste. Mix in the crushed tomatoes and vegetable broth.

    Cooking StageTimeKey Action
    Sautéing Onions10-12 minutesDevelop sweet, soft texture
    Adding Garlic1 minuteRelease aromatic oils
    Simmering10 minutesBlend flavors

    Let the mix simmer for about 10 minutes. This blends the flavors well. For creaminess, use an immersion blender in the pot. Or, blend it in a blender for a smoother soup.

    Finally, add 1/2 cup of heavy whipping cream and season with salt and pepper. Your Panera-style tomato soup is ready to enjoy!

    Achieving the Perfect Creamy Texture

    Making a velvety smooth cream soup needs precision and skill. The right blending method can turn your tomato soup into something special. It will have a luxurious texture, just like Panera’s.

    Blending Techniques for Smooth Perfection

    Your cream soup needs careful blending. Here are some key techniques:

    • Use an immersion blender for direct, in-pot blending
    • Transfer soup to a standard blender for ultra-smooth results
    • Blend in batches to prevent overflow and ensure consistency
    • Always remove the center lid cap when blending hot liquids to release steam

    Cream Integration Tips

    Adding cream needs a gentle touch. Add it slowly and stir well to avoid separation. Use 1/2 cup of cream for 4-6 servings.

    Cream TypeTexture ResultRecommended Usage
    Heavy CreamRich, luxuriousBest for indulgent soups
    Half-and-HalfLighter, smootherGood for reduced-calorie versions
    Plant-Based CreamVegan-friendlyAlternative for dietary restrictions

    Thickness Adjustments

    Change your soup’s thickness by adjusting liquids. For a thicker soup, use less vegetable broth or add more beans. To make it thinner, add more broth or warm water.

    • Start with recommended liquid quantities
    • Add liquids incrementally
    • Taste and adjust seasoning after each modification

    Herb and Seasoning Combinations

    Making the perfect tomato soup is all about finding the right mix of herbs and spices. Fresh basil is a key player, adding a bright, aromatic flavor that pairs well with the tomatoes. Choosing the right herbs can turn a simple soup into a gourmet dish.

    Here are the top herbs and spices to take your tomato soup to the next level:

    • Basil: The main flavor, adding a fragrance that balances the tomatoes’ acidity
    • Dried oregano: Adds an earthy, peppery taste
    • Fresh thyme: Brings a floral note that lightens the soup’s richness
    • Garlic: Adds depth and complexity

    Seasoning is an art of balance. Start with a little salt and pepper, then adjust to taste. Black pepper adds a subtle kick, while salt enhances the flavors.

    “Herbs are the magic wand that transforms a simple soup into a culinary masterpiece.” – Culinary Wisdom

    Here are some extra flavor boosters for your tomato soup:

    • A pinch of smoked paprika for depth
    • A dash of balsamic vinegar for tang
    • A sprinkle of celery seed for aromatic complexity

    Pro tip: Roasting your herbs before adding them to the soup releases their oils. This makes the flavors more intense and layered. Your homemade tomato soup will be as good as any restaurant’s with these herbs and seasonings.

    Perfect Pairing Suggestions

    Make your tomato soup special with the right friends. These pairings can turn a simple meal into a memorable experience.

    Classic Grilled Cheese Companion

    Tomato soup and grilled cheese are a match made in heaven. This combo offers a perfect mix of tastes:

    • Traditional mozzarella-filled sandwich
    • Upgraded BLT with peppercorn-crusted bacon
    • Pulled pork sandwich for heartier appetites

    Bread and Crouton Options

    Choose from a variety of breads to go with your soup. They add texture and taste:

    • Garlic bread
    • Focaccia
    • Crispy croutons
    • Warm breadsticks

    Complementary Side Dishes

    Try these sides to make your meal even better:

    • Appetizers:
      • Mozzarella sticks
      • Caprese skewers
      • Stuffed mushrooms
    • Salads:
      • Chopped salad
      • Caprese salad
      • Pasta salad
    • Vegetable sides:
      • Roasted asparagus
      • Green beans
      • Cauliflower

    Pro tip: Add fresh herbs, grated cheese, or a bit of olive oil to your soup. It will taste like it’s from a fancy restaurant.

    Storage and Reheating Guidelines

    Keeping your homemade tomato soup fresh is key. You need to pay attention to how you store and reheat it. This way, you keep the soup’s great taste and creamy texture.

    • Refrigeration is ideal for short-term storage
    • Use airtight containers to prevent contamination
    • Cool the soup completely before storing

    Storing your tomato soup in the fridge is important for safety:

    Storage LocationDurationTemperature
    Refrigerator4-5 daysBelow 40°F (4°C)
    FreezerUp to 3 months0°F (-18°C)

    When reheating your tomato soup, be careful. You want to keep its rich flavor and smooth texture. Here are some good ways to do it:

    1. Stovetop: Warm on low heat, stirring frequently
    2. Microwave: Heat in 1-minute intervals, stirring between each
    3. Avoid reheating the same portion multiple times

    Pro tip: Leave about one inch of space at the top of your container when freezing to allow for expansion. This helps prevent damage to your container and keeps your soup perfect.

    Always label your containers with the date of preparation to track freshness and optimize your meal planning.

    By sticking to these guidelines, you’ll enjoy your homemade tomato soup at its best. It will be full of flavor and safe to eat.

    Recipe Variations and Dietary Modifications

    Your Panera-style tomato soup recipe is super flexible for different diets. It works for vegetarians, vegans, and those who can’t have dairy. You can easily change it to fit your needs.

    • Vegan Modification: Use extra-virgin olive oil instead of butter
    • Dairy-Free Option: Swap cream with full-fat oat milk or cashew milk
    • Gluten-Free Friendly: The recipe doesn’t have flour

    Adding protein and veggies makes your soup even better. Try these ideas:

    1. Roasted chickpeas for protein
    2. Fresh basil leaves (10-15) for more flavor
    3. Diced bell peppers for extra nutrition

    Keep the vegetable broth amount the same, about 1 to 2 cups. Adjust the cream to your liking, using oat or cashew milk for creaminess.

    Pro tip: Always taste and adjust seasonings after making modifications to ensure balanced flavor profiles.

    Conclusion

    Your search for the best tomato soup ends here. This Panera-inspired recipe turns simple ingredients into a top-notch dish. You can make it in your kitchen with just 2 tablespoons of olive oil, fresh ingredients, and 30 minutes of cooking.

    This homemade tomato soup is very versatile. It’s great for a family of 4-6 or for meal prep. Each serving is full of vitamins and balanced nutrients, making it more than just a comfort food.

    Cooking is all about trying new things and having fun. You can make your tomato soup your own by changing spices, adding fresh herbs, or adjusting the creaminess. The 4.90-star rating from 205 reviews shows it’s a hit with many.

    So, grab your pot and start cooking. Let the amazing smell of this tomato soup fill your kitchen. Your cooking journey begins now – enjoy every bite!

    FAQ

    What makes San Marzano tomatoes special for this soup?

    San Marzano tomatoes are known for their sweet taste and thick flesh. They add a richer tomato flavor to the soup. This makes the homemade version taste more authentic and delicious, just like Panera’s.

    How long can I store the homemade tomato soup?

    You can keep the soup in the fridge for 3-4 days in an airtight container. For longer storage, freeze it for up to 3 months. When reheating, use medium-low heat and stir often to keep it creamy.

    Can I make this soup vegetarian or vegan?

    Yes, you can! Use vegetable broth instead of chicken broth for a vegetarian version. For a vegan version, swap the cream with coconut cream or a plant-based alternative. Make sure all ingredients are dairy-free.

    What are the best side dishes to serve with this tomato soup?

    Grilled cheese sandwiches are a classic choice. But you can also try crusty bread, garlic croutons, or a light salad. Other good options include grilled paninis, herb-roasted veggies, or a simple green salad.

    How can I adjust the soup’s thickness?

    To thin the soup, add more vegetable broth or water slowly. To thicken it, simmer uncovered for a few minutes or add a bit of tomato paste. Blending also helps achieve the right consistency.

    Are there any dairy-free alternatives for the cream?

    Yes! Coconut cream, cashew cream, or plant-based milks like almond or oat milk work well. They add a creamy texture without dairy.

    What herbs work best in this tomato soup?

    Basil is the main herb, but you can try oregano, thyme, or rosemary too. Fresh herbs taste better than dried ones. Mixing fresh basil with a bit of dried herbs can enhance the flavor.

    How long does it take to prepare this soup?

    It takes about 30 minutes to make the soup. This includes chopping veggies, cooking, and blending. It’s a quick recipe for a busy weeknight dinner.

    What is your rating for the recipe?