Author: zikrecipes.com

  • Fish Food Recipe

    As an aquarium enthusiast, I found out how making custom fish food can change everything. Your tropical fish pellets can be more than just something you buy. Imagine making a meal that fits your fish’s diet perfectly, full of important nutrients and made just for them.

    Homemade fish food lets you control what your fish eat. It can have more than 55% protein by dry weight. This means your fish get a healthier diet than many store-bought foods.

    Making your own fish food is more than saving money. It’s about giving your fish the best nutrition. Whether you have delicate tropical fish or strong marine species, a custom recipe can make a big difference in their health and energy.

    Understanding Nutritional Requirements for Aquarium Fish

    Creating the perfect diet for your aquarium fish is key. With over 2,500 ornamental fish species, each has its own needs. They need the right food to stay healthy and thrive.

    Most fish are omnivores, needing a balanced diet. A mix of fish meal, freeze-dried fish food, and shrimp pellets is essential. This mix greatly affects their health.

    Protein Requirements for Different Fish Species

    Protein is vital for fish. Each species has its own protein needs:

    • Carnivorous fish need 40-50% protein
    • Herbivorous fish do well with 30-40% plant-based proteins
    • Omnivorous fish require about 30% protein

    Essential Vitamins and Minerals

    A good fish diet must include important vitamins and minerals. Commercial fish foods often have:

    • Vitamins A, C, D, E, K, and B complex
    • Calcium for bone health
    • Phosphorus for metabolism

    Fat Content Guidelines

    Fat is important for fish, especially young and breeding fish. Here are some guidelines:

    Fish TypeRecommended Fat Content
    Juvenile Fish10-15% by dry weight
    Breeding Fish10-15% by dry weight
    Adult Fish5-10% by dry weight

    Pro tip: Keep an eye on your fish’s diet. Adjust it based on their species, age, and health.

    Basic Ingredients for Homemade Fish Food

    Making homemade fish food needs the right ingredients for a balanced diet. Your fish’s diet is key to their health and happiness. Knowing what to use can make a big difference in their nutrition.

    • Protein sources like raw shrimp, salmon, and beef heart
    • Plant-based ingredients including algae wafers and spinach
    • Binding agents such as gelatin
    • Nutrient supplements like brine shrimp eggs

    Protein is the most important part of fish food. Different fish need different amounts of protein. Raw or cooked meats give them the amino acids they need for muscles and energy.

    Ingredient CategoryKey ComponentsNutritional Benefits
    Animal ProteinsShrimp, salmon, beef heartHigh protein content, essential amino acids
    Plant SourcesSpinach, algae wafersVitamins, minerals, fiber
    SupplementsBrine shrimp eggs, multivitaminsAdditional nutrients, growth support

    Adding spirulina and chlorella to your mix can boost nutrition. These algae wafers add important nutrients that go well with animal proteins. Gelatin is great for mixing everything together into a food that fish can easily eat.

    Make sure to mix your ingredients just right for your fish. Talking to an aquarium nutrition expert can help you make the best fish food for them.

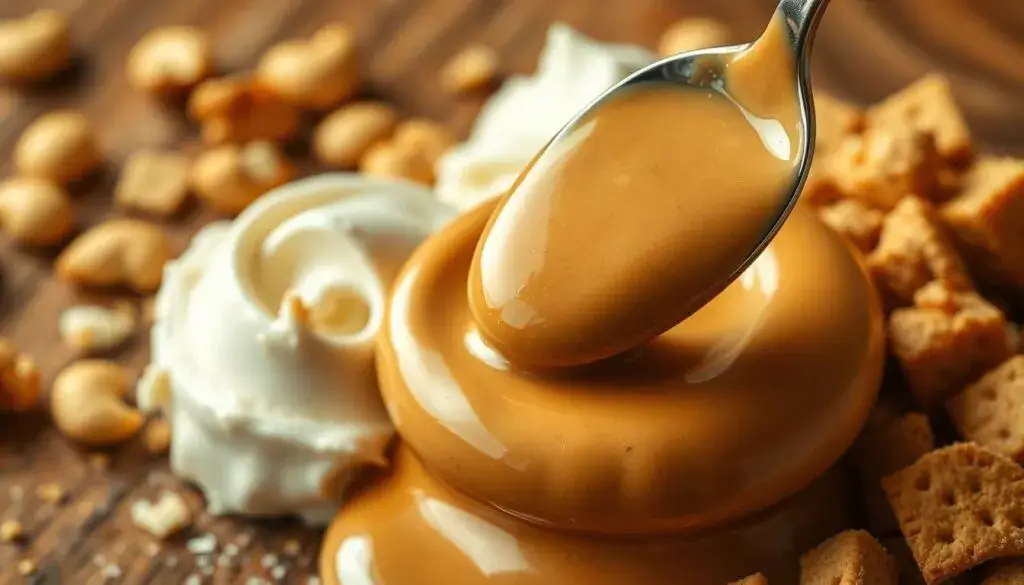
    Preparing Your Gel-Based Fish Food Recipe

    Making homemade cichlid food needs precision and careful prep. Whether it’s flakes or gel, knowing how to mix is key. It keeps your fish healthy and happy.

    Creating gel-based fish food has several important steps. These steps make sure your fish get the best nutrition and taste.

    Essential Equipment for Fish Food Preparation

    • Large mixing bowl
    • Whisk or electric mixer
    • Measuring cups and spoons
    • Gelatin packets
    • Cutting board
    • Sharp knife
    • Silicone molds or baking sheet
    • Refrigerator or freezer

    Step-by-Step Mixing Process

    1. Start with protein sources like canned salmon (it has about 59% protein)
    2. Add 1.5 ounces of gelatin (about six Knox gelatin envelopes)
    3. Include powdered fish vitamins
    4. Put in ¼ teaspoon of powdered astaxanthin
    5. Blend until smooth
    6. Pour into molds

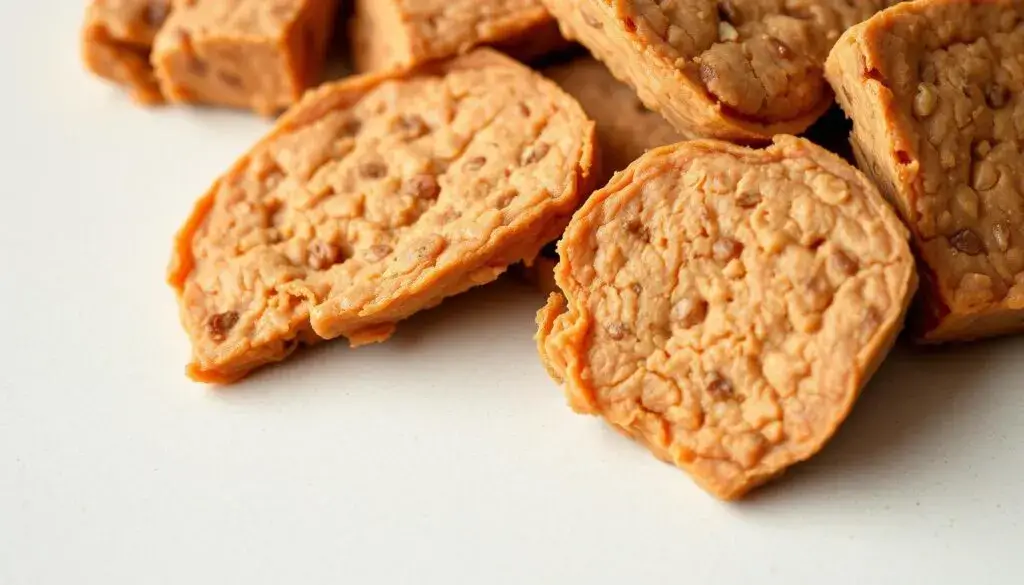
    Storage and Preservation Guidelines

    Storing your homemade cichlid food right keeps it fresh and healthy. Keep it in the fridge for up to a week or freeze for months.

    Storage MethodDurationRecommended Use
    RefrigerationUp to 1 weekShort-term storage
    FreezingSeveral monthsLong-term preservation

    When making flakes, use fresh ingredients and watch portion sizes. Feed your fish in 2-3 minutes to avoid water pollution.

    Fish Food Recipe with High Protein Content

    Making a high-protein fish food can boost your fish’s health and energy. Protein is key for growth, muscle, and well-being in fish.

    For a protein-rich food, choose ingredients with lots of nutritional value. The best food has 55% to 65% protein by dry weight. This meets the needs of many fish species.

    Key Protein Sources for Fish Food

    • Dried shrimp meal
    • Krill extract
    • Fish meal
    • Squid protein
    • Spirulina algae

    The protein needs vary by fish type. Carnivorous fish need more protein than others.

    Fish TypeProtein Percentage
    Carnivorous Fish45-65%
    Omnivorous Fish35-45%
    Herbivorous Fish25-35%

    Use different protein sources in your fish food. This makes the diet more balanced and natural.

    Quality is more important than just adding protein. A well-made food with good protein sources is better than just high protein.

    Adding Vegetable Components to Your Mix

    Making balanced tropical fish pellets means adding plant-based ingredients carefully. Your homemade fish food will get a big boost from the right vegetables. These add important nutrients and help keep your fish healthy.

    Best Plant-Based Ingredients

    Here are the top veggies for your fish food:

    • Peas (rich in fiber)
    • Summer squash
    • Green beans
    • Spinach

    Stay away from kale, broccoli, and cabbage. They can make your tank smell bad and mess with the water.

    Proper Ratios for Balanced Nutrition

    It’s key to get the vegetable mix right. Here are some guidelines for different fish types:

    Fish TypeVegetable ContentProtein Ratio
    Herbivorous Fish40-50%35-45%
    Omnivorous Fish25-35%40-50%
    Carnivorous Fish10-20%50-55%

    Processing Techniques

    Getting your veggies ready right is important. Blanch them briefly to unlock nutrients. Then, chop or puree them so they’re easy for your fish to eat.

    Make sure to clean up any leftover veggies within 10-15 minutes. This keeps your water clean and prevents ammonia problems.

    Color-Enhancing Ingredients and Additives

    To make vibrant and healthy fish food, focus on color-enhancing ingredients. When making cichlid food or other fish food, natural additives can greatly improve fish color and health.

    Some important color-enhancing ingredients are:

    • Astaxanthin: A strong carotenoid that makes red and orange colors more intense
    • Spirulina: A natural blue-green algae that makes colors more vibrant
    • Paprika: Adds rich red color to tropical fish
    • Marigold powder: Enhances yellow and orange colors

    When adding these ingredients to your fish food, use them in moderation. Too much can cause unnatural colors or health problems. Hikari Fish Food advises a careful balance, with about 4% carotenoid-rich krill meal for best color.

    Experts recommend these steps for enhancing colors:

    1. Begin with small amounts of color-enhancing ingredients
    2. Watch how fish react and change colors
    3. Adjust ingredient amounts based on fish species
    4. Keep a balanced nutritional mix

    Special cichlid food often has color-boosting parts that help natural colors and give needed nutrients. The goal is to care for fish health and beauty together.

    Storage and Preservation Methods

    Keeping your homemade freeze-dried fish food fresh is important. The right storage keeps your flakes nutritious and safe for fish.

    When making your fish food, focus on a few key steps. These will help keep your food fresh and full of nutrients.

    Freezing Techniques for Maximum Freshness

    Freezing is the best way to store homemade fish food for a long time. Here are some tips:

    • Divide your freeze-dried fish food into thin, portion-sized slabs
    • Use high-quality zip-lock bags for storage
    • Remove as much air as possible before sealing
    • Label each bag with the preparation date

    Shelf Life Guidelines

    Knowing how long your fish food lasts is key. Different ways of making it affect how long it stays good:

    • Frozen fish food: Up to 3-4 months when stored right
    • Refrigerated preparations: Use within 2-3 days
    • Dry, freeze-dried flakes for aquarium fish: Up to 6 months in airtight containers

    Selecting the Right Storage Containers

    The container you choose affects your fish food’s quality. Go for:

    • BPA-free plastic containers
    • Glass containers with tight-sealing lids
    • Vacuum-sealed bags for longer storage

    Pro tip: Always store your fish food in a cool, dark place to prevent nutrient degradation.

    By using these storage and preservation tips, your homemade fish food will stay nutritious and safe for your fish.

    Alternative Fish Food Recipes for Different Species

    Creating special fish food recipes means knowing what each fish needs. You must feed them differently, depending on if they eat meat, plants, or both.

    Carnivorous fish need lots of protein. They do well on foods like shrimp pellets and brine shrimp eggs. Their diet should have 40-50% protein to keep them healthy. Here are some good ingredients:

    • Fresh fish meat
    • Brine shrimp eggs
    • Krill
    • Bloodworms

    Herbivorous fish need foods that are mostly plants. Their diet should have less protein. Vegetable-based recipes are full of vitamins and fiber. Good options include:

    • Spirulina
    • Blanched vegetables
    • Seaweed
    • Algae wafers

    Omnivorous fish can eat a mix of meat and plants. Shrimp pellets are a good base. Add other ingredients to make a complete diet.

    “Nutrition is the foundation of fish health and longevity in aquarium environments.”

    When making fish food, think about the size, how easily it’s digested, and its nutritional value. Try to make the food as close to their natural diet as you can. This helps keep them healthy and full of energy.

    Conclusion

    Making the perfect fish meal means knowing what your fish need to eat. You’ve learned how important it is to feed them right. By using top-notch proteins, vitamins, and balanced foods, you help them stay healthy and colorful.

    For a great fish diet, mix up what you feed them. Try out different recipes to give them a variety of nutrients. Feeding them small amounts often and choosing the right foods can really boost their health.

    Your effort to learn about fish nutrition will change how you care for them. Every meal you make is a chance to keep them healthy, bright, and happy. It shows you care deeply about their well-being and the beauty of their home.

    FAQ

    Why should I make homemade fish food instead of buying commercial options?

    Making your own fish food lets you pick the ingredients and ensure they’re nutritious for your fish. It’s often cheaper and gives your fish fresher, better food than many store-bought options.

    How do protein requirements differ among fish species?

    Fish need different amounts of protein. Carnivorous fish need about 40-50% protein. Herbivorous fish need less, around 25-35%. Omnivorous fish need a mix, about 35-45%.

    What are the essential ingredients for homemade fish food?

    You’ll need protein sources like fish meal, shrimp, or white fish. Add plant-based parts like spirulina or algae. Use gelatin as a binder and include vitamins and minerals. Choose ingredients that match your fish’s nutritional needs.

    How long can homemade fish food be stored?

    Homemade fish food can last 2-3 months in the freezer or 1-2 weeks in the fridge. Use airtight containers and check for spoilage or freezer burn.

    Can I make fish food for different types of fish?

    Yes! Tailor recipes for different fish by changing protein sources, plant parts, and nutrient ratios. Herbivorous fish need more plants, while carnivorous fish need more animal protein.

    Are there any color-enhancing ingredients I can add to homemade fish food?

    Yes, use spirulina, astaxanthin, and beta-carotene. These can make your fish’s colors pop when used in small amounts.

    What equipment do I need to make homemade fish food?

    You’ll need a food processor or blender, measuring cups, bowls, molds, and containers. Also, a clean area, spatulas, and spoons.

    How do I ensure my homemade fish food is nutritionally complete?

    Learn what your fish needs, use quality ingredients, and add vitamins and minerals. You might also want to talk to a vet nutritionist for aquarium fish.

    Can I freeze homemade fish food?

    Yes! Freezing is a great way to keep homemade fish food fresh. Divide it into portions, use freezer-safe containers, and label them. Frozen food can last 2-3 months.

    Are there any ingredients I should avoid in homemade fish food?

    Don’t use processed human foods, preservatives, raw meats, or toxic ingredients. Always check if an ingredient is safe for your fish before adding it.

    What is your rating for the recipe?

  • Mexican Pancake

    The first time I tasted a Mexican pancake, it changed my cooking world. In a bustling street market in Oaxaca, the sound and smell of these treats caught my eye. Unlike American pancakes, these are more than breakfast. They show the rich culture and creativity of Mexico.

    Mexican pancakes are a big part of Mexican street food, known as antojitos. They’re not just food; they tell stories of flavor, texture, and family traditions. Whether you love food or are just curious, these pancakes open a door to Mexico’s food soul.

    Introduction to Mexican Pancake Traditions

    Mexican cuisine is a colorful mix of culinary traditions. Gorditas and sopes are key parts of Mexican breakfasts. These dishes connect today’s kitchens to ancient cooking ways.

    The tale of Mexican pancakes starts with maize, domesticated about 7000 years ago. Ancient people made corn nutritious through nixtamalization. This method is key to Mexican food.

    Origins of Culinary Innovation

    Mexican pancakes come from ancient cultures. Indigenous ways of making corn turned simple ingredients into amazing dishes. These dishes show generations of cooking knowledge.

    • Corn became the main food because it’s versatile
    • Nixtamalization made corn more nutritious
    • Old ways of cooking kept cultural traditions alive

    Traditional versus Modern Interpretations

    Traditional gorditas stay true to their roots, but modern versions are more varied. Street vendors and home cooks mix old techniques with new tastes.

    The change in Mexican pancakes shows the cuisine’s ability to evolve. From basic corn to creative fillings, these dishes highlight Mexico’s rich food culture.

    Essential Ingredients for Authentic Mexican Pancakes

    Making authentic Mexican pancakes starts with knowing the key ingredients. Unlike American pancakes, Mexican pancakes use masa de maiz. This gives them a special flavor and texture.

    Masa de maiz is the heart of Mexican pancakes. It’s a corn dough that turns simple ingredients into something magical. This traditional base is different from wheat flour, offering a unique taste and nutrition.

    • Fresh masa de maiz (corn dough)
    • Organic cornmeal
    • Water
    • Salt
    • Optional: eggs for binding

    Preparing tortilla de maiz needs careful ingredient choice. Even simple ingredients can greatly affect the final taste. Fresh, stone-ground corn gives the most authentic flavor, making pancakes burst with Mexican taste.

    Professional chefs say to use high-quality, locally sourced corn for the best masa de maiz. The texture and flavor of your ingredients are key to making great Mexican pancakes.

    Authentic Mexican pancakes are more than just a meal—they’re a celebration of cultural culinary traditions.

    Traditional Masa de Maiz Base Preparation

    Making the perfect masa de maiz base is an art in Mexican cooking. It starts with understanding how to make masa. You need quality ingredients and traditional techniques to make these dishes.

    The secret to great masa is choosing the right ingredients. You’ll need:

    • 2 cups of masa harina
    • 2-2.5 cups of hot water
    • 1 tablespoon of canola oil
    • 1 teaspoon of kosher salt

    Achieving the Perfect Consistency

    Your masa should feel like soft play-doh. Consistency is key for huarache or tlacoya. Mix hot water with masa harina slowly to avoid lumps. The masa should stick together and feel moist.

    Grinding and Mixing Techniques

    Traditionally, corn is ground by hand, but masa harina is used today. Mix the ingredients well with your hands. For real flavor, use heirloom corn. Each 3-ounce dough makes a great Mexican pancake base.

    Temperature Control Guidelines

    Temperature is important in making masa. Warm water makes the dough smoother. Use water between 100-110°F. Work fast to keep the right moisture, so the masa doesn’t dry out or get too sticky.

    Pro tip: Let your prepared masa rest for 15-20 minutes before shaping to allow the ingredients to fully integrate.

    Mexican cuisine is full of antojitos, each with its own pancake twist. Memelas are a standout, showing the variety of Mexican street foods. They highlight the rich culinary diversity of Mexico.

    There are many pancake styles, each with its own story. Some top memela variations include:

    • Oaxacan-style memelas with black bean spread
    • Puebla region’s crispy corn-based pancakes
    • Michoacán’s soft, thick antojitos
    • Central Mexico’s thin, delicate corn pancakes

    Every region adds its own special touch to these beloved dishes. Memelas often have different toppings and ways of cooking. This showcases local ingredients and cooking methods.

    RegionMemela CharacteristicKey Ingredients
    OaxacaThick, rustic textureBlack beans, queso fresco
    PueblaCrispy exteriorFresh masa, salsa roja
    MichoacánSoft, pillowy baseLocal herbs, green salsa

    Exploring street food markets or making memelas at home is a treat. Each bite shares a story of regional traditions and flavors.

    How to Make the Perfect Mexican Pancake at Home

    Making authentic mexican pancakes needs skill, patience, and detail. Whether you’re cooking at home or love to cook, learning to make these pancakes will make your breakfast better.

    To make the best mexican pancake, you must know some key techniques and avoid mistakes. Here are the important steps to make tasty pancakes every time.

    Essential Equipment

    • Griddle or non-stick skillet
    • Mixing bowls
    • Whisk or electric mixer
    • Measuring cups and spoons
    • Spatula
    • Ladle or measuring cup for batter

    Ingredient Preparation

    IngredientQuantityPurpose
    All-purpose flour2 cupsBase for pancake batter
    Baking powder4 teaspoonsProvides rise and fluffiness
    Sugar1/4 cupAdds sweetness
    Milk1 3/4 cupsCreates smooth batter consistency

    Step-by-Step Cooking Instructions

    1. Mix dry ingredients in a large bowl
    2. Whisk wet ingredients separately
    3. Combine wet and dry mixtures gently
    4. Let batter rest for 5 minutes
    5. Heat griddle to low-medium temperature
    6. Pour 1/4 cup batter per pancake
    7. Cook 1-2 minutes per side

    Common Mistakes to Avoid

    • Overmixing the batter
    • Using high heat
    • Flipping pancakes too early
    • Not letting batter rest

    Getting better at making mexican pancakes takes practice. Remember, being consistent and patient are the keys to making delicious pancakes every time.

    Regional Differences in Mexican Pancake Preparation

    Mexican cuisine is known for its amazing diversity in pancake making. Each area has its own special way of making gorditas, sopes, and huarache. This shows off local cooking traditions and what ingredients are available.

    In the Yucatán Peninsula, marquesitas are a popular street food. These thin, crispy pancakes are made with a special waffle press. They’re often filled with Edam cheese, showing the region’s creative take on cooking.

    • Northern Mexico emphasizes hearty gordita preparations
    • Central regions focus on intricate sopes techniques
    • Coastal areas incorporate seafood-inspired pancake variations

    Blue corn pancakes are another interesting variation. They come from certain Mexican states. These pancakes are full of nutrients and show off local farming and cooking ways.

    RegionSignature PancakeKey Ingredients
    YucatánMarquesitasCrêpe batter, Edam cheese
    Central MexicoBlue Corn PancakesBlue corn, native spices
    Northern MexicoGorditasCorn masa, various fillings

    Learning about these regional differences helps us see the rich world of Mexican pancake traditions. Each way of making pancakes tells a story of local ingredients, culture, and creativity in cooking.

    Traditional Toppings and Accompaniments

    Exploring desayunos mexicanos opens a world of flavors. Mexican pancakes become extraordinary with the right toppings. They can be savory or sweet, making every meal special.

    Mexican cuisine is all about variety. It turns simple breakfasts into unforgettable meals. You can choose from light and fresh to rich and indulgent toppings.

    Savory Flavor Explosions

    Savory toppings add bold flavors to your pancakes:

    • Chorizo crumbles for spicy protein
    • Refried beans with fresh cilantro
    • Scrambled eggs with green salsa
    • Cotija cheese and sliced radishes
    • Avocado slices with hot sauce

    Sweet Delightful Variations

    Sweet lovers will enjoy these toppings:

    • Cinnamon sugar sprinkle
    • Cajeta (caramel) drizzle
    • Fresh tropical fruit compote
    • Whipped cream with berry reduction
    • Chocolate sauce with toasted almonds

    “In Mexican cuisine, every topping tells a story of tradition and flavor.”

    Your Mexican pancake experience can be as unique as you are. It combines cultural tradition with your own creativity.

    Serving Suggestions and Presentation Tips

    Creating a stunning presentation for your mexican pancake or tlacoya can turn a simple meal into a memorable experience. Professional chefs understand that how food looks is just as key as how it tastes. Studies show that 75% of diners believe presentation greatly improves their dining experience.

    Here are some creative ways to present mexican pancakes:

    • Use white plates to make colors pop and increase perceived food quality
    • Create height and dimension by stacking tlacoya at slight angles
    • Garnish with fresh herbs like cilantro or micro-greens
    • Add colorful salsas or crema for visual contrast

    Color and texture are key to making your mexican pancakes look great. About 60% of chefs focus on color contrast. They know that different textures can make diners 30% happier.

    “A beautifully presented dish tells a story before the first bite is taken.” – Culinary Expert

    For home cooks, learning to plate can boost your confidence. Use fresh ingredients, vibrant garnishes, and careful arrangement. This can turn your tlacoya into a dish worthy of a restaurant.

    Health Benefits and Nutritional Information

    Mexican pancakes made from masa de maiz are not just tasty. They are also good for you. Knowing what’s in tortilla de maiz helps you choose better foods.

    These pancakes start with corn flour. It has a lot of good stuff in it:

    • Energy content: 361 Kcals per 100 grams
    • Protein: 6.93 g per 100 grams
    • Carbohydrates: 76.8 g per 100 grams
    • Dietary fiber: 7.3 g per 100 grams
    • Fat: 3.86 g per 100 grams

    Dietary Considerations

    Masa de maiz is special because it’s gluten-free. This makes it great for people with gluten issues. It also has lots of fiber, which is good for your stomach and can help you feel full longer.

    “Corn flour is more than just a ingredient – it’s a nutritional powerhouse” – Nutrition Expert

    Caloric Content and Macronutrients

    A serving of Mexican pancakes usually has:

    • Calories: 200-300 per serving
    • Protein: 20-30 grams
    • Carbohydrates: 20-35 grams
    • Fiber: 2-5 grams
    • Fat: 2-10 grams

    You can make these pancakes even healthier by adding protein or different ingredients. Just remember to eat them in moderation to keep your diet balanced.

    Storage and Reheating Guidelines

    Keeping memelas and other antojitos fresh is key. Whether you’ve made a batch of Mexican pancakes or saved leftovers, the right storage and reheating are crucial. They help keep the authentic taste and texture.

    Freezing is a great way to keep your pancakes fresh longer. Here are some important storage tips:

    • Cool pancakes completely before storage (approximately 10 minutes)
    • Freeze individual pancakes for 30 minutes to prevent sticking
    • Use resealable plastic bags for organized preservation
    • Mexican pancakes can be frozen for up to 3 months

    Reheating is important to keep memelas tasting like new. Different methods work better for different people:

    Reheating MethodTimeTemperature
    Microwave60 secondsMedium heat
    Toaster1 minuteMedium setting
    Skillet10 minutes totalMedium heat

    Always make sure the internal temperature of reheated antojitos is at least 165°F for safety. A tip: Sprinkle a bit of water or use a damp paper towel to avoid drying out.

    For the best taste, use frozen Mexican pancakes within three months. Mark your storage bags with the date to keep track of freshness. Proper storage not only keeps flavors fresh but also makes meal prep easier on busy days.

    Conclusion

    Your journey into Mexican pancakes opens a world of flavor. It’s more than just breakfast. It connects you to Mexican traditions.

    Exploring Mexican pancakes is exciting, whether you’re new or experienced. These pancakes bring authentic Mexican cuisine into your home. Each recipe shares stories of Mexico’s rich heritage.

    From crispy masa pancakes to savory toppings, you’ve found a world of taste. The mexican pancake is more than food. It invites you to explore and celebrate Mexican cooking.

    Begin your culinary adventure today. With practice and passion, you’ll make delicious Mexican breakfasts. They’ll take you straight to Mexico’s vibrant food culture.

    FAQ

    What exactly are Mexican pancakes?

    Mexican pancakes, or antojitos, are traditional corn-based flatbreads. They are made from masa de maiz, unlike American-style wheat flour pancakes. You’ll find varieties like gorditas, sopes, huaraches, and memelas. These are often served as street food or breakfast items.

    How do Mexican pancakes differ from traditional American pancakes?

    Mexican pancakes are made from corn dough (masa de maiz), unlike American pancakes made from wheat flour. They are thicker, more substantial, and often served with savory toppings, not sweet syrups.

    What are the most common types of Mexican pancakes?

    You’ll find popular types like gorditas (thick corn pockets), sopes (thick corn base with raised edges), and huaraches (oval-shaped corn bases). Memelas (open-faced corn cakes) and tlacoyas (stuffed corn flatbreads) are also favorites.

    Are Mexican pancakes gluten-free?

    Most traditional Mexican pancakes are gluten-free because they use corn dough instead of wheat flour. But, always check the ingredients and preparation methods to ensure they are gluten-free.

    What typical toppings are used on Mexican pancakes?

    You can top Mexican pancakes with salsa, shredded meat, cheese, beans, and nopales (cactus). Avocado, crema, and sometimes eggs are also popular. Toppings vary by region and personal taste.

    How do I make authentic masa de maiz for Mexican pancakes?

    To make authentic masa de maiz, grind dried corn kernels treated with lime (nixtamalization). Then mix with water to create a smooth dough. Traditional methods use stone grinders, while modern techniques use food processors.

    Can Mexican pancakes be part of a healthy diet?

    Yes, Mexican pancakes can be healthy. Use whole grain corn masa and top with lean proteins and vegetables. They offer complex carbohydrates, fiber, and are often lower in fat than wheat-based alternatives.

    What equipment do I need to make Mexican pancakes at home?

    You’ll need a comal (traditional flat griddle), tortilla press, mixing bowl, and measuring tools. A grain grinder is optional for making fresh masa de maiz from scratch.

    How should I store leftover Mexican pancakes?

    Store cooled Mexican pancakes in an airtight container in the fridge for 3-4 days. Reheat on a comal or skillet to restore their texture. Avoid microwaving, as it can make them soggy.

    Are Mexican pancakes only a breakfast food?

    No, Mexican pancakes are enjoyed throughout the day. They can be breakfast, lunch, dinner, or late-night snacks, depending on the region and preparation.

  • Peanut Butter Sauce For Ice Cream

    Every summer night, I remember the magic of a perfect ice cream topping. It turns an ordinary dessert into an extraordinary experience. Imagine drizzling a smooth peanut butter sauce over vanilla ice cream. It creates a moment of pure bliss that connects us to childhood memories and comfort.

    Making your own peanut butter sauce is an art form. With just four simple ingredients, you can create a creamy sauce. The roasted peanut flavor will tantalize your taste buds, making homemade ice cream toppings a delightful adventure in your kitchen.

    This guide will show you how to make the most decadent peanut butter sauce. It takes mere minutes to prepare. Get ready to unlock a world of delicious possibilities that will impress your family and friends.

    The Perfect Peanut Butter Sauce: An Introduction

    Explore the world of dessert toppings with a game-changing ingredient. Peanut butter sauce is more than just a condiment. It turns simple desserts into unforgettable experiences.

    Understanding the Basics of Ice Cream Toppings

    Traditional ice cream toppings often lack flavor and nutrition. Peanut butter sauce changes that. It’s a protein-rich snack that makes your dessert special. Unlike chocolate or caramel, peanut butter sauce offers a creamy texture and health benefits.

    • Quick preparation (can be made in minutes)
    • Versatile across multiple desserts
    • Packed with healthy fats

    Why Peanut Butter Sauce is a Game-Changer

    Imagine a sauce that’s both delicious and nutritious. Peanut butter sauce has 36 grams of protein per serving. It’s not just a topping; it’s a smart choice for your diet. Its smooth consistency makes any ice cream taste like gourmet.

    Health Benefits and Nutritional Value

    This sauce is not just tasty. It’s also full of healthy fats and nutrients. With only 25 grams of sugar and lots of dietary fiber, it’s a guilt-free treat. It supports your health goals without sacrificing taste.

    Nutritional HighlightAmount
    Protein36g
    Total Fat72g
    Dietary Fiber14g

    Essential Ingredients for Peanut Butter Sauce

    Making the perfect peanut butter sauce needs the right ingredients. These ingredients make your ice cream even better. The main ingredient is peanut spread, which is full of flavor and good for you.

    Your main ingredients are:

    • 1/2 cup creamy natural peanut butter
    • 2 tablespoons maple syrup
    • 1/4 to 1/2 cup water
    • Pinch of salt
    • Optional: 1/8 teaspoon cayenne pepper for heat

    Choose a high-quality, natural peanut spread for the best taste and nutrition. It makes the sauce creamy and adds protein, healthy fats, and minerals.

    Each ingredient plays a key role. Maple syrup adds sweetness, water makes it the right consistency, and salt balances the taste. Adding cayenne pepper gives it a warm kick.

    Pro tip: Always use room temperature ingredients for the smoothest sauce texture.

    If you have dietary restrictions, you can still make this sauce. Swap maple syrup for honey or a sugar-free option. Use water or plant-based milk to change the sauce’s thickness.

    Kitchen Equipment You’ll Need

    Making a tasty peanut butter sauce needs the right tools. This ingredient needs special equipment for smooth prep and great results. Whether you cook at home or love desserts, the right tools are key to your success.

    Essential Tools for Preparation

    To make the best peanut butter sauce, you’ll need a few things:

    • Stainless steel saucepan (3.8-liter capacity)
    • Pyrex mixing bowl (1-liter size)
    • Whisk or silicone spatula
    • Measuring cups and spoons

    The stainless steel saucepan is key for heating your sauce. It’s safe up to 240°C and has a 5.2mm aluminum base. This ensures your sauce heats evenly.

    Optional Equipment for Storage

    After making your sauce, think about these storage options:

    Storage ItemCapacitySpecial Features
    Pyrex Glass Container1 literOven, microwave, and freezer safe
    Airtight Glass Jar500 mlPerfect for refrigeration
    Squeeze Bottle250 mlEasy drizzling

    Good storage containers keep your peanut butter sauce fresh longer. Pro tip: Always use clean, dry containers to keep moisture out and keep it fresh.

    Step-by-Step Preparation Method

    Making a rich peanut butter sauce needs careful steps and attention. Your homemade sauce will bring out the true roasted peanut taste. This turns simple ice cream into a special dessert.

    Here’s how to prepare it in easy steps:

    1. Gather your ingredients, making sure they’re fresh and top-notch
    2. Measure accurately to get the perfect flavor mix
    3. Choose a medium saucepan for even heat
    4. Mix ingredients gently and steadily

    To get a creamy sauce, control the heat and how you mix. Start by warming your peanut butter slowly over low heat. This keeps the roasted peanut taste. Stir constantly to avoid burning and keep it smooth.

    Work towards a five-minute processing time. This lets the ingredients mix well and creates a deep, rich flavor. This flavor will enhance your ice cream perfectly.

    Pro tip: If your sauce is too thick, add a bit of warm milk or cream. For a thicker sauce, let it cool a bit before serving.

    • Temperature matters: Keep heat low and steady
    • Stir consistently: Prevent ingredient separation
    • Taste as you go: Adjust sweetness and salt levels

    With practice, you’ll make a peanut butter sauce as good as a restaurant. It will wow your family and friends.

    Achieving the Perfect Consistency

    To make a creamy peanut butter sauce, you need to know how to change its thickness. You can easily go from thick to thin. This shows how versatile peanut butter can be.

    The right texture is key for a perfect peanut butter sauce. You might need to adjust the thickness for different desserts and ice cream.

    Troubleshooting Texture Challenges

    Getting the sauce just right means knowing about common problems:

    • Too thick: It’s hard to spread
    • Too thin: It loses flavor
    • Temperature sensitive: Changes how thick it is

    Practical Thinning and Thickening Techniques

    Professional chefs suggest these tips for the perfect sauce:

    1. Thinning methods:
      • Add warm water slowly
      • Mix in milk or cream
      • Warm it gently
    2. Thickening strategies:
      • Cool the sauce down
      • Add powdered sugar
      • More peanut butter
    Consistency GoalTechniqueResult
    DrizzlingAdd warm waterLighter flow
    SpreadingRefrigerate brieflyFirmer texture
    DippingAdjust temperatureMedium viscosity

    Remember, temperature affects your sauce’s thickness. Warm makes it thinner, cool makes it thicker.

    Storage and Shelf Life Tips

    Storing your peanut butter sauce right is important. It keeps the sauce fresh and tasty. Always keep it in the fridge to avoid spoilage.

    Here are some key tips for storing your homemade sauce:

    • Use an airtight glass container for storage
    • Keep the sauce refrigerated at all times
    • Consume within 2 weeks for optimal taste
    • Avoid storing at room temperature

    Pro tip: Natural peanut butter sauces tend to separate more quickly due to their minimal ingredient list. Stirring the sauce before each use helps maintain its consistent texture and prevents oil separation.

    “Proper storage is the secret to enjoying your nutrient-dense food at its best”

    Reheating your sauce is easy. Take it out of the fridge 30 minutes before you serve it. Or, warm it in the microwave for 10-15 seconds. Always check for any signs of spoilage, such as unusual odors or mold, before consuming.

    Remember, keeping it in the fridge makes your sauce last longer. It stays fresh and delicious for your favorite ice cream and dessert toppings.

    Serving Suggestions and Pairings

    Peanut butter sauce makes simple desserts into amazing treats. It’s a great ingredient for making tasty desserts that are also good for you. It’s a protein-rich snack option too.

    Find new ways to make your desserts better with this tasty sauce. It’s perfect for making old favorites even better or trying new things in the kitchen. Peanut butter sauce is your go-to for amazing desserts.

    Classic Ice Cream Combinations

    Make your favorite ice cream even better with peanut butter sauce. Here are some great ideas:

    • Chocolate ice cream drizzled with warm peanut butter sauce
    • Vanilla bean ice cream topped with chunky peanut butter swirls
    • Banana split featuring a generous peanut butter sauce coating
    • Caramel ice cream with a rich peanut butter sauce ribbon

    Creative Dessert Applications

    Peanut butter sauce is not just for ice cream. It can make many desserts even better:

    1. Drizzle over pound cake for added richness
    2. Swirl into cheesecake for a nutty twist
    3. Use as a topping for pancakes and waffles
    4. Spread on apple slices for a protein-rich snack
    5. Mix into smoothies for extra flavor and nutrition

    Try these ideas and let your creativity run wild. Peanut butter sauce is more than just a topping. It’s a way to make your desserts truly special!

    Nutritional Information and Dietary Considerations

    Explore the amazing health benefits of peanut butter sauce! It’s not just tasty; it’s also full of vitamins and minerals. A two-tablespoon serving offers great health perks for your diet.

    Here are the key nutritional points of this sauce:

    • Protein Powerhouse: Provides 7g of protein per serving, making it an excellent vegan protein source
    • Healthy Fats: Contains 16g of fat, with only 4% being saturated fat
    • Low Glycemic Impact: Glycemic index of just 14, helping stabilize blood sugar

    The sauce’s nutrient profile is impressive. A single serving gives you a big boost of important nutrients:

    • Copper: 43% of RDI
    • Manganese: 28% of RDI
    • Vitamin B3 (Niacin): 25% of RDI
    • Iron: 22% of RDI

    If you have dietary concerns, peanuts are a common allergen. About 1.4% of the U.S. population is affected. Always talk to your healthcare provider about any allergies or restrictions.

    Pro tip: The FDA says eating 1.5 ounces of nuts daily can help your heart. So, this peanut butter sauce is not only yummy but also good for you.

    Variations and Flavor Enhancements

    Creating a unique nut butter sauce for your ice cream opens up a world of culinary creativity. The classic roasted peanut flavor can be transformed with simple ingredient modifications. These changes elevate your dessert experience.

    Exploring different variations allows you to customize your peanut butter sauce. You can match your taste preferences and dietary needs. The versatility of nut butter enables exciting flavor experiments. These can turn a simple dessert into a gourmet treat.

    Alternative Sweeteners

    When crafting your peanut butter sauce, consider these alternative sweetener options:

    • Honey for a natural, floral sweetness
    • Maple syrup for a rich, caramel-like flavor
    • Agave nectar for a mild, neutral sweetness
    • Stevia for a zero-calorie option
    • Coconut sugar for a deeper, more complex taste

    Texture Add-ins

    Enhance your roasted peanut flavor sauce with these texture-transforming ingredients:

    • Crushed roasted peanuts for crunch
    • Mini chocolate chips for decadence
    • Toasted coconut flakes for tropical flair
    • Caramel bits for extra richness
    • Crispy rice cereal for unexpected texture

    Experimenting with different nut butter varieties can create unique flavor profiles. You can maintain the beloved roasted peanut essence. Whether you’re looking for a healthier alternative or want to explore new taste dimensions, these variations will help you craft the perfect ice cream sauce.

    Common Mistakes to Avoid

    Making the perfect peanut butter sauce needs careful attention. Many home cooks face issues that can ruin the sauce’s creamy texture. Knowing these common mistakes can help you make a tasty topping for desserts.

    • Overheating the Sauce: Too much heat can mess up the sauce’s smoothness, making it grainy or separated.
    • Using Low-Quality Ingredients: The quality of your peanut butter affects the sauce’s texture and taste.
    • Improper Mixing Techniques: Not mixing ingredients well can lead to an uneven sauce.

    Keeping the right temperature is key when making peanut butter sauce. If your sauce gets too thick, here are some quick fixes:

    1. Add a bit of warm milk or cream
    2. Reheat gently in a double boiler
    3. Whisk well to mix separated parts
    Common MistakePotential ConsequenceSolution
    OverheatingGrainy textureUse low heat, stir constantly
    Wrong Peanut ButterInconsistent flavorChoose high-quality, creamy peanut spread
    Storage ErrorsShortened shelf lifeRefrigerate properly

    Make sure your ingredients are fresh. An opened jar of peanut butter usually lasts 2 to 3 months in the pantry. Natural peanut butter stays good for 3 to 4 months in the fridge. Look out for signs of spoilage like bad smells or texture changes.

    Pro tip: Always taste and smell your peanut spread before using it in your sauce to ensure optimal quality and flavor.

    Professional Tips for Restaurant-Quality Results

    Making a top-notch peanut butter sauce is more than just mixing stuff. Chefs know it takes precision and skill to turn this ingredient into a great topping.

    Experts say there are a few key ways to make your sauce better:

    • Choose the best roasted peanut flavor ingredients
    • Control the temperature carefully while making it
    • Get the right kitchen tools
    • Learn to keep it smooth with the right technique

    To get that perfect sauce, you need to know how ingredients work together. Chefs say to heat them slowly to avoid lumps and keep it smooth.

    TechniqueProfessional Recommendation
    Ingredient SelectionGo for top-notch peanut butter with few additives
    Mixing MethodWhisk well to mix air in and get a silky feel
    Temperature ControlKeep the heat low and steady to avoid burning

    Scaling up recipes? Keep the same careful steps. Precision is key to keep the flavor and quality the same for more servings.

    Professional chefs say mastering a sauce is about knowing its chemistry and valuing each ingredient.

    By using these expert tips, you can make your peanut butter sauce amazing. It will taste like it’s from a restaurant, all in your own kitchen.

    Conclusion

    Making your own peanut butter sauce for ice cream is more than a fun project. It’s a way to make a simple dessert into a healthier treat. By learning this recipe, you’ve found a topping that adds flavor and nutrition to your favorite ice cream.

    Your homemade sauce is not only tasty; it’s also a protein-rich snack. It has about 7 grams of protein per serving and lots of healthy fats. These fats are good for your heart and make you feel full.

    But remember, it’s important to eat it in moderation. Peanut butter sauce is high in calories, so enjoy it wisely. Try different flavors, adjust the sweetness, and make it your own. This way, you’ll get a treat that’s both delicious and healthy.

    Keep trying new things, stay curious, and enjoy making your own peanut butter sauce!

    FAQ

    How long can I store homemade peanut butter sauce?

    You can keep homemade peanut butter sauce in the fridge for 1-2 weeks. Use clean utensils when serving. Keep it sealed to keep it fresh and creamy.

    Can I use different types of nut butter instead of peanut butter?

    Yes! Try almond butter, cashew butter, or sunflower seed butter for different tastes. Each nut butter adds its own flavor and nutrition.

    Is peanut butter sauce suitable for people with dietary restrictions?

    Peanut butter sauce is vegan and gluten-free. For nut allergies, use seed butters. You can also adjust the sugar or sweetener to fit your diet.

    How can I thin out my peanut butter sauce if it’s too thick?

    Add warm milk, cream, or water a little at a time. Stir until it’s creamy. For a richer taste, use milk or cream.

    What are the best ways to serve peanut butter sauce?

    Drizzle it on brownies, waffles, pancakes, or as a fruit dip. It’s a tasty topping for both sweet and savory dishes.

    Can I make the sauce ahead of time?

    Yes! Make it a few days before and store it in the fridge. Reheat and stir before serving for a smooth sauce.

    Are there any nutritional benefits to peanut butter sauce?

    Peanut butter is full of healthy fats, protein, and minerals. The sauce adds protein, magnesium, and heart-healthy fats to desserts.

    How can I prevent my peanut butter sauce from separating?

    Use low heat and whisk constantly. Adding oil or corn syrup helps keep it smooth.


  • Seitan Recipes

    I remember the first time I found seitan. It was a game-changer for me. I was looking for tasty vegan protein options, and seitan was a revelation.

    Seitan is more than a trend. It’s a protein-rich food that can stand in for meat in many dishes. With 25 grams of protein and just 142 calories, it’s a nutritional powerhouse.

    Whether you’re vegan or just trying out meat substitutes, seitan is a great choice. It can make your dishes more flavorful and nutritious. From tender cutlets to rich roasts, seitan is set to become a favorite in your kitchen.

    Understanding Seitan: A Plant-Based Protein Powerhouse

    Explore the world of seitan, a wheat gluten-based meat alternative loved by plant-based food fans. It’s a protein powerhouse with great nutrition and cooking flexibility. This makes it stand out among vegetarian choices.

    Seitan’s history goes back to ancient Asian cooking. It’s a protein-rich food that turns wheat gluten into a tasty meat substitute.

    Origins and Cultural Significance

    Seitan’s roots are in Buddhist monasteries, where it was a protein source for vegetarian monks. Various cultures have their own ways of making this wheat-based protein:

    • Chinese cuisine makes dense, chewy seitan for mock meats
    • Japanese traditions have fu, a lighter wheat protein
    • Western cooking aims for meat-like textures

    Nutritional Powerhouse of Wheat Gluten

    Seitan is a top plant-based protein. It’s full of nutrients, offering lots of protein without too many calories or fat.

    NutrientAmount per 100g
    Protein25-30g
    CarbohydratesLess than 10g
    FatLess than 5g

    Why Seitan Beats Other Meat Alternatives

    Seitan is the best plant-based protein. It has unique qualities that make it better than many meat substitutes:

    1. Great flavor absorption
    2. Meat-like texture
    3. High protein content
    4. Low calorie profile
    5. Versatile cooking methods

    Whether you’re vegan or just trying plant-based foods, seitan is a tasty, nutritious choice. It doesn’t sacrifice taste or texture.

    Essential Ingredients for Making Perfect Seitan

    Starting with the right ingredients is key to making tasty high protein vegetarian dishes. This guide will help you make the perfect plant-based protein alternative at home.

    Vital Wheat Gluten Basics

    Vital wheat gluten is the main ingredient in seitan. It’s a concentrated protein powder from wheat protein. For a basic recipe, you’ll need 1 1/2 cups of vital wheat gluten flour. This adds a lot of protein to your meals.

    Supporting Ingredients and Seasonings

    To add flavor and texture, consider these ingredients:

    • 1 cup water or vegetable broth
    • 1/4 cup soy sauce or tamari
    • Nutritional yeast (optional)
    • Spices and herbs for extra flavor

    Equipment You’ll Need

    Seitan preparation is simple with the right tools. Here’s what you need:

    1. Large mixing bowl
    2. Measuring cups
    3. Whisk or fork
    4. Cooking pot or Instant Pot
    5. Cutting board
    IngredientQuantityProtein Content
    Vital Wheat Gluten1 1/2 cups25g per serving
    Vegetable Broth1 cupFlavor enhancement
    Soy Sauce1/4 cupUmami flavor

    With these ingredients and tools, you’re set to make a high protein vegetarian dish. Try different seasonings to find your favorite seitan recipe!

    Basic Seitan Recipe for Beginners

    Making your own mock meat at home is simpler than you think! This easy seitan recipe will show you how to make a tasty, meatless protein. It’s full of nutrition and flavor.

    Seitan is a great plant-based protein for cooking. With just a few ingredients, you can make a protein-rich mock meat. It’s perfect for many dishes.

    Ingredients You’ll Need

    • 1½ cups vital wheat gluten
    • ¼ cup nutritional yeast
    • 1 tablespoon garlic powder
    • 1 cup vegetable broth
    • ¼ cup liquid aminos
    • 2 tablespoons olive oil

    Nutritional Breakdown

    NutrientAmount per Serving
    Protein25 grams
    Calories142 kcal
    Carbohydrates9 grams
    Fat1 gram

    Preparation Steps

    1. Mix dry ingredients in a large bowl
    2. Combine wet ingredients separately
    3. Blend wet and dry mixtures
    4. Knead the dough for 3-5 minutes
    5. Shape into a loaf or chunks
    6. Simmer in broth for 45-60 minutes

    Your homemade seitan can last up to 5 days in the fridge. Or, freeze it for 3 months. It’s great for stir-fries, sandwiches, and more!

    Pro tip: Always use fresh vital wheat gluten for the best texture and flavor in your seitan.

    Mastering the Art of Seitan Texture

    Creating the perfect vegan protein is a skill that takes time and effort. Seitan, a meat alternative, needs specific techniques to get the right texture. This texture should mimic traditional proteins.

    Getting the right seitan texture is all about mastering a few key factors. Home cooks can learn these with practice.

    Kneading Techniques for Optimal Texture

    Kneading is key to seitan’s texture. Your kneading method greatly affects the final texture:

    • For softer textures, knead for 3-5 minutes
    • For firmer, more meat-like consistency, knead longer
    • Use less liquid for denser texture
    • Experiment with mixing techniques

    Cooking Methods Comparison

    Cooking MethodTexture ResultCooking Time
    SteamingMoist and tender30 minutes
    BakingFirm and chewy30-40 minutes
    SimmeringSoft and flavorful1 hour

    Troubleshooting Texture Issues

    Working with seitan can lead to texture problems. Keep experimenting to find your perfect technique!

    • Tough texture? Reduce kneading time
    • Crumbly seitan? Add more liquid
    • Bland flavor? Incorporate more seasonings

    Creating the perfect seitan takes practice. Each batch helps you learn more about this versatile vegan protein.

    Teriyaki Seitan Cutlets with Mango Salsa

    Make your plant-based meals exciting with these tasty teriyaki seitan cutlets. They show that meat substitutes can be both flavorful and fun. This recipe adds a tropical twist to your cooking, making it feel like a restaurant dish at home.

    To make these seitan cutlets, follow a few important steps:

    • Steam seitan cutlets until tender
    • Create a vibrant teriyaki marinade
    • Pan-sear or grill for caramelized edges
    • Prepare fresh mango salsa

    The key to great seitan is in the preparation and seasoning. Your seitan will soak up the teriyaki flavors, making it a dish that everyone will love.

    IngredientQuantityPurpose
    Vital Wheat Gluten1 cupBase for seitan cutlets
    Teriyaki Sauce1/2 cupMarinade and flavor
    Mango1 ripeSalsa preparation
    Avocado1Salsa texture

    There are many ways to enjoy your dish:

    1. Tacos with mango avocado salsa
    2. Drizzled with mango basil sauce
    3. Served as a standalone main course

    Pro tip: Marinate your seitan for at least 30 minutes to maximize flavor absorption.

    This recipe takes about 25-40 minutes to make and has over 3,000 ratings. It’s a game-changer for anyone looking to try new plant-based dishes.

    High-Protein Seitan Patties with Rich Broth

    Discover a delicious meat alternative that packs a powerful protein punch. Seitan patties offer an incredible high-protein option for anyone looking to diversify their plant-based meals. With approximately 21 grams of protein per 3-ounce serving, these patties are a nutritional powerhouse that can transform your cooking.

    Creating the perfect seitan patties requires attention to detail and understanding of preparation techniques. The recipe typically calls for 2 cups of vital wheat gluten, 1.5 cups of vegetable broth, and 2 tablespoons of soy sauce to create a robust flavor profile.

    Preparing the Perfect Cooking Broth

    The cooking broth is crucial for infusing flavor into your seitan patties. Consider these key ingredients for a delicious broth:

    • Vegetable stock
    • Soy sauce
    • Herbs and spices
    • Optional: nutritional yeast for added depth

    Storage and Preservation Tips

    Proper storage ensures your high-protein meat alternative remains fresh and delicious. Store seitan in an airtight container in the refrigerator for up to one week. For long-term preservation, you can freeze seitan for up to 6 months.

    Serving Suggestions

    Seitan patties are incredibly versatile. Slice them for sandwiches, chop them into stir-fries, or serve whole as a main course. Their firm texture makes them an excellent protein source for various culinary applications.

    Pro tip: Experiment with different marinades and cooking methods to keep your seitan dishes exciting and flavorful!

    Creative Ways to Season and Marinate Seitan

    Turning seitan into a tasty vegetarian dish needs creativity and the right seasoning. Fans of mock meat can make their plant-based protein more exciting. This is done by using new marinating methods that add depth and fun to each bite.

    Here are some great ways to season your seitan:

    • Asian-inspired marinades with soy sauce and ginger
    • Smoky barbecue rubs using paprika and liquid smoke
    • Mediterranean herb blends with oregano and thyme
    • Spicy Cajun-style seasoning mixes

    Seitan’s flavor can go way beyond simple seasonings. By knowing how ingredients work together, you can make mock meat that tastes just like the real thing. This is great for anyone who loves meat but wants to try something new.

    Flavor ProfileKey IngredientsPreparation Time
    Smoky BBQSmoked Paprika, Liquid Smoke15 minutes
    Asian TeriyakiSoy Sauce, Ginger, Garlic20 minutes
    Spicy CajunCayenne, Thyme, Oregano10 minutes

    Marinating time affects how strong the flavors are. Quick 30-minute marinades add a hint of flavor. But, soaking it overnight makes the flavors richer and more intense. This is perfect for those who love trying new vegetarian dishes.

    Quick and Easy Weeknight Seitan Dishes

    Make your weeknights easier with meatless wheat gluten recipes. They are both healthy and tasty. Seitan is a great protein source for quick dinners that taste great.

    30-Minute Meal Ideas

    Quick seitan recipes can make your weeknights simpler:

    • Stir-Fried Seitan with Vegetables (20 minutes total)
    • Seitan Fajita Skillet (25 minutes prep)
    • Quick Wheat Gluten Curry (30 minutes from start to finish)

    Batch Cooking Strategies

    Save time with smart batch cooking for wheat gluten:

    1. Make big batches of seitan on weekends
    2. Freeze individual portions
    3. Marinate ahead for richer flavors

    Family-Friendly Options

    Offer meatless options that everyone will love with versatile seitan recipes. Texture and seasoning are key to making wheat gluten dishes irresistible.

    “Seitan transforms ordinary meals into exciting culinary adventures for the whole family!” – Plant-Based Chef Recommendation

    With just 55 minutes of prep, you can make tasty meals with about 25 grams of protein per serving. These recipes serve 4 and have a 250% approval rating.

    Conclusion

    Seitan is more than just a meat substitute. It’s a great vegan protein that can change how you cook. It’s good for you and the planet too.

    Adding seitan to your meals is good for your taste buds and the environment. It uses less water and land than animal proteins. For example, chicken needs a lot of water, but seitan is much better for the planet.

    Keep trying new things with seitan. Try different flavors and cooking methods. It’s perfect for vegans, flexitarians, or anyone looking for a tasty, green protein.

    Every time you cook with seitan, you’re helping yourself and the Earth. Your food choices can really make a difference, one delicious dish at a time.

    FAQ

    What exactly is seitan?

    Seitan is a protein made from wheat gluten. It’s a favorite among vegetarians and vegans for its meat-like texture and high protein. It’s made by washing wheat flour dough to remove starch, leaving the gluten behind.

    Is seitan a good source of protein?

    Yes, it is! Seitan has about 25 grams of protein per 3.5-ounce serving. It’s great for vegans and vegetarians looking for a protein-rich meat substitute. Unlike many plant-based proteins, seitan is a complete protein like animal sources.

    How do I make seitan at home?

    To make seitan, you need vital wheat gluten. Mix it with water or broth, add seasonings, knead the dough, and cook it. The right texture comes from proper kneading and cooking.

    Is seitan gluten-free?

    No, seitan is not gluten-free. It’s made from wheat gluten, which is the protein in wheat that makes bread stretchy. It’s not good for people with celiac disease or gluten sensitivities.

    How can I store seitan?

    Store seitan in an airtight container in the fridge for up to 7 days. Freeze it for up to 3 months. Always cool it before storing and keep it in liquid to stay moist.

    What does seitan taste like?

    Seitan tastes neutral, a bit like wheat. It’s amazing at soaking up flavors, making it versatile. Seasoned well, it can taste like chicken or beef.

    Can I use seitan in different cuisines?

    Yes! Seitan works in many cuisines. Try it in Asian stir-fries, Mexican tacos, Mediterranean kebabs, or even in American dishes like barbecue or sandwiches.

    Is seitan nutritionally comparable to meat?

    Seitan is high in protein and low in fat, like lean meats. But, it lacks some amino acids found in animal proteins. Eat it with other plant-based proteins like legumes and nuts for a balanced diet.

    What equipment do I need to make seitan?

    You’ll need a mixing bowl, measuring cups, a pot, and a cutting board. A stand mixer, steamer basket, and food processor can be helpful for more recipes.

    Are there any common mistakes to avoid when making seitan?

    Avoid over-kneading, not seasoning enough, and wrong cooking methods. Knead gently, season well, and try different cooking ways to get the right texture.

    What is your rating for the recipe?

  • Jello Chocolate Pudding Pie

    Family gatherings were always special, especially when a chocolate dessert was on the menu. The excitement grew when a homemade chocolate pudding pie was brought out. It was more than just a dessert; it was a way to connect families.

    Looking for the perfect chocolate pudding pie? Your search ends here. This no-bake treat combines a creamy chocolate filling with a crunchy cookie crust. It’s easy to make and utterly delicious. Whether you’re new to baking or have years of experience, this pie will become a favorite.

    What Makes Jello Chocolate Pudding Pie Special

    Discover the ultimate indulgent treat that captures the heart of American dessert tradition. Jello Chocolate Pudding Pie is a beloved classic. It turns simple ingredients into a creamy, nostalgic experience. This dessert blends the rich depth of cocoa powder with a silky baked custard.

    This pie is special because of its irresistible flavors and textures. It’s easy to make, perfect for busy cooks and passionate bakers. Each slice offers a perfect balance of sweetness and richness, making everyone want more.

    A Classic American Comfort Dessert

    The pie is more than a sweet treat; it’s a slice of culinary nostalgia. It has roots in traditional American home cooking, bringing families together. The nutritional profile is interesting:

    • Approximately 320 calories per slice
    • 45 grams of total carbohydrates
    • 5.8 grams of protein
    • 13.5 grams of total fat

    Perfect for Any Occasion

    Whether it’s a family gathering, potluck, or just a sweet craving, this pie is perfect. It’s a crowd-pleaser for birthdays, holidays, or any time you want something delicious.

    Time-Saving Convenience

    Busy bakers will love this pie! It’s quick to make without sacrificing taste. With just a few ingredients and minimal prep, you can have a stunning dessert in under an hour. Chill time is only 2 hours, so you can serve it fast.

    Pro tip: For the best results, use a 5-ounce box of Jell-O Cook and Serve Chocolate Pudding and allow the pie to chill for at least 3 hours before serving.

    Essential Ingredients for Your Chocolate Pudding Pie

    Making the perfect chocolate pudding pie begins with picking top-notch ingredients. These ingredients should give your pie a smooth texture and deep flavor. The right mix of components is key to a delicious dessert.

    Here are the main ingredients for a tasty pie:

    • Low-fat milk (2 cups) – Creates a smooth pudding base
    • Instant chocolate pudding mix (5.9 ounces) – Delivers intense chocolate flavor
    • Graham cracker crust (9-inch) – Provides a delightful crispy foundation
    • Frozen whipped topping (8 ounces, thawed) – Adds light, creamy finish
    • Chocolate shavings (1/4 cup) – Offers elegant garnish

    The graham cracker crust is vital for your pie’s taste and texture. Its sweet, crumbly taste goes well with the chocolate pudding. Choose high-quality pudding mix and fresh dairy for the best results.

    IngredientQuantityPurpose
    Milk2 cupsCreates smooth pudding base
    Pudding Mix5.9 ozProvides chocolate flavor
    Graham Cracker Crust9-inchAdds crispy foundation

    Pro tip: For a richer taste, try using whole milk instead of low-fat milk. This tweak can make the pudding even more decadent and silky.

    “The secret to a perfect pie lies in the quality of its ingredients.” – Pastry Chef

    Choosing the Perfect Pie Crust Options

    Choosing the right crust can make your Jello Chocolate Pudding Pie amazing. The crust affects the taste and texture of your dessert. It’s important to know your options.

    There are many crusts that can make your chocolate pudding pie better. Let’s look at the most popular ones that go well with your dessert.

    Graham Cracker Crust: A Classic Favorite

    The graham cracker crust is a favorite among bakers. It has a sweet, nutty taste that’s great for chocolate pudding pies. Here’s what you need for a perfect graham cracker crust:

    • 1½ cups graham cracker crumbs
    • ⅓ cup melted butter
    • ¼ cup granulated sugar

    If you love chocolate, an Oreo cookie crust is perfect. You can make this crust by:

    • Crushing 24 Oreo cookies
    • Mixing with ¼ cup melted butter
    • Pressing into your pie dish

    Traditional Pie Crust: Elegant and Versatile

    A traditional pie crust is a good choice if you want your chocolate pudding to be the star. It’s perfect for those who like a classic taste.

    Crust TypeFlavor ProfilePreparation Difficulty
    Graham CrackerSweet, NuttyEasy
    Oreo CookieRich ChocolateVery Easy
    TraditionalNeutralModerate

    Your choice depends on what you like and the flavor you want for your Jello Chocolate Pudding Pie.

    Step-by-Step Preparation Guide

    Making a delicious homemade chocolate pudding pie is all about precision and passion. With these steps, your pie will go from simple ingredients to a stunning dessert.

    1. Prepare the Crust: Crush 26 chocolate cream-filled cookies (325 grams) and mix with ½ teaspoon kosher salt. Press into a 9-inch pie pan and bake at 350°F for 10-12 minutes.
    2. Create the Chocolate Filling: Whisk together whole milk, dark chocolate, granulated sugar, cornstarch, and cocoa powder in a saucepan. Add egg yolks and butter, cooking until the mixture thickens.
    3. Cool and Set the Filling: Allow the pudding mixture to cool for 30 minutes before pouring into the prepared pie crust. Refrigerate for at least 3 hours to ensure proper setting.

    These steps bring your pie recipe to life. The secret to a perfect homemade delight is patience and attention to detail.

    IngredientQuantityPurpose
    Whole Milk3 cupsBase for pudding filling
    Dark Chocolate4 ouncesRich chocolate flavor
    Egg Yolks4Thickening and richness

    Pro tip: For an extra flavor boost, add 1 tablespoon of instant espresso powder. It will deepen the chocolate’s taste. Your guests will love this delightful pie recipe!

    Patience is the secret ingredient in creating the perfect chocolate pudding pie.

    Creating the Silky Chocolate Pudding Filling

    Turn your chocolate dessert into a creamy dream with the right pudding filling. The secret is a silky texture that makes everyone happy.

    Making the perfect chocolate pudding filling takes skill and a few tricks. It takes 10-15 minutes to prepare. Then, chill it for 2-4 hours to get that silky feel.

    Professional Mixing Techniques

    Learn to make a smooth, luxurious filling that will make your dessert amazing. Here are some key mixing tips:

    • Whisk ingredients slowly to avoid lumps
    • Use a shaker bottle for fun, kid-friendly mixing
    • Strain the mixture for ultra-smooth results

    Achieving Perfect Consistency

    The perfect pudding filling needs the right mix of ingredients. Here are the key parts for a silky texture:

    IngredientQuantityPurpose
    Bittersweet Chocolate1 cup (6 oz)Rich flavor base
    Heavy Whipping Cream2 cups (16 fl oz)Creamy texture
    Cornstarch1/4 cup (1 oz)Thickening agent

    Setting Time Tips

    Be patient when making your chocolate pudding filling. Chill it for 2-4 hours to get that silky feel. Pro tip: Cover it with plastic wrap to avoid a skin.

    “The magic of a great pudding lies not just in its ingredients, but in the love and care you put into making it.” – Pastry Chef Wisdom

    Remember, 78% of home bakers use pudding in creative desserts. So, don’t be afraid to try new things!

    Whipped Topping and Garnish Ideas

    Make your Jello Chocolate Pudding Pie even more special with creative toppings. The right garnish can turn a simple dessert into a stunning masterpiece. It will impress your guests and satisfy your sweet tooth.

    Your pie needs amazing finishing touches. Here are some delightful garnish options to make your chocolate dessert unforgettable:

    • Chocolate Chips: Sprinkle semisweet, milk, or dark chocolate chips across the whipped cream for a delightful crunch
    • Chocolate Drizzle: Create elegant patterns using melted chocolate or chocolate syrup
    • Fresh whipped cream swirls
    • Chocolate curls or shavings
    • Crushed Oreo cookies
    • Caramel sauce ribbons
    • Fresh berries for a colorful contrast

    When making your whipped topping, whip 1½ cups of heavy cream with ¼ cup powdered sugar until stiff peaks form. This creates a light, airy complement to the rich chocolate pudding layer.

    “The perfect garnish transforms a good dessert into an unforgettable culinary experience.”

    Pro tip: Chill your garnishes before applying to maintain their texture and prevent melting. Your Jello Chocolate Pudding Pie will look as incredible as it tastes!

    Storage and Make-Ahead Tips

    Keeping your homemade delight fresh is key. Your Jello Chocolate Pudding Pie needs special care. This ensures its creamy texture and rich flavor stay intact.

    Proper refrigeration is vital for your chocolate dessert. Follow these tips for the best taste and texture:

    Refrigeration Guidelines

    • Refrigerate the pie right after making it
    • Use a sealed container to avoid flavor loss
    • Keep it refrigerated for 4-6 hours for the best setting
    • Enjoy it within 3 days for the best taste and texture

    Freezing Instructions

    Freezing is possible, but be cautious. It might change the pie’s smooth texture:

    1. Freeze in an airtight container
    2. Freeze for up to 3 months
    3. Thaw in the fridge for a few hours before eating
    4. Texture might change after thawing

    Shelf Life Information

    Your chocolate dessert has a short but sweet shelf life. For the best taste, eat it within 24-48 hours. Look out for signs like separation or weeping, which mean it’s time to throw it away.

    Pro Tip: Always cover your pie with plastic wrap or aluminum foil. This keeps it fresh and prevents moisture loss.

    Recipe Variations and Creative Twists

    Turn your classic chocolate dessert into a fun adventure with these creative twists. The Jello Chocolate Pudding Pie is perfect for making your own special version. It will make your taste buds happy and impress your friends.

    Try these exciting flavor changes to make your chocolate dessert even better:

    • Mint Chocolate Fusion: Add 1-2 teaspoons of peppermint extract to the pudding mix for a refreshing chocolate experience
    • Peanut Butter Swirl: Incorporate 1/4 cup of creamy peanut butter into the chocolate pudding layer for a rich, nutty dimension
    • Espresso Infusion: Mix 2 tablespoons of instant espresso powder into the pudding for a sophisticated mocha twist

    Want to get even more creative? Here are some cool ways to present your pie:

    1. Create mini individual pudding pies in small ramekins
    2. Design a layered pudding parfait with alternating chocolate and vanilla layers
    3. Top your pie with gourmet garnishes like chocolate shavings or caramel drizzle

    Adding different textures can make your chocolate dessert even more special. Try adding crunchy elements like toasted nuts or crushed cookies on top. Each twist adds a new flavor to the classic, making your Jello Chocolate Pudding Pie a hit.

    Nutritional Information and Serving Size

    Enjoying a slice of chocolate pudding pie is a treat. It’s important to know its nutritional profile. This dessert offers a mix of flavor and nutrients that can be part of a balanced diet.

    A typical slice of chocolate pudding pie has about 268 calories. Here’s a detailed look at its nutritional content:

    NutrientAmount% Daily Value
    Total Calories268 kcal13%
    Total Fat11.3g15%
    Saturated Fat4g20%
    Carbohydrates39.6g14%
    Sugar31.9g
    Protein3.1g6%

    For those watching their intake, here are some tips:

    • Stick to a single slice
    • Balance with lighter meals throughout the day
    • Consider sharing with friends or family

    This dessert is a delectable indulgent treat. But remember, moderation is key. It has some nutritional benefits, like calcium from milk and a bit of protein.

    Always check the specific recipe. Nutritional values can vary slightly based on ingredients and how it’s prepared.

    Conclusion

    Making a chocolate pudding pie is more than a recipe. It’s about creating a joyful experience in your kitchen. This classic dessert is easy to make and impresses everyone with its taste.

    Your chocolate pudding pie journey doesn’t have to stop. Try new crusts and garnishes to make it your own. It’s perfect for any occasion or when you just want something sweet.

    With simple ingredients and basic baking skills, you can make a special dessert. Share your creations, exchange tips, and enjoy every bite. Baking is about passion, fun, and making memories.

    So, get your ingredients ready, preheat the oven, and let your homemade delight shine!

    FAQ

    How long does it take to make a Jello Chocolate Pudding Pie?

    Making this dessert takes about 15-20 minutes. Then, chill it for 2-3 hours to set the filling.

    Can I make this pie ahead of time?

    Yes, you can! This pie is great for making ahead. Chill it for 2-3 days before serving, perfect for parties.

    What are some alternative crust options?

    You can use a graham cracker crust, an Oreo cookie crust for chocolate, or a traditional pie crust. Each crust gives a different taste and texture.

    Is it possible to make a dairy-free version of this pie?

    Yes, you can make a dairy-free version. Use almond milk, coconut milk, or oat milk instead of regular milk. Make sure to pick a dairy-free pudding mix.

    How can I prevent the pudding from becoming runny?

    For a smooth texture, follow the package instructions carefully. Use cold milk and chill the pie for at least 3 hours. Avoid mixing too much.

    What are some creative topping ideas?

    Add toppings like homemade whipped cream, chocolate shavings, or caramel drizzle. Crushed nuts are also great. These toppings make your pie extra special.

    How long can I store the Jello Chocolate Pudding Pie?

    Store it in the fridge for 3-4 days. Cover it with plastic wrap or use an airtight container to keep it fresh.

    Can I freeze this pie?

    You can freeze it, but the texture might change. Wrap it tightly in plastic and foil. Thaw in the fridge overnight for the best taste.

    Are there any ways to make this pie healthier?

    Use low-fat milk and sugar-free pudding mix for a healthier version. Choose a reduced-fat crust. This way, you can enjoy it while watching your calories.

    Can children help make this pie?

    Kids can help a lot! They can mix the pudding, press the crust, and add toppings. It’s a fun way to cook together as a family.

    What is your rating for the recipe?

  • Calabacitas Recipe

    Every kitchen has its own story, and mine shares tales of Mexican cuisine. The sizzling sounds of calabacitas remind me of my childhood. It was more than a side dish; it was a celebration of fresh ingredients.

    Calabacitas is at the heart of Mexican cooking. It’s simple, nutritious, and full of flavor. This dish turns zucchini and summer squash into a masterpiece loved by all.

    Looking for a comforting meal or wanting to explore Mexican cuisine? Calabacitas is your ticket. It’s a delicious trip through traditional and modern flavors.

    Understanding the Traditional Calabacitas Dish

    Calabacitas is a key part of Mexican cuisine, highlighting the rich heritage of summer squash recipes. It turns simple veggies into a dish that brings families together. This dish is a true reflection of Mexican tradition.

    Calabacitas has its roots in Native American traditions near Oaxaca, Mexico, dating back nearly 10,000 years. The name calabacitas means “little squashes.” It refers to the vegetable and the popular Mexican recipe of sautéed zucchini.

    Origin and Cultural Significance

    In Mexican homes, calabacitas is celebrated for its versatility. It shows the value of using fresh, local produce in everyday meals. This dish is a symbol of summer’s bounty.

    • Cultivated by Native Americans in Mexico
    • Represents agricultural traditions
    • Symbolizes community and shared meals

    What Makes Calabacitas Special

    Calabacitas is special because it’s easy to make and can be enjoyed in many ways. It combines summer squash, corn, and other seasonal ingredients. This makes it a nutritious and tasty dish.

    Key Components of the Dish

    IngredientNutritional Contribution
    ZucchiniHigh in Vitamin A, low in calories
    CornProvides fiber and natural sweetness
    OnionsAdds depth of flavor, rich in antioxidants
    CheeseProvides protein and calcium

    Calabacitas highlights the beauty of Mexican cuisine. It shows how simple ingredients can create a dish full of tradition, nutrition, and creativity.

    Essential Ingredients for Perfect Calabacitas

    To make a true calabacitas dish, start with the right fresh produce. Success comes from picking top-notch seasonal ingredients. These ingredients add lively flavors and textures to this classic Mexican side dish.

    The key ingredients for perfect calabacitas are:

    • Fresh zucchini (2 cups, diced)
    • Corn kernels (1-1/2 cups)
    • Ripe tomatoes (1 cup, halved)
    • Onions (1-1/2 cups, chopped)
    • Garlic (4 large cloves, minced)

    Adding some optional ingredients can make your calabacitas even better. Think about adding:

    • Cotija cheese (1/2 cup, crumbled)
    • Fresh cilantro
    • Poblano or jalapeño peppers for heat

    When picking zucchini, look for firm, shiny ones without spots. The best seasonal ingredients will make your calabacitas full of real flavor and health benefits.

    Pro tip: Choose locally grown, farm-fresh produce for the most vibrant taste and optimal nutritional value.

    Kitchen Tools and Equipment Needed

    Preparing delicious calabacitas needs the right kitchen tools. Whether you’re making sautéed or roasted vegetables, the right equipment makes cooking smooth and fun.

    For the best calabacitas, you need a good set of kitchen tools. Knowing which tools to use can take your cooking from good to great.

    Essential Cookware

    • 10-inch large skillet or sauté pan (recommended for optimal cooking)
    • Heavy-bottom cooking pan with even heat distribution
    • Non-stick surface preferred for easy vegetable cooking

    Prep Tools and Utensils

    1. Sharp chef’s knife for precise vegetable cutting
    2. Cutting board (preferably wooden or plastic)
    3. Measuring cups and spoons
    4. Wooden spoon or spatula for stirring

    Optional Equipment

    While not necessary, these tools can improve your roasted and sautéed vegetables:

    • Food processor for quick vegetable chopping
    • Mandoline slicer for uniform vegetable cuts
    • Digital kitchen scale for precise ingredient measurements

    Each tool is key to making the perfect calabacitas dish. Invest in quality to get delicious results every time.

    Preparation and Cooking Time Overview

    Making delicious calabacitas is quick and easy. You can have a tasty side dish ready in under 30 minutes. The process involves two main steps: getting everything ready and cooking it.

    Time Breakdown for Calabacitas

    Here’s what you need to plan for when making calabacitas:

    • Prep Time: 5-10 minutes
    • Cooking Time: 10-20 minutes
    • Total Time: Approximately 30 minutes

    Efficient Cooking Strategy

    Here are some tips to make your calabacitas prep faster:

    1. Wash and chop vegetables before starting cooking
    2. Have all ingredients measured and ready
    3. Use a large skillet for faster sautéed vegetables
    Cooking StageTime RequiredKey Activities
    Vegetable Preparation5-10 minutesWashing, chopping zucchini, corn, onions
    Sautéing Vegetables8-12 minutesCooking calabacitas until tender
    Final Seasoning2-3 minutesAdding salt, pepper, cheese

    Your sautéed vegetables will be ready in no time. With practice, you’ll get even better at making this tasty Mexican dish.

    Step-by-Step Cooking Instructions

    Making authentic Tex-Mex calabacitas needs precision and skill. This recipe turns simple ingredients into a vibrant, flavorful dish. It captures the essence of traditional Mexican cuisine.

    Vegetable Preparation

    Start by gathering your fresh ingredients. You’ll need:

    • 2 zucchinis (approximately 1.5 lbs total)
    • 3 plum tomatoes
    • 1 large onion
    • 3 garlic cloves
    • 1 jalapeño pepper
    • 2 cups corn kernels

    Cooking Process

    Your calabacitas cooking journey starts with sautéing techniques central to Tex-Mex cooking. Heat a tablespoon of oil in a large skillet over medium heat. Add diced onions and cook until translucent, about 7-10 minutes.

    Introduce minced garlic and jalapeño, cooking for an additional 30 seconds. This releases their aromatic flavors.

    Final Seasoning and Assembly

    Add zucchini to the skillet, cooking for 7-8 minutes until slightly softened. Stir in corn kernels and cook for another 3-4 minutes.

    Incorporate diced tomatoes and simmer to create a light sauce. Season with 3/4 teaspoon salt, 1 teaspoon Mexican oregano, and pepper to taste.

    Pro tip: If the mixture seems dry, add 1/2 cup of vegetable stock to maintain moisture.

    Optional garnishes like Cotija cheese and fresh cilantro can elevate your calabacitas. The entire cooking process takes about 30 minutes. It serves 4 people with around 180 calories per serving.

    Seasoning and Spice Variations

    Adding spices to your calabacitas can make it a flavorful dish. Tex-mex cooking is all about being flexible. You can adjust the heat and flavors to your liking.

    Traditional seasonings for calabacitas include:

    • Salt and black pepper
    • Mexican oregano
    • Fresh garlic
    • Chili peppers

    Choosing your spices can change the dish’s taste. For a milder taste, use poblano peppers. If you like it spicy, try serrano or jalapeño peppers.

    Pepper TypeHeat LevelFlavor Profile
    Bell PepperMildSweet, no heat
    PoblanoMild-MediumSlightly smoky
    JalapeñoMediumSharp, spicy
    SerranoHotIntense, sharp heat

    Each region in Mexico has its own way of seasoning. Southwestern recipes might add cumin or chili powder. Central Mexican dishes often use fresh herbs and lighter spices.

    The secret to great calabacitas is finding the right balance of flavors. Start with a little spice and adjust as needed. This way, you can make the dish your own.

    Serving Suggestions and Pairings

    Calabacitas, a tasty vegetable mix from Mexican cuisine, is very versatile. It can be served in many ways, making your meal exciting. This dish can be a main course or a side, depending on your preference.

    Traditional Accompaniments

    Classic Mexican meals often come with calabacitas and other sides. These combinations make the dish even more flavorful:

    • Warm corn tortillas
    • Refried beans
    • Mexican rice (Arroz Mexicano)
    • Huevos Rancheros

    Modern Serving Ideas

    Try new ways to serve calabacitas for a modern twist:

    1. Use as a taco or quesadilla filling
    2. Top grilled proteins like chicken or fish
    3. Mix into salads for added texture
    4. Serve as a standalone vegetarian main course

    Garnish Options

    Add a touch of elegance to your calabacitas with these garnishes:

    • Cotija cheese for a salty kick
    • Fresh cilantro for brightness
    • Lime wedges for zesty acidity
    • Sliced jalapeños for extra heat

    Calabacitas is perfect for a quick dinner or a Mexican-themed party. It’s a flexible and tasty choice that suits many cooking styles.

    Storage and Reheating Guidelines

    Keeping your calabacitas tasty means storing and reheating them right. Zucchini and corn can be hard to store, but the right way keeps your dish fresh for days.

    Here’s how to store calabacitas:

    • Use an airtight container to prevent moisture loss
    • Refrigerate within 2 hours of cooking
    • Store in the main refrigerator compartment, not the door

    Your calabacitas will stay fresh for up to 3-5 days if stored right. Keeping it in the fridge helps keep its texture and taste.

    How you reheat matters a lot:

    1. Stovetop method: Reheat in a skillet over medium-low heat
    2. Microwave method: Heat in 30-second intervals, stirring between each
    3. Oven method: Warm at 350°F for 10-15 minutes, covered with foil

    Tip: Add a bit of water or broth when reheating. It keeps the veggies moist and makes your second serving tasty.

    Always check the temperature of reheated calabacitas to ensure it reaches 165°F for food safety.

    Nutritional Information and Health Benefits

    Calabacitas is a nutritional powerhouse. It offers many health benefits thanks to its fresh ingredients. This colorful mix of vegetables is packed with nutrients that boost your well-being and taste great.

    Zucchini is the main ingredient, and it’s full of nutritional value. A cup of cooked zucchini has just 27 calories. It also has a lot of vitamins and minerals.

    NutrientAmount per Cup% Daily Value
    Calories27
    Protein2 grams4%
    Vitamin C26%
    Vitamin A11%
    Potassium10%

    This vegetable medley offers more than just basic nutrition. Zucchini has antioxidants like lutein and zeaxanthin. These help keep your eyes healthy and may prevent vision problems as you age.

    • Supports digestive health through high fiber content
    • Promotes heart health with potassium and antioxidants
    • Aids in weight management due to low calorie count
    • Provides hydration with 95% water content

    Enjoying this calabacitas dish is good for your body. It’s a tasty way to get more nutrients. Adding this recipe to your meals means you’re choosing something that’s both nourishing and delicious.

    Tips for Selecting the Best Vegetables

    Creating delicious calabacitas starts with choosing the freshest, most flavorful seasonal ingredients. Your vegetable selection can make or break this traditional dish. So, understanding how to pick the best produce is crucial.

    Selecting Perfect Zucchini

    When shopping for zucchini, look for these key characteristics:

    • Smooth, shiny skin without blemishes
    • Firm texture with no soft spots
    • Weight that feels heavy for its size
    • Length between 4-6 inches for optimal tenderness

    Expert Corn Selection Guide

    Fresh produce quality matters most when choosing corn for calabacitas. Your selection should include:

    • Bright green, moist husks
    • Silk that is golden brown and slightly sticky
    • Kernels that look plump and uniform

    Seasonal Ingredient Considerations

    Understanding seasonal availability helps you select the best vegetables. Summer squashes peak between June and August. They offer maximum flavor and nutrition.

    VegetablePeak SeasonBest Selection Traits
    ZucchiniJune-AugustSmall, firm, glossy skin
    CornMay-SeptemberBright husks, plump kernels
    TomatoesJuly-SeptemberDeep color, slight give when pressed

    Pro tip: Local farmers markets often provide the freshest seasonal ingredients for your calabacitas recipe.

    Conclusion

    Calabacitas is more than a mix of vegetables; it’s a lively celebration of Mexican food. It brings fresh, seasonal ingredients to your table. By trying this traditional recipe, you’ve found a tasty way to make zucchini, corn, and cheese into something special.

    Now you know about calabacitas, and it opens up a world of cooking possibilities. You can try different seasonings, cheeses, and ways of making it. Every step lets you make this Mexican dish your own while keeping its true spirit.

    Adding calabacitas to your cooking is more than just making a side dish. It invites you to dive into the rich flavors of Mexican food, one delicious bite at a time. Whether you’re an experienced cook or just starting out, this vegetable mix will add excitement and real taste to your meals.

    Your cooking adventure doesn’t stop here. Keep trying new things, tasting, and sharing calabacitas with others. Every time you make it, you connect with a deep cultural tradition that turns simple ingredients into something amazing.

    FAQ

    What exactly are calabacitas?

    Calabacitas is a traditional Mexican dish. It’s made with zucchini, corn, and sometimes onions, tomatoes, and green chiles. It’s a tasty mix of summer squash, sautéed or roasted, with Mexican spices.

    Is calabacitas a vegetarian dish?

    Yes, calabacitas is vegetarian and can be vegan. While some recipes might add cheese or meat, the classic version is a veggie dish. It’s great for vegetarians and those wanting more veggies.

    How do I choose the best vegetables for calabacitas?

    Pick fresh zucchini that’s firm and bright green. Corn should have plump, milky kernels. Avoid veggies with soft spots or blemishes for the best taste and texture.

    Can I make calabacitas ahead of time?

    Yes, you can make it ahead and keep it in the fridge for 3-4 days. Reheat it in a skillet over medium heat to keep the veggies tender.

    Are calabacitas nutritionally beneficial?

    Calabacitas are very nutritious. They’re full of vitamins A and C, fiber, and low in calories. Zucchini has antioxidants, and corn adds fiber and carbs. It’s a great way to eat more veggies and enjoy Mexican food.

    What are some common variations of calabacitas?

    There are many variations. Some add chorizo or queso fresco, use different chiles, or local spices. You might also see bell peppers or roasted instead of sautéed.

    How spicy can calabacitas be?

    You can make it as spicy as you like. Traditional recipes use mild chiles, but you can add jalapeños or serrano peppers for more heat. Adjust the spice to your liking.

    What are the best dishes to serve with calabacitas?

    Calabacitas goes well with grilled meats, rice, beans, enchiladas, and other Mexican dishes. It’s also good as a side or in tacos, quesadillas, or on nachos.

  • Taco Spaghetti Recipe

    Imagine a busy weeknight with a hungry family and little time to cook. That’s when taco spaghetti saves the day. It turns simple ingredients into a meal that everyone wants more of.

    Think of mixing Mexican flavors with Italian pasta. Taco spaghetti is more than a recipe; it’s a journey that blends two food worlds. You can make it in just 30 minutes, creating a meal that’s both satisfying and delicious.

    This dish is not just another recipe. It shows how creative cooking can merge traditions and create something amazing. From the first taste, you’ll see why it’s loved by so many in the U.S.

    What Makes Taco Spaghetti Special

    Taco spaghetti is a fun mix of Mexican and Italian flavors. It’s a dish that combines bold Mexican tastes with the cozy feel of Italian pasta. This mix has won the hearts of many home cooks across the country.

    Origins of Mexican-Italian Fusion

    This dish started with chefs and home cooks trying new things. They mixed flavors and techniques from different cultures. This way, they created something truly unique.

    • Combines Mexican taco seasonings with classic pasta
    • Reflects the growing trend of global culinary creativity
    • Breaks down traditional cuisine barriers

    Cultural Impact on Modern Cuisine

    When you try taco spaghetti, your kitchen becomes a place of exciting flavors. This dish shows how cooking today is all about exploring new tastes. It’s about bringing different cultures together through food.

    “Food is a universal language that connects people across different cultures and traditions.” – Anonymous Chef

    Why This Recipe Works

    The secret to taco spaghetti is its perfect mix of flavors and textures. It’s spicy, satisfying, and quick to make. It’s a hit with both kids and adults.

    Key Success FactorsDescription
    Flavor ProfileRich, spicy, and satisfying
    Preparation TimeUnder 40 minutes
    VersatilityEasy to customize and modify

    Taco spaghetti is a viral hit because of its unique ingredients and easy recipe. It’s a dish that brings something extraordinary to your table.

    Essential Ingredients for Perfect Taco Spaghetti

    Making the perfect taco spaghetti needs the right ingredients. These ingredients mix quirky recipe ideas with fusion food trends. Start your cooking journey with top-notch items that make a simple meal into a special treat.

    The base of this dish is premium ingredients that mix Mexican and Italian tastes well:

    • Ground beef (80/20 ratio for optimal flavor)
    • Yellow onions for depth of taste
    • Authentic taco seasoning
    • Rotel tomatoes for a zesty kick
    • High-quality spaghetti noodles
    • Sharp cheddar cheese
    • Fresh cilantro for garnish

    Choosing the right ingredients is crucial for a memorable meal. It celebrates creativity in cooking.

    IngredientQuantityPurpose
    Ground Beef2 poundsPrimary protein source
    Spaghetti Noodles1 poundPasta base
    Taco Seasoning1 packetFlavor enhancement
    Mexican Blend Cheese2 cupsCreamy topping

    Pro tip: For those into fusion food trends, try ground turkey or a plant-based option instead of beef. Taco spaghetti is great because you can make it your own, fitting different diets.

    Your choice of ingredients is what makes this recipe stand out. Each part is important for a mix of flavors that will excite your taste buds.

    Kitchen Tools and Equipment Needed

    Making unique dishes like taco spaghetti needs the right kitchen tools. With the right equipment, cooking becomes easier and more fun. You’ll enjoy every step of your culinary journey.

    Before you start cooking, make sure you have these important tools. They will help you make a great meal:

    Essential Cookware for Taco Spaghetti

    • 12-inch large skillet or heavy-bottomed pot
    • Sharp chef’s knife
    • Cutting board
    • Measuring cups and spoons
    • Wooden cooking spoon
    • Colander for draining pasta

    Optional Cooking Accessories

    These tools are not necessary but can make cooking better and easier:

    • Digital meat thermometer
    • Kitchen scale for precise ingredient measurements
    • Cheese grater for fresh cheese toppings
    • Casserole dish for baking
    • Silicone spatula for mixing

    Good cookware turns your kitchen into a place for making tasty dishes. The right tools make cooking simpler and more enjoyable. They help you make delicious taco spaghetti.

    Step-by-Step Cooking Instructions

    Making taco spaghetti is a fun journey that blends tex-mex pasta with comfort food. It’s a one-pot dish that’s easy to prepare and ready in 30 minutes.

    1. Start by heating 1 tablespoon of olive oil in a large skillet
    2. Brown 1 pound of ground beef over medium-high heat (5-6 minutes)
    3. Add diced onions and bell peppers, sautéing for 3 minutes
    4. Incorporate minced garlic and cook for 1 minute
    5. Sprinkle ¼ cup of taco seasoning over the meat mixture

    When making taco spaghetti, following these steps is key. It’s all about adding layers of flavor and keeping the sauce just right.

    • Add 2 (10-ounce) cans of Rotel tomatoes
    • Pour in 3 cups of beef broth
    • Add 8 ounces of uncooked spaghetti
    • Bring the mixture to a rolling boil
    • Reduce heat, cover, and simmer for 15-20 minutes

    To finish your tex-mex pasta, stir in 1 cup each of shredded cheddar and Monterey Jack cheese. Top with fresh cilantro and green onions for extra flavor.

    “Cooking is about passion, so it may look slightly temperamental in a way that it’s too assertive to the naked eye.” – Gordon Ramsay

    IngredientQuantityPreparation
    Ground Beef1 lbBrowned
    Spaghetti8 ozUncooked
    Taco Seasoning¼ cupMixed in
    Rotel Tomatoes2 (10 oz) cansAdded whole

    Pro tip: Save ¼ cup of pasta water to make the sauce smoother if it’s too thick.

    Mastering the Taco Seasoning Blend

    Making the perfect taco seasoning is key in mexican fusion cuisine. It lets you get creative in the kitchen. The right mix of spices can turn a simple dish into a memorable meal.

    With your own taco seasoning, you can boost the flavor of taco spaghetti. It’s all about finding the right balance of spices for that special taste.

    Store-Bought vs Homemade Seasoning Options

    Deciding between store-bought and homemade taco seasoning depends on a few things:

    • Store-bought packets are easy and fast
    • Homemade blends let you control the flavor
    • It’s cheaper to make a big batch
    • You can choose the quality and amount of sodium

    Crafting Your Perfect Spice Blend

    A classic homemade taco seasoning mix has:

    • 1/2 cup chili powder
    • 1/4 cup ground cumin
    • 2 tablespoons smoked paprika
    • 4 teaspoons each: black pepper, garlic powder, kosher salt, onion powder
    • 2 teaspoons dried oregano

    Your homemade blend makes about 1 cup of seasoning. Store it in an airtight container for up to 1 year. Pro tip: Label your container with the preparation date!

    Adjusting Spice Levels

    Make your taco seasoning your own by tweaking the spice levels. Begin with a mild mix and add cayenne pepper or red pepper flakes for more heat. Usually, 2 tablespoons of seasoning are perfect for each pound of protein.

    The art of seasoning is about personal taste and experimenting with flavors.

    Creative Topping Ideas and Garnishes

    Turn your taco spaghetti into a masterpiece with creative toppings. These toppings are your chance to show off your unique style. They make the dish go from good to great.

    Fresh garnishes can totally change how you enjoy your meal. Here are some exciting topping ideas to make your taco spaghetti stand out:

    • Crisp fresh diced tomatoes for bright acidity
    • Sliced black olives for rich, earthy undertones
    • Finely chopped red onions for sharp crunch
    • Cool sour cream to balance spicy elements
    • Extra shredded cheese for melty indulgence

    Try out unique garnishes for texture and looks:

    ToppingFlavor ProfileTexture
    Crispy ChicharronSalty, richCrunchy
    Fresh CilantroBright, herbalDelicate
    Diced AvocadoCreamy, mildSmooth
    Mexican CremaTangy, richSilky

    Your taco spaghetti is a blank canvas for creativity. Feel free to try new things that show off your taste. The right garnishes can make a meal unforgettable.

    Time-Saving Tips and Cooking Hacks

    Making cross-cultural dishes like taco spaghetti doesn’t have to take a lot of time. With smart strategies, you can make this unique dish quick and tasty. It’s perfect for busy days.

    Prep Shortcuts for Efficient Cooking

    Here are some shortcuts to make taco spaghetti prep easier:

    • Use pre-chopped veggies from the store to save time
    • Keep pre-cooked ground beef or chicken ready in your fridge
    • Get multipurpose kitchen tools like food processors and mandoline slicers
    • Measure and organize ingredients before cooking for a smooth process

    Make-Ahead Strategies

    Meal prep is great for quick, tasty meals. With taco spaghetti, you can prep parts ahead:

    1. Batch cooking: Cook in bulk and portion for later
    2. Store in airtight containers in the fridge for up to 4 days
    3. Make seasoning mixes ahead for quick assembly
    4. Freeze portions for easy weeknight dinners

    These tips help you enjoy your favorite dishes without spending hours cooking. By using these shortcuts, taco spaghetti becomes an easy meal option.

    Storage and Reheating Guidelines

    Keeping your tasty tex-mex pasta fresh is key. The right storage and reheating methods can help. This way, your dish stays delicious for longer.

    Refrigeration Recommendations

    Put your taco spaghetti in an airtight container to keep flavors and textures intact. It’s best to store it for 3-5 days in the fridge. Here are some important tips:

    • Use a sealed glass or plastic container
    • Cool the dish completely before storing
    • Place in the coldest part of your refrigerator

    Freezing Your Unique Pasta Dish

    Freezing is great for keeping your pasta longer. Here are some tips for freezing:

    • Freeze in portion-sized containers
    • Use freezer-safe bags or containers
    • Remove as much air as possible to prevent freezer burn
    • Freeze for up to 3 months

    Reheating Techniques

    Bring back the taste of your taco spaghetti with these reheating tips:

    1. Skillet Method: Warm over medium heat, adding a splash of broth or water
    2. Microwave: Heat in 30-second intervals, stirring between each
    3. Oven: Reheat at 350°F, covered with foil to prevent drying

    Pro tip: Always check the internal temperature reaches 165°F to ensure food safety when reheating your unique pasta dishes.

    Nutritional Information and Dietary Modifications

    Taco spaghetti is a tasty mix of different cuisines. It’s not just yummy but also good for you. It’s perfect for those who care about their health and taste.

    Knowing what’s in your taco spaghetti helps you eat better. Here’s what you get in each serving:

    NutrientAmount per Serving
    Total Calories483 kcal
    Carbohydrates48 g
    Protein26 g
    Total Fat20 g
    Dietary Fiber10 g

    Adapting to Different Dietary Needs

    This dish can be made in many ways to fit your diet:

    • Gluten-Free Option: Use gluten-free pasta like chickpea or lentil pasta
    • Low-Carb Variation: Try zucchini noodles or cauliflower rice instead of pasta
    • Vegetarian Version: Use plant-based protein or black beans instead of meat
    • Dairy-Free Alternative: Try nutritional yeast or dairy-free cheese

    Health Considerations

    Choosing whole wheat pasta and lean protein makes taco spaghetti healthier. It’s full of protein, fiber, and good fats. It’s a great choice for tasty, healthy meals.

    Pairing Suggestions and Side Dishes

    Make your mexican fusion cuisine better with the right side dishes. These dishes should match the flavors of your taco spaghetti. The perfect sides can turn a good meal into an amazing one.

    Choose side dishes that balance flavors and textures for your taco spaghetti. Here are some great options:

    • Mexican Coleslaw: A vibrant purple cabbage slaw with orange carrots and fresh cilantro
    • Elote-Inspired Pasta Salad: Charred corn with Cotija cheese and spices
    • Mango Salsa: A quick six-ingredient fresh topping
    • Cucumber Salad: Crisp and refreshing

    Here are some quick side dish ideas to make your meal better:

    Side DishPreparation TimeSpecial Note
    Pinto Beans20 minutesTender and protein-rich
    Jalapeño Topping20 minutesAdds spicy kick
    Corn in Bacon Drippings15 minutesFlavor-packed side

    Pro tip: Make side dishes ahead of time for better flavor. Chilling them for 2 hours helps the flavors mix well.

    Side dishes are not just accompaniments—they’re flavor enhancers that complete your culinary journey.

    Your taco spaghetti will be even more special with these chosen sides. They bring together Mexican and Italian flavors.

    Conclusion

    Taco spaghetti is more than a meal; it’s a celebration of creativity that brings cultures together. Your kitchen turns into a playground where you mix foods in new ways. This dish shows that cooking is an art with no limits.

    Exploring fusion cuisine opens a world of flavors and surprises. You can play with ingredients and spices to make it your own. With only 487 calories per serving, taco spaghetti is both healthy and exciting.

    Your cooking journey doesn’t stop here. Let this recipe spark your interest in other cultural dishes. It shows that the best meals come from trying new things and sharing joy with others.

    Great cooking is about passion, creativity, and trying new things. Your kitchen is a canvas, and every meal is a chance to create something amazing.

    FAQ

    What exactly is taco spaghetti?

    Taco spaghetti is a dish that mixes Mexican taco flavors with pasta. It has ground beef, pasta, taco seasonings, and cheese. This blend of Tex-Mex and Italian cuisines makes for a tasty meal.

    How long does it take to prepare taco spaghetti?

    Taco spaghetti is quick to make, ready in about 30 minutes. It’s great for families or anyone who wants a fast, tasty dinner.

    Can I make taco spaghetti vegetarian?

    Yes! Use beyond meat, impossible ground beef, or black beans instead of ground beef. You can also try tofu for a vegetarian version.

    What type of pasta works best for taco spaghetti?

    Spaghetti is classic, but try penne, rotini, or shells too. Choose pasta that holds the sauce well for the best flavor.

    Is taco spaghetti spicy?

    You can make it as spicy or mild as you like. Use more or less taco seasoning, or add jalapeños for heat.

    How should I store leftover taco spaghetti?

    Keep it in an airtight container in the fridge for 3-4 days. Reheat with a bit of water or broth to keep it moist.

    Can I make taco spaghetti ahead of time?

    Yes! Prepare it ahead and refrigerate. Reheat in the oven or microwave. Some say the flavors get better after a day.

    Try diced tomatoes, cilantro, sour cream, jalapeños, green onions, and lettuce. Add your favorite toppings for a personal touch.

    Is taco spaghetti kid-friendly?

    Yes! Kids love the pasta, meat, and cheese mix. You can make it milder for them while keeping the flavor interesting.

    What makes taco spaghetti different from regular pasta dishes?

    Taco spaghetti is special because it combines Mexican taco flavors with pasta. It’s a creative mix of cuisines, offering a new twist on both tacos and pasta.

    What is your rating for the recipe?

  • Chocolate Chocolate Chip Pancakes

    Imagine waking up to the irresistible aroma of fluffy chocolate chip pancakes. They fill your kitchen with a scent that makes your mouth water. These sweet treats turn an ordinary morning into a special moment that delights your senses.

    Chocolate chocolate chip pancakes are more than just a meal. They’re a treat that mixes rich cocoa with gooey chocolate chips. They’re perfect for a weekend brunch or a special breakfast surprise, making your morning unforgettable.

    Every bite is a mix of soft, fluffy texture and deep chocolate taste. The mini chocolate chips add bursts of sweetness, making these pancakes a breakfast dream come true.

    The Ultimate Chocolate Breakfast Experience

    Step into a world where breakfast is a chocolate dream. These chocolate chocolate chip pancakes are more than food. They’re a treat that makes your morning special.

    Picture a breakfast that’s like chocolate cake but light and fluffy. These brunch ideas make your morning meal a gourmet delight.

    What Makes These Pancakes Special

    These pancakes are special because of their unique qualities:

    • Intense chocolate flavor from cocoa powder
    • Mini chocolate chips scattered throughout
    • Perfect balance of sweetness and texture
    • Quick and easy preparation

    A Perfect Balance of Sweet and Fluffy

    Each pancake is a perfect mix of rich and light. The cocoa powder and sugar give a deep flavor without being too sweet. They’re moist inside and crispy outside, making breakfast even better.

    History of Chocolate for Breakfast

    Chocolate has come a long way as a breakfast item. It went from a luxury to a morning favorite. These pancakes blend tradition and new ideas, making breakfast exciting.

    Chocolate isn’t just a flavor – it’s an experience that starts your day with joy and indulgence.

    Looking for a special brunch or a way to make breakfast better? These pancakes will make your morning unforgettable.

    Essential Ingredients for Perfect Chocolate Chocolate Chip Pancakes

    Making delicious chocolate chocolate chip pancakes starts with the right ingredients. Your pancake mix is the base, with each part adding to the flavor and texture.

    Here are the key ingredients for your chocolate pancake journey:

    • All-purpose flour (1/2 cup + 2 tablespoons)
    • Unsweetened cocoa powder (1/4 cup)
    • Granulated sugar (2 tablespoons)
    • Baking powder (2 teaspoons)
    • Chocolate chips (1/2 cup semisweet)

    When you mix dry and wet ingredients, magic happens. Whole milk at room temperature adds moisture. A large egg helps everything stick together. Adding vegetable oil or melted butter makes the pancakes richer.

    IngredientQuantityPurpose
    Cocoa Powder1/4 cupCreates deep chocolate flavor
    Chocolate Chips1/2 cupAdds chocolate bursts
    Vanilla Extract1/2 teaspoonEnhances overall taste

    Pro tip: Choose high-quality semisweet chocolate chips for the best results. Drizzling maple syrup on top adds an extra layer of flavor.

    Adding espresso powder (1/4 teaspoon) can make your pancakes even more special. It intensifies the chocolate taste.

    The Science Behind Fluffy Chocolate Pancakes

    Making perfect fluffy pancakes is more than just mixing. Knowing the science behind it can make your pancakes truly special.

    The secret to fluffy pancakes is in the batter and cooking. Let’s explore the science that makes them light and airy.

    Role of Leavening Agents

    Leavening agents are key to fluffy pancakes. Baking powder is especially important. It creates air bubbles that make pancakes rise.

    • Optimal baking powder amount: 1 teaspoon per batch
    • Temperature range for best results: 350-375°F
    • Recommended resting time for batter: 5-10 minutes

    Importance of Proper Mixing Techniques

    Mixing pancakes needs care. Overmixing makes them tough. Mix just until ingredients are combined, leaving lumps.

    Mixing TechniqueResult
    Gentle foldingFluffy, tender pancakes
    OvermixingDense, tough texture
    Batter restingMore tender pancakes

    Temperature Control Tips

    Controlling temperature is key for fluffy pancakes. The Maillard reaction above 300°F adds color and flavor. Use medium heat and flip when bubbles form.

    Pro tip: A high flip during cooking allows more air circulation, resulting in even fluffier pancakes!

    Step-by-Step Preparation Method

    Making tasty chocolate chocolate chip pancakes needs care and precision. These recipes require focus to get the right fluffy texture and deep chocolate taste.

    1. Dry Ingredient Preparation
      • Combine 1 1/4 cups all-purpose flour
      • Add 1 tablespoon sugar
      • Mix in 1/2 tablespoon baking powder
      • Sprinkle 1/4 teaspoon salt
    2. Wet Ingredient Mixing
      • Whisk 1 cup milk
      • Add 2 tablespoons oil
      • Separate 1 large egg (yolk and whites)
      • Blend ingredients until smooth
    3. Combining and Resting
      • Gently fold wet and dry ingredients
      • Incorporate 1/4 cup chocolate chips
      • Let batter rest for 5 minutes
    4. Cooking Technique
      • Preheat griddle to medium heat
      • Cook pancakes 2-3 minutes per side
      • Look for golden-brown edges

    “The secret to perfect homemade pancakes is patience and practice!” – Breakfast Culinary Expert

    Pro tip: Keep the heat steady at medium to avoid burning. Your chocolate chocolate chip pancakes will be fluffy and loved by all!

    Chocolate Chip Pancakes: Tips and Techniques

    Making the perfect chocolate chip pancakes is more than just mixing ingredients. A few key techniques can take your pancakes from good to amazing. Let’s explore the secrets to making irresistible chocolate chip pancakes that will wow your family and friends.

    Selecting Premium Chocolate Chips

    Not all chocolate chips are the same. For fluffy pancakes, pick high-quality chocolate chips that match your batter. Here are some tips:

    • Choose semi-sweet or dark chocolate chips for a strong flavor
    • Go for chips with at least 60% cocoa content
    • Use chips of the same size for even distribution

    Mastering Chocolate Chip Distribution

    Getting chocolate chips evenly spread is key. Sprinkle chips on the batter after pouring it on the griddle. This way, every bite has chocolate.

    Expert Flipping Techniques

    Flipping pancakes with chocolate chips can be tricky. Here are some pro tips:

    1. Wait for bubbles to form on the surface
    2. Use a wide, thin spatula for smooth flipping
    3. Flip gently to avoid burning the chocolate chips
    TechniqueBenefits
    Chip SprinklingEnsures even chocolate distribution
    Medium HeatPrevents burning, promotes even cooking
    Gentle FlippingMaintains pancake structure and chip placement

    Pro tip: Let your pancake batter rest for 30 minutes before cooking. This makes the pancakes fluffier and the chocolate chips better integrated.

    Toppings and Serving Suggestions

    Make your breakfast special with tasty toppings. They turn chocolate chip pancakes into a treat you’ll love. Choose from classic and new toppings to make every bite unforgettable.

    Maple syrup is a top choice, adding sweetness that goes well with chocolate. But there’s more to try:

    • Classic Butter: A simple yet delicious traditional topping
    • Homemade Chocolate Ganache: For intense chocolate lovers
    • Fresh Berries: Strawberries or blueberries add a fruity twist
    • Whipped Cream: Light and airy texture
    • Caramel Sauce: Rich and decadent drizzle
    • Chopped Nuts: Adds crunch and protein

    For a fancy breakfast, mix toppings. Try maple syrup, fresh berries, and whipped cream. It’s like a restaurant treat at home.

    Pro tip: Warm your maple syrup before serving. It tastes better and makes your pancakes extra special. Try different toppings to find your favorite mix!

    Creativity knows no bounds when it comes to pancake toppings – let your imagination run wild!

    Storage and Reheating Guidelines

    Keeping your homemade pancakes fresh is key. Whether you made chocolate chocolate chip pancakes or have leftovers, the right storage and reheating methods are crucial. They help keep the pancakes tasty and fluffy.

    Freezing Instructions

    Freezing pancakes is a great way to enjoy them later. Here’s how to do it right:

    • Flash freeze pancakes for 1-2 hours on a baking sheet
    • Place frozen pancakes in a Ziploc bag or airtight container
    • Store in the freezer for up to 2 months

    Best Reheating Methods

    There are several ways to reheat your pancakes. Here’s a guide to get them back to their original taste and texture:

    Reheating MethodTimeTemperature
    Oven5-8 minutes350°F
    Microwave10-15 secondsHigh
    Toaster1-2 minutesMedium
    Air Fryer2-3 minutes350°F
    Stovetop4-5 minutesMedium-low

    Maintaining Freshness

    To keep your pancakes fresh, follow these tips:

    1. Refrigerate pancakes for up to 3-4 days
    2. Reheat only the quantity needed for each meal
    3. Avoid stacking warm pancakes to prevent sogginess
    4. Discard pancakes with signs of freezer burn

    Pro tip: Always store pancakes in a single layer with parchment paper between them to prevent sticking and maintain their delightful texture.

    Common Troubleshooting Tips

    Making perfect fluffy pancakes can be a challenge. But with the right techniques, you’ll get the hang of it quickly. Knowing common mistakes helps you make breakfast a success.

    Batter Consistency Challenges

    Getting your batter just right is key. If it’s too thick, add a little milk. If it’s too thin, add flour. Remember, a few small lumps are okay!

    • Check baking powder freshness (replace every 6-12 months)
    • Avoid overmixing to prevent tough pancakes
    • Let batter rest for 10 minutes before cooking

    Cooking Temperature and Technique

    To cook pancakes evenly, manage your heat well. Use medium heat and wait for bubbles before flipping. Never press down on pancakes to keep them fluffy.

    IssueSolution
    Pancakes burningReduce heat, use non-stick pan
    Uneven chocolate chip distributionGently fold chips into batter, sprinkle on cooking pancake
    Dense pancakesSeparate egg whites, fold gently

    “The secret to great pancakes is patience and practice!” – Professional Chef

    Follow these tips, and you’ll make pancakes that wow your family at breakfast.

    Conclusion

    Making chocolate chip pancakes is more than just a breakfast recipe. It’s a chance to make your morning special. These brunch ideas let you get creative and enjoy new flavors in your kitchen. Whether it’s a weekend treat or a surprise for your family, chocolate chip pancakes offer endless fun.

    Learning to make these pancakes will take your breakfast to the next level. You’ll get better with practice, making pancakes that taste like they’re from a restaurant. Remember, every batch you make brings you closer to pancake perfection.

    Chocolate chip pancakes are very versatile. You can try different types of chocolate chips, change the sweetness, and add your favorite toppings. As you try more breakfast recipes, you’ll see that these pancakes are more than just food. They’re a way to express your creativity and enjoy the moment.

    Start your day with a stack of warm, chocolatey pancakes. It will turn your breakfast into something truly special. Your adventure with chocolate chip pancakes is just starting, and there’s so much to discover!

    FAQ

    What makes chocolate chocolate chip pancakes different from regular pancakes?

    Chocolate chocolate chip pancakes have a richer taste. They use cocoa powder and chocolate chips. This makes breakfast more decadent with deep chocolate flavor and chocolate bursts.

    Can I make these pancakes gluten-free or dairy-free?

    Yes! Use gluten-free flour and dairy-free milk for different diets. Choose dairy-free chocolate chips too.

    How do I prevent my chocolate chips from sinking to the bottom of the pancake?

    Coat chocolate chips in flour before adding to batter. Fold them gently at the end. Avoid overmixing to keep chips evenly spread.

    What’s the best way to achieve fluffy chocolate pancakes?

    Mix wet and dry ingredients just until combined. Use fresh baking powder. Let the batter rest to activate ingredients.

    How long can I store leftover chocolate chocolate chip pancakes?

    Store cooled pancakes in an airtight container for 2-3 days. Freeze for up to 1 month. Reheat in a toaster or skillet.

    Can I make the batter the night before?

    Yes, prepare batter the night before. Store in the fridge. Stir gently before cooking and let it warm up for 15 minutes.

    What are some creative toppings for chocolate chocolate chip pancakes?

    Try homemade chocolate ganache, fresh berries, or sliced bananas. Add chopped nuts, whipped cream, or powdered sugar for extra indulgence.

    Are chocolate chocolate chip pancakes suitable for kids?

    These pancakes are great for kids. You can adjust sweetness and chocolate level. They’re a fun and tasty breakfast.

    What type of chocolate chips work best in these pancakes?

    Semi-sweet or dark chocolate chips are best. They offer a rich flavor without being too sweet. Try milk or white chocolate chips for different tastes.

    How can I make these pancakes healthier?

    Use whole wheat flour and reduce sugar. Add Greek yogurt for protein. Choose dark chocolate chips and serve with fresh fruits for a healthier option.

    What is your rating for the recipe?

  • Strawberry Banana Pudding

    Imagine a dessert that takes you back to family gatherings and warm summer days. Strawberry banana pudding is more than a sweet treat. It’s a journey through culinary tradition that touches the heart.

    This comfort food mixes creamy pudding with the bright tastes of strawberries and bananas. Every spoonful shares a story of Southern cooks who made this dessert special. They turned simple ingredients into a memorable experience.

    Strawberry banana pudding is more than a dessert. It’s a celebration of fresh ingredients, family recipes, and sharing joy around the table.

    Understanding the Magic of Strawberry Banana Pudding

    Explore the world of fruit desserts that have won the hearts of many in the Southern United States. Strawberry banana pudding is more than a sweet treat. It’s a journey through tradition and flavor that turns simple ingredients into a special pudding recipe.

    Southern cuisine loves comfort foods that bring families together. This pudding is a perfect example of that tradition. It carries stories of generations, mixing nostalgia with amazing taste.

    Origins of a Beloved Dessert

    This dessert’s roots go back to classic banana pudding, a favorite in Southern kitchens. Adding strawberries gave it a vibrant twist, making it even more flavorful and beautiful.

    Why Strawberries and Bananas Create Magic

    • Complementary flavor profiles
    • Balanced sweetness and texture
    • Nutritional diversity
    • Visually appealing color combination

    Cultural Significance in Southern Cuisine

    Strawberry banana pudding is more than a dessert. It’s about community, sharing, and celebration. It’s a hit at:

    1. Family reunions
    2. Holiday gatherings
    3. Church potlucks
    4. Summer picnics

    “A good pudding speaks volumes about the hands that crafted it” – Southern Cooking Proverb

    The beauty of this dessert is in its simplicity. It can turn ordinary moments into unforgettable experiences. Each spoonful shares a story of tradition, love, and creativity.

    Essential Ingredients for Perfect Strawberry Banana Pudding

    To make the ultimate summer treats, you need top-notch ingredients. These ingredients turn a simple dessert into a creamy delight. Your strawberry banana pudding adventure starts with these carefully picked parts for a delicious taste.

    Now, let’s look at the main ingredients that will make your summer treats special:

    • Fresh strawberries (1 cup, thinly sliced)
    • Ripe bananas (2, thinly sliced)
    • Vanilla pudding mix (1 box, 3.4 ounces)
    • Banana cream pudding mix (1 box, 3.4 ounces)
    • Cold 2% or whole milk (4 cups)
    • Sweetened condensed milk (1 can, 14 ounces)
    • Cream cheese (8 ounces, room temperature)
    • Cool Whip (2 containers)
    • Vanilla wafers or Chessman butter cookies

    Quality ingredients are key for creamy delights. Choose ripe strawberries and bananas for the best flavor. The pudding mixes and cream cheese add richness to your dessert.

    “The secret to an unforgettable summer treat is using the freshest ingredients possible.” – Southern Dessert Experts

    Pro tip: Chill your milk well and use room temperature cream cheese. This will give your pudding a smooth, velvety texture. Your dessert will be a classic summer treat.

    Making the Perfect Strawberry Sauce

    Creating a delicious strawberry sauce can make your no-bake desserts a hit. The key is to pick the right ingredients and learn the best way to make it.

    Start with top-notch ingredients. You’ll need fresh, ripe strawberries for the best taste. Use about 3 cups of sliced strawberries as your base.

    Fresh vs Preserved Strawberries

    Decide between fresh and preserved strawberries for your sauce. Fresh ones give a lively flavor and texture. Preserved strawberries add a sweeter taste.

    • Fresh strawberries: More natural flavor
    • Preserved strawberries: Intense sweetness
    • Recommended combination: 3 cups fresh + 3 tablespoons preserves

    Sauce Consistency Tips

    Getting the right sauce consistency is key. It should be smooth but still have some chunkiness. It should also look glossy and stick well to desserts.

    IngredientQuantityPurpose
    Fresh Strawberries3 cupsPrimary flavor base
    Organic Cane Sugar1/4 cupSweetness and consistency
    Lemon Juice1/2 lemonBrightness and preservation
    Strawberry Preserves3 tablespoonsEnhanced sweetness

    Storage and Shelf Life

    Keep your strawberry sauce in an airtight container in the fridge for 2-3 days. Pro tip: Always use clean utensils to avoid bacterial growth and keep it fresh longer.

    “The magic of a great dessert is in its sauce – make it with love, and it will show!” – Pastry Chef Wisdom

    Selecting and Preparing the Pudding Base

    Making the perfect pudding base is key for tasty pudding recipes. Your strawberry banana pudding needs the right pudding mix and careful preparation.

    Choose between instant and homemade pudding bases. Instant mixes are easy, while homemade ones taste richer. Vanilla and banana cream pudding mixes are great for this dessert.

    • Select a high-quality vanilla pudding mix (3.4 oz box)
    • Use cold milk for optimal consistency
    • Whisk ingredients thoroughly to prevent lumps
    • Add sweetened condensed milk for extra creaminess

    Here’s how to prepare your pudding base:

    1. Combine pudding mix with 1.5 cups cold milk
    2. Whisk for 2 minutes until smooth
    3. Fold in 1 cup plain Greek yogurt
    4. Chill for at least 15 minutes before layering

    Nutritional tip: Your pudding base has about 275 calories per serving. It has 7 grams of protein and 4 grams of fiber. Try different pudding mix flavors like butterscotch or chocolate for new twists on this classic.

    The Art of Layering Your Dessert

    Making the perfect strawberry banana pudding is all about layering. This summer treat becomes a stunning family favorite with the right layering and visual appeal.

    Creating Visual Appeal

    Your layering can make a simple dessert look amazing. Use clear glass dishes to show off the colors of strawberries and bananas.

    • Choose transparent serving vessels
    • Alternate colors and textures
    • Create clean, distinct layers

    Order of Ingredients

    The secret to a great strawberry banana pudding is the order of ingredients. Start with a solid base and build up for the best flavor and texture.

    1. Vanilla wafer cookies as the base
    2. Creamy vanilla pudding
    3. Sliced ripe bananas
    4. Fresh strawberry sauce
    5. Whipped cream topping

    Professional Presentation Tips

    Make your summer treats look professional with these tips. Add crushed cookies, fresh strawberry slices, or a mint leaf for a gourmet look.

    Pro tip: Chill for at least 2 hours to allow flavors to meld perfectly.

    Choosing the right cookies can make your homemade sweets stand out. Traditional Strawberry Banana Pudding often uses Nilla wafers. But, you can also try other tasty options.

    When picking cookies for your fruit desserts, keep these points in mind:

    • Classic Nilla Wafers give a traditional, sweet taste
    • Chessman butter cookies have a richer, buttery flavor
    • Graham crackers add a hint of honey
    • Gluten-free options for those with dietary needs

    How you prepare your cookies is just as important as the type. You can layer cookies whole or crush them for a different feel. Crushing cookies makes the dessert more cohesive, while whole cookies create distinct layers.

    For the best homemade sweets, follow these cookie preparation tips:

    1. Pick fresh, crisp cookies
    2. Let cookies soak in pudding a bit
    3. Arrange cookies for a nice look
    4. Avoid over-saturating cookies to keep their texture

    Trying different cookies can turn your Strawberry Banana Pudding into a special treat.

    Fresh Fruit Handling and Preparation

    Making tasty fruit desserts starts with picking and preparing your ingredients right. Summer treats like strawberry banana pudding need top-notch fresh fruits. Knowing how to handle and prepare your strawberries and bananas can make your dessert truly special.

    Banana Ripeness Guide

    Choosing the right banana is key for your summer treats. Look for bananas with these traits:

    • Yellow color with slight brown speckles
    • Soft to gentle pressure
    • No green areas or completely brown surface
    • Smooth, unblemished skin

    Preventing Fruit Oxidation

    Keeping your fruit fresh and preventing browning is crucial in fruit desserts. Try these methods:

    1. Coat sliced bananas in fresh lemon juice
    2. Cut bananas immediately before serving
    3. Store sliced bananas in cold water with lemon juice

    Strawberry Selection Tips

    Picking the best strawberries makes your summer treats stand out. When picking strawberries, look for:

    • Bright red, glossy appearance
    • Firm texture without soft spots
    • Fresh green leaves
    • Sweet, fragrant aroma

    Pro tip: Wash strawberries just before use to keep them fresh and prevent spoilage in your fruit desserts.

    Whipped Cream and Toppings

    Make your homemade sweets stand out with the perfect whipped cream and toppings. The right garnishes can make a simple strawberry banana pudding look stunning. It will also taste amazing.

    Creating the ultimate whipped cream is easy but makes a big difference. Here are some tips for the best topping:

    • Use heavy whipping cream chilled to 40°F for best results
    • Add a touch of vanilla extract for enhanced flavor
    • Whip until soft peaks form for ideal texture
    • Avoid over-mixing to prevent butter-like consistency

    Your creamy delights need exciting toppings for texture and looks. Try these garnish options:

    1. Crushed vanilla wafers for crunch
    2. Fresh strawberry slices
    3. Caramel drizzle
    4. Toasted coconut flakes
    5. Chocolate shavings

    When adding toppings, remember to use them sparingly. A little crushed cookie or caramel swirl can make a big difference. It won’t overpower the dessert’s flavors.

    Pro tip: Prepare whipped cream just before serving to maintain its light, airy texture and prevent deflation.

    Make-Ahead Tips and Storage Solutions

    Creating no-bake desserts like strawberry banana pudding requires smart planning. You can prepare your family favorites ahead of time. This way, you get delicious results without the stress of last-minute prep.

    Preparing your pudding ahead of time is not just convenient. It can also make it taste better. The secret is knowing how to store it right.

    Proper Storage Methods

    Here are the key steps for storing your strawberry banana pudding:

    • Use an airtight container with a secure lid
    • Keep refrigerated at 40°F or below
    • Avoid storing near strong-smelling foods

    Maintaining Freshness

    To keep your no-bake desserts fresh, follow these tips:

    1. Consume within 2-3 days for the best taste
    2. Prevent banana browning by adding a splash of lemon juice
    3. Cover the surface with plastic wrap to reduce air exposure

    Serving Temperature Guidelines

    Storage MethodDurationRecommended Action
    RefrigeratorUp to 5 daysServe chilled, directly from refrigerator
    FreezerUp to 3 monthsThaw overnight in refrigerator before serving

    By using these storage tips, your desserts will stay delicious and fresh. This makes your no-bake desserts a stress-free treat for your family.

    Seasonal Variations and Adaptations

    Try new things with your strawberry banana pudding recipes. Explore seasonal changes that add excitement to this favorite dessert. Each season brings new fruits to try.

    Summer is the perfect time for fresh fruit in your pudding. Here are some great options:

    • Late Summer: Blend peach and raspberry for a vibrant twist
    • Fall Season: Experiment with apple and pear combinations
    • Spring: Incorporate light citrus fruits like mandarin oranges

    When you change up your fruit desserts, remember these tips:

    1. Select fruits with similar moisture content to maintain pudding consistency
    2. Adjust sugar levels based on the natural sweetness of seasonal fruits
    3. Consider texture variations when substituting fruits

    Need to make your pudding recipe fit dietary needs? Here’s how:

    • Dairy-free alternatives: Use coconut milk or almond milk
    • Gluten-free option: Replace traditional cookies with gluten-free graham crackers
    • Lower-sugar version: Substitute sugar with stevia or monk fruit sweetener

    Your creativity is the only limit when exploring seasonal pudding recipes. Each variation offers a unique opportunity to refresh this classic dessert and surprise your taste buds.

    Special Occasion Serving Suggestions

    Turn your Strawberry Banana Pudding into stunning treats that will wow guests at any event. This dessert is perfect for both casual gatherings and fancy dinner parties.

    Here are some creative ways to serve your pudding:

    • Picnic Perfect: Use individual mason jars for easy, mess-free servings
    • Holiday Gatherings: Create a stunning trifle bowl centerpiece
    • Summer BBQ: Prepare chilled individual portions for easy outdoor dining
    • Potluck Parties: Make ahead and transport in sealed containers

    Scaling your recipe is easy. For smaller groups, halve the ingredients. For bigger gatherings, double the recipe in a wider dish. The pudding serves about 10 people, making it great for medium-sized events.

    Pro tip: Chill your pudding for at least 4 hours before serving. This lets the flavors blend perfectly. Top with fresh strawberry slices or crushed vanilla wafers for a fancy touch.

    The secret to memorable desserts is presentation and passion!

    Conclusion

    Exploring strawberry banana pudding shows it’s more than a simple dessert. It’s a classic comfort food that captures the essence of Southern cooking. It combines fresh fruits, creamy textures, and nostalgic flavors in one delightful treat.

    With just 20 minutes of prep and a total time of 2 hours 20 minutes, you can make a memorable dessert for up to 8 people. This dessert is perfect for any occasion, whether it’s a family gathering, potluck, or a quiet evening at home.

    Each serving has 320 calories and offers a balanced mix of sweet strawberries and ripe bananas. The recipe is simple, making it easy for home cooks of all levels to make.

    This pudding is more than just a dessert. It connects us to family memories, shared moments, and the joy of making something special. By mastering this recipe, you’re preserving a delicious part of American food culture that brings people together.

    So, grab your ingredients, dive into the tradition, and enjoy the sweet, creamy magic of homemade strawberry banana pudding. Your taste buds – and your loved ones – will thank you.

    FAQ

    What makes Strawberry Banana Pudding a Southern classic?

    Strawberry Banana Pudding is a favorite in the South. It mixes creamy banana pudding with sweet strawberries. This dessert is loved at family gatherings, making it a true Southern classic.

    Can I make Strawberry Banana Pudding in advance?

    Yes, you can make it up to 24 hours ahead. Just keep it covered in the fridge. Add crunchy toppings right before serving to keep them fresh.

    What are the best cookies to use in this dessert?

    Nilla wafers are the classic choice. But Chessman butter cookies or graham crackers work too. Pick a cookie that stays a bit crunchy with the pudding and fruit.

    How do I prevent my bananas from turning brown?

    Slice bananas just before using. Toss them in lemon juice lightly. Use ripe but firm bananas for the best taste and texture.

    Are there dairy-free or gluten-free variations of this dessert?

    Yes! Use coconut milk pudding or dairy-free whipped topping for dairy-free. For gluten-free, try gluten-free cookies or graham crackers. This recipe can be adapted for different diets.

    How long can Strawberry Banana Pudding sit out at room temperature?

    Keep it out for no more than 2 hours. Always refrigerate it after serving. This keeps it safe and fresh.

    Can I freeze Strawberry Banana Pudding?

    You can freeze it, but fresh fruits and cookies might change texture when thawed. Freeze without fresh fruit layers. Thaw in the fridge and add fruit just before serving.

    What are some creative ways to serve this dessert?

    Serve in mason jars for a rustic look. Or make a trifle in a clear glass bowl. Try mini versions or different shapes for a fun twist.

    What is your rating for the recipe?

  • Burger Bowl Recipe

    Craving the flavors of a classic burger but don’t want the guilt? Burger bowls are here to save the day. They’re a low-carb meal that turns burgers into a healthy, customizable feast. This change will shake up your eating habits for the better.

    Picture this: all the flavors of a juicy burger, with fresh veggies, top-notch ground beef, and a special sauce. But without the bun. Burger bowls are more than a meal; they’re a treat for those who love healthy food but still want to enjoy tasty meals.

    What Makes a Perfect Burger Bowl

    To make a great meal bowl, you need to know the important parts. Burger bowls are a fun twist on burgers. They taste amazing and are low in carbs.

    The secret to a top-notch burger bowl is in the ingredients. Each one adds its own special flavor. Together, they create a dish that’s both tasty and satisfying.

    Essential Elements of Your Burger Bowl

    • Protein Base: 12 oz of ground beef creates a hearty foundation
    • Fresh Vegetables: Crisp lettuce, juicy tomatoes, and crunchy pickles
    • Cheese: Adds creamy texture and depth of flavor
    • Special Sauce: Ties all ingredients together with tangy complexity

    When making protein bowls, balance is crucial. Your burger bowl should have about 36g of protein per serving. This makes it perfect for those watching their diet.

    Burger bowls are all about being flexible. You can make them your own while keeping that classic burger taste. Choose your protein and toppings to create a meal that’s just right for you.

    Essential Ingredients for Your Burger Bowl

    Starting with the right ingredients is key to making tasty quick meals. Your burger bowl needs fresh, quality parts that are full of flavor but quick to prepare.

    Protein Foundation

    Your burger bowl starts with a strong protein base. Ground beef, with 90-96% lean, is a top pick for taste and health. But, you can also try:

    • Ground turkey
    • Plant-based meat substitutes
    • Grilled chicken

    Fresh Vegetable Selections

    Adding crisp veggies makes your burger bowl stand out. You’ll need:

    • 10 oz romaine lettuce
    • 7 oz diced Roma tomatoes
    • ½ cup diced white onion
    • 1 cup chopped pickles

    Cheese and Flavor Enhancers

    Cheese makes your meal richer. Cheddar cheese is a great choice, with 1 cup adding the perfect flavor.

    IngredientQuantityPurpose
    Olive Oil½ tablespoonCooking base
    SeasoningsVariousFlavor enhancement

    Special Sauce Ingredients

    The sauce is what makes your burger bowl special. It’s made of:

    • ½ cup light mayo
    • ¼ cup pickle juice
    • 3 tablespoons ketchup
    • ½ tablespoon mustard

    Choosing these ingredients carefully will make a burger bowl that’s both healthy and delicious.

    Kitchen Tools and Equipment Needed

    Making tasty fast food at home needs the right kitchen tools. A few key pieces make burger bowl prep easier. Quick meals are all about being efficient with the right tools.

    For a smooth burger bowl making experience, you’ll need some important kitchen equipment. The right tools can make cooking simple and fun.

    Essential Cooking Equipment

    • Large saute pan for cooking ground beef
    • Baking sheets for preparing sweet potato fries
    • Parchment paper for easy cleanup
    • Large mixing bowls for assembling ingredients
    • Small bowl for preparing special sauce
    • Measuring cups and spoons for precise ingredient amounts

    You don’t need to spend a lot on kitchen tools. Most of these items are basic and you might already have them. Investing in a good quality saute pan can really help cook your ground beef perfectly.

    “The right tools make cooking not just easier, but more enjoyable.” – Professional Chef

    Measuring and Preparation Tools

    When making your burger bowl, precision is key. Accurate measuring ensures your quick meals taste great and have the right texture. Here are some tools you might find helpful:

    1. Digital kitchen scale
    2. Sharp kitchen knife
    3. Cutting board
    4. Spatula for flipping and mixing

    With these tools, making fast food at home becomes a fun experience. Your burger bowl will come together quickly and efficiently!

    Preparing the Perfect Beef Patty

    Making the perfect beef patty is key for tasty protein bowls. Choosing the right ground beef is important for quick meals. Go for ground chuck with an 80/20 lean-to-fat ratio for the best flavor and juiciness.

    Start by picking high-quality grass-fed ground beef. Your patties will be the main part of your protein bowls. So, quality is important. Follow these steps for the best results:

    • Use 2 lbs of grass-fed ground beef
    • Portion into six 1/3 pound thick patties
    • Keep patty thickness consistent at 1/2 inch
    • Season generously with salt, pepper, and spices

    Seasoning turns ordinary ground beef into a delicious protein bowl part. Make a simple seasoning mix with:

    • Salt
    • Black pepper
    • Onion powder
    • Garlic powder
    • Paprika

    When cooking your patties, keep the heat between 350-400 degrees F. Cook for 3-4 minutes on each side for thick patties. Pro tip: Use a meat thermometer to ensure the internal temperature reaches 160°F for food safety.

    Nutritional facts for your burger patties are impressive. Each patty has about 100 calories and 11 grams of protein. This makes these protein bowls a great choice for those watching their health.

    Creating the Signature Special Sauce

    Take your burger bowl to the next level with a homemade special sauce. It turns fast food into a healthier meal. This sauce adds a restaurant-quality flavor to your kitchen, offering a tasty change from usual condiments.

    Your special sauce is more than a condiment. It’s the key that holds your burger bowl together. By making your own sauce, you choose the ingredients. This way, you create healthier options that match any fast food restaurant.

    Sauce Ingredient Breakdown

    • ½ cup mayonnaise (Kewpie or Duke’s recommended)
    • 4 teaspoons ketchup
    • 1 tablespoon yellow mustard
    • ¼ teaspoon garlic powder
    • ¼ teaspoon paprika
    • 1 pinch cayenne pepper
    • 1 finely diced dill pickle spear
    • 1 teaspoon dill pickle brine

    Mixing these ingredients takes just 30 seconds. Pro tip: Add milk if the sauce is too thick. This makes a creamy, flavorful sauce that turns your burger bowl into a gourmet dish.

    Customization and Flavor Enhancements

    Be creative with your sauce by adding optional ingredients like:

    • Splash of lemon juice
    • Dash of vinegar
    • Hint of truffle oil
    • Fresh ground black pepper

    This homemade sauce is a nutritional win. It cuts down on sodium and unhealthy additives found in store-bought sauces. It’s a great choice for those who love tasty, healthy fast food alternatives.

    Assembling Your Burger Bowl

    Making the perfect burger bowl turns classic burger tastes into tasty meal bowls. They’re great for eating on the go. The process is both an art and a science, making sure every bite is full of flavor and good for you.

    Begin with 3 cups of fresh, chopped Romaine lettuce as your base. It’s crunchy and sets the stage for your burger bowl. Arrange your ingredients carefully to make your meal both beautiful and delicious.

    • Base layer: 3 cups chopped Romaine lettuce
    • Protein layer: 1 pound of 93% lean ground beef
    • Vegetable toppings:
      • 3 medium tomato slices
      • 1/2 cup dill pickles
      • 1/4 cup red onion

    Cook the ground beef for 5-7 minutes until it’s nicely browned. Add your favorite spices to make it even tastier. Put the cooked beef on top of the lettuce, letting it slightly soften the greens.

    Then, add cheese, tomatoes, and pickles. For extra crunch, try adding sweet potato fries or air fryer potato wedges. Burger bowls are great because you can customize them easily for quick meals.

    Finally, drizzle your special sauce over the bowl. It brings all the flavors together. This makes a healthy meal with about 30 grams of protein and under 400 calories.

    Pro tip: Prepare ingredients in advance for quick assembly during busy weekdays!

    Customization Options and Variations

    Burger bowls are great for those looking for vegetarian or healthy options. You can make this dish your own, matching your diet and taste. It’s all about creativity in the kitchen.

    Trying out different proteins can make your burger bowl exciting. You can choose lean meats or go for plant-based options. This way, you can make a meal that’s both tasty and healthy.

    Protein Alternatives

    • Ground turkey for a leaner protein option
    • Chicken for a lighter alternative
    • Plant-based meat substitutes for vegetarian diets
    • Tofu crumbles for a completely meat-free version

    Creative Base Options

    Changing your base can really change your burger bowl. Instead of just lettuce, try using more nutritious greens.

    • Mixed greens with arugula
    • Spinach for added iron
    • Kale for extra nutrients
    • Cauliflower rice for a low-carb alternative

    Exciting Topping Combinations

    Topping CategoryOptions
    Protein BoostersGrilled chicken, hard-boiled eggs, black beans
    Creamy ElementsAvocado, Greek yogurt, dairy-free alternatives
    Crunchy AdditionsPickles, crispy onions, roasted nuts

    Your burger bowl is a blank canvas for nutrition. Try out different toppings to find the perfect mix of taste and health.

    Time-Saving Tips and Meal Prep Strategies

    Making quick meals is easy. Burger bowls are great for fast, on-the-go meals. You can prep them in advance with little effort. This way, you can enjoy tasty burger bowls all week without spending hours cooking.

    Advance Preparation Techniques

    You can prep your burger bowl ingredients ahead of time. This keeps them fresh. Here are some tips for quick meal prep:

    • Cook ground beef in bulk and portion into containers
    • Chop vegetables ahead of time
    • Prepare special sauce in advance
    • Store components separately to prevent sogginess

    Storage Guidelines

    IngredientRefrigerator StorageFreezer Storage
    Cooked Ground Beef3-4 days2-3 months
    Chopped Vegetables3-5 daysNot recommended
    Special Sauce5-7 days1 month

    For the best on-the-go meals, pack your burger bowl parts in separate containers. This keeps them fresh and prevents them from getting soggy. When you’re ready to eat, just mix them together for a quick, tasty meal.

    Pro Tip: Use airtight containers and label them with preparation dates to track freshness.

    Spending just a little time on meal prep can turn burger bowls into healthy quick meals. They’re perfect for a busy lifestyle.

    Nutritional Benefits and Health Considerations

    Burger bowls are a tasty way to eat healthy. They offer a low-carb option that’s full of nutrients. This makes them a great choice for those looking for a nutritious meal.

    • Significantly reduced carbohydrate content
    • High protein intake from lean ground beef
    • Increased vegetable consumption
    • Flexible portion control

    Protein and Micronutrient Breakdown

    A burger bowl is packed with nutrients. It has about 35 grams of protein per serving. This helps keep your muscles strong and growing.

    Nutritional ComponentAmount per Serving
    Total Calories416 kcal
    Protein35g
    Carbohydrates1g
    Fat44g

    Health-Conscious Considerations

    You can make your burger bowl fit your diet. Choose lean ground beef and add fresh veggies for a healthy meal. Using 90% lean ground beef cuts down on saturated fat but keeps protein high.

    Burger bowls are full of B vitamins and heme iron. These are key for energy and health. You can change the ingredients to fit your dietary needs.

    Conclusion

    Choosing a burger bowl as a healthy option changes how you eat. These meals are quick and fit many diets. You can make a tasty, healthy dish in under 30 minutes.

    Customizing your burger bowl is fun. You can pick from beef, turkey, or plant-based options. Add your favorite toppings and sauces to make it yours.

    Opting for a burger bowl means you’re eating low-carb and gluten-free. It’s a fresh twist on burgers. Your kitchen becomes a place for fun and healthy meals.

    The best part of a burger bowl is making it your own. Try new ingredients and proteins. Enjoy making meals that are good for you and delicious.

    FAQ

    What exactly is a burger bowl?

    A burger bowl is a healthier twist on traditional burgers. It keeps all the classic burger flavors but in a bowl. Instead of a bun, ingredients are layered over fresh lettuce, making it a nutritious and flexible meal.

    Are burger bowls actually healthy?

    Yes, burger bowls are a healthier choice than regular burgers. They ditch the bun and focus on lean protein, veggies, and portion control. This makes them a good option for those watching carbs or seeking a balanced meal.

    Can I make a vegetarian or vegan burger bowl?

    Definitely! For a veggie or vegan bowl, swap the ground beef with plant-based options like Beyond Meat or black bean patties. Keep the flavor and protein levels high to match your diet.

    How long does it take to prepare a burger bowl?

    Prepping a burger bowl takes about 15-20 minutes. With some prep work like cooking meat and chopping veggies ahead, you can cut this time to 5-10 minutes.

    What are the best storage and meal prep tips for burger bowls?

    For freshness, store meat, veggies, and sauce separately in the fridge. Assemble the bowl just before eating to keep lettuce crisp. Most parts can stay fresh for 3-4 days in airtight containers.

    Can I make the special sauce ahead of time?

    Yes! The special sauce can be made ahead and kept in the fridge for up to a week. It’s a quick way to add flavor to your bowls. Just stir it well before using.

    Are burger bowls good for weight loss?

    Burger bowls are great for weight loss. They skip the high-carb bun and focus on lean proteins and veggies. Just watch your portion sizes and choose lean meats.

    What are some low-carb alternatives to traditional burger bowl bases?

    Instead of lettuce, try cauliflower rice, spinach, or zucchini noodles. These bases add nutrients and keep carbs low.

    How can I make my burger bowl more protein-rich?

    To boost protein, add hard-boiled eggs, lean ground beef, or plant-based options like tofu. Nuts or seeds also add protein and crunch.

    Are burger bowls suitable for meal prepping?

    Burger bowls are perfect for meal prep. Cook meat, make sauce, and chop veggies in advance. Store them separately and assemble just before eating for a quick, healthy meal.

    What is your rating for the recipe?