Author: zikrecipes.com

  • Rockfish Recipes

    The first time I grilled a Pacific rockfish, it changed my cooking forever. This fish isn’t just another meal – it’s a blank canvas for amazing flavors. It makes quick, healthy meals that elevate any weeknight dinner.

    Rockfish, also known as striped bass or Pacific snapper, is a great choice for home cooks. It’s perfect for beginners and experts alike. You can pan-sear or air fry it, making it adaptable to many cooking styles.

    Looking for a light dinner or something new? Rockfish recipes will be your go-to. They offer a world of tasty, healthy dishes to try.

    Understanding Pacific Rockfish and Its Culinary Appeal

    Explore the world of Pacific rockfish, a fish loved by many in North America. It’s known as rock cod and ocean perch. These fish are tasty and good for you, making them a favorite in kitchens everywhere.

    Pacific rockfish are found along the western coast of North America. They are loved by anglers and food lovers for their unique taste and how well they cook.

    Exploring Rockfish Species

    The rockfish family has many varieties, each with its own special taste:

    • Black Rockfish: Known for its firm texture and robust flavor
    • Vermilion Rockfish: Offers a slightly sweeter taste profile
    • Yelloweye Rockfish: Prized for its delicate white meat

    Nutritional Powerhouse

    Rock cod is not only tasty but also very healthy. A 3-ounce serving is packed with nutrients:

    NutrientAmount per 3 oz Serving
    Protein17-20g
    Calories90-110
    Omega-3 Fatty Acids0.3g

    Selecting the Perfect Rockfish

    When buying ocean perch, look for these signs of freshness:

    1. Clear, bright eyes
    2. Firm, elastic flesh
    3. Clean, ocean-like smell
    4. Bright, consistent coloration

    Pro tip: Ask your fishmonger about the catch date to ensure maximum freshness and flavor.

    Essential Ingredients and Kitchen Tools for Rockfish Preparation

    Starting to cook scorpionfish dishes means getting the right stuff. Whether it’s pacific scorpionfish or another rockfish, a good kitchen is key. It helps make your seafood meals unforgettable.

    Essential Ingredients for Rockfish

    • Fresh herbs: Dill, parsley, and chives
    • Citrus fruits: Lemons and limes
    • Aromatics: Garlic and shallots
    • Butter and high-quality olive oil
    • Capers and fresh seasonings

    Choosing the right ingredients for your scorpionfish dish is important. Go for fresh, quality items. They’ll make your pacific scorpionfish dish stand out.

    Kitchen Tools You’ll Need

    1. Non-stick skillet or cast-iron pan
    2. Sharp fish spatula
    3. Baking dishes
    4. Sharp chef’s knife
    5. Measuring cups and spoons

    Having the right tools makes cooking rockfish better. A good fish spatula makes handling fillets easy. A non-stick pan ensures your fish is perfectly seared.

    Pro tip: Always pat your scorpionfish dry before cooking to achieve a crispy, golden exterior.

    With these ingredients and tools, you’re set to make amazing rockfish dishes. They’ll wow your family and friends.

    Pan-Seared Rockfish with Lemon Butter Sauce

    Cooking California scorpionfish needs skill and care. Pan-searing makes this fish a top-notch dish. It has a crispy outside and a soft, flaky inside.

    To make a great rockfish dish, you need to know how to cook and pick the best ingredients. This recipe will help you make a delicious meal that highlights the fish’s natural taste.

    Preparing the Perfect Sear

    To get a golden-brown crust on your rockfish, follow these steps:

    • Pat the rockfish fillets dry with paper towels
    • Season generously with salt and black pepper
    • Use a heavy-bottomed skillet for even heat distribution
    • Heat oil until it shimmers but doesn’t smoke
    • Cook fillets for 3-4 minutes per side

    Making the Signature Sauce

    The lemon butter sauce takes the California scorpionfish to a new level. Here’s a simple yet elegant recipe:

    • Melt 2 tablespoons of butter in the same pan
    • Add minced garlic (5-6 cloves)
    • Pour in 1 tablespoon fresh lemon juice
    • Whisk in 3 tablespoons chicken stock
    • Sprinkle a teaspoon of flour to thicken

    Plating and Garnishing Tips

    To make your pan-seared rockfish look amazing, follow these tips:

    • Place the fillet on a warm plate
    • Drizzle sauce around the fish, not directly on top
    • Garnish with fresh parsley or chives
    • Add a lemon wedge for extra brightness

    Pro tip: Serve immediately to enjoy the crisp texture and vibrant flavors of your perfectly cooked California scorpionfish.

    Baked Rockfish with Herbs and Vegetables

    Rockfish becomes a tasty dish when baked with fresh veggies and herbs. This method highlights the fish’s flavor and makes a healthy, easy meal.

    To make a great baked rockfish, follow these steps:

    • Preheat your oven to 375°F (190°C)
    • Choose fresh rockfish fillets, preferably from sustainable sources
    • Pick veggies like zucchini and bell peppers
    • Use herbs like parsley, dill, or thyme

    Striped bass and other rockfish are great for baking. Use just 1 tablespoon of olive oil for two fillets. Seasoning is key to enhancing the dish’s flavor.

    Bake for 15-18 minutes, depending on the fish’s thickness. It’s done when it’s flaky and opaque. Add fresh lemon wedges for a zesty touch.

    “The secret to great rockfish is respecting its natural flavor while adding subtle, complementary ingredients.”

    Pair your baked rockfish with quinoa, couscous, or a fresh salad. It’s a complete meal that feels like dining out at home.

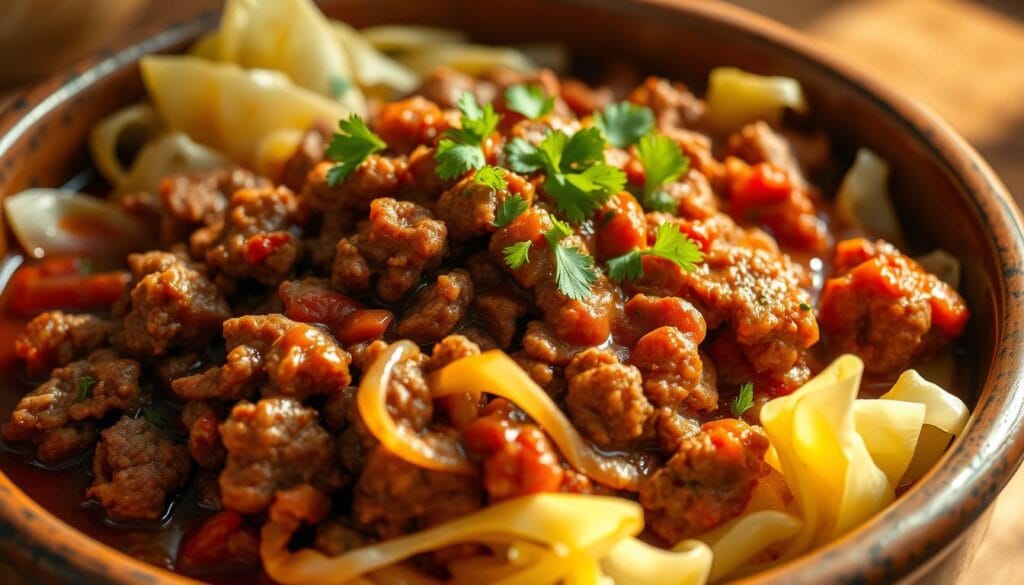
    Asian-Inspired Chili Garlic Rockfish

    Turning pacific snapper into a tasty Asian dish needs skill and the right stuff. Rock cod and rockfish are great for making a meal that’s full of flavor and spice.

    Rockfish fans can take their cooking to the next level with this spicy recipe. It mixes Asian cooking methods with fresh, lively ingredients.

    Sauce Components

    Your chili garlic sauce is the main attraction. Make a strong flavor with these ingredients:

    • Fresh garlic, minced
    • Store-bought chili garlic sauce
    • Soy sauce
    • Scallions, finely chopped
    • Rice vinegar

    Cooking Techniques

    There are several ways to cook your rockfish that fit the Asian flavor:

    1. Pan-frying: Gives a crispy outside
    2. Baking: Keeps it moist and cooks evenly
    3. Broiling: Adds a quick, caramelized touch

    Serving Suggestions

    “The perfect dish balances heat, flavor, and presentation.” – Culinary Expert

    Make your rockfish dish even better with these sides:

    • Steamed jasmine rice
    • Asian wheat noodles
    • Stir-fried vegetables
    • Fresh cilantro garnish

    Your Asian-inspired chili garlic rockfish will wow with its rich flavors and beautiful look.

    Crispy Breaded Rockfish Variations

    Turning reef fish like ocean perch into a crispy, golden treat is simple. Breading rockfish makes it a tasty delight, with a satisfying crunch. It’s loved by both home cooks and food lovers.

    Choosing the right breading method is key to a great rockfish dish. Here are some popular ways to do it:

    • Classic breadcrumb coating
    • Panko breadcrumb method
    • Crushed buttery cracker breading
    • Seasoned flour dredging

    For a perfect crispy outside, use top-notch ingredients and learn the right cooking techniques. Air frying is a healthier choice than deep-frying. It helps you get a crisp texture with less oil.

    “The key to great breaded rockfish is maintaining a delicate balance between crispy exterior and tender interior.” – Seafood Chef

    Here’s a quick guide to breading your ocean perch or reef fish:

    Breading MethodTextureCooking Time
    Panko BreadcrumbsExtra Crispy2-3 minutes per side
    Classic BreadcrumbsMedium Crunch3-4 minutes per side
    Buttery Cracker CrumbsRich, Golden Crust2-3 minutes per side

    Pro tip: Add herbs like parsley, dill, or paprika to your breading for extra flavor. Try different coatings to find your favorite crispy rockfish!

    Rockfish Tacos with Fresh Toppings

    Discover the ultimate summer meal that combines the delicate flavor of scorpionfish with vibrant toppings. Pacific scorpionfish tacos are a delightful way to enjoy fresh seafood with minimal preparation time. In just 25 minutes, you can create a restaurant-worthy dish that will impress your family and friends.

    Preparing the Fish

    Cooking rockfish for tacos is straightforward and quick. Follow these steps to prepare your fish perfectly:

    • Select 1 lb of fresh rockfish fillets
    • Pat the fish dry with paper towels
    • Season with salt, pepper, and your favorite spice blend
    • Cook at 400°F for 4 minutes per side
    • Ensure internal temperature reaches 140-145°F

    Creating Complementary Salsas

    Elevate your tacos with fresh, zesty salsas that complement the mild flavor of scorpionfish. A corn salsa adds brightness and texture to your dish.

    • Grill corn for 3-4 minutes per side
    • Chop grilled corn kernels
    • Mix with diced tomatoes, onions, and cilantro
    • Add lime juice for extra flavor

    Assembly Instructions

    Create perfect rockfish tacos with these simple assembly tips:

    1. Warm flour tortillas
    2. Place cooked pacific scorpionfish in the center
    3. Top with corn salsa
    4. Add optional garnishes like:
      • Diced avocado
      • Shredded cabbage
      • Sour cream
      • Fresh cilantro
    5. Serve immediately

    Pro tip: Each taco contains approximately 324 calories and 18g of protein, making it a nutritious meal option!

    Tips for Achieving Restaurant-Quality Results

    To make your rockfish dishes as good as those in restaurants, you need to focus on details. Chefs know that cooking california scorpionfish and other rockfish needs careful attention.

    Here are some key techniques for cooking rockfish perfectly:

    • Pat the fish dry with paper towels to remove extra moisture
    • Preheat your pan to get a golden, crispy outside
    • Use a dedicated fish spatula for gentle handling
    • Keep the cooking temperature just right

    It’s important to control the temperature when cooking rockfish. You want to reach an internal temperature of 145°F. This makes sure the fish is cooked well without drying out. For pan-searing, cook each side for 3-4 minutes to get a beautiful golden-brown crust.

    Choosing fresh rockfish is also key. Look for:

    1. Bright, clear eyes
    2. Shiny, moist skin
    3. Clean seawater smell
    4. Firm, strong flesh

    Pro tip: Don’t overcrowd the pan when cooking rockfish. This lets each fillet sear evenly. It helps create a delicious crispy outside, just like in restaurants.

    Conclusion

    Your journey into rockfish cooking shows how versatile this seafood is. From striped bass to pacific snapper, it’s a blank canvas for chefs. With only 90-110 calories per 3-ounce serving and 17-20 grams of protein, it’s a healthy choice for many meals.

    The recipes you’ve seen make it easy to create dishes like those in restaurants. You can pan-sear, bake, or make Asian-inspired tacos. Each method brings out the fish’s mild, sweet taste. Cooking it to 130°F to 135°F ensures it’s always perfect.

    Adding rockfish to your meals supports sustainable fishing. It’s full of omega-3s, vitamin D, and B12, good for your heart and health. Keep exploring the tasty world of rockfish cooking.

    Great cooking comes from practice and creativity. Try new flavors, marinades, and cooking ways. Your rockfish cooking journey is just starting!

    FAQ

    What types of rockfish are commonly used in cooking?

    Rockfish varieties include rock cod, ocean perch, and striped bass. You also have pacific snapper, California scorpionfish, and reef fish. Each has its own taste and texture, making them great for different cooking ways.

    Is rockfish a healthy protein option?

    Yes, rockfish is a great choice for a healthy protein. It’s packed with protein, low in calories, and full of nutrients. It’s also lean and rich in omega-3s, which are good for your heart and overall health.

    What are the best cooking methods for rockfish?

    Rockfish is very versatile and can be cooked in many ways. You can pan-sear, bake, air fry, grill, or bread it. Just remember, it cooks fast, so don’t overdo it to keep it moist.

    How do I know when rockfish is fully cooked?

    Rockfish is done when it’s opaque and flakes with a fork. It should reach 145°F (63°C) inside. The flesh should be moist and flaky when pressed gently.

    Can I freeze rockfish?

    Yes, you can freeze rockfish. Wrap it tightly in plastic or freezer paper, then in a freezer bag. It stays fresh for up to 3 months. Thaw it in the fridge before cooking.

    What flavors pair well with rockfish?

    Rockfish’s mild flavor goes well with many things. Try citrus, herbs, garlic, capers, butter, and light spices. Asian and Mediterranean flavors also bring out its taste.

    Is rockfish sustainable?

    Many rockfish species are fished sustainably. Look for certifications or ask your fishmonger about the fish’s origin.

    What’s the difference between rockfish and other white fish?

    Rockfish is firmer than cod or tilapia. It tastes milder and works well with many seasonings. This makes it very versatile in cooking.

    How can I prevent rockfish from becoming dry when cooking?

    To avoid dryness, don’t overcook it. Pat it dry, cook at high heat briefly, and use methods like baking with veggies or sauces. Cooking times are usually short, 3-5 minutes per side.

    What are some easy rockfish recipe ideas for beginners?

    Start with simple recipes like pan-seared rockfish with lemon butter or baked with herbs. You can also try breaded rockfish or rockfish tacos. These are easy and let the fish’s flavor shine.

    What is your rating for the recipe?

  • Scrambled Pancakes

    Do you remember those mornings when making perfect pancakes seemed like a big challenge? Welcome to the world of scrambled pancakes, a new twist on breakfast. This trend has taken social media by storm, with TikTok creators like Archived Chef leading the way.

    Scrambled pancakes are more than just a trick. They’re a fresh way to start your day. Imagine mixing your pancake batter like scrambled eggs. No need to worry about flipping or getting the shapes right. This trend offers tasty, easy-to-make pancake bits that are ready in no time.

    People are divided online, with some calling it a culinary crime and others seeing it as genius. With over 20 million views on TikTok, scrambled pancakes have become a big deal. They’re not just a recipe; they’re a cultural phenomenon that shakes up traditional breakfast ideas.

    What Are Scrambled Pancakes: Origins and History

    Scrambled pancakes are a mix of old European cooking and new social media trends. They turn regular pancakes into small, tasty bites. This has caught the eye of cooks and food lovers everywhere.

    The story of scrambled pancakes starts with Kaiserschmarrn, a dish from Austria. It means “Emperor’s Mess” and has a history from the mid-1800s. It’s tied to Austrian cooking traditions.

    Austrian Kaiserschmarrn Connection

    Kaiserschmarrn was loved by Austrian Emperor Franz Joseph I. It was made by a farmer who had to feed the royal couple suddenly. The dish is known for:

    • Pancake batter broken into pieces
    • Served with powdered sugar
    • Homemade apple sauce as a classic side

    Evolution into Modern Breakfast Trend

    Thanks to TikTok, scrambled pancakes have become a big hit for brunch. Here are some numbers that show how popular they are:

    • @archivedchef’s video got 13.7 million views
    • @bekmarsden’s version got 3.2 million views
    • 12,000 comments show how much people love it

    Cultural Significance

    Scrambled pancakes are great for home cooks, especially when making meals for kids or those with fine motor issues. They’re chewier and easier to eat than regular pancakes. This makes them a fun and easy breakfast choice.

    Essential Ingredients for Perfect Scrambled Pancakes

    To make delicious fluffy pancakes, you need the right ingredients. Each one plays a key role in your recipe. Understanding this helps you make great scrambled pancakes.

    Here are the main ingredients for perfect scrambled pancakes:

    • All-Purpose Flour: 1 cup is the base
    • Baking Powder: 1 teaspoon for lightness
    • Sugar: 1 tablespoon for sweetness
    • Large Eggs: 1 egg to hold it all together
    • Buttermilk: 1 cup for a rich taste
    • Butter or Oil: 1 tablespoon for flavor and color

    Knowing how each ingredient works is key. Flour gives structure, baking powder makes it light, and eggs bind it all. This mix creates a delicious egg dish.

    Pro tip: Let your batter rest for 10 minutes. This makes the pancakes tender and fluffy. Using butter and oil adds flavor and color.

    The secret to perfect scrambled pancakes lies in balancing ingredients and mastering cooking technique.

    Choosing the right ingredients can turn a simple breakfast into a special meal. Try different mixes and methods to find your favorite way to make scrambled pancakes.

    Kitchen Tools and Equipment Needed

    Preparing delicious breakfast recipes needs the right kitchen tools. Choosing the right equipment makes cooking scrambled pancakes special.

    Choosing the Right Pan

    Your pan choice greatly affects scrambled pancakes’ quality. Here are some good options:

    • Lodge Cast Iron Skillet – pre-seasoned with great heat retention
    • Scanpan Impact Fry Pan – lasts a lifetime and is scratch-proof
    • Solidteknics AUS-ION Frypan – light and distributes heat well

    Essential Spatula Selection

    A good spatula is key for making perfect scrambled pancakes. Silicone spatulas are great because they’re heat-resistant and flexible.

    Spatula TypeKey FeaturesBest For
    Silicone SpatulaHeat-resistant, flexibleScrambling pancakes
    Stainless Steel SpatulaDurable, precise edgesFlipping and turning

    Additional Tools for Success

    Boost your breakfast with these extra tools:

    1. Fine mesh strainer for powdered sugar dusting
    2. Pancake batter dispenser for precise pouring
    3. Measuring cups for accurate ingredient proportions

    Quality kitchen tools make cooking scrambled pancakes fun and tasty.

    Step-by-Step Scrambled Pancakes Preparation

    Making delicious scrambled pancakes needs care and skill. This recipe turns regular pancakes into a tasty, textured dish. It will change your morning breakfast.

    First, get all your ingredients and tools ready. The secret to great scrambled pancakes is being prepared and knowing when to act.

    1. Prepare the Batter
      • Mix dry ingredients well
      • Whisk wet ingredients until smooth
      • Let batter rest for 5-10 minutes
    2. Heat Your Cooking Surface
      • Use a non-stick pan or cast-iron skillet
      • Set heat to medium-low
      • Lightly grease the surface
    3. Cooking Technique
      • Pour batter in thin layer
      • Wait until bubbles form
      • Begin scrambling with spatula
      • Break pancake into uneven pieces

    Your scrambled pancakes are done when they’re golden brown and a bit crispy. They usually take 2-3 minutes to cook.

    Cooking ParameterRecommended Value
    Batter Amount1/2 to 1 cup
    Cooking Time2-3 minutes
    Heat LevelMedium-low
    Batter Resting Time5-10 minutes

    Pro tip: The secret to perfect scrambled pancakes is patience and constant movement during cooking.

    Remember, the more you practice, the better you’ll get at making scrambled pancakes. Every time you try, you’ll get a little better.

    Tips for Achieving the Perfect Texture

    Making fluffy pancakes needs precision and knowing key cooking techniques. Whether it’s for breakfast or brunch, getting the pancake texture right can change your cooking game.

    Getting the perfect scrambled pancake texture is all about a few key things. These can make or break your breakfast.

    Batter Consistency Guide

    The secret to fluffy pancakes is in your batter’s mix. Here are the must-haves:

    • 1 ½ cups all-purpose flour
    • 2 tablespoons granulated sugar
    • 2 teaspoons baking powder
    • ½ teaspoon baking soda
    • ¼ teaspoon salt
    • 1 large egg
    • 1 ½ cups buttermilk

    Temperature Control Techniques

    Controlling the temperature is key for perfect egg dishes and pancakes. Use medium-low heat to avoid toughness and ensure even cooking.

    Cooking ParameterRecommended Setting
    Pan TemperatureMedium-Low
    Batter Resting Time10 minutes
    Cooking Time per Side2-3 minutes

    Timing and Flipping Methods

    Flipping pancakes can be tricky. In fact, 45% of people struggle with pancake flipping. Here are some tips to help you get it right:

    1. Wait for bubbles to form on the surface
    2. Use a wide, thin spatula
    3. Flip gently and quickly
    4. Cook for an additional 1-2 minutes after flipping

    By using these methods, you’ll make pancakes that are as good as those in a restaurant. They’ll impress your family and friends.

    Common Mistakes to Avoid When Making Scrambled Pancakes

    Mastering scrambled pancakes means knowing what not to do. Many home cooks face issues that turn these tasty dishes into failures. It’s all about avoiding common mistakes.

    • Batter Overload: Too much batter at once messes up cooking and texture
    • Premature Scrambling: Breaking up the batter too soon leads to a mess
    • High Heat Danger: Cooking on too high heat burns and makes tough pieces

    Timing is key when making scrambled pancakes. Chefs say wait until the batter starts to set before breaking it. This way, each piece gets a golden-brown outside and stays soft inside.

    Keeping the temperature right is also important. Your pan should be warm but not too hot. If the batter sizzles too fast, turn down the heat. The goal is to cook slowly and evenly.

    Remember: Patience transforms ordinary breakfast recipes into extraordinary culinary experiences!

    The right tools make a big difference. A rubber spatula helps make small, delicate curds. It also stops you from breaking the batter too much. Stir gently and often to keep the pancakes light and fluffy.

    • Use ½ tablespoon of butter per egg serving
    • Cook over low to medium-low heat
    • Remove from heat when 90% cooked

    Avoiding these mistakes will make your scrambled pancakes amazing. They’ll be a hit with both kids and adults.

    Creative Toppings and Serving Suggestions

    Turn your scrambled pancakes into a fancy brunch dish with exciting toppings. These toppings can make your breakfast recipes stand out. The right mix of garnishes and creative additions can turn them into culinary masterpieces.

    Traditional Garnishes

    Classic toppings are always a hit for brunch lovers. Here are some timeless favorites:

    • Powdered sugar dusting
    • Real maple syrup
    • Fresh berries
    • Whipped cream

    Modern Topping Combinations

    Try new flavor combinations to spice up your scrambled pancakes:

    Topping CategoryRecommended Options
    CreamyGreek yogurt, Nutella, almond butter
    CrunchyGranola, coconut flakes, crushed almonds
    FruitySliced mango, fresh figs, mixed berries
    StickyCinnamon syrup, honey, caramel sauce

    Seasonal Variations

    Make your scrambled pancakes reflect the season with these ideas:

    • Spring: Strawberry compote, edible flowers
    • Summer: Fresh peaches, lavender honey
    • Autumn: Caramelized apples, pumpkin spice
    • Winter: Spiced pear, candied pecans

    For a memorable brunch, be creative and balance your toppings. Mix and match to find your favorite breakfast recipe!

    Nutritional Information and Dietary Adaptations

    Scrambled pancakes are a great egg dish for many diets. They offer a lot of nutrients, making them a top choice for breakfast.

    Nutritional Breakdown per Serving:

    • Total Calories: 371
    • Protein: 53g
    • Carbohydrates: 19g
    • Fat: 10g (including 3.7g saturated)
    • Fiber: 1.5g
    • Calcium: 303.5mg
    • Iron: 4.1mg

    Scrambled pancakes can be adapted for different diets. You can make them gluten-free with special flours like:

    1. Almond flour
    2. Coconut flour
    3. Oat flour
    4. Chickpea flour

    For egg-free versions, try using tofu seasoned with black Himalayan salt and turmeric. Ground flaxseed mixed with water also works well as an egg substitute.

    Those with dairy issues can use soy milk instead of regular milk. It’s high in protein and thick. Vegan butter is a direct swap for regular butter.

    Pro tip: Always check ingredient labels carefully to avoid potential cross-contamination, especially for individuals with severe food allergies.

    Storing your scrambled pancakes is easy. Refrigerate them for up to 4 days or freeze for 2 months. This way, you always have a healthy meal ready.

    Variations and Special Recipe Modifications

    Try new things with your breakfast by making scrambled pancakes in exciting ways. These changes let you make your dish your own and try out new tastes and ingredients.

    Here are some cool ways to make your scrambled pancakes better:

    • Fruit Infusions: Mix fresh fruits into the batter
      • Blueberries for antioxidants
      • Bananas for sweetness
      • Diced strawberries for color
    • Alternative Flour Options:
      • Whole wheat flour for health
      • Almond flour for gluten-free
      • Coconut flour for texture
    • Flavor Enhancers:
      • Cinnamon for spice
      • Vanilla extract for sweetness
      • Cardamom for a twist
      • Lemon zest for citrus

    When you change your scrambled pancakes, remember these tips: start small, taste as you go, and be creative. Each change can turn your simple breakfast into a special dish.

    Pro Tip: Adding 1-2 teaspoons of lemon juice can make your scrambled pancakes taste amazing.

    Try mixing different things to find your favorite scrambled pancakes recipe. It should match your taste and diet.

    Conclusion

    Scrambled pancakes have gone from a TikTok hit to a big deal in cooking. They’ve got nearly 20 million views and over 12,500 comments. This dish is more than a trend; it’s a game-changer for breakfast lovers.

    These pancakes are special because you can make them your own. They’re great for those who want a protein-packed meal or a gluten-free option. Fitness fans and busy people will love them. The mix of sparkling water and almond flour makes them light and fluffy.

    Starting your scrambled pancakes adventure means being open to trying new things. The skills you learn can make your breakfasts amazing. Feel free to add your favorite toppings and ingredients to make it yours. Your brunch menu will love the new twist.

    Now, you’re ready to wow your loved ones with your scrambled pancakes skills. It’s time to move beyond old pancake recipes. Enjoy a morning meal that’s as exciting to make as it is to eat.

    FAQ

    What exactly are scrambled pancakes?

    Scrambled pancakes mix pancake batter with a special cooking method. This makes them fluffy and with crispy edges. It’s inspired by Austrian Kaiserschmarrn, where the batter is broken up while cooking.

    How are scrambled pancakes different from regular pancakes?

    Unlike regular pancakes, scrambled pancakes are broken up while cooking. This makes them fluffy and with crispy edges. They offer a unique, textured eating experience.

    What type of pan works best for making scrambled pancakes?

    Use a non-stick pan or a well-seasoned cast iron skillet. These pans distribute heat well and prevent sticking. A silicone spatula helps break and move the pancake pieces for the perfect texture.

    Can I make scrambled pancakes gluten-free?

    Yes! For a gluten-free version, use almond flour, coconut flour, or a gluten-free flour blend. Just adjust the liquid to get the right batter consistency.

    You can top them with powdered sugar, maple syrup, and fresh berries. Try seasonal fruits, whipped cream, chocolate chips, or even bacon, herbs, or cheese for a twist.

    How long does it take to make scrambled pancakes?

    It takes about 15-20 minutes. The batter rests for 5-10 minutes, and cooking takes 5-7 minutes. They’re quick and delicious for breakfast.

    Are scrambled pancakes considered a healthy breakfast option?

    Their healthiness depends on ingredients and portion size. They offer protein from eggs. Use whole grain flours, add protein powder, or fruits and nuts for more nutrition. Choose healthy toppings and control portion sizes for a balanced breakfast.

    Can I prepare scrambled pancake batter in advance?

    Yes, you can make the batter up to 24 hours ahead. Store it in an airtight container in the fridge. Before cooking, whisk it well and let it sit at room temperature for a few minutes.

    What is the origin of scrambled pancakes?

    They come from Kaiserschmarrn, an Austrian dessert. It was made to use up leftover batter. Now, it’s a popular breakfast dish worldwide, thanks to social media.

    Can I make scrambled pancakes vegan?

    Yes, you can make vegan scrambled pancakes. Use plant-based milk, egg replacers like mashed banana, and plant-based flour. The trick is to get the right batter consistency and texture.

    What is your rating for the recipe?

  • Oreo Dirt Cake Recipe

    Childhood memories often taste sweet, and nothing captures that like an Oreo dirt cake. This no-bake treat turns simple ingredients into a fun dessert. It’s a playful mix of crushed Oreos, creamy pudding, and a garden of deliciousness.

    The Oreo dirt cake is more than a recipe—it’s an experience. It takes just 20 minutes to prepare and needs no special cooking skills. It’s perfect for kids’ parties or when you want a whimsical treat. This dessert is all about having fun in the kitchen.

    Introduction to the Classic Oreo Dirt Cake

    Get ready to explore a world of Oreo dessert magic! The Oreo dirt cake is a playful, irresistible treat. It turns simple ingredients into a whimsical garden plot that tastes like pure indulgence.

    Exploring the Delicious History

    The dirt cake’s origins come from creative home bakers. They wanted to make a fun, memorable dessert. Inspired by the idea of mimicking soil and garden elements, it quickly became a hit at gatherings.

    • Invented in the 1970s as a creative dessert concept
    • Rapidly gained popularity in suburban American kitchens
    • Became a staple at children’s birthday parties

    Perfect for Every Celebration

    This oreo dessert is incredibly versatile. It’s perfect for kids’ birthday parties, summer picnics, or family dinners. Its adaptable nature allows for endless creative presentations.

    Preparation Overview

    This layered dessert is surprisingly simple to make. With just 30 minutes of preparation, you can serve up to 20 people. The recipe is easy, making it perfect for both novice and experienced bakers.

    Preparation TimeServing SizeDifficulty Level
    30 minutes20 servingsEasy

    Get ready to impress your guests with this delightful, Instagram-worthy dessert. It’s as fun to make as it is to eat!

    Essential Ingredients for Your Oreo Dirt Cake

    To make the perfect Oreo dirt cake, you need the right ingredients. Chocolate cookie crumbs are the main attraction. They turn a simple dessert into a fun treat that everyone loves.

    Here’s what you’ll need for your pudding cups masterpiece:

    • Cookies: 18-19 oz of regular Oreo cookies (avoid Double Stuff varieties)
    • Butter: 6 tablespoons of salted butter, melted
    • Dairy Components:
      • 3 1/2 cups whole or 2% milk
      • 8 oz cream cheese, softened
      • 12 oz whipped topping, thawed
    • Pudding Mix: 2 boxes (3.4 oz each) of instant French vanilla pudding
    • Sweetener: 1 cup powdered sugar
    • Optional Decoration: Gummy worms

    The secret to this dessert is turning simple ingredients into something amazing. The chocolate cookie crumbs give it a fun “dirt” texture. The pudding cups add a creamy, rich base that holds it all together.

    Pro tip: For the best results, make sure all ingredients are at room temperature before mixing. This ensures a smooth, even texture in your dessert.

    Kitchen Tools and Equipment Needed

    To make the perfect Oreo dirt cake, you’ll need some specific kitchen tools. These tools will make preparing your dessert smooth and fun. You won’t need any fancy or expensive equipment to make this delightful treat.

    Start your kitchen adventure by gathering the right utensils for this delicious dessert. Knowing the essential tools will help you make a sweet treat that looks and tastes amazing.

    Essential Utensils for Delicious Preparation

    • Large mixing bowls (2-3 medium to large sizes)
    • Rubber spatula for smooth mixing
    • 9×13-inch baking dish
    • Electric mixer or whisk
    • Sharp kitchen knife
    • Cutting board

    Precise Measuring Tools

    Accuracy is key in easy dessert recipes. Your measuring tools will ensure the perfect balance of ingredients every time.

    • Dry measuring cups
    • Liquid measuring cups
    • Measuring spoons
    • Kitchen scale (optional but recommended)

    Optional Equipment for Creative Presentations

    While not mandatory, these additional tools can elevate your Oreo dirt cake presentation and make it even more exciting.

    • Individual serving glasses or mason jars
    • Trifle bowl
    • Pastry bag for decorative piping
    • Cookie crusher or food processor

    With these tools, you’ll be well-prepared to create a stunning Oreo dirt cake. It will look as amazing as it tastes. Remember, the right equipment makes preparing easy dessert recipes not just simple, but genuinely enjoyable.

    Step-by-Step Preparation Method

    Making this easy dessert recipe is easier than you think. The Oreo dirt cake comes together in just a few steps. You’ll have a delicious treat ready in no time.

    1. Crush the Oreo Cookies
      • Use a food processor or place cookies in a sealed bag
      • Crush until you have fine crumbs
      • Separate about 1-1/3 cups for the base layer
    2. Prepare the Cream Mixture
      • Blend cream cheese with powdered sugar
      • Fold in Cool Whip gently
      • Ensure a smooth, creamy consistency
    3. Make the Pudding Layer
      • Whisk 2 packages of vanilla instant pudding
      • Use 3 ½ cups of cold milk
      • Mix until thick and creamy

    The key to a perfect Oreo dirt cake is layering. Alternate between crushed Oreos, pudding mixture, and cream cheese layers. Aim for at least 3 layers for a visually appealing and delicious dessert.

    LayerIngredientQuantity
    BaseCrushed Oreos1-1/3 cups
    Cream LayerCream Cheese Mixture8 oz
    Pudding LayerVanilla Pudding2 packages (3.4 oz each)

    Once layered, refrigerate your Oreo dirt cake for at least 3 hours or overnight. This chilling time allows the flavors to meld and the texture to set perfectly. Pro tip: For the best results, prepare your dirt cake no more than a day ahead of serving to prevent the cookies from becoming too soft.

    Creative Serving Presentations

    Turn your Oreo dirt cake into stunning party food ideas that will impress your guests! Pudding cups are perfect for making this classic dessert both tasty and beautiful. Whether it’s a birthday party, family gathering, or casual get-together, these creative serving suggestions will make your dessert stand out.

    Individual Dirt Cups

    Personal pudding cups are a hit for parties. Use clear plastic or glass containers to show off the layers. These single-serve treats let guests enjoy their own portion without the mess.

    • Use 9-ounce clear plastic cups
    • Layer carefully for visual appeal
    • Top with gummy worms for extra fun
    • Perfect for children’s parties

    Trifle Bowl Display

    A large glass trifle bowl makes your Oreo dirt cake a stunning centerpiece. Strategically layer the ingredients to create a stunning visual gradient that will impress your guests. This presentation is great for larger gatherings and sophisticated dinner parties.

    Flower Pot Arrangements

    Serve your dessert in clean terracotta flower pots for a whimsical twist. This playful presentation is perfect for garden-themed events or summer celebrations. Add mint leaves or artificial flowers to complete the garden look.

    • Use small, food-safe flower pots
    • Clean thoroughly before use
    • Add decorative “planted” elements
    • Great for themed parties

    Tips for Perfect Oreo Crumb Texture

    Making the perfect chocolate cookie crumbs is an art. It can take your dirt cake from good to amazing. The texture of your Oreo crumbs is key to getting that “dirt-like” look and feel everyone loves.

    There are a few ways to get the right consistency for your chocolate cookie crumbs:

    • Food Processor Method: Pulse Oreo cookies in short bursts to create uniform crumbs
    • Rolling Pin Technique: Place cookies in a sealed bag and crush for a more rustic texture
    • Hand Crumbling: Break cookies manually for varied chunk sizes

    Pro tip: Keep some larger cookie chunks to maintain an authentic “dirt” appearance. The goal is to mix fine crumbs with small, crunchy pieces for texture.

    “The secret to a perfect dirt cake is in the crumbs – not too fine, not too chunky!”

    Your aim is to make chocolate cookie crumbs that are:

    1. Mostly fine and uniform
    2. Sprinkled with occasional larger cookie pieces
    3. Dry enough to maintain crunchiness

    Moisture can make your crumbs soggy. To avoid this, add layers carefully and don’t over-mix your dirt cake.

    Try different crushing methods to find your favorite chocolate cookie crumbs texture. Each method will give your dirt cake a special touch!

    Variations and Customizations

    Making a kid-friendly recipe like Oreo dirt cake is fun and easy. You can surprise your family or add a new twist to this classic dessert. These variations will inspire you.

    Exciting Pudding Flavor Combinations

    Try new pudding flavors to change up your Oreo dirt cake. Here are some tasty options:

    • Chocolate pudding for a rich, decadent taste
    • Cheesecake pudding for a tangy twist
    • Vanilla pudding for a lighter flavor profile
    • Butterscotch pudding for a caramel-like sweetness

    Seasonal Decorating Ideas

    Make your Oreo dessert festive with these creative decoration suggestions:

    • Halloween: Add candy pumpkins and orange sprinkles
    • Easter: Use pastel-colored candies and chocolate eggs
    • Christmas: Sprinkle crushed peppermint and green sugar crystals
    • Summer: Decorate with colorful gummy worms and beach-themed toppers

    Dietary Modifications

    Everyone can enjoy this kid-friendly recipe with these adaptations:

    • Gluten-free: Use gluten-free sandwich cookies
    • Dairy-free: Substitute milk with almond or oat milk
    • Low-sugar: Use sugar-free pudding mix
    • Vegan: Replace dairy ingredients with plant-based alternatives

    Pro tip: Always taste-test when making changes. This way, you can make sure the flavors and textures are still great. Your creativity can turn this classic Oreo dessert into a personalized treat that everyone will love!

    Storage and Make-Ahead Instructions

    Preparing no-bake treats like Oreo dirt cake in advance is a game-changer for busy home bakers. This delightful dessert offers incredible flexibility for meal planning and entertaining.

    When it comes to storing your no-bake treats, follow these essential guidelines to maintain optimal taste and texture:

    • Refrigerate the dirt cake within 2 hours of preparation
    • Store in an airtight container to prevent moisture absorption
    • Keep refrigerated at 40°F or below

    Pro tip: Always cover the dirt cake tightly with plastic wrap or a lid to prevent absorption of other refrigerator odors.

    Storage DetailRecommendation
    Maximum Storage Time3-4 days
    Optimal Flavor Blending Time8-12 hours
    Best Prepared1 day before serving

    “The secret to perfect no-bake treats is smart preparation and proper storage!” – Dessert Enthusiasts

    To prevent soggy cookies, assemble the layers just before serving. If preparing in advance, keep the Oreo crumbs and pudding mixture separate until ready to serve. This technique ensures each bite maintains its delightful crunch.

    For those planning ahead, you can confidently make your Oreo dirt cake up to 24 hours in advance. Simply store it in the refrigerator, covered, and enjoy the convenience of this make-ahead dessert.

    Nutritional Information and Serving Size

    Enjoying your homemade oreo dirt cake? Knowing its nutritional info is key. A serving has about 256 calories. It’s a treat best savored in small amounts.

    The nutritional breakdown is as follows:

    • Calories: 256 per serving
    • Carbohydrates: 34g
    • Protein: 3g
    • Fat: 12g

    How much you eat matters. A standard serving is 1/2 cup. It’s enough to satisfy your sweet tooth without overdoing it. If you’re watching your diet, try these tips:

    1. Use low-fat cream cheese
    2. Substitute some Oreo cookies with lighter alternatives
    3. Reduce sugar by using sugar-free pudding mix

    Pro tip: Oreo dirt cake can fit into many diets if eaten wisely. Its creamy texture and rich taste make it a delightful treat now and then.

    But remember, it’s not a health food. Enjoy it with fresh fruits or a light drink to balance the indulgence.

    Conclusion

    Creating the ultimate oreo dirt cake is more than a recipe. It’s a journey that brings joy to any event. These easy desserts turn simple ingredients into a treat that sparks memories.

    Whether it’s for a birthday, family reunion, or a sweet craving, this recipe is perfect. It’s versatile and delicious. You can change it up with different flavors, decorations, or presentations to surprise your guests.

    Be your own dessert artist and try new things. Each time, you’ll find new ways to make it your own. You can make it in flower pots or individual cups. Your oreo dirt cake is a canvas for your creativity.

    So, get your ingredients ready and let your creativity shine. Impress everyone with a dessert that’s fun to make and eat. Your oreo dirt cake adventure begins now!

    FAQ

    What is Oreo dirt cake?

    Oreo dirt cake is a no-bake dessert that looks like dirt. It’s made with crushed Oreo cookies and creamy pudding. Decorated with gummy worms, it’s a hit at parties.

    How long does it take to prepare Oreo dirt cake?

    It’s quick to make, taking 15-20 minutes to prepare. Then, it chills in the fridge for 1-2 hours to set.

    Can I make Oreo dirt cake ahead of time?

    Yes, it’s perfect for making ahead. You can prepare it up to 24 hours in advance. Just keep it covered to stay fresh.

    Are there any variations for dietary restrictions?

    Yes, you can make it for different diets. Use gluten-free cookies, dairy-free pudding, and non-dairy whipped topping for various needs.

    What are some creative ways to serve Oreo dirt cake?

    Serve it in individual cups, a trifle bowl, or even flower pots for a garden look. Add chocolate rocks or candy flowers for extra festivity.

    How do I keep the Oreo crumbs from getting soggy?

    Layer the crumbs carefully and avoid overmixing. Add them just before serving or use a method that keeps them separate from the creamy layers.

    Can I freeze Oreo dirt cake?

    Freeze it for up to 2 weeks. Wrap it tightly in plastic wrap and store in an airtight container. Thaw overnight in the fridge before serving.

    Try chocolate, cheesecake, or vanilla pudding flavors. Use flavored Oreo cookies like mint or peanut butter for unique tastes.

    Is Oreo dirt cake kid-friendly?

    Absolutely! Kids love it because of the gummy worms and fun presentation. They can even help make it.

    What equipment do I need to make Oreo dirt cake?

    You’ll need mixing bowls, a whisk or mixer, and serving dishes. A food processor or rolling pin can crush cookies. No special baking equipment is needed.

    What is your rating for the recipe?

  • Beef Back Ribs Recipe

    The smell of sizzling beef back ribs in the kitchen brings back memories of family gatherings and summer barbecues. As a passionate home cook, I’ve spent years perfecting the art of turning these lean cuts into mouthwatering masterpieces. These dishes make taste buds dance with joy.

    Beef back ribs are a true delicacy that challenges even experienced home chefs. They come from the ribeye roast and need patience, technique, and a deep understanding of low and slow cooking. Whether you’re a backyard grilling enthusiast or a weekend warrior in the kitchen, this beef rib recipe will guide you to creating restaurant-quality ribs. These ribs will impress your friends and family.

    Understanding Beef Back Ribs

    Exploring beef back ribs is a tasty journey for grill lovers. These cuts come from the cow’s upper ribcage, near the spine. They provide a rich, flavorful taste for meat fans.

    When picking beef back ribs for grilling, knowing their special traits is key. A full rack has 7 to 8 bones. Each serving weighs about 1.5 pounds for an adult.

    What Makes Beef Back Ribs Special

    • Sourced from the upper ribcage area
    • Contains 7-8 bones per full rack
    • Ideal for low and slow cooking methods
    • Perfect for grilling ribs enthusiasts

    Meat Quality and Selection

    When choosing beef short ribs, look for these quality signs:

    1. Rich, deep red color
    2. Consistent marbling throughout the meat
    3. Firm texture with moderate fat content
    4. Fresh appearance with minimal discoloration

    Difference Between Back Ribs and Short Ribs

    CharacteristicBeef Back RibsShort Ribs
    LocationUpper ribcage near spineLower chest area
    Number of Bones7-8 bones2-3 bones
    Cooking Time4-6 hoursFaster cooking
    Fat ContentModerateHigher fat content

    Pro tip: Beef back ribs are a less common but tasty choice for BBQ fans. Knowing their traits helps you make dishes that wow your guests.

    Essential Ingredients and Equipment

    To make perfect beef back ribs, you need the right ingredients and tools. Your rib rub seasoning is key to amazing flavor. It turns simple meat into a delicious treat.

    Key Ingredients for Rib Rub Seasoning

    • 2 teaspoons salt
    • 1.5 teaspoons smoked paprika
    • 1 teaspoon garlic powder
    • 1 teaspoon onion powder
    • 0.5 teaspoon black pepper
    • 0.5 teaspoon chili powder
    • 0.25 teaspoon cayenne pepper

    Your bbq rib marinade needs extra ingredients for great taste. Apple cider vinegar is perfect for tenderizing the meat and adding a tangy flavor.

    Essential Equipment

    1. Smoker or oven
    2. Meat thermometer
    3. Mixing bowls
    4. Measuring spoons
    5. Aluminum foil
    6. Basting brush

    Choosing quality ingredients for your rib rub seasoning is important. Fresh spices give better flavor. Pro tip: Consider toasting whole spices before grinding for an extra depth of flavor.

    Ingredient CategoryPurposeRecommended Quantity
    SaltPrimary seasoning2 teaspoons
    PaprikaColor and mild flavor1.5 teaspoons
    Garlic PowderAromatic enhancement1 teaspoon

    Creating the perfect bbq rib marinade is an art. Try different ratios to find your unique flavor.

    Preparing Your Beef Back Ribs

    Getting your beef back ribs ready for delicious barbecue ribs requires careful preparation. The right techniques will ensure tender, flavorful meat that falls right off the bone. Before you start cooking, you’ll need to take a few crucial steps to transform your raw ribs into a mouthwatering dish.

    Removing the Membrane

    The key to exceptional beef rib recipes starts with removing the tough membrane on the back of the ribs. This thin layer can prevent seasonings from penetrating and make your ribs less tender. Here’s how to remove it:

    • Use a blunt knife to gently slide under the membrane
    • Loosen the membrane from the bone side
    • Grip the membrane with a paper towel
    • Pull steadily to remove the entire membrane

    Trimming and Cleaning

    Proper trimming is essential for perfect barbecue ribs. Look for any excess fat or loose meat pieces that might burn during cooking. Use a sharp knife to:

    1. Trim large fat deposits
    2. Remove any loose meat fragments
    3. Create an even surface for consistent cooking

    Basic Preparation Tips

    Before cooking, consider these final preparation steps for your beef back ribs:

    • Pat the ribs dry with paper towels
    • Ensure ribs are at room temperature before cooking
    • Apply ½ cup of olive oil to help seasonings stick
    • Prepare for a total preparation time of about 10 minutes

    Pro tip: Proper preparation is the foundation of incredible beef rib recipes!

    Creating the Perfect Dry Rub

    Making a great rib rub seasoning can turn simple beef rib recipes into amazing dishes. It’s all about mixing flavors right and knowing how spices work together. This creates a taste that’s hard to forget.

    With your own dry rub, you can make your beef back ribs truly special. Here’s a top-notch recipe to make your ribs unforgettable:

    • 1/4 cup paprika
    • 1/4 cup mild chili powder
    • 1/4 cup brown sugar
    • 1/4 cup ground black pepper
    • 1 tablespoon cayenne pepper
    • 1 tablespoon garlic powder
    • 1 tablespoon kosher salt

    When making your rib rub, how you do it is just as important as what you use. Use about 2 tablespoons of rub per side of the rib rack. This way, you get the best flavor without overpowering the meat.

    It’s key to store your dry rub well to keep its flavor strong. Use an airtight container to keep it fresh for up to six months. For the best taste, use it within three to four months.

    Pro tip: Keep your cooking temperature below 265°F when using sugar-based rubs to prevent burning.

    If you like trying new things, here are some ideas:

    • Spicy Version: Add more cayenne and red pepper flakes
    • Smoky Variation: Use smoked paprika instead of regular
    • Herbal Twist: Mix in dried herbs like oregano and thyme

    Your homemade rib rub isn’t just for beef ribs. Try it on pork chops, chicken, and even roasted veggies. It’s a great way to add flavor to your dishes.

    Marinade and Basting Solutions

    Creating the perfect bbq rib marinade is an art. It turns good beef rib recipes into unforgettable meals. Marinades add moisture and deep flavor, making each bite delicious.

    The secret to a great marinade is finding the right mix of acidic and sweet. A classic marinade combines several ingredients. These work together to tenderize and enhance the meat’s natural flavors.

    Apple Cider Vinegar Base

    Apple cider vinegar is a top choice for marinades. It’s tangy and helps break down tough meat. It also adds a complex flavor.

    • Use 1/2 cup apple cider vinegar as your liquid base
    • Add 2 tablespoons of hot pepper sauce for kick
    • Include 1/4 cup olive oil for moisture
    • Mix in 2 minced garlic cloves

    Hot Sauce Enhancement

    Hot sauce can make your marinade stand out. The right amount of heat adds depth and complexity to your beef rib recipes.

    “A great marinade is about balance – not overwhelming the meat, but complementing its natural flavors.”

    Basting Techniques

    Effective basting keeps your ribs juicy. Apply your bbq rib marinade every 30 minutes with a silicone brush. This ensures even coverage and maximum flavor.

    • Baste ribs during the initial cooking stage
    • Use marinade sparingly to prevent burning
    • Reserve some marinade for final glazing

    Smoking Methods for Beef Back Ribs

    Mastering the art of smoking beef back ribs takes skill and dedication. To make delicious smoked ribs, knowing the right techniques is key. It can make your cooking journey more enjoyable.

    Smoking beef back ribs needs careful temperature control. Your smoker should be at 225-250°F. This temperature is perfect for tender, flavorful meat. The smoking time is 4-6 hours, depending on the ribs’ size and thickness.

    Essential Smoking Techniques

    • Choose high-quality wood chips like oak or pecan for rich smoky flavor
    • Maintain consistent temperature throughout cooking
    • Use a meat thermometer to track internal temperature
    • Allow ribs to rest for 15-20 minutes after smoking

    Different smokers have their own benefits. Whether it’s a Traeger, electric, or charcoal smoker, keeping the temperature steady is crucial. Pro tip: Preheat your smoker for 10-15 minutes before adding the beef back ribs to ensure even cooking.

    Wood Chip Selection

    The wood chip you choose greatly affects the ribs’ flavor. Pecan and oak give a strong, rich taste that goes well with beef back ribs. Stay away from woods that might overpower the meat’s natural taste.

    “The secret to great smoked ribs is patience and precision” – BBQ Experts

    It’s important to track the internal temperature. Aim for around 195°F. This ensures your beef back ribs are tender and juicy. Remember, smoking is an art that needs practice and passion.

    Oven-Baking Technique

    Learning to make beef rib recipes in the oven can take your barbecue ribs to the next level. Without a grill, your oven is the best place to cook tender, flavorful ribs. These ribs will surely wow your guests.

    Oven-baking beef back ribs needs careful attention and patience. The goal is to mimic the slow cooking that barbecue ribs are known for.

    Temperature Control for Perfect Ribs

    Temperature is key when cooking beef rib recipes. Here’s what you need to do:

    • Preheat the oven to 275°F (135°C)
    • Keep the oven at a steady low temperature
    • Use a meat thermometer to check the ribs’ internal temperature

    Timing Guidelines

    The cooking time for barbecue ribs varies based on the meat’s size and thickness. Here’s a guide:

    1. Total cooking time: 2 hours and 45 minutes to 3 hours
    2. Shoot for an internal temperature of 190-200°F
    3. Plan for about 0.75 pounds of ribs per person

    Wrapping Methods

    Wrapping your ribs in aluminum foil is a game-changer for moisture retention. This method seals in flavor and makes the meat tender. Wrap the ribs tightly to prevent steam from escaping.

    “The secret to perfect oven-baked ribs is low heat and patience.” – BBQ Experts

    After taking the ribs out of the oven, they will still cook a bit. Let them rest for 10-15 minutes. This allows the juices to spread, making the ribs even more flavorful and tender.

    The 3-2-1 Cooking Method

    Mastering grilling ribs means knowing the 3-2-1 cooking method. This method turns tough beef back ribs into tender, delicious food. It uses a specific time and temperature.

    The 3-2-1 method has three key stages for perfect beef back ribs:

    • 3 Hours: Smoking unwrapped at 225 degrees Fahrenheit
    • 2 Hours: Wrapped in foil with a splash of liquid
    • 1 Hour: Unwrapped and finished at higher temperature

    In the first 3 hours, your beef back ribs soak up a deep smoky flavor. The slow cooking keeps them moist and adds layers of taste. Keeping the temperature at 225 degrees is key for great results.

    The 2-hour foil-wrapping stage makes the meat tender. Adding a bit of apple cider or other liquid creates steam. This helps soften the ribs, making them tender to the bite.

    In the last hour, take off the foil and heat up. This step caramelizes the outside, adding a tasty crust. Cook until the internal temperature is between 190°F to 205°F for perfectly cooked ribs.

    Pro tip: Patience is key when grilling ribs using the 3-2-1 method!

    About 95% of barbecue fans say this method is the best. It makes you look like a pro at grilling ribs.

    BBQ Sauce Application and Caramelization

    Turning your barbecue ribs into something amazing is all about the sauce and caramelization. After hours of smoking or baking, the last step is key. It makes your beef rib recipes a hit with your guests.

    Timing and technique are key when you apply BBQ sauce. Wait until the last 15-20 minutes to brush it on. This way, the sauce gets sticky and glossy without burning.

    • Use about 3 tablespoons of BBQ sauce per rack of ribs
    • Brush sauce evenly on all sides of the meat
    • Set broiler to high heat for caramelization

    To get perfect caramelization, place your baking sheet 6 inches below the broiler. Watch carefully and broil for 3-5 minutes. You want a crispy, slightly charred exterior that enhances flavor and glaze.

    Pro tip: If you’re using homemade BBQ sauce, cook it briefly first. A 5-minute boil can thicken it and deepen the flavors for your ribs.

    The secret to great caramelization is patience and careful attention during the final cooking stage.

    Proper Storage and Reheating Tips

    Keeping your barbecue ribs delicious means storing and reheating them right. After you’ve enjoyed your beef rib recipes, you’ll want to keep the leftovers tasty.

    For the best storage, put your cooked beef back ribs in an airtight container. They can stay in the fridge for 3-4 days at 40°F or below. Freezing them for up to 3 months is also an option, if you seal them well.

    Refrigeration Storage Guidelines

    • Cool ribs completely before storing
    • Use shallow, airtight containers
    • Store within 2 hours of cooking
    • Maintain refrigerator temperature below 40°F

    Reheating Techniques

    Reheating beef ribs needs a gentle touch to keep them moist and flavorful. The oven method is the best:

    1. Preheat oven to 250°F
    2. Place ribs in a baking dish
    3. Cover with aluminum foil
    4. Heat until internal temperature reaches 165°F

    Tip: Avoid microwave reheating, as it can dry out your ribs and compromise their tender texture.

    Freezing Best Practices

    For long-term storage, wrap your barbecue ribs tightly in freezer-safe packaging. Vacuum-sealed bags work best. When you’re ready to enjoy, thaw them in the fridge for 24 hours before reheating.

    Pro tip: Always check the internal temperature when reheating to ensure food safety and optimal taste!

    Conclusion

    Your journey into beef back ribs recipes is more than just cooking—it’s a culinary adventure. Mastering these rich, flavorful ribs requires patience, practice, and passion. Whether you’re smoking, baking, or grilling, understanding the nuances of beef back ribs will elevate your barbecue skills to professional levels.

    The key to exceptional beef back ribs lies in selecting quality meat, preparing your seasonings carefully, and respecting the cooking process. From choosing premium cuts at suppliers like Snake River Farms to perfecting your smoking technique between 225-250°F, each step contributes to creating mouthwatering ribs that will impress family and friends.

    Remember that cooking beef back ribs is an art form. Experiment with different wood chips, seasonings, and techniques. Don’t be afraid to adapt recipes to your taste. With practice, you’ll develop the skills to transform tough cuts into tender, succulent masterpieces that showcase the incredible potential of beef rib recipes.

    Ultimately, great cooking is about enjoyment. Embrace the process, learn from each attempt, and savor the delicious results of your dedication to perfecting beef back ribs.

    FAQ

    What are beef back ribs?

    Beef back ribs come from the upper part of the cow’s rib cage. They are near the spine. These ribs are meatier and tenderer than others, with meat between the bones.

    They are loved for their rich flavor. They are a favorite in barbecue and grilling.

    How do I choose the best beef back ribs?

    Look for ribs with good marbling and a bright red color. They should have minimal excess fat. Choose ribs that are evenly thick and look fresh.

    Avoid ribs with dark spots, too much liquid, or a bad smell. Better ribs come from USDA Prime or Choice grades.

    What’s the difference between back ribs and short ribs?

    Beef back ribs are from the top of the rib cage, near the spine. They are leaner. Short ribs are from the lower part and have more meat.

    Back ribs are longer and have less meat on the bone. Short ribs are shorter and have more fat.

    How long should I cook beef back ribs?

    Cooking time depends on your method. But, beef back ribs need 3-5 hours of slow cooking. Use the 3-2-1 method for 3 hours unwrapped, 2 hours wrapped, and 1 hour with sauce.

    Smokers need 4-5 hours at 225-250°F for tender ribs.

    What’s the best way to tenderize beef back ribs?

    To tenderize ribs, remove the membrane and apply a dry rub. Cook low and slow at 225-250°F. Wrap in foil to keep moist.

    Marinating or basting can also help make them tender.

    Can I cook beef back ribs in the oven?

    Yes, you can cook beef back ribs in the oven. Preheat to 275°F. Place ribs on a baking sheet, cover with foil, and cook for 2-3 hours.

    For the last 30 minutes, remove the foil and brush with BBQ sauce. This method makes tender, flavorful ribs like smoking.

    How do I know when beef back ribs are done?

    Ribs are done when the meat pulls back from the bone by 1/2 inch. The internal temperature should be 195-203°F.

    You can also check by twisting a bone. If it twists easily, they’re ready. The bend test works too: they should bend without breaking.

    What’s the best wood for smoking beef back ribs?

    Hickory, oak, and mesquite are great for smoking beef back ribs. Hickory gives a strong, bacon-like flavor. Oak offers a medium smoke, and mesquite is intense.

    Fruit woods like apple or cherry add a sweet touch.

    How should I store leftover beef back ribs?

    Store leftover ribs in an airtight container in the fridge for 3-4 days. To reheat, wrap in foil and warm in the oven at 250°F for 20-30 minutes.

    For longer storage, freeze ribs for up to 3 months. Make sure they’re wrapped tightly to avoid freezer burn.

    What is your rating for the recipe?

  • Cinnamon Applesauce

    Growing up, the smell of homemade cinnamon applesauce in my grandmother’s kitchen was magical. We’d peel apples together, watching her turn simple ingredients into a treat. This sparked my love for cooking. Today, I’m excited to share how to make homemade applesauce that’s better than store-bought.

    Making cinnamon applesauce is more than a recipe. It’s a way to connect with tradition and fill your home with warmth. With a few fresh ingredients and a little effort, you can make a delicious condiment. It brings joy to your table and nourishes your family.

    This guide will show you how to make the perfect homemade applesauce. You’ll learn why making it yourself is a big deal in cooking. From picking the right apples to finding the perfect cinnamon balance, it’s easy and rewarding.

    What Makes Homemade Applesauce Special

    Making your own apple puree turns a simple task into a fun adventure. Homemade spiced fruit sauce has a flavor that store-bought can’t beat. When you make applesauce at home, you get a taste and nutrition boost that store-bought can’t offer.

    Superior Taste and Freshness

    Homemade apple puree is full of fresh, vibrant flavors that store-bought can’t match. The main reason is the quality of ingredients and how quickly it’s made. Your spiced fruit sauce will show off the real taste of ripe apples, with every bite offering a rich, true flavor.

    • Freshly picked apples provide maximum flavor
    • Complete control over ingredient selection
    • No preservatives or artificial additives
    • Customizable spice and sweetness levels

    Cost-Effective Benefits

    Making your own applesauce is also very affordable. With just a few simple ingredients, you can make lots of delicious apple puree for less than store-bought. A batch costs very little but gives you a lot of tasty rewards.

    Health Advantages of Homemade

    When you make spiced fruit sauce at home, you control every ingredient. This means you can choose how much sugar, avoid bad preservatives, and keep it super nutritious. Homemade applesauce is a healthy treat you can feel proud to serve your family.

    • Lower sugar content
    • No artificial preservatives
    • Higher nutritional value
    • Tailored to dietary needs

    Essential Ingredients for Cinnamon Applesauce

    Making the perfect warm cinnamon sauce begins with choosing top-notch ingredients. Your fall dessert topping needs a mix of fresh apples and spices. This blend creates a tasty homemade applesauce.

    Core Ingredients

    • Fresh apples (8-9 medium-sized)
    • Ground cinnamon
    • Lemon juice
    • Apple cider
    • Maple syrup

    When making your warm cinnamon sauce, pick apples that taste great. Some top choices are:

    Sweet ApplesTart Apples
    HoneycrispGranny Smith
    GalaBramley
    FujiPink Lady

    Your fall dessert topping needs about 3 teaspoons of ground cinnamon. This amount adds just the right warmth and sweetness. The mix of sweet and tart apples gives your sauce a deep, satisfying flavor.

    Optional Flavor Enhancers

    • Vanilla extract
    • Nutmeg
    • Orange zest

    For an amazing warm cinnamon sauce, use fresh, quality ingredients. Also, play with spice amounts to match your taste.

    Best Apple Varieties for Perfect Sauce

    Choosing the right apples is crucial for a great baked apple compote. The right fruit can turn a simple spread into a masterpiece. Whether you like sweet, tart, or a mix, knowing your apples is essential for the perfect sauce.

    Sweet Apple Options

    Sweet apples add natural sweetness to your applesauce. Here are some great options:

    • Honeycrisp: Juicy and crunchy, though prone to bruising
    • Fuji: Incredibly sweet, may require less added sugar
    • Gala: Mild and floral flavor, cooks down quickly
    • Golden Delicious: Moderately sweet and fast-cooking

    Tart Apple Choices

    Tart apples add depth and brightness to your sauce. Here are some top picks:

    • Granny Smith: Zippy flavor, holds shape well
    • Braeburn: Crisp and aromatic
    • Pink Lady: Resists browning, provides a slight pink hue

    Mixing Apple Varieties

    Blending different apple types is the secret to a great applesauce. Mix sweet and tart apples for a balanced flavor.

    Sweet AppleTart AppleFlavor Result
    HoneycrispGranny SmithRich, complex taste
    FujiPink LadyBalanced sweetness
    GalaBraeburnSmooth, aromatic

    Pro tip: Try different apple mixes to find your favorite spiced fruit spread. The best applesauce is the one you love!

    Kitchen Tools and Equipment Needed

    Making the perfect autumn condiment like homemade cinnamon applesauce needs some key tools. The right equipment can turn a good applesauce into a great one.

    Essential Cooking Equipment

    • Large Cooking Pot: A heavy-bottomed pot for even heat distribution
    • Cutting Board: Preferably wooden or plastic for apple preparation
    • Sharp Knife: For precise apple cutting and coring
    • Peeler: To remove apple skins quickly

    Texture-Creating Tools

    The tools you pick can affect your cinnamon apple dip’s texture. Here are some options:

    1. High-powered blender for smooth consistency
    2. Food processor for medium-chunk texture
    3. Immersion blender for quick mixing
    4. Potato masher for chunky, rustic applesauce

    “The right tool can transform simple ingredients into a delightful autumn condiment.”

    Additional Helpful Tools

    Think about these extra tools to make applesauce making easier:

    • Measuring cups and spoons
    • Wooden spoon for stirring
    • Airtight containers for storage
    • Corer/slicer for quick apple preparation

    You don’t need fancy equipment to make delicious homemade applesauce. What’s most important is your creativity and passion!

    Step-by-Step Cooking Process

    Making tasty cinnamon applesauce at home is simple. This guide will show you how to make perfect homemade applesauce. It will make your taste buds happy and impress your family.

    Preparing the Apples

    First, pick the best apples for your applesauce. Wash them well and prepare them carefully:

    • Quarter the apples carefully
    • Remove the core completely
    • Chop into 1-inch uniform cubes
    • Select a mix of sweet and tart apples for complex flavor

    Cooking Method

    The cooking process turns raw apple chunks into smooth, tasty cinnamon applesauce. Just follow these steps:

    1. Place apple cubes in a 5- to 6-quart Dutch oven
    2. Add ⅓ cup water
    3. Sprinkle ½ teaspoon ground cinnamon
    4. Heat until mixture starts bubbling
    5. Reduce heat and simmer for 15-20 minutes

    Blending Techniques

    The last step is to choose your favorite texture for your applesauce. You have a few options:

    TechniqueResultProcessing Time
    Food ProcessorSmooth Sauce1-2 minutes
    Potato MasherChunky Texture3-5 minutes
    Food MillMedium Consistency2-3 minutes

    Your homemade cinnamon applesauce is ready to enjoy! Keep it in the fridge for up to a week or freeze it for later.

    Perfecting the Cinnamon Balance

    Creating the perfect warm cinnamon sauce for your apple puree is all about balance. The right amount of cinnamon can make your homemade applesauce truly special.

    Choosing the right cinnamon is key for rich flavor. You have two main options:

    • Ground cinnamon: Quick and easy to add
    • Whole cinnamon sticks: Offers deeper, more complex flavors

    Start with a small amount of cinnamon and add more as needed. Typically, 3/4 teaspoon of ground cinnamon is perfect for a standard batch of applesauce. For cinnamon sticks, 2-3 sticks will add a warm, aromatic touch to your apple puree.

    “Spices are the magic that turns good cooking into great cooking.” – Unknown Chef

    Here are some tips for achieving balanced cinnamon flavor:

    1. Add cinnamon in small increments
    2. Taste after each addition
    3. Let the flavors meld for a few minutes before final adjustment
    Cinnamon TypeQuantityFlavor Intensity
    Ground Cinnamon3/4 teaspoonModerate
    Cinnamon Sticks2-3 sticksRich and Deep

    The goal is to enhance your apple puree, not overpower it. A subtle hint of warm cinnamon sauce can turn your homemade applesauce into a delightful treat.

    Storage and Preservation Methods

    Keeping your homemade spiced fruit sauce fresh is key. Your cinnamon applesauce can be a great fall treat if stored right. This ensures it stays flavorful and fresh.

    Refrigeration Tips

    Storing your applesauce in the fridge is easy and works well. Here’s how to keep your spiced fruit sauce perfect:

    • Use airtight glass or plastic containers
    • Store at temperatures between 36-40°F
    • Consume within 7-10 days for optimal taste
    • Always use clean utensils when scooping

    Freezing Guidelines

    Freezing is great for keeping your fall dessert topping for longer. Here are some important freezing tips:

    1. Cool the applesauce completely before freezing
    2. Leave 1/2 inch of headspace in containers
    3. Use freezer-safe containers or heavy-duty freezer bags
    4. Label containers with the date of preparation
    5. Freeze for up to 6 months

    When you’re ready to use your frozen applesauce, thaw it in the fridge overnight. Stir well before serving to restore its original texture.

    Pro tip: Portion your applesauce into smaller containers for easier thawing and to prevent waste.

    Creative Ways to Use Your Applesauce

    Your homemade cinnamon applesauce is more than just a side dish. It’s a versatile ingredient that can change many recipes and snacks. It’s perfect for baking and topping desserts, offering endless options.

    Here are some exciting ways to enjoy your baked apple compote and cinnamon apple dip creation:

    • Breakfast Enhancements
      • Stir into morning oatmeal
      • Mix with yogurt for a tangy treat
      • Use as a pancake or waffle topping
    • Baking Substitutions
      • Replace oil in cake recipes
      • Create moisture in muffins
      • Use as a binding agent in quick breads
    • Dessert Innovations
      • Drizzle over vanilla ice cream
      • Create a cinnamon apple dip for fruit platters
      • Layer in parfaits

    Applesauce is a smart ingredient because of its nutritional value. It has only 13g of sugar per serving. This makes it a healthier choice than many other ingredients in recipes.

    Be creative in the kitchen! Your homemade applesauce can turn simple dishes into unforgettable meals.

    Customizing Your Recipe

    Creating a unique spiced fruit spread lets you turn basic cinnamon applesauce into a special autumn treat. It’s all about making it your own. You can try out different flavors and ingredients.

    Exploring Sweetener Options

    There are many natural sweeteners to choose from to make your applesauce better:

    • Honey: Adds floral sweetness and depth
    • Maple Syrup: Introduces rich, caramel-like undertones
    • Brown Sugar: Provides a classic, molasses-like sweetness
    • Coconut Sugar: Offers a subtle caramel note

    Exciting Spice Combinations

    Make your autumn condiment even better by trying out new spice combinations:

    • Nutmeg for warm, nutty undertones
    • Allspice for a complex, peppery flavor
    • Ginger to add a subtle, zesty kick
    • Cardamom for an exotic, aromatic touch

    Remember, homemade applesauce is all about trying new things. Start with small amounts of new ingredients. Then, adjust to your liking.

    Nutritional Benefits and Values

    Your homemade cinnamon applesauce is not just tasty—it’s full of health benefits. This simple apple puree is a great addition to your diet. It offers many health advantages.

    Making cinnamon applesauce at home gives you a nutrient-rich food. It supports your overall health. A typical serving has:

    • Low in calories (90 calories per 2/3 cup)
    • Zero fat content
    • Good source of dietary fiber (3g per serving)
    • Natural sugars (15g)
    • Minimal sodium

    The mix of apples and cinnamon is more than just a tasty treat. Cinnamon may help with metabolism. Apple puree gives you important vitamins and minerals. These include potassium and vitamin C, which are good for your heart and immune system.

    Choosing homemade cinnamon applesauce lets you control what goes into it. You avoid unnecessary additives. This way, you get a pure, nutrient-dense food that helps you reach your dietary goals.

    Pro tip: For maximum nutritional benefits, use organic apples and enjoy your applesauce within 7 days of preparation.

    Seasonal Tips for Making Applesauce

    Making the perfect spiced fruit sauce depends on knowing when apples are in season. Fall is the best time for this, when local orchards are full of fresh apples.

    When planning your applesauce adventure, consider these seasonal strategies:

    • Visit local you-pick farms during peak apple season (September-October)
    • Select crisp, sweet varieties like Honeycrisp, Fuji, and Gala
    • Check farmers markets for the freshest local produce
    • Purchase apples in bulk during harvest for cost-effective preparation

    Different seasons offer unique apple characteristics that can transform your spiced fruit sauce. Summer apples are softer and sweeter. Fall apples have more robust flavors, perfect for a rich fall dessert topping.

    “The secret to amazing applesauce is selecting the right apples at the right time of year.” – Local Orchard Expert

    Pro tip: Store your freshly picked apples in a cool, dark place to maintain their crispness. If you can’t use them immediately, most apple varieties will stay fresh for several weeks when properly stored.

    Remember that each season brings its own apple nuances. Experiment with different varieties to discover your ultimate homemade applesauce recipe!

    Conclusion

    Making homemade applesauce is a fun journey that turns simple ingredients into a cozy treat. Your warm cinnamon sauce will make your kitchen smell amazing. It’s also a healthier choice than store-bought applesauce.

    Creating your own warm cinnamon sauce is easy and rewarding. You can make your applesauce smooth or chunky, just how you like it. You can also try different apples and spices to make each batch special.

    Your homemade applesauce is more than a side dish. It’s a healthy snack, a baking ingredient, or a cozy treat for everyone. By using fresh ingredients and following this guide, you’ll make a delicious, wholesome dish. It will bring joy and peace of mind to your family’s meals.

    Your cooking adventure doesn’t stop here. Keep trying new things and enjoying making delicious, homemade food. With each batch of applesauce, you’ll get better at cooking and love making fresh meals even more.

    FAQ

    How long can homemade cinnamon applesauce be stored in the refrigerator?

    Your homemade cinnamon applesauce can last 7-10 days in the fridge. Keep it in an airtight container. Always use clean utensils to serve and keep it fresh longer.

    Can I freeze homemade applesauce?

    Yes, you can freeze it for 3-4 months. Use containers or bags safe for freezing, leaving space for expansion. Thaw it in the fridge overnight when you’re ready.

    What are the best apple varieties for making applesauce?

    Honeycrisp, Fuji, Gala, and Granny Smith are top choices. Mixing sweet and tart apples adds depth to the flavor. Softer apples like McIntosh make the sauce smooth.

    How much cinnamon should I add to my applesauce?

    Start with 1/2 to 1 teaspoon of cinnamon per 4-6 apples. Adjust to taste. You can add more cinnamon while cooking. Whole cinnamon sticks offer a milder flavor.

    Is homemade applesauce healthier than store-bought?

    Yes, homemade applesauce is healthier. You control the ingredients, avoiding added sugars and preservatives. It keeps more nutrients and lets you tailor it to your diet.

    Can I make applesauce without a food processor or blender?

    Definitely! Use a potato masher for a chunky texture or a strainer for smoothness. A fork works well for small batches, giving a rustic texture.

    How can I use homemade cinnamon applesauce in cooking?

    Cinnamon applesauce is versatile! Top pancakes, mix into yogurt, or use in baking. It’s great as a side dish or quick snack. It’s also perfect as a dessert topping or in oatmeal.

    What sweeteners work best in homemade applesauce?

    Maple syrup, honey, and brown sugar are great choices. Stevia or agave nectar are good for fewer calories. Ripe apples might not need extra sugar.

    How can I prevent my applesauce from turning brown?

    Add lemon juice to prevent browning. The acid keeps the color bright and adds flavor. Choose apples less prone to oxidation for better color.

    Is cinnamon applesauce good for children?

    Yes! It’s a nutritious snack for kids. It’s easy to digest and full of vitamins. Just watch the sugar content for young children.

  • Apple Coffee Cake Recipe

    As autumn leaves dance outside your window and crisp morning air fills the kitchen, nothing beats the smell of a freshly baked apple coffee cake. This fall baking classic turns simple ingredients into a warm, comforting breakfast pastry. It speaks directly to the heart of cozy mornings.

    The apple coffee cake is more than a recipe—it’s a celebration of seasonal flavors. Imagine tender cake with juicy apple pieces, topped with a rich cinnamon streusel that crumbles perfectly with each bite. It’s not just a dessert; it’s a moment of pure culinary joy. It turns an ordinary morning into something extraordinary.

    Introduction to This Classic Breakfast Pastry

    Coffee cake is a warm tradition that adds joy to your breakfast. It combines soft cake, tangy sour cream, and a tasty cinnamon streusel topping. This mix turns a simple morning into a special treat.

    What Makes This Recipe Special

    Your apple coffee cake is special for many reasons. The sour cream cake is incredibly moist. It has:

    • Rich, tender crumb from high-quality ingredients
    • Generous layer of crumb topping with cinnamon
    • Fresh apple chunks distributed throughout the batter
    • Perfect balance of sweetness and spice

    Brief History of Coffee Cake

    Coffee cake comes from kaffekuchen, a German pastry. European bakers made these sweet breads for morning coffee. By the 1870s, they became a hit in the Northeast, especially in New York, New Jersey, and Delaware.

    Why You’ll Love This Recipe

    This apple coffee cake with cinnamon streusel is more than a treat. It’s a way to connect with old baking traditions. Enjoy it on a quiet morning or at a brunch, and it will become a family favorite.

    Essential Ingredients for Apple Coffee Cake

    Making the perfect apple spice cake needs the right ingredients. These ingredients make your baked goods stand out. They turn a simple recipe into a special breakfast treat.

    • 2 cups all-purpose flour
    • 1 ¼ cup brown sugar (lightly packed)
    • 2 large eggs
    • 1 cup plain Greek yogurt
    • ½ cup canola oil
    • 2 teaspoons ground cinnamon
    • 1 teaspoon baking powder
    • ½ teaspoon baking soda
    • ½ teaspoon salt
    • 2 Granny Smith apples (peeled and diced)

    Every ingredient is important for the cake’s texture and taste. Fresh apples add sweetness and moisture. Yogurt and oil make the crumb tender. The spices make the cake truly special.

    Using room-temperature ingredients helps the batter mix better. This makes your apple spice cake perfect. Measuring ingredients accurately is crucial for the right taste and texture.

    Kitchen Tools and Equipment Needed

    To make a tasty apple coffee cake, you need some basic kitchen tools. The right baking gear makes baking smooth and fun. Let’s look at the key items for this yummy treat.

    Baking Pan Essentials

    Choosing the right baking pan is crucial for a perfect apple coffee cake. A 9×13 inch rectangular dish is best. Ceramic or glass dishes are great because they distribute heat evenly and help your coffee cake turn out right.

    • 9×13 inch baking pan
    • Parchment paper or non-stick cooking spray
    • Aluminum foil (for covering if needed)

    Mixing Tools

    Good baking needs precision and the right tools. An electric mixer makes mixing smooth, but a hand whisk works too.

    • Large mixing bowl
    • Electric mixer or hand whisk
    • Measuring cups and spoons
    • Rubber spatula
    • Wooden spoon

    Additional Equipment

    Having a few extra tools can make baking easier and more fun. Keep these items ready when you’re making your coffee cake.

    • Cooling rack
    • Sharp knife for chopping apples
    • Cutting board
    • Kitchen scale (optional but helpful)

    Pro tip: Get your tools and ingredients ready before baking. This mise en place method makes baking stress-free and helps you make perfect treats every time.

    Preparing the Cinnamon Streusel Topping

    Making the perfect cinnamon streusel topping is an art. It can turn your apple coffee cake into something truly special. The topping adds a delightful texture and rich flavor that makes every bite unforgettable.

    To make an amazing cinnamon streusel, you’ll need a few key ingredients:

    • 1 cup dark or light brown sugar
    • 1 1/2 tablespoons ground cinnamon
    • 12 tablespoons (170g) unsalted butter, melted
    • 1/2 cup all-purpose flour
    • Optional: 1/4 cup chopped nuts for extra crunch

    The secret to a perfect streusel is in the technique. Start by mixing your dry ingredients thoroughly before adding the melted butter. This ensures flavors are evenly distributed, creating those crispy, crumbly clusters we all love.

    When you put the cinnamon streusel on your cake, spread it evenly. Gently press it into the batter so it sticks during baking. This will give you a golden-brown, textured layer that’s both beautiful and delicious.

    IngredientQuantityPurpose
    Brown Sugar1 cupAdds sweetness and moisture
    Cinnamon1 1/2 tablespoonsProvides warm, spicy flavor
    Melted Butter12 tablespoonsBinds ingredients, creates crumbly texture

    Pro tip: For an extra layer of flavor, try adding a pinch of nutmeg or a dash of vanilla extract to your cinnamon streusel. These small additions can make your crumb topping truly spectacular.

    Creating the Perfect Cake Batter Base

    Making a great apple spice cake begins with the cake batter. The batter’s texture and taste come from the sour cream cake base. Knowing how to mix ingredients well can make a big difference.

    To make the perfect cake batter, you need to be precise and careful. Every ingredient is important for a moist and tasty apple coffee cake. It will surely wow your family and friends.

    Essential Mixing Techniques

    Getting the cake batter right is all about mixing ingredients well. Follow these steps for a smooth, well-mixed base:

    • Cream butter and sugar until light and fluffy
    • Add eggs one at a time, mixing thoroughly
    • Incorporate sour cream for moisture and richness
    • Gently fold in dry ingredients

    Ingredient Incorporation Strategy

    Mixing the batter just right is an art. Alternating wet and dry ingredients helps avoid overmixing. This keeps your apple spice cake tender.

    Ingredient CategoryMixing TechniquePurpose
    Wet IngredientsCream thoroughlyCreate smooth base
    Dry IngredientsSift and fold gentlyPrevent gluten development
    Apple MixtureFold carefullyEven distribution

    Apple Integration Technique

    The last step is to fold diced apples into the batter. Do this gently to spread the apples evenly. Use about 2 cups of chopped apples, which is 2 medium Granny Smith apples.

    Pro tip: Toss apple chunks in a little flour before adding to prevent sinking to the bottom of the cake.

    Best Apple Varieties for Baking

    Choosing the right apple variety is key for your fall baking. Not all apples are good for baking. Some stay firm, while others get mushy.

    For a perfect apple coffee cake, try these top picks:

    • Granny Smith: Known for their firm and crisp texture, these tart apples provide excellent structure
    • Honeycrisp: An all-purpose apple that maintains shape and offers balanced sweetness
    • Braeburn: Delivers a complex sweet-tart flavor profile ideal for fall baking
    • Pink Lady: Combines sweetness with a tangy undertone perfect for coffee cake

    But, avoid Gala and Red Delicious apples. They have too much water and turn soggy in your cake.

    When picking apples, choose firm ones without bruises. Mixing two varieties adds depth to your coffee cake. You want apple chunks that add texture and flavor to each bite.

    Pro tip for fall baking: Always peel and core your apples before adding them to the batter. This keeps the cake smooth and prevents tough apple skins.

    Step-by-Step Baking Instructions

    Making the perfect apple coffee cake needs focus and care. Your success comes from following important steps in this recipe.

    Precise Oven Preparation

    First, heat your oven to 350°F (175°C). This temperature helps your cake bake evenly. Use a 9×9-inch or 8×8-inch square pan, greased well to avoid sticking.

    Temperature and Timing Guidelines

    Baking time is usually 35-40 minutes. Several things affect how done your cake is:

    • Oven performance variations
    • Specific pan size
    • Moisture content of apples

    Testing Your Cake’s Readiness

    To know if your cake is done, check a few things:

    1. Insert a toothpick into the cake’s center
    2. Look for clean toothpick without wet batter
    3. Check for golden-brown top surface
    4. Observe slight pulling away from pan edges
    Baking ParameterRecommended Setting
    Temperature350°F (175°C)
    Baking Time35-40 minutes
    Toothpick TestClean when removed
    Visual CueGolden-brown surface

    Pro tip: Every oven is unique, so start checking your cake around the 30-minute mark to prevent over-baking.

    Optional Glaze and Toppings

    Turn your apple coffee cake into a showstopper with these finishing touches. The right topping can make your cake irresistible.

    Classic Glaze Options

    Make a tasty glaze with just a few ingredients. Here’s a simple recipe to make your cake shine:

    • ½ cup powdered sugar
    • 2 tablespoons maple syrup
    • 1 tablespoon melted butter

    Mix these until smooth, then drizzle over your cooled cake. Pro tip: Let the glaze set for a few minutes for the perfect drizzle.

    Creative Topping Ideas

    Want to elevate your breakfast pastry? Try these delicious toppings:

    1. Dust with additional powdered sugar
    2. Add a scoop of vanilla ice cream
    3. Sprinkle chopped nuts (pecans or walnuts work great)
    4. Drizzle with caramel sauce

    “The right topping can turn a simple cake into a memorable dessert experience.” – Baking Enthusiast

    Each topping adds a special flavor to your apple coffee cake. Serve it as a morning treat or an after-dinner dessert. These toppings will make your cake unforgettable.

    Storage and Freshness Tips

    Keeping your homemade apple coffee cake fresh is important. It’s a tasty treat that needs care to stay delicious. This ensures it keeps its great flavor and texture.

    Keeping Your Cake Fresh at Room Temperature

    For short-term storage, room temperature is best. Here’s how to keep your coffee cake tasty:

    • Store the cake in an airtight container
    • Keep at room temperature for up to 3 days
    • Cover with plastic wrap or a cake dome
    • Avoid direct sunlight or heat sources

    Freezing for Long-Term Preservation

    Freezing is great for enjoying your coffee cake weeks later. Here’s how to freeze it right:

    1. Cool the cake completely before freezing
    2. Wrap tightly in plastic wrap
    3. Add an additional layer of aluminum foil
    4. Store in the freezer for up to 3 months
    5. Thaw at room temperature for best results

    Pro tip: Slice the coffee cake before freezing for individual servings. This way, you can thaw only what you need, keeping the rest fresh.

    Remember, proper storage is key to maintaining the delightful taste and texture of your homemade baked goods!

    Recipe Variations and Substitutions

    Your apple coffee cake is incredibly versatile. It’s perfect for fall baking enthusiasts who love to customize their desserts. Whether you have dietary restrictions or just want to try something new, these variations will help you create a unique treat.

    Dietary Adaptations

    For those with specific dietary needs, try these apple spice cake substitutions:

    • Gluten-free option: Use a 1-to-1 gluten-free flour blend
    • Dairy-free alternative: Replace butter with coconut oil
    • Vegan adaptation: Swap eggs with flax eggs or applesauce

    Flavor Enhancement Options

    Elevate your fall baking experience with these delicious twists:

    1. Add 1 cup of crushed almonds to the streusel topping
    2. Mix in additional spices like nutmeg or cardamom
    3. Incorporate different apple varieties like Honeycrisp or Fuji

    Nutritional Modifications

    Adjust the cake to suit your nutritional preferences:

    • Reduce sugar by using stevia or monk fruit sweetener
    • Increase protein by adding Greek yogurt to the batter
    • Lower fat content by using applesauce instead of some butter

    Remember, the beauty of this apple spice cake is its adaptability. Don’t be afraid to experiment and make the recipe your own!

    Conclusion

    Your fall baking journey with this apple coffee cake is more than a recipe. It turns your kitchen into a cozy, inviting space. With just 30 minutes of prep and 45 minutes of baking, you can make a breakfast pastry for four. It brings rich, comforting flavors in every bite.

    This apple coffee cake is more than a simple dessert. It’s perfect for morning brunches, afternoon tea, or a weekend treat. The mix of tender cake, spiced apple filling, and crumbly streusel topping makes it a standout. It will become a favorite in your fall baking.

    Don’t be afraid to try new things with the recipe. Experiment with different apple varieties, change the spices, or add your own twist. Whether you’re an experienced baker or just starting, this apple coffee cake is a great way to make memories. Enjoy the joy of baking and sharing this delicious breakfast pastry with loved ones.

    Remember, great recipes are meant to be shared. We encourage you to explore more fall baking ideas. Make this apple coffee cake your own signature dish. Happy baking!

    FAQ

    Can I use different types of apples in this coffee cake recipe?

    Yes, you can pick from Honeycrisp, Granny Smith, or Fuji apples. Each variety adds a unique taste and texture. Choose apples that are firm and have a good balance of sweet and tart for the best flavor.

    How long will this apple coffee cake stay fresh?

    Your apple coffee cake will stay fresh for 3-4 days at room temperature in an airtight container. For longer storage, refrigerate it for up to a week or freeze for up to 3 months.

    Can I make this recipe gluten-free?

    Absolutely! Use a gluten-free flour blend instead of all-purpose flour. Make sure it’s a 1:1 baking replacement flour. Also, check that other ingredients like baking powder are gluten-free.

    Is it possible to make this coffee cake ahead of time?

    Yes, you can make the apple coffee cake ahead. Bake it the day before and store it at room temperature, covered. Or, prepare the batter and streusel separately and refrigerate them overnight. Then, bake fresh in the morning.

    Can I substitute sour cream with something else?

    You can use Greek yogurt or plain yogurt instead of sour cream. They offer similar moisture and tanginess. For a dairy-free option, try coconut yogurt or a non-dairy sour cream alternative.

    How do I know when the coffee cake is fully baked?

    Use the toothpick test: insert a toothpick into the center of the cake. If it comes out clean or with just a few moist crumbs, it’s done. The top should be golden brown, and the edges should be slightly pulling away from the pan.

    Can I add nuts to the streusel topping?

    Definitely! Chopped pecans or walnuts add great texture and flavor. Mix them into the dry ingredients before adding the melted butter for a deliciously crunchy topping.

    How should I store leftover apple coffee cake?

    Cover the cake tightly with plastic wrap or store in an airtight container. It will stay fresh for 3-4 days at room temperature. For longer storage, wrap it well and store in the refrigerator for up to a week, or freeze for up to 3 months.

    What is your rating for the recipe?

  • Hamburger And Cabbage Recipes

    Growing up, our kitchen was always filled with warmth. My mother’s hamburger and cabbage dishes were a big part of that. The smell of sizzling beef and fresh cabbage would make our home feel cozy.

    Hamburger and cabbage recipes are more than just food. They show the beauty of simple, affordable, and tasty home cooking. These dishes have been a favorite in American kitchens for years. They offer quick, healthy meals that bring families closer together.

    If you’re always on the go, a parent looking for cheap meals, or someone who loves easy cooking, these recipes are for you. This guide will show you how to make these classic dishes into amazing meals. You’ll see how simple ingredients can create something truly special.

    Understanding the Appeal of Ground Beef and Cabbage Combinations

    Ground beef and cabbage make a great meal. They are nutritious, affordable, and easy to make. This combo turns simple ingredients into a tasty dinner that everyone enjoys.

    Health Benefits of Combining Beef and Cruciferous Vegetables

    Ground beef and cabbage are a healthy mix. They offer many nutritional benefits. Here’s what you get:

    • High protein content: 28.4g per serving
    • Low carbohydrates: Only 3.3g
    • Moderate fat: 11.2g

    Budget-Friendly Meal Planning with Basic Ingredients

    This dish is easy on your wallet. You only need 1 pound of lean ground beef and ½ a medium cabbage. It makes 4-5 servings and costs less than most restaurants.

    IngredientQuantityEstimated Cost
    Lean Ground Beef (90% lean)1 pound$5-7
    Cabbage½ head$1-2
    SeasoningsBasic pantry items$0-1

    Quick and Easy Dinner Solutions

    Busy families will find this recipe a lifesaver. It takes only 20 minutes to prepare and cook. It’s also great for meal prep, lasting up to a week in the fridge.

    Pro tip: When reheating, add a splash of water or broth to revive the flavors and maintain moisture.

    Essential Ingredients for Perfect Hamburger and Cabbage Dishes

    Creating tasty hamburger and cabbage dishes begins with picking top-notch ingredients. Even without traditional bun and condiments, you can make flavorful meals. These recipes will surely please your taste buds.

    The key to a great hamburger and cabbage dish is the ground beef. Choose lean ground beef with about 85% lean meat. This ensures a perfect mix of taste and nutrition. Your toppings will come from fresh veggies, adding depth and nutrition.

    • Ground beef (1 pound, preferably lean)
    • Fresh green cabbage (1 head, cut into 1-inch slices)
    • Onions for added flavor
    • Tomato sauce or ketchup (1/2 cup)
    • Seasonings: salt, black pepper, garlic

    Seasonings are crucial in making your hamburger and cabbage recipe stand out. A mix of salt, black pepper, grated garlic, and red chili pepper flakes can elevate a simple dish. Adding fresh herbs like parsley or green onions adds an extra flavor boost.

    “The secret to a great dish is not just in the ingredients, but in how you combine them.” – Culinary Wisdom

    Your choice of ingredients is key to a successful dish. Fresh, quality ingredients make for a nutritious and tasty meal. The right mix of ground beef, cabbage, and seasonings can create a healthy and quick one-pan wonder.

    Basic Cooking Techniques for Ground Beef Preparation

    Learning to cook ground beef is key to making tasty hamburgers and cabbage dishes. Whether you’re making a beef patty or loose ground meat, knowing how to cook it right can improve your cooking skills.

    Choosing the right ground beef is the first step to a great meal. Opt for beef with 85-90% lean meat content for the best flavor and health. This mix of fat and lean meat adds taste without being too heavy.

    Proper Beef Browning Methods

    To get the perfect beef patty or ground meat, browning is crucial. Here are some tips to follow:

    • Use a heavy-bottomed skillet for even heat
    • Preheat the pan before adding the ground beef
    • Break the meat into small, uniform pieces while cooking
    • Avoid overcrowding the pan for proper browning

    Seasoning Tips for Enhanced Flavor

    Seasoning can turn a simple beef patty into a flavorful dish. Here are some strategies:

    1. Add salt and pepper before cooking
    2. Use minced garlic for extra depth
    3. Try spices like cumin and smoked paprika
    4. Season in layers for a richer flavor

    Fat Content and Draining Guidelines

    Beef Fat ContentDraining Recommendation
    70% leanDrain extensively
    85-90% leanLight draining recommended
    93% leanMinimal draining needed

    When cooking ground beef, it’s important to drain excess fat to cut down on calories. Use a colander or paper towels to get rid of unwanted grease. This makes your dish healthier.

    Preparing and Cutting Cabbage for Optimal Results

    Learning how to prepare cabbage is key for tasty dishes. It’s important for making great hamburgers or coleslaw. The right cabbage prep can make your cooking better.

    First, pick a fresh cabbage from the brassica family. Before you cut it, wash it well to get rid of dirt. Here’s how to prepare cabbage the best way:

    • Remove the outer leaves, which may be wilted or damaged
    • Rinse the cabbage under cool running water
    • Pat dry with a clean kitchen towel
    • Place the cabbage on a cutting board with the core facing up

    How you cut cabbage depends on your recipe. For most hamburger recipes, you’ll want to:

    1. Cut the cabbage in half through the core
    2. Remove the tough core by making a triangular cut
    3. Slice the cabbage into thin strips or chop into smaller pieces

    For coleslaw, you need ultra-thin slices. Use a sharp knife for 1/8-inch thick cuts. A mandoline slicer can make uniform slices fast.

    Keeping cabbage fresh is important. A whole head lasts 1-2 weeks in the fridge. Cut or shredded cabbage stays fresh for three days in an airtight container.

    Remember, the way you prepare and cut your cabbage can make or break your dish!

    Classic One-Pan Hamburger and Cabbage Stir Fry Recipe

    Looking for a tasty and quick meal? This hamburger and cabbage stir fry is perfect. It’s full of flavor and good for you, making it a hit with families.

    This recipe is easy and flexible. With a few ingredients, you can make a meal that’s both affordable and healthy.

    Step-by-Step Cooking Instructions

    1. Heat 2 tablespoons of olive oil in a large skillet over medium-high heat
    2. Add 1 pound of lean ground beef and brown thoroughly
    3. Drain excess fat if needed
    4. Add minced garlic and diced onions, cooking for 2-3 minutes
    5. Incorporate chopped cabbage and cook until slightly tender
    6. Pour in 28 ounces of crushed tomatoes
    7. Simmer for 5-8 minutes

    Seasoning Variations and Adjustments

    Make your hamburger and cabbage stir fry your own with these seasonings:

    • Salt and black pepper
    • Dried oregano
    • Paprika
    • Onion powder
    • Crushed red pepper flakes

    Serving Suggestions

    This dish is great on its own. Pro tip: Try it with crusty bread or over rice for more flavor. It’s packed with nutrients like:

    • Calories per serving: 345 kcal
    • Protein: 31g
    • Fiber: 10g
    • Vitamin C: 102 mg

    It’s perfect for a quick dinner on a busy weeknight. This recipe is ready in just 18 minutes!

    Creative Recipe Variations and International Flavors

    Exploring global culinary traditions can turn your hamburger and cabbage dishes into exciting adventures. By adding international spices and unique ingredients, you’ll make your cooking more interesting. You’ll also find new and tasty flavor combinations.

    Try these creative recipe variations to bring global tastes to your kitchen:

    • Moroccan-Inspired Spice Blend: Add cumin, coriander, and harissa for a North African twist
    • Asian Fusion: Incorporate soy sauce, ginger, and sesame oil for an umami-rich experience
    • Mediterranean Style: Mix in oregano, mint, and lemon zest for a bright, fresh flavor profile

    Think outside the box when it comes to toppings and condiments. Try pickled vegetables, herb-infused yogurt sauces, or spicy chili crisp. These add depth and complexity to your dish.

    Protein substitutions can also spark creativity. Consider replacing ground beef with:

    1. Ground turkey for a leaner option
    2. Plant-based meat alternatives
    3. Chopped mushrooms for a vegetarian twist

    Nutritional variety comes from strategic ingredient swaps. A 1 lb ground beef serving provides about 30g of protein. So, keep this in mind when trying different protein sources.

    Pro tip: Always balance your flavors and consider the cultural context of your chosen spices and ingredients.

    By embracing these international variations, you’ll turn a simple hamburger and cabbage recipe into a culinary journey. This journey will delight your taste buds and expand your cooking repertoire.

    Complementary Side Dishes and Accompaniments

    Make your hamburger and cabbage meal even better with the right side dishes. These can turn a simple dinner into a special moment. The perfect sides can add balance and excitement to your meal.

    Rice and Grain Pairings

    Find tasty grain options that go great with your hamburger and cabbage:

    • Brown rice with a nutty flavor
    • Quinoa for added protein
    • Barley for a hearty texture
    • Jasmine rice for a fragrant touch

    Vegetable Side Options

    Add healthy and colorful leafy vegetable sides to your meal:

    1. Roasted Brussels sprouts
    2. Sautéed spinach with garlic
    3. Fresh garden salad
    4. Grilled zucchini sticks

    Bread and Starch Selections

    Try something different instead of traditional hamburger buns:

    • Crusty artisan bread
    • Roasted sweet potato wedges
    • Garlic herb focaccia
    • Cornbread muffins

    Pro tip: Make sides ahead of time. Many vegetable dishes and salads can be prepped up to 8 hours in advance. This saves time and reduces stress when cooking.

    Storage and Meal Prep Guidelines

    Storing your hamburger and cabbage dishes right keeps them tasty and safe. Meal prep or saving leftovers, knowing how to store them is key. This way, you can enjoy your meals all week long.

    Refrigeration Best Practices

    Here are the main tips for storing your dish:

    • Use airtight containers to keep it fresh
    • Cool the mix completely before storing
    • Put it in the fridge within 2 hours of cooking
    • It stays good for 4-5 days in the fridge

    Freezing Techniques

    Freezing is great for keeping your meals longer. Proper packaging is key for quality.

    • Choose freezer-safe containers or bags
    • Get rid of air to stop freezer burn
    • Mark containers with when you made it
    • Freeze for up to 3 months

    Reheating Guidelines

    Here’s how to reheat your stored dish:

    1. Thaw in the fridge overnight
    2. Heat it in a skillet on medium
    3. Add water or broth to keep it moist
    4. Stir often for even heating
    Storage MethodDurationBest Practices
    Refrigerator4-5 daysUse airtight containers
    FreezerUp to 3 monthsRemove air, label containers
    Room Temperature2 hours maxDo not leave out longer

    By following these tips, your hamburger and cabbage dishes will stay fresh and delicious. You’ll always have a tasty meal ready when you need it.

    Nutritional Information and Dietary Considerations

    Mixing beef patties with cabbage makes a meal full of nutrients. It’s good for your health. Knowing what’s in your food helps you make better choices.

    Caloric Content and Macronutrients

    A typical serving of hamburger and cabbage has a good mix of nutrients:

    • Approximate calories: 234
    • Protein: 28.4g
    • Fat: 11.2g
    • Carbohydrates: 3.3g
    NutrientAmount per ServingPercentage of Daily Value
    Protein28.4g57%
    Vitamin C (from cabbage)54mg60%
    Iron2.5mg14%

    Dietary Modifications for Special Needs

    Adjust your hamburger and cabbage recipe for different diets:

    1. Gluten-free: Use gluten-free seasonings
    2. Low-carb: Great for low-carb diets
    3. High-protein: Good for building muscle

    Cabbage adds health benefits like fighting cancer and improving metabolism. It has sulforaphane and indole-3-carbinol. These may protect cells and boost wellness.

    Nutrition is about balance and understanding how different foods contribute to your health goals.

    Troubleshooting Common Cooking Issues

    Cooking hamburger and cabbage can sometimes be tricky. Knowing how to fix common problems will make you a better cook.

    Ground beef can cause issues that affect your dish’s quality. Here are some tips to help:

    • Prevent watery hamburger by thoroughly draining excess fat
    • Ensure proper browning by using high heat and avoiding overcrowding the pan
    • Control moisture when cooking cabbage to maintain ideal texture

    When cooking cabbage, texture is key. Cutting cabbage into uniform ¼ to ⅛ inch thick shreds is important. Cooking it uncovered helps avoid a soggy dish.

    “The secret to great hamburger and cabbage dishes is mastering moisture control and precise cooking techniques.”

    Seasoning is also crucial for a tasty dish. Here are some tips for better flavor:

    1. Use approximately 1 teaspoon of salt per pound of cabbage
    2. Experiment with different spice combinations
    3. Balance vinegar, salt, and sugar proportions

    With these tips, you’ll make hamburger and cabbage dishes that are always a hit.

    Conclusion

    Hamburger and cabbage recipes are a journey of taste, health, and savings. You’ve discovered simple yet tasty meals to spice up your cooking. The mix of cabbage and lean beef is a flavor and health boost.

    Now, you can make meals that are both tasty and healthy. These recipes are great for quick dinners or meal prep. They’re affordable and easy to make, perfect for home cooks.

    These recipes are great for many diets, from low-carb to high-protein. You can change flavors and ingredients to fit your needs. This keeps your meals exciting and healthy.

    Cooking is all about trying new things. Use what you’ve learned, try different spices, and make these recipes your own. Your kitchen is ready for delicious, healthy, and affordable meals that will wow everyone.

    FAQ

    What are the health benefits of combining hamburger and cabbage?

    Mixing lean ground beef with cabbage is great for your health. Cabbage is full of vitamins K and C, fiber, and antioxidants. Lean ground beef adds protein, iron, and zinc. Together, they make a meal that’s good for you and not too heavy.

    How can I prevent my cabbage from becoming too mushy when cooking?

    To keep cabbage crisp, don’t overcook it. Add it late in the cooking process. Cut it into even pieces and cook on medium-high. Cook for 5-7 minutes to get a nice texture. Stir-frying or sautéing keeps it crunchy.

    Can I substitute ground turkey for beef in these recipes?

    Yes, you can! Ground turkey is a good choice for those who want less red meat. It’s leaner, so adjust cooking times and add oil to prevent drying. The seasoning and cooking method stay the same.

    How long can I store hamburger and cabbage dishes in the refrigerator?

    Store them in an airtight container for 4-5 days. Cool the dish first, then refrigerate within two hours. This keeps it safe and fresh.

    What are the best varieties of cabbage to use in these recipes?

    Green cabbage is the most versatile. Napa cabbage has a milder taste, while red cabbage adds color and a peppery flavor. Each type of cabbage has its own nutritional benefits.

    Are hamburger and cabbage recipes suitable for meal prep?

    Yes, they’re perfect for meal prep. They can be cooked in bulk, portioned, and stored. They’re great for busy people who need quick, healthy meals.

    How can I make these recipes more low-carb or keto-friendly?

    Use high-fat ground beef, add more veggies, and avoid sugars and carbs. Swap out seasonings for low-carb options. Serve without grains or starchy sides.

    What are some creative ways to add more flavor to hamburger and cabbage dishes?

    Try Cajun, Mexican, or Asian spices. Add fresh herbs, garlic, onion powders, or Worcestershire sauce. A splash of vinegar-based hot sauce or a quick pan sauce can also boost flavor.

    What is your rating for the recipe?

  • Greek Chicken And Potatoes

    Imagine a warm kitchen filled with the smell of lemon, garlic, and herbs. It turns a simple dinner into a journey of flavors. Greek chicken and potatoes is more than a meal; it’s a way to connect with family traditions.

    This Mediterranean dinner combines tender chicken and crispy potatoes in a burst of taste. It’s like a trip to Greece without leaving your kitchen. Your new favorite dinner is ready to shine.

    The Perfect Mediterranean Comfort Food Experience

    Explore the heart of Mediterranean cooking with a Greek chicken and potatoes recipe. It turns family dinners into unforgettable moments. This dish is more than food; it’s a celebration of tradition and wholesome ingredients that unite people.

    Greek cuisine brings a unique twist to comfort food, nourishing both body and soul. It combines simple, fresh ingredients in a way that creates a symphony of flavors. Every bite is exciting and satisfying.

    Origins of Greek-Style Roasted Chicken

    Roasted chicken is a staple in Mediterranean cooking. Greek families have made it special over generations. They use herbs, olive oil, and citrus to turn ordinary ingredients into something amazing.

    • Ancient cooking methods inspired modern techniques
    • Olive oil and lemon become signature flavor enhancers
    • Herbs like oregano provide authentic Mediterranean taste

    Why This Recipe Works for Family Dinners

    Family dinners need to be simple and tasty. This Greek chicken recipe is perfect, with easy prep and flavors everyone loves. You can make it quickly and wow your family.

    Recipe AttributeValue
    Preparation Time35 minutes
    Total Cooking Time60 minutes
    Servings4 people
    Calories per Serving384 kcal

    Health Benefits of Mediterranean Cooking

    Mediterranean cooking is not only tasty but also very healthy. The recipe’s ingredients are full of lean proteins, healthy fats, and essential nutrients.

    1. Rich in heart-healthy olive oil
    2. High protein from chicken thighs
    3. Low in saturated fats
    4. Abundant in vitamins and minerals

    Try this Mediterranean comfort food and make your family dinners a celebration of flavor, health, and tradition.

    Essential Ingredients for Authentic Greek Chicken and Potatoes

    To make authentic Greek recipes, you need the right ingredients. They bring out the rich flavors of traditional dishes. Your journey starts with picking the best parts for a delicious Mediterranean feast.

    For a great Greek chicken and roasted vegetables dish, you’ll need top-quality ingredients. They should capture the essence of Mediterranean cooking:

    • Chicken Selection: 8 bone-in chicken thighs (skin-on or off)
    • Potato Choice: 17½ oz of Yukon Gold potatoes, perfect for crispy roasted vegetables
    • Fresh Herbs:
      • 2 tablespoons dried oregano
      • 1 teaspoon dried thyme
    • Flavor Enhancers:
      • ⅔ cup extra virgin olive oil
      • ⅓ cup fresh lemon juice
      • 2 large garlic cloves

    The secret to authentic Greek chicken is in the ingredients. Yukon Gold potatoes give a creamy texture that crisps well. Fresh herbs and quality olive oil add the Mediterranean flavor.

    “Great cooking starts with passionate ingredient selection” – Greek Culinary Tradition

    Your spice blend will include:

    • 1 teaspoon garlic powder
    • ½ teaspoon onion powder
    • 1 tablespoon Dijon mustard
    • ½ teaspoon paprika
    • 2 teaspoons salt
    • ½ teaspoon black pepper

    Each ingredient is key to making simple dishes into a memorable Mediterranean meal. It will take your taste buds on a trip to the Greek countryside.

    The Secret to the Perfect Lemon-Garlic Marinade

    Making a great lemon-garlic marinade can turn simple meals into amazing dishes. It’s all about the right flavors for your Greek chicken.

    Marinating chicken is all about finding the right mix of ingredients. This mix brings out the best flavors in your dish.

    Marinade Ingredients and Proportions

    For a delicious marinade, you need the right ingredients:

    • 8 cloves of fresh garlic, minced
    • 3/4 cup (180ml) of high-quality olive oil
    • 1/2 cup (120ml) fresh lemon juice
    • 2 tablespoons Dijon mustard
    • 3.5 teaspoons dried oregano
    • Fresh thyme sprigs
    • Salt and black pepper to taste

    Optimal Marination Times

    For the best flavor, marinate your chicken for 12 to 48 hours. This lets the flavors really sink in.

    Marination DurationFlavor Intensity
    4-6 hoursLight flavor
    12-24 hoursMedium flavor
    24-48 hoursDeep, rich flavor

    Flavor Enhancement Techniques

    Here are some tips to make your marinade even better:

    1. Use both lemon juice and zest for intense citrus notes
    2. Crush garlic to release more essential oils
    3. Whisk ingredients thoroughly to create a consistent mixture
    4. Always marinate in a non-reactive container
    5. Massage marinade into chicken for even coverage

    These tips will make your easy recipes taste like they’re from a restaurant. Your home-cooked meals will always impress.

    Step-by-Step Preparation Method

    Making Greek Chicken and Potatoes is easy and quick. It’s perfect for busy weeknights. With a few simple steps, you can turn basic ingredients into a tasty meal everyone will enjoy.

    1. Marinate the Chicken: Mix olive oil, lemon juice, garlic, and herbs in a big bowl. Coat the chicken well, making sure each piece is seasoned.
    2. Prepare the Potatoes: Cut Yukon Gold potatoes into 1-inch cubes. Toss them with olive oil, salt, and dried oregano for extra flavor.
    3. Arrange in Roasting Pan: Put chicken pieces skin-side up in a large roasting pan. Add the potato cubes around the chicken.

    For the best taste, follow these cooking tips:

    • Choose bone-in, skin-on chicken thighs for more flavor
    • Cut potatoes evenly for even cooking
    • Preheat the oven to 425°F (220°C) for great browning
    IngredientQuantityPreparation
    Chicken Thighs8 piecesBone-in, skin-on
    Yukon Gold Potatoes6 mediumCubed 1-inch pieces
    Garlic3-4 clovesFinely chopped

    This method takes about 45-60 minutes, ideal for busy families. It needs only 10 minutes of prep and 20-25 minutes of cooking. You’ll get a healthy meal for 4-6 people.

    “Cooking should be a celebration of fresh ingredients and simple techniques” – Mediterranean Cooking Wisdom

    Pro tip: For crispy potatoes, spread them in a single layer. Avoid overcrowding the pan. This way, each potato will be golden and crispy.

    Mastering the Roasting Technique

    To get the perfect roasted chicken, you need to be precise and know the right roasting techniques. By following these expert tips, your Greek chicken will go from good to great. You’ll get crispy skin and amazing flavor.

    The key to great roasting is controlling the temperature and timing. Chefs say a smart approach is key. This way, your chicken will be golden, juicy, and perfectly cooked.

    Temperature Control Tips

    Getting your roasting right starts with oven management. Begin with a high temperature of 425°F. This initial sear is crucial for crispy chicken skin.

    • Preheat oven to exactly 425°F
    • Place chicken in center rack
    • Use a reliable meat thermometer

    Timing and Doneness Guidelines

    Cooking time changes with chicken weight. A good rule is 30 minutes per pound. This ensures the meat is cooked well without drying out.

    Chicken WeightCooking TimeInternal Temperature
    3-4 pounds1.5-2 hours165°F (breasts)
    4-5 pounds2-2.5 hours185°F (thighs)

    Achieving Crispy Skin Results

    For crispy chicken skin, pat the chicken dry before roasting. Moisture is the enemy of crispiness. Brush with olive oil and season well to boost texture and flavor.

    • Pat chicken completely dry with paper towels
    • Rub skin with olive oil
    • Season generously with salt and herbs
    • Consider using convection setting if available

    Remember, patience is key. Let your chicken rest 15-20 minutes after roasting. This lets juices redistribute, making each bite juicy and perfectly cooked.

    Creating the Perfect Pan Sauce

    To make your Greek chicken dish stand out, you need to master sauce recipes and flavor enhancement. The pan sauce turns your roasted chicken into something amazing. It captures every tasty browned bit left in the roasting pan.

    To make an amazing pan sauce, follow these steps:

    • Remove the chicken and potatoes from the roasting pan
    • Place the pan directly on the stovetop
    • Deglaze with ¼ cup of chicken broth
    • Scrape up all the flavorful browned bits
    • Simmer the liquid to reduce and concentrate flavors

    Adding these steps makes your pan sauce richer. Whisk in a tablespoon of butter at the end. This makes the sauce silky and rich, coating the chicken perfectly. You can also add fresh herbs or a bit of white wine for more flavor.

    Pro tip: Let the sauce reduce by half. This makes the flavors intense and coats your Greek chicken like a pro meal. Remember, patience is key. Slow simmering brings out the best flavors.

    Tips for Achieving Extra Crispy Potatoes

    Making perfect crispy potatoes is an art. It turns a simple side dish into a masterpiece. Whether it’s with roasted veggies or Greek chicken, getting crispy potatoes right needs special techniques and prep.

    The secret to top-notch crispy potatoes is in a few key cooking tips. These tips can take your dish from good to great. Knowing how to pick and prepare potatoes is key for that golden-brown look.

    Selecting the Right Potatoes

    Not all potatoes are the same for crispiness. For the best results, pick:

    • Yukon Gold potatoes for their medium starch content
    • Russet potatoes for exceptional crunchiness
    • Medium-sized potatoes (1½ to 2 inches wide)

    Preparation Techniques for Crispy Perfection

    To get crispy potatoes that wow your guests, follow these steps:

    1. Soak potato wedges in cold water for 30 minutes to remove excess starch
    2. Pat potatoes completely dry before roasting
    3. Use avocado oil or extra virgin olive oil for optimal browning
    4. Preheat your baking sheet to 425°F before adding potatoes

    Roasting Methods for Maximum Crunch

    The best crispy potatoes need precise cooking. Spread potatoes in a single layer, avoiding overcrowding. Roast for 30 minutes, then flip and cook for another 20 minutes. This way, you get a crispy outside and a soft inside.

    Pro tip: Refrigerating potatoes overnight can make them even crisper. It turns starches into sugars, making them taste better.

    Serving Suggestions and Pairing Options

    Planning family dinners with Greek chicken and potatoes can be exciting. You aim to make a complete Mediterranean cuisine experience. This dish is versatile, allowing you to try different serving options that bring out its flavors.

    Classic side dishes that go well with Greek chicken include:

    • Horiatiki (traditional Greek village salad)
    • Tzatziki sauce
    • Stewed green beans with tomato sauce
    • Roasted seasonal vegetables

    For drinks, consider these options to make your meal even better:

    1. Crisp white wines like Assyrtiko
    2. Refreshing Greek lager
    3. Sparkling water with lemon
    4. Homemade iced tea with mint

    Make your family dinner a fun culinary adventure with these ideas. The goal is to mix flavors and textures well. Also, keep things simple and fun in the kitchen.

    Pro tip: Prepare parts of the meal ahead of time. This makes weeknight meals easier and less stressful.

    It’s easy to make dietary changes. Add more roasted veggies for extra nutrition. Or serve with a light Greek salad for a meal that everyone can enjoy.

    Conclusion

    Greek Lemon Chicken and Potatoes makes your meals feel like a Mediterranean feast. It only takes 45 minutes to prepare and cook. This way, you can enjoy a tasty, healthy meal that feels like a trip to Greece.

    This recipe is more than just food. It opens the door to Mediterranean cooking, letting you make dishes like a pro. With just four chicken thighs, baby Yukon potatoes, and some fresh ingredients, you can make a gourmet meal easily.

    Don’t stop here. Learning this recipe will boost your confidence in cooking tasty, healthy meals. It’s perfect for any occasion, whether it’s a family dinner or a party. Greek Chicken and Potatoes shows that home-cooked meals can be both fancy and comforting.

    Cooking is a journey, not a destination. Every time you make this dish, you’ll get better and create special memories. Let your kitchen be a place of discovery and delicious food.

    FAQ

    What makes Greek Chicken and Potatoes a unique Mediterranean dish?

    Greek Chicken and Potatoes is a classic dish. It combines tender chicken, crispy potatoes, and Mediterranean flavors. These include olive oil, lemon, and oregano. Its simplicity and robust flavors make it a beloved comfort food, showcasing the best of Greek cuisine.

    How long should I marinate the chicken for the best flavor?

    Marinate your chicken for at least 2-4 hours, or overnight for the best flavor. This lets the lemon-garlic marinade deeply penetrate the meat. Even 30 minutes can add some flavor to your dish.

    What type of potatoes work best for this recipe?

    Yukon Gold potatoes are the best choice. They have a creamy texture and crisp up nicely. They keep their shape well during roasting, offering a perfect golden-brown exterior and soft interior.

    Can I make this recipe with chicken parts other than a whole chicken?

    Absolutely! You can use chicken thighs, drumsticks, or bone-in chicken breasts. Each cut works well with the marinade and roasting. Bone-in, skin-on pieces are recommended for the most flavor and crispy skin.

    Is Greek Chicken and Potatoes a healthy meal option?

    Yes, it’s a healthy choice. It uses lean protein, heart-healthy olive oil, and fresh herbs. The cooking method is healthier than frying, and it includes nutritious ingredients that support wellness.

    How can I ensure my potatoes get extra crispy?

    For crispy potatoes, preheat your roasting pan and use enough olive oil. Spread potatoes in a single layer and avoid overcrowding. Soaking potato cuts in cold water before roasting can also help remove excess starch and promote crispiness.

    What are some good side dishes to serve with Greek Chicken and Potatoes?

    Serve it with horiatiki (Greek village salad), tzatziki, or a simple Greek salad. Steamed vegetables are also a good choice. For a complete Mediterranean experience, serve warm pita bread or a light Greek white wine.

    How long does the entire cooking process take?

    The total time is 1-1.5 hours, including marination and cooking. Marinating can be done in advance. The actual roasting takes about 45-60 minutes, depending on the size of your chicken and potatoes.

    Can I prepare this dish in advance?

    You can marinate the chicken overnight and prepare the potatoes ahead of time. The dish is best served fresh from the oven. But you can do much of the prep work in advance to make weeknight cooking easier.

    What if I don’t have all the traditional Greek herbs on hand?

    You can substitute with dried herbs or a Mediterranean herb blend if you’re missing oregano and thyme. Fresh parsley can also be a good alternative if you’re missing some of the classic herbs.

    What is your rating for the recipe?

  • Easy Peanut Butter Overnight Oats

    Mornings can be chaotic, but your breakfast doesn’t have to be. Imagine waking up to a delicious, nutritious meal that’s already prepared and waiting in your refrigerator. Peanut butter overnight oats are the ultimate healthy breakfast solution for busy individuals seeking convenience without compromising nutrition.

    This easy meal prep breakfast is more than just a quick bite. It’s a balanced, protein-packed start to your day that takes only 5 minutes to prepare. Your future self will thank you for the minimal effort and maximum flavor of these peanut butter overnight oats.

    Understanding Overnight Oats: A Quick and Nutritious Breakfast Solution

    Overnight oats have changed the breakfast game with their no-cook method. They offer a quick and healthy start to your day. This is great for those who are always on the go.

    The magic of no-cook oats is in how they’re made. Unlike regular oatmeal, you soak rolled oats in liquid overnight. This makes a creamy, delicious breakfast without cooking.

    What Makes Overnight Oats Unique

    • Cold-soaked technique preserves nutrient integrity
    • No cooking required, saving time and energy
    • Develops a smooth, creamy texture naturally
    • Easily digestible compared to hot-cooked oatmeal

    Benefits of Cold-Soaked Oats

    Cold-soaked oats are great for your morning. Soaking breaks down phytic acid, making nutrients easier to digest. This way, you get the most nutritional benefits from your breakfast.

    Why Peanut Butter Elevates Overnight Oats

    IngredientNutritional BenefitProtein Content
    Peanut ButterHealthy Fats8g per 2 tablespoons
    Rolled OatsFiber5g per 1/2 cup
    Chia SeedsOmega-3 Fatty Acids3g per tablespoon

    Peanut butter makes your breakfast recipes special. It adds a creamy texture and essential proteins and fats. Oats and peanut butter together make a balanced, satisfying breakfast that keeps you going all morning.

    Essential Ingredients for Peanut Butter Overnight Oats

    Making the perfect overnight oatmeal needs the right ingredients. These turn simple oats into a healthy snack. The mix ensures a tasty and energizing breakfast.

    Your base ingredients for this delightful overnight oatmeal will include:

    • Rolled Oats: The foundation of your overnight oats, providing essential fiber and complex carbohydrates
    • Milk (dairy or plant-based): Adds creaminess and helps soften the oats
    • Greek Yogurt: Boosts protein content and creates a rich texture
    • Peanut Butter: Delivers healthy fats and a delicious nutty flavor
    • Maple Syrup: Natural sweetener that enhances taste

    Optional add-ins can make your overnight oatmeal even better. Think about adding:

    • Chia Seeds: Increase nutritional value and provide extra thickness
    • Cinnamon: Adds warmth and potential metabolic benefits
    • Dark Chocolate Chips: Introduces a decadent touch
    • Fresh Fruits: Brings natural sweetness and additional nutrients

    When picking ingredients for your overnight oatmeal, choose quality and freshness. Go for natural peanut butter without added sugars. Also, pick old-fashioned rolled oats for the best texture and nutrition.

    Basic Recipe Instructions and Preparation Steps

    Making peanut butter overnight oats is a breeze. It’s a great way to start your day with a nutritious meal. It’s easy to prepare and packed with flavor, perfect for those on the go.

    To make a perfect breakfast, start by picking the right ingredients. Then, follow a simple step-by-step guide. Remember, precision and patience are key.

    Mixing the Base Ingredients

    First, choose your ingredients wisely. You’ll need:

    • 1 1/2 cups rolled oats
    • 2 cups unsweetened almond milk
    • 2 tablespoons peanut butter
    • 1 1/2 tablespoons chia seeds
    • 1 teaspoon vanilla extract
    • 1/4 teaspoon sea salt

    Proper Storage Methods

    Storing your oats right is important. Use a clean, airtight glass jar or container. Pro tip: Mason jars are great for individual servings.

    Mix everything well to ensure even distribution. Then, seal the container and refrigerate. Your oats will stay fresh for up to 5 days, making it a perfect make-ahead breakfast.

    Ideal Soaking Time

    Refrigeration is where the magic happens. Let your oats soak for at least 4 hours. But, for the best texture and flavor, soak them overnight (8 hours).

    When you’re ready to eat, stir your oats well. Add fresh berries or crushed peanuts for extra nutrition and crunch.

    Nutritional Benefits and Protein Content

    Peanut butter overnight oats are a nutritional powerhouse. They offer a protein-rich breakfast that fuels your morning. This healthy option supports your wellness and energy.

    Let’s explore the amazing nutritional benefits of this tasty meal:

    • High protein content: Approximately 12 grams per serving
    • Balanced macronutrient profile
    • Rich in essential vitamins and minerals

    This meal is a standout for protein. Each serving gives a big nutritional boost:

    NutrientAmount per Serving
    Calories290 kcal
    Protein12 g
    Total Carbohydrates40 g
    Dietary Fiber7 g
    Total Fat10 g

    Pro tip: The mix of oats and peanut butter makes a complete meal. It supports energy and muscle recovery.

    “Nutrition is not about being perfect. It’s about eating food that makes you feel great.” – Unknown

    These overnight oats offer more than just protein. They have beta-glucan for heart health and lots of fiber. This makes them a great choice for a nutritious and filling breakfast.

    Make-Ahead Tips and Meal Prep Strategies

    Easy meal prep makes mornings less stressful. Peanut butter overnight oats are great for busy people. They offer a convenient and tasty breakfast solution.

    Start your day off right by making overnight oats ahead of time. It’s easy and can be done in a few steps. You can make enough for the whole week.

    Batch Preparation Guidelines

    Here are some tips to make meal prep more efficient:

    • Make 3-5 servings at once in individual containers
    • Store them in airtight glass or mason jars
    • Use 1/2 cup oats to 2/3 cup milk for the right mix
    • Add 1 tablespoon of chia seeds for extra nutrition

    Storage Duration and Best Practices

    Proper storage is key to keeping your breakfast fresh. Here’s how to keep your overnight oats at their best:

    Storage MethodDurationQuality Preservation
    Refrigerator StorageUp to 5 daysOptimal freshness
    Freezer StorageUp to 3 monthsGood for long-term preservation

    Pro tip: Store your overnight oats in the coldest part of the fridge. Always use clean utensils when preparing and storing to prevent contamination.

    Meal prepping can save you up to 2-3 hours per week. Overnight oats are a fantastic time-saving breakfast choice!

    Customization Options and Flavor Variations

    Exploring peanut butter recipes for overnight oatmeal opens up a world of delicious possibilities. Your basic overnight oats can transform into an exciting culinary adventure with just a few creative additions.

    Let’s dive into some mouthwatering customization options that will elevate your overnight oatmeal experience:

    • Fruit Fusion: Add fresh or frozen fruits like sliced bananas, strawberries, or blueberries to introduce natural sweetness
    • Protein Power: Incorporate protein powder for an extra nutritional boost
    • Nut Butter Swap: Experiment with different nut butters such as almond or cashew butter
    • Chocolate Lovers: Sprinkle mini chocolate chips for a decadent twist

    Your overnight oatmeal can be a canvas for endless creativity. By adjusting ingredients like milk quantity, sweetener levels, and toppings, you’ll discover personalized breakfast combinations that suit your taste preferences.

    For those seeking additional texture and flavor, consider mixing in:

    • Chopped nuts
    • Shredded coconut
    • Chia seeds
    • Granola clusters

    Remember, the key to amazing overnight oatmeal is experimentation. Don’t be afraid to mix and match ingredients to create your perfect breakfast bowl!

    Choosing the Right Type of Oats and Peanut Butter

    Making tasty no-cook oats begins with picking the best ingredients. Your peanut butter recipes will be amazing with the right oats and peanut butter mix.

    Choosing the right oats is key for the perfect texture in your overnight oats. Old-fashioned rolled oats are the best for several reasons:

    • They give a creamy, smooth feel
    • They soak up liquid well during overnight soaking
    • They keep a great texture
    • They are best for no-cook oats

    Best Oats for Overnight Soaking

    Among all oats, rolled oats are the top pick for overnight oats. Bob’s Red Mill has great gluten-free options. But, stay away from instant or steel-cut oats. They won’t give you the creamy texture you want.

    Selecting Quality Peanut Butter

    Your peanut butter recipes need top-notch ingredients. Look for natural, unsweetened peanut butter with few additives. The best peanut butter should:

    1. Have only peanuts and maybe salt
    2. Give a rich, real flavor
    3. Be full of nutrients
    4. Blend well into your no-cook oats

    Pro tip: Stir your natural peanut butter before adding to ensure even distribution of oils and consistent flavor.

    By choosing your ingredients wisely, you’ll make overnight oats that are both healthy and delicious.

    Delicious Topping Ideas and Combinations

    Turn your peanut butter overnight oats into a gourmet breakfast with creative toppings. The right mix can make your morning meal exciting and delicious.

    Fresh fruits add natural sweetness and nutrition. Try these topping ideas:

    • Sliced bananas with honey
    • Fresh berries (strawberries, blueberries, raspberries)
    • Diced apples with cinnamon
    • Tropical fruits like mango or passion fruit

    Add crunchy elements for texture and extra nutrients:

    • Chopped almonds or walnuts
    • Pumpkin or sunflower seeds
    • Granola clusters
    • Toasted coconut flakes

    For a treat, add these indulgent toppings:

    • Dark chocolate chips
    • Caramel drizzle
    • Extra peanut butter swirl
    • Maple syrup

    Creating the perfect peanut butter overnight oats is about finding the right mix. Try different toppings to find your favorite breakfast.

    Topping CategoryBest CombinationsNutritional Boost
    FruitsBanana + CinnamonPotassium, Vitamins
    NutsAlmonds + Chia SeedsProtein, Omega-3
    Sweet AdditionsDark Chocolate + CoconutAntioxidants, Fiber

    Remember, the secret to amazing peanut butter overnight oats is being creative and following your taste. Don’t hesitate to mix toppings to find your perfect snack.

    Dietary Modifications: Vegan and Gluten-Free Options

    Making a vegan breakfast can be tough, but peanut butter overnight oats are a great fix. With a few easy swaps, you can make this meal plant-based and gluten-free. It’s perfect for everyone’s dietary needs.

    Here’s how to make vegan-friendly overnight oats:

    • Swap dairy milk for oat milk, almond milk, or soy milk
    • Choose dairy-free yogurt from coconut or almond
    • Go for natural peanut butter without dairy
    • Make sure your oats are gluten-free if you’re sensitive

    Even with these changes, your vegan breakfast stays packed with nutrients. A serving can give you:

    • 40 grams of plant-based protein
    • 533 calories for lasting energy
    • 47 grams of complex carbs
    • 22 grams of healthy fats
    • 7 grams of dietary fiber

    “Dietary restrictions don’t mean compromising on flavor or nutrition. With the right ingredients, anyone can enjoy a delicious and wholesome breakfast.” – Nutrition Expert

    Choose high-quality ingredients for the best taste and nutrition. Opt for certified gluten-free oats and natural peanut butter. These choices will boost your vegan breakfast’s flavor and health benefits.

    Troubleshooting Common Issues and Texture Adjustments

    Making the perfect overnight oatmeal can take some tweaking. Whether you’re new to meal prep or a breakfast pro, knowing how to tweak your oats is key. It can really change your morning.

    Texture and consistency are vital in overnight oats. They can make or break your breakfast. Here are some tips to get the perfect texture:

    Fixing Consistency Problems

    Overnight oats can be too thick or too thin. Here’s how to fix it:

    • Too Thick: Add more milk (1-2 tablespoons at a time) to thin it out
    • Too Thin: Add more oats or chia seeds to soak up extra liquid
    • Use a 1:1 ratio of oats to milk for the best consistency
    • Soak for 2-4 hours, or better yet, overnight

    Adjusting Sweetness Levels

    It’s easy to adjust the sweetness of your oatmeal:

    1. Begin with a small amount of sweetener (like maple syrup or honey)
    2. Keep tasting and add more until it’s sweet enough for you
    3. Try natural sweeteners like mashed banana or apple sauce
    4. Spices like cinnamon can also make it taste sweeter

    Remember, overnight oats are very flexible. With a bit of practice, you’ll get the hang of making the perfect breakfast. It will be just right for your taste and health needs.

    Serving Suggestions and Temperature Preferences

    Your peanut butter overnight oats are super versatile. You can enjoy them in many ways, depending on your mood.

    Here are some temperature options for your overnight oats:

    • Cold – straight from the fridge (the most common way)
    • Room temperature – let it sit for 10-15 minutes before eating
    • Warm – gently heat it in the microwave for 30-60 seconds

    Here are some tips for serving your peanut butter overnight oats:

    1. Use clear glass jars to show off the layers
    2. Top with fresh berries or sliced bananas
    3. Sprinkle more chia seeds for crunch
    4. Drizzle honey or maple syrup for sweetness

    For the best taste, eat your overnight oats within 4 days. The texture gets thicker over time. You might need to add a bit of milk to get the right consistency.

    Pro tip: Try different serving temperatures to find what you like best!

    Conclusion

    Peanut butter overnight oats are a great choice for a healthy breakfast. They mix nutrition, convenience, and taste. Plus, they’re easy to prepare the night before, saving you time in the morning.

    Starting with overnight oats opens up a world of flavors and health. Choosing whole ingredients and controlling sugar is smart for your diet. These oats are packed with fiber, energy, and protein, making them a nutritious start to your day.

    Overnight oats are not just a meal; they’re a way to make breakfast your own. You can make them gluten-free or vegan, and add your favorite toppings. Try different milks and mix-ins to find your favorite. Make your mornings better with a healthy and tasty breakfast.

    FAQ

    What are overnight oats?

    Overnight oats are a simple way to make oatmeal. You soak rolled oats in milk or a dairy alternative in the fridge overnight. This makes the oats soft and creamy, and boosts their nutritional value.

    How long can I keep peanut butter overnight oats in the refrigerator?

    You can store peanut butter overnight oats in the fridge for up to 5 days. They’re great for meal prep and a quick, healthy breakfast all week.

    Can I make overnight oats with plant-based milk?

    Yes! Use almond milk, oat milk, soy milk, or coconut milk for vegan-friendly oats. They keep the oats creamy and delicious.

    Are overnight oats healthy?

    Yes, they’re very healthy. They’re packed with protein, complex carbs, and healthy fats from peanut butter. They also have vitamins and minerals, supporting energy and muscle recovery.

    Do I need to heat overnight oats before eating?

    No, eat them cold from the fridge. But, if you like them warm, microwave them for 30-45 seconds. Be careful not to overheat.

    Can I make overnight oats gluten-free?

    Yes, use gluten-free oats. Most brands offer gluten-free options that work well for overnight oats.

    What are the best add-ins for peanut butter overnight oats?

    Try chia seeds, sliced bananas, honey, chocolate chips, chopped nuts, cinnamon, and Greek yogurt. They add flavor, texture, and nutrition.

    How can I make my overnight oats thicker or thinner?

    Change the liquid-to-oats ratio to adjust the texture. More liquid makes them thinner, more oats or chia seeds makes them thicker. Greek yogurt can also thicken them.

    Are overnight oats good for weight loss?

    Yes, they’re great for weight management. They’re full of fiber, protein, and nutrients that keep you full, helping with calorie control and healthy eating.

    Can children eat overnight oats?

    Yes, kids love them! They’re nutritious, customizable, and can be flavored to please kids. Just watch for nut allergies and adjust ingredients as needed.

    What is your rating for the recipe?

  • Crab Brulee Recipe

    Imagine turning the classic dessert crème brûlée into a fancy dish that mixes sweet and savory. The crab brulee is a masterpiece that brings together French elegance and the rich taste of seafood.

    This dish is more than a recipe; it’s a celebration of creativity in cooking. It reimagines the traditional dessert, making it a surprise with every bite of fresh crab.

    Get ready to improve your cooking and wow your guests with this recipe. The crab brulee is not just a meal; it’s an adventure in your kitchen.

    Introduction to Crab Brulee

    Get ready for a culinary adventure that turns crème brûlée into a unique crustacean dessert. This dish combines the sweet custard with the rich taste of fresh crab meat. It’s a bold move that pushes the limits of flavor.

    Origins of Savory Brulee

    The brulee has evolved from a sweet treat to a sophisticated savory dish. This change shows the creativity of modern chefs. The crab brulee is a top example of how classic recipes can be reinvented.

    Why This Recipe Stands Out

    • It offers a sweet and savory flavor mix.
    • The creamy custard and tender crab create a luxurious texture.
    • It’s a fresh take on traditional seafood appetizers.

    What Makes It Special

    Your taste buds will love the mix of flavors. The dish has:

    1. A creamy custard base.
    2. Fresh, juicy crab meat.
    3. A caramelized sugar crust.
    4. Subtle herbs and seasonings.

    “A true culinary masterpiece that transforms expectations with every bite.”

    This elegant dish has 350 calories per serving. It shows that indulgence can be both classy and healthy. The choice of ingredients and the way it’s made make crab brulee a standout dish.

    Essential Ingredients for Perfect Crab Brulee

    To make a stunning shellfish dessert, you need the right ingredients. They must balance flavors perfectly. Your gourmet crab dish needs top-quality parts to make it special.

    The main ingredients for this recipe are:

    • 150 grams of fresh crab meat
    • 400 ml single cream
    • 2 large egg yolks
    • 1 large whole egg
    • 1/2 tablespoon pickled ginger, finely chopped
    • 1 clove garlic, finely chopped
    • 2 tablespoons grated parmesan cheese

    Using the best ingredients makes this dish stand out. Fresh, high-quality crab meat is key to a memorable dessert.

    IngredientQuantityPurpose
    Crab Meat150gPrimary protein source
    Single Cream400mlCreates smooth custard base
    Parmesan Cheese2 tbspAdds depth of flavor
    Pickled Ginger1/2 tbspProvides subtle spicy note

    When making this gourmet crab dish, remember that the quality of ingredients matters a lot. Always choose fresh, local ingredients to get the best flavor and texture.

    Choosing the Right Crab Meat

    Creating the perfect crab custard delight starts with picking the right crab meat. The type of crab you choose can change the flavor and texture of your brulee.

    Exploring Crab Varieties

    There are many crab types, each with its own taste. Here are some top picks:

    • Blue Crab: Delicate and sweet, great for a light flavor
    • Dungeness Crab: Has a meaty texture and a mild sweetness
    • King Crab: Luxurious and rich, perfect for a fancy crab custard delight
    • Snow Crab: Fine texture with a subtle sweetness

    Fresh vs. Frozen Crab Meat

    The type of crab meat you choose greatly affects the dish’s quality. Fresh crab meat usually tastes better and has a better texture than frozen.

    Crab TypeRecommended QuantityFlavor Profile
    King Crab150 gramsRich, buttery
    Blue Crab168 gramsSweet, delicate
    Dungeness Crab160 gramsMild, slightly sweet

    Quality Indicators

    When picking crab meat for your crab custard delight, look for these quality signs:

    1. Fresh, clean ocean smell
    2. Bright, consistent color
    3. Firm, moist texture
    4. No signs of discoloration
    5. Minimal shell fragments

    Pro tip: For the best seafood delicacy experience, buy crab meat from trusted fishmongers or specialty seafood markets.

    Kitchen Equipment Needed

    To make a tasty caramelized crab topping, you need the right tools. Your crab dish needs precision and the best equipment for perfection.

    Essential Equipment List

    • Ramekins: Individual serving dishes crucial for creating perfect portions
    • Large baking dish for water bath setup
    • Whisk for smooth custard preparation
    • Kitchen torch or broiler for caramelization
    • Mixing bowls
    • Measuring cups and spoons

    The kitchen torch is key for that perfect caramelized crab topping. If you don’t have a torch, your broiler works great too.

    Equipment Recommendations

    EquipmentPurposeRecommended Type
    RamekinsIndividual servingsCeramic, 4-6 oz size
    Kitchen TorchCaramelizing sugarCulinary butane torch
    Baking DishWater bath containerDeep rectangular glass or ceramic

    Invest in quality tools to make your crab dish amazing. Each tool is important for a top-notch caramelized crab topping. It will wow your guests.

    Preparation and Mixing Techniques

    Making a perfect crab brulee needs precision and careful technique. This dish requires attention to detail from the start to the end. You must focus on every step, from making the custard base to adding the crab meat.

    Creating the Custard Base

    Your crab brulee starts with a smooth custard base. Follow these steps for a perfect base:

    • Whisk 3 medium egg yolks until smooth and pale
    • Slowly add 200 ml double cream and 100 ml whole milk
    • Add 1 teaspoon Dijon mustard for depth of flavor
    • Blend in 1 tablespoon lemon juice
    • Season with ½ teaspoon cayenne pepper

    Incorporating Crab Meat

    The success of your crab brulee depends on how you mix the crab meat. Gently fold 200g of white crab meat into the custard base. Make sure it’s evenly distributed without breaking the meat.

    IngredientQuantityPreparation Tip
    White Crab Meat200gPick through to remove any shell fragments
    Cayenne Pepper½ teaspoonAdds subtle heat to the dish
    Lemon Juice1 tablespoonBrightens the crab’s natural flavor

    Proper Seasoning Methods

    Seasoning is key in this dish. Use a light hand to enhance the crab flavor. Taste as you go and adjust salt and pepper little by little. Adding smoked paprika or a pinch of nutmeg can also improve your crab brulee.

    Step-by-Step Baking Process

    Making the perfect seafood dish needs precision and skill. Your crab brulee journey is key during baking. It turns raw ingredients into a fancy dish.

    1. Preheat your oven to 325°F (163°C) for the best cooking temperature
    2. Get your ramekins ready with the crab custard mixture
    3. Make a water bath by putting ramekins in a deep baking dish
    4. Fill the baking dish with warm water, up to halfway on the ramekin sides

    Baking needs your full attention. Your seafood dish will take about 35 minutes. Start checking it at 25 minutes. It should have set edges and a slight jiggle in the middle.

    Look for these signs your crab custard is done:

    • Internal temperature hits 175°F (79°C)
    • The custard is slightly firm but not solid
    • Edges are set, but the center is still a bit wobbly

    After baking, let your ramekins cool at room temperature for about an hour. For the best taste, chill them for 3-4 hours before caramelizing. This step makes the custard smooth and luxurious.

    The Art of Caramelization

    Mastering the caramelized crab topping is key to making your crab brulee a hit. It’s a mix of savory and sweet that needs precision. You want a golden-brown crust that breaks beautifully with each spoon.

    Sugar Selection Tips

    Choosing the right sugar is crucial for a great caramelized crab topping. You have a few options:

    • Turbinado sugar: Provides a robust, crunchy layer
    • Granulated sugar: Offers a more delicate caramelization
    • Demerara sugar: Adds a deeper, more complex flavor

    Torching Techniques

    How you caramelize can make or break your dish. A kitchen blowtorch is best for an even crust. Keep the flame 2 inches away from the sugar and move it evenly.

    Caramelization MethodTime RequiredDifficulty Level
    Kitchen Blowtorch1-3 minutesIntermediate
    Oven Broiler2-4 minutesEasy

    Achieving the Perfect Crust

    Getting a stunning caramelized crab topping takes patience and skill. Sprinkle about 1/2 tablespoon of sugar over each ramekin. Look for a golden-brown color to know it’s done right.

    Pro tip: Let the caramelized surface cool for a minute. This makes it crack nicely when you break through, showing the creamy crab custard.

    Serving and Presentation Tips

    Improving your coastal cuisine starts with how you present it. Your crab dish should look as good as it tastes. With careful plating, this brulee becomes a true masterpiece.

    Here are some expert tips for presenting your crab brulee:

    • Garnish with fresh microgreens for a vibrant green contrast
    • Sprinkle sea salt flakes for texture and enhanced flavor
    • Add delicate edible flowers to create visual intrigue
    • Use pristine white plates to highlight the dish’s golden caramelized top

    Temperature is key when serving this dish. Serve it slightly warm or at room temperature. This keeps the sugar crust crisp and the custard creamy.

    For an even more stunning presentation, try these finishing touches:

    1. Garnish with finely chopped chives
    2. Add crispy bacon bits for texture
    3. Serve with fresh lemon wedges to brighten the flavor

    Pro tip: Use a high-quality kitchen torch to caramelize the sugar topping just before serving. This creates a perfect, golden-brown crust.

    Pairing Suggestions

    Your crab brulee is a special dish that deserves the right sides. These sides should make your meal even better. The right choices can turn a simple meal into a memorable one.

    When picking drinks, go for something light and refreshing. This will match the rich custard base of your crab brulee:

    • White Wines:
      • Pinot Grigio
      • Sauvignon Blanc
      • Late Harvest Riesling (served at 48°F)
    • Light-Bodied Beers:
      • Pilsner
      • Wheat Beer

    If you prefer not to drink alcohol, try sparkling water with lemon or a light herbal tea. These options won’t overwhelm the crab’s delicate taste.

    Choosing the right sides is important too. Here are some ideas:

    • Lightly toasted artisan bread
    • Crisp water crackers
    • Small mixed green salad
    • Pickled vegetable garnish

    The goal is to find balance. The creamy crab brulee needs crunchy, light sides. These will contrast nicely and make the flavors pop.

    Storage and Make-Ahead Tips

    Preparing your crab brulee ahead of time can save you a lot of effort. It also makes the flavors richer. The secret to keeping it fresh is in how you store and prepare it.

    Here are the must-knows for storing your crab brulee:

    • Refrigerate it right after you make it
    • Use plastic wrap to keep it moist-free
    • It’s best to eat it within 2 days
    • Avoid storing it near foods with strong smells

    For the best results, make your crab brulee up to 48 hours before you serve it. This lets the flavors mix well, making your dessert even more special.

    Here’s how to serve your chilled crab brulee:

    1. Take it out of the fridge 30 minutes before you serve it
    2. Let it warm up naturally to room temperature
    3. Re-caramelize the sugar just before you serve it
    4. Use a kitchen torch for a perfect crisp top

    If you need to warm it up a bit, put the ramekins in a 250°F oven for 10-15 minutes. This keeps your crab brulee warm without ruining its creamy texture.

    Pro tip: Always caramelize the sugar topping just before serving to maintain the signature crisp crack that makes brulee so delightful!

    Remember, keeping your crab brulee safe is key, especially with seafood. Always store it in the coldest part of the fridge. And eat it within 2 days for the best taste and quality.

    Conclusion

    Your journey with crab brulee is more than a recipe. It’s a mix of old and new in cooking seafood. You’ve picked top ingredients like fresh crab and learned to balance custard with caramel.

    This dish is perfect for impressing guests or treating yourself. Each ramekin shows your skill, from the crab meat to the caramelized sugar. You’ve shown you’re creative and open to new flavors.

    Cooking is always learning. This crab brulee recipe is a good start, but try new things. Change the seasoning, use different crab, or pair it with wine. Your unique touch will make it special.

    Keep trying new seafood recipes. Your kitchen is a place to create amazing dishes. Every meal is a chance to make something unforgettable.

    FAQ

    What exactly is crab brulee?

    Crab brulee is a unique dish that mixes creamy crème brûlée with fresh crab meat. It’s a mix of sweet and savory, turning a classic dessert into a fancy appetizer or main dish. It has a rich custard base, caramelized sugar, and crab meat on top.

    What type of crab meat works best for this recipe?

    Blue crab, Dungeness crab, and king crab are great for crab brulee. Use fresh lump crab meat for the best taste and texture. Choose crab that smells fresh and looks bright and even.

    Do I need a kitchen torch to make crab brulee?

    A kitchen torch is best for caramelizing the sugar. But, you can also use your oven’s broiler. Just be careful not to burn it and aim for a golden-brown color.

    How far in advance can I prepare crab brulee?

    You can make the custard base up to 24 hours before. But, caramelize the sugar just before serving. This keeps the topping crisp and crackly.

    What wines pair well with crab brulee?

    White wines, especially crisp ones, pair well with crab brulee. Try a Sauvignon Blanc, Chardonnay, or dry Riesling. They complement the seafood and custard nicely.

    Can I make a vegetarian version of this dish?

    Yes, you can make a vegetarian version. Try using hearts of palm, artichoke hearts, or lobster mushrooms. They can mimic the texture and flavor of crab.

    How do I know when the custard is perfectly cooked?

    The custard should be set but still a bit jiggly. It should wobble like jelly when you shake the ramekin. Avoid overcooking to keep it smooth and creamy.

    Are there any common mistakes to avoid when making crab brulee?

    Avoid overheating the custard and using low-quality crab. Also, don’t forget to season it well and caramelize the sugar evenly. Use fresh, high-quality ingredients for the best taste.

    What is your rating for the recipe?