Author: zikrecipes.com

  • Mexican Chicken Salad

    Every summer, my family comes together for a backyard fiesta. We celebrate our love for vibrant Tex-Mex cuisine. The highlight of these gatherings is a delicious Mexican chicken salad.

    This salad is more than just a meal. It’s a celebration of bold flavors that excite your taste buds. It’s a dish that turns simple ingredients into something extraordinary.

    Our Mexican chicken salad is a tribute to Tex-Mex cooking traditions. It’s filled with grilled chicken, fire-roasted corn, and a creamy cilantro lime dressing. It brings the flavors of Mexican street food right to your plate.

    Looking for a quick lunch or a dinner that impresses? This Mexican chicken salad is perfect. It’s a mix of nutrition and excitement. Get ready for a tasty adventure that will change how you see salads.

    What Makes Mexican Chicken Salad Special

    Southwest salads are special, but Mexican chicken salads are even more vibrant. They draw from traditional Mexican street food, like esquites. This corn-based snack is a big part of Mexican cuisine.

    These salads are unique because of their ingredients and flavors. They mix different textures and tastes. This makes a simple chicken salad into a special dish.

    • Authentic Mexican-inspired ingredients
    • Complex flavor combinations
    • Fresh and zesty components
    • Versatile serving options

    Mexican chicken salads blend American salad ideas with bold Mexican flavors. Ingredients like fire-roasted corn, cotija cheese, and cilantro make them stand out. They turn simple meals into gourmet dishes.

    IngredientNutritional ImpactFlavor Profile
    Fire-roasted Corn7g FiberSmoky, Sweet
    Cotija Cheese187mg CalciumTangy, Salty
    Fresh Cilantro60mg Vitamin CFresh, Herbal

    Mexican chicken salads are perfect for a quick lunch or a big dinner. They’re loved for their flexibility and taste. They suit many diets and are always delicious.

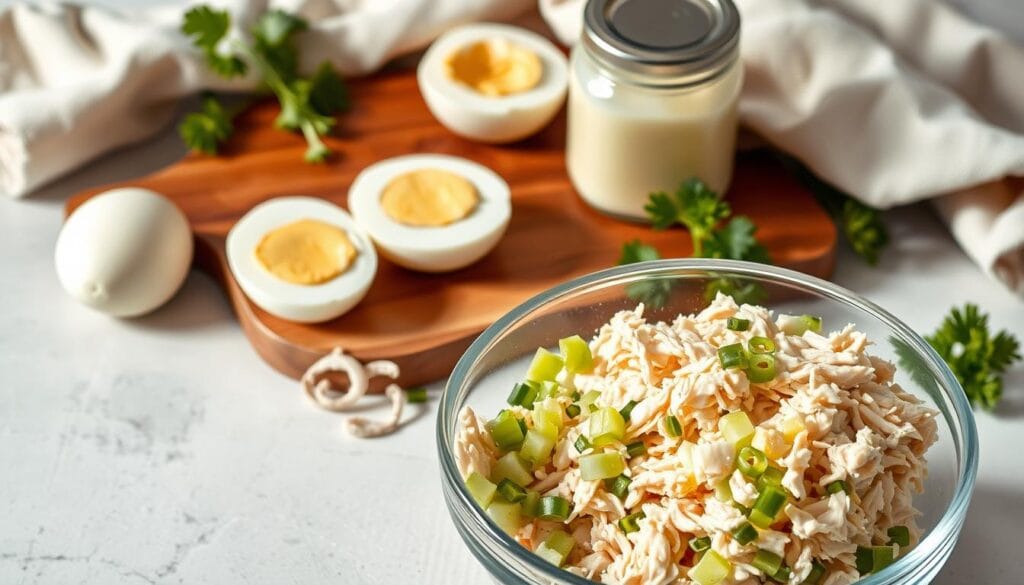
    Essential Ingredients for Mexican Chicken Salad

    Making tasty salad recipes means picking the right ingredients. Avocado salads, like the Mexican chicken salad, mix protein, fresh veggies, and a zesty dressing. This mix turns a simple meal into a feast for the senses.

    Your Mexican chicken salad will come alive with a mix of ingredients. These components work together to make a dish that’s truly special.

    Protein Components

    The base of your salad is high-quality protein. Choose from:

    • Grilled chicken breast
    • Shredded rotisserie chicken
    • Seasoned grilled turkey

    Fresh Produce Elements

    Fresh ingredients make your salad stand out:

    • Ripe avocado, diced
    • Fire-roasted corn
    • Red bell pepper
    • Red onion
    • Fresh cilantro
    • Jalapeño for heat

    Dressing Ingredients

    A creamy, tangy dressing brings it all together:

    IngredientQuantity
    Greek yogurt1/4 cup
    Mayonnaise2 tablespoons
    Lime juice2 tablespoons
    Cotija cheese1/4 cup

    “The secret to an incredible salad is balancing flavors and textures.” – Culinary Expert

    Each ingredient is key to a memorable Mexican chicken salad. It will wow your family and friends.

    How to Prepare the Perfect Chicken

    To make the perfect chicken for your meal prep salads, you need to pay close attention. Chicken is the protein star of your Mexican chicken salad. It turns a simple dish into a memorable meal.

    Here are the key steps to cook chicken just right:

    • Choose top-quality boneless, skinless chicken breasts
    • Make sure chicken is cooked to 165°F for safety
    • There are several ways to cook chicken:
      1. Baking in the oven
      2. Grilling for a smoky taste
      3. Poaching for tender meat

    For chicken salads that stand out, keep these tips in mind:

    “The secret to memorable chicken salads is perfectly seasoned and cooked chicken.” – Professional Chef

    When making chicken for meal prep salads, aim for tender and flavorful meat. Rotisserie chicken is a quick option if you’re short on time. For homemade, baking is a reliable choice.

    Baking method for perfect chicken:

    1. Preheat oven to 450°F
    2. Season chicken with salt and pepper
    3. Put it in a shallow baking dish
    4. Cook for 15-18 minutes
    5. Check if the internal temperature is 165°F

    After cooking, let the chicken rest for 5-10 minutes before shredding or dicing. This step helps keep the chicken moist. Your chicken salads will be a hit with everyone.

    Creating the Signature Cilantro Lime Crema

    The heart of any delicious mexican chicken salad lies in its extraordinary dressing. Cilantro Lime Crema turns an ordinary salad into a vibrant, zesty culinary experience. It celebrates healthy mexican food flavors.

    Your homemade crema will make your mexican chicken salad even better. It’s creamy and tangy. The secret is balancing fresh ingredients to make a sauce that’s unforgettable.

    Base Ingredients

    • Greek yogurt (1/2 cup)
    • Mayonnaise (1/4 cup)
    • Fresh lime juice (2 tablespoons)
    • Fine salt (1/4 teaspoon)

    Flavor Enhancements

    To make your base into an exceptional crema, add some Mexican spices:

    • Chili powder (1/2 teaspoon for mild heat)
    • Ground cumin (1/4 teaspoon)
    • Fresh chopped cilantro (2 tablespoons)
    • Paprika (pinch for color and depth)

    Whisk all ingredients in a bowl until smooth. Taste and adjust seasonings as needed. For a thinner consistency, add a splash of water. The crema can be stored in an airtight container for up to 5-7 days. This lets flavors develop and intensify.

    Pro Tip: For an extra creamy texture, let your cilantro lime crema rest in the refrigerator for an hour before serving.

    Assembling Your Mexican Chicken Salad

    Making a great salad in tex-mex cuisine needs careful steps. Your Mexican chicken salad comes together with a mix of fresh ingredients. This mix boosts flavor and texture.

    Begin with a big mixing bowl. This gives you space to mix everything well. The secret to a top salad is spreading flavors evenly.

    • Add cooked shredded chicken as your protein base
    • Incorporate fire-roasted corn for a smoky flavor
    • Mix in diced bell peppers for crunch
    • Sprinkle red onion for a sharp bite
    • Gently fold in fresh avocado chunks
    • Scatter chopped jalapeños for heat
    • Garnish with fresh cilantro
    • Finish with crumbled cotija cheese

    Pro tip: Add delicate ingredients like avocado last to prevent crushing during mixing.

    “The art of a great salad is in its thoughtful composition.” – Culinary Chef

    Lightly toss all ingredients. This way, each bite is balanced. It keeps your tex-mex salad perfect.

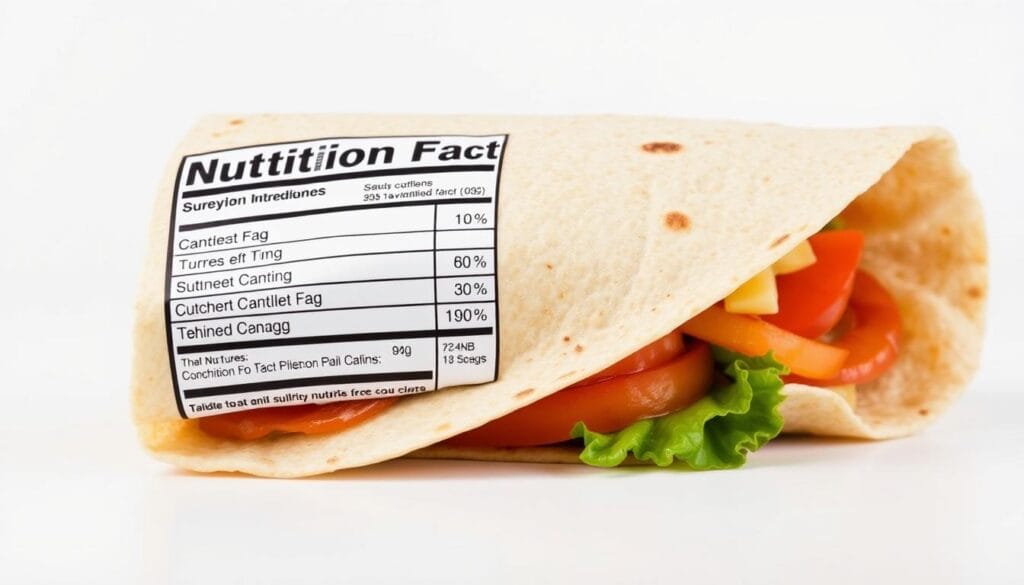
    Nutritional Benefits and Health Value

    Your Mexican chicken salad is more than just tasty—it’s full of nutrients. It’s a healthy choice that helps you stay well and meet your diet goals.

    Knowing what’s in your salad is key to making good food choices. Let’s look at the important nutrients in this salad. They make it a great pick for those who care about their health.

    Macro Nutrient Breakdown

    This Mexican chicken salad has a great nutritional profile:

    • Protein: 36g (supports muscle health and repair)
    • Carbohydrates: 36g (provides steady energy)
    • Total Fat: 30g (includes heart-healthy monounsaturated fats)

    Dietary Considerations

    This salad fits many diets. It’s perfect for those who need more protein or want to eat less carbs. You can adjust it to meet your dietary needs.

    “Food is not just eating. It’s an experience.” – Guy Fieri

    Here are some key nutrients in the salad:

    • Low sodium options available
    • High protein content for muscle maintenance
    • Rich in essential vitamins and minerals

    The salad also has great micronutrients, including:

    • Vitamin A: 187% daily value
    • Vitamin C: 25% daily value
    • Calcium: 22% daily value
    • Iron: 22% daily value

    Choosing this salad means you’re not just eating well. You’re also taking care of your health.

    Serving Suggestions and Presentation Ideas

    Turn your mexican chicken salad into a stunning centerpiece with these creative tips. Potluck salads are all about making a visual impact and delivering great flavor.

    Your mexican chicken salad can become many delightful options:

    • Serve atop crisp romaine lettuce
    • Create individual appetizer portions in small mason jars
    • Use as a filling for fresh tortilla wraps
    • Present as a dip with crunchy tortilla chips

    When preparing for gatherings, consider these presentation techniques:

    1. Use colorful serving bowls to create visual interest
    2. Garnish with fresh cilantro and lime wedges
    3. Arrange ingredients in separate sections for build-your-own salad experiences
    Serving StyleBest ForRecommended Accompaniments
    Lettuce WrapLight LunchLime wedges, hot sauce
    Tostada BaseCasual DinnerSour cream, salsa
    Appetizer PortionParty GatheringTortilla chips, guacamole

    Pro tip: Keep ingredients chilled before serving and arrange just before guests arrive to maintain freshness. Presentation is key in making your mexican chicken salad truly memorable!

    Storage and Meal Prep Tips

    Mastering meal prep salads means knowing how to store them right. Your Mexican chicken salad can be a hit all summer with the right storage tips. Keeping it fresh and tasty is key.

    • Store the salad in an airtight container
    • Keep refrigerated at 40°F or below
    • Separate wet and dry ingredients until serving
    • Consume within 3-4 days for optimal freshness

    Smart prep can make your summer salads even better. Here are some tips:

    1. Prep chicken and vegetables separately
    2. Chop fresh ingredients just before serving
    3. Store dressing in a separate container
    4. Use portion-controlled containers

    Your Mexican chicken salad has different parts that need special care. Chicken and beans can go together, but keep crunchy veggies like bell peppers apart. This keeps them fresh.

    IngredientRefrigeration TimeStorage Tip
    Cooked Chicken3-4 daysStore in sealed container
    Fresh Vegetables2-3 daysKeep in separate container
    Cilantro Lime Crema3-4 daysStore in sealed jar

    Freezing is not the best choice for this salad. It can ruin the texture of fresh ingredients and yogurt dressings. Enjoy your salads fresh and full of flavor!

    Variations and Customization Options

    Creating delicious salad recipes is all about creativity. Your Mexican chicken salad can change with simple swaps and exciting additions. Southwest salads are perfect for making your own way.

    Here are some fun ways to make your salad better:

    • Protein Alternatives:
      • Try grilled shrimp instead of chicken
      • Go for a vegetarian option with black beans
      • Choose pulled pork for a meatier taste
    • Vegetable Enhancements:
      • Add roasted corn kernels
      • Dice up cucumber
      • Throw in cherry tomatoes
    • Texture Boosters:
      • Sprinkle tortilla strips
      • Add crispy bacon bits
      • Mix in toasted pepitas

    Make your southwest salads your own by trying new ingredients. Add jalapeños for spice or adjust chili powder. Try mango or pineapple for a sweet surprise.

    For healthier options, swap mayonnaise for Greek yogurt. This keeps it creamy but cuts down on fat. The best part? These salads can fit any taste or diet.

    Common Cooking Mistakes to Avoid

    Making delicious meal prep salads needs focus and skill. Many home cooks make simple mistakes. These mistakes can ruin a great dish.

    When making chicken salads, several common mistakes can mess up your dish. Knowing these mistakes helps you make top-notch meals every time.

    Preparation Challenges

    Start by mastering basic techniques to avoid mistakes in chicken salads:

    • Overcooking chicken makes it dry and tough, ruining the salad
    • Not seasoning enough makes the salad taste bland
    • Not draining ingredients well can make the salad watery

    “Perfect chicken salads are about precision and attention to detail.” – Professional Chef

    Storage Strategies

    Storing chicken salads right is key to keeping them fresh. Wrong storage can turn a fresh salad into a soggy mess.

    • Keep wet and dry ingredients separate until serving
    • Use airtight containers to keep things fresh
    • Refrigerate quickly to stop bacteria from growing
    • Eat within 3-4 days for the best taste and safety

    Pro tip: For the best meal prep salads, use fresh ingredients. Prepare parts just before serving. This keeps your chicken salads full of flavor and texture.

    Remember, great cooking is about learning from mistakes and getting better with time.

    Conclusion

    Your Mexican chicken salad is more than a quick meal. It’s a colorful celebration of Tex-Mex cuisine. It combines nutrition and flavor in one delicious dish. With just 30 minutes of prep, you get a meal full of protein and vitamins from fresh veggies.

    This recipe lets you get creative while staying healthy. You can serve it on tostadas, in a tortilla, or as a salad. The mix of chicken, veggies, and dressing makes for a meal that keeps you going.

    The secret to a great Mexican chicken salad is using fresh ingredients and careful prep. By knowing the nutritional values and trying different things, you make the recipe your own. It’s a dish that can change with your tastes and needs.

    Your Mexican chicken salad journey is just starting. It’s a chance to explore flavors, nutrition, and the fun of cooking. Keep trying new things, stay curious, and enjoy every bite of this Tex-Mex delight.

    FAQ

    What is Mexican chicken salad?

    Mexican chicken salad is a mix of shredded chicken, fresh veggies, and herbs. It has a zesty cilantro lime crema. It includes corn, cotija cheese, and avocado for a unique flavor.

    Is Mexican chicken salad healthy?

    Yes, it’s a healthy choice. It has chicken, avocado, and veggies for protein and vitamins. You can make it fit different diets like low-carb or dairy-free.

    Can I make Mexican chicken salad ahead of time?

    Absolutely! It’s great for meal prep. Prepare the chicken and dressing ahead. Add avocado and cilantro just before serving. It stays fresh for 3-4 days.

    What type of chicken works best for this salad?

    Use boneless, skinless chicken breasts. Bake, grill, or poach it for tenderness. Rotisserie chicken is also a quick and easy option.

    How can I make this salad vegetarian?

    Replace chicken with black beans, tofu, or jackfruit. Keep the Mexican flavors with cilantro lime crema, corn, and veggies.

    What are some serving suggestions for Mexican chicken salad?

    Serve it in wraps, on greens, with tortilla chips, or in avocado halves. It’s great for lunch, dinner, or potlucks.

    How spicy can I make the Mexican chicken salad?

    You can make it as spicy as you like. Add jalapeños, more chili powder, or hot sauce. Or, keep it mild with bell peppers and less spice.

    What’s the key to a great cilantro lime crema?

    A great crema mixes creamy elements with lime juice, cilantro, and spices. Adjust the mix to your taste. Use dairy-free options if needed.

    What is your rating for the recipe?

  • Ground Lamb Recipes

    Imagine turning your kitchen into a Mediterranean paradise with ground lamb’s rich flavor. This versatile ingredient opens up a world of exciting dishes. It will make your taste buds dance and impress your guests.

    Ground lamb is more than just meat. It’s a key to exploring vibrant cuisines that have loved it for centuries. From juicy meatballs to hearty kebabs, it adds a special taste that makes meals unforgettable.

    Whether you’re an experienced cook or new to international flavors, ground lamb is an exciting journey. Our guide will show you how to choose, prepare, and make delicious dishes with this amazing ingredient.

    Understanding Ground Lamb: A Flavorful Alternative to Traditional Meats

    Ground lamb is a unique choice for cooking. It has a rich, earthy flavor that’s different from other meats. This makes lamb patties and burgers a hit with food lovers looking for something new.

    Ground lamb is versatile and loved by both home cooks and chefs. Its fat content, between 15% to 20%, makes dishes juicy and full of flavor.

    Selecting Quality Ground Lamb

    When picking ground lamb, keep these tips in mind:

    • Choose meat that’s bright pink to red
    • Make sure it’s dry in the packaging
    • Opt for grass-fed for better nutrition
    • Go for 85% lean for the best taste and texture

    Nutritional Powerhouse

    Ground lamb is not only tasty but also packed with nutrients. Here’s what it offers:

    NutrientAmount per 100g
    Protein19g
    Calories250-280
    IronHigh
    Vitamin B12Excellent source

    Storage and Handling Tips

    Storing ground lamb right keeps it fresh for your dishes:

    1. Put it in the fridge as soon as you buy it
    2. Use it within 1-2 days
    3. Freeze it if you won’t cook it right away
    4. Thaw it in the fridge to keep it quality

    Pro tip: Always cook ground lamb to an internal temperature of 145°F for food safety.

    Ground lamb is a tasty and healthy choice that can spice up your cooking.

    Essential Spices and Seasonings for Ground Lamb

    Take your lamb kofta and kebabs to the next level with the right spices. These seasonings can turn simple ground lamb into a feast for the senses. They bring out the rich, bold flavors that make Mediterranean and Middle Eastern dishes so popular.

    When making ground lamb, aim for a spice mix that enhances its natural taste. A good blend usually includes:

    • Ground coriander (1.5 teaspoons)
    • Ground cumin (1 teaspoon)
    • Ground cinnamon (½ teaspoon)
    • Dried oregano (1 teaspoon)
    • Smoked paprika (½ teaspoon)
    • Cayenne pepper (¼ teaspoon)
    • Black pepper (¼ teaspoon)

    These spices together create a flavor profile that boosts the lamb’s natural taste. Cumin and coriander add a warm, earthy note. Cinnamon brings a hint of sweetness. Smoked paprika adds a smoky depth that makes lamb dishes unforgettable.

    Pro tip: Toast your whole spices before grinding to intensify their flavors and bring out their essential oils.

    Try mixing different herbs and spices to make dishes that are truly yours. Whether you’re making traditional Mediterranean recipes or adding your own twist to lamb kebabs, these seasonings will take your cooking to new levels.

    Classic Mediterranean Ground Lamb Meatballs

    Learn to make authentic Mediterranean lamb meatballs at home. These tasty bites bring out the rich flavor of ground lamb. They offer a unique culinary experience.

    Ground lamb meatballs are a tasty twist on regular meat dishes. They are 85% lean, making them both delicious and healthy. To make perfect meatballs, choose high-quality ground lamb and learn the right cooking method.

    Key Ingredients for Perfect Meatballs

    For amazing lamb meatballs, pick the right ingredients:

    • 1 1/2 pounds ground lamb
    • 2 slices white bread, soaked in milk
    • 1 teaspoon ground coriander
    • 1/2 teaspoon ground cumin
    • 1/2 teaspoon crushed red pepper flakes
    • Kosher salt and fresh herbs

    Step-by-Step Cooking Instructions

    Here’s how to cook your lamb meatballs:

    1. Mix ground lamb with soaked bread and seasonings
    2. Form 16 uniform meatballs (approximately 2 ounces each)
    3. Sear for 1-2 minutes on each side
    4. Bake at 400°F for 5-7 minutes until internal temperature reaches 145°F

    Sauce Pairing Suggestions

    Try these sauces with your lamb meatballs:

    • Yogurt Sauce: Whole-milk strained yogurt with feta cheese
    • Mint Tzatziki: A cooling, traditional Mediterranean side
    • Spicy Harissa: For an extra flavor boost

    Your lamb meatballs will have about 314 calories per serving. They offer 21g of protein and rich flavors that remind you of the Mediterranean coast.

    Authentic Lamb Kofta Kebabs

    Explore the world of lamb kofta kebabs, a favorite Middle Eastern street food. It turns minced lamb into a culinary gem. These skewers are a traditional cooking method that makes simple ground lamb into a special meal.

    Making perfect lamb kebabs needs quality ingredients and careful prep. Your lamb kofta should have 1 pound of ground lamb with about 20% fat. This ensures they are juicy and tender.

    Essential Ingredients

    • 1 pound ground lamb
    • 3 tablespoons minced shallot
    • 2 minced garlic cloves
    • 1 teaspoon minced ginger
    • 2 teaspoons cumin
    • 1 teaspoon coriander

    When making lamb kofta kebabs, aim for uniform logs. They should be 1.5 inches wide and 7 inches long. Divide the meat into 6 skewers for perfect shapes.

    Grilling Techniques

    Grilling lamb kebabs needs attention to detail. Cook for 6-8 minutes, turning once, until they hit 160°F inside. Each side should grill for 3-5 minutes, based on your liking.

    DonenessInternal Temperature
    Rare120°F
    Medium Rare130°F
    Medium140°F
    Well Done160°F

    Enjoy your lamb kofta kebabs with basmati rice, lettuce, cucumbers, and tomatoes. Each serving has about 324 calories and 18g of protein.

    Pro tip: Let your lamb kofta kebabs rest for a few minutes after grilling to retain maximum juiciness.

    Ground Lamb Pita Creations

    Explore the tasty world of ground lamb pita sandwiches. These handheld treats mix seasoned lamb, fresh veggies, and zesty sauces in warm pita bread. It’s a perfect blend of Mediterranean flavors in your kitchen.

    Ground lamb pitas are a culinary journey. They turn simple ingredients into a remarkable meal. With a few key parts, you can make a dish that rivals restaurants.

    Traditional Toppings and Accompaniments

    To make your lamb patties even better, try these classic toppings:

    • Fresh chopped tomatoes (100 g)
    • Crisp lettuce (100 g)
    • Roasted red peppers (80 g)
    • Crumbled feta cheese (40 g)
    • Fresh mint leaves

    Yogurt Sauce Variations

    The key to a great ground lamb pita is its sauce. Here are some tasty options:

    1. Classic Tzatziki: Creamy yogurt with cucumber and herbs
    2. Mint-infused yogurt sauce
    3. Spicy harissa yogurt blend

    “A perfectly crafted lamb pita is like a flavor symphony in every bite!” – Mediterranean Cuisine Expert

    Here are some nutritional highlights for your ground lamb pita:

    • Total calories: 321 kcal
    • Protein: 24 g
    • Carbohydrates: 38 g
    • Fat: 10 g

    Try adding 2 tablespoons of Za’atar spice blend to your lamb patties for a true Mediterranean flavor. Grill the lamb for 10-12 minutes. This ensures it’s cooked just right and full of flavor for your pita.

    Ground Lamb Moussaka Recipe

    Explore the real taste of Greek food with this classic moussaka recipe. It uses ground lamb. This dish has tender eggplant, flavorful lamb mince, and a creamy béchamel sauce. It feels like a trip to the Mediterranean.

    Making moussaka needs patience and care. Start with top-notch ground lamb, the main ingredient. Each layer must be made just right for the best taste.

    Ingredients for Authentic Moussaka

    • 3 large eggplants, sliced 1/2 inch thick
    • 1 pound ground lamb
    • 2 onions, finely chopped
    • 1 clove garlic, minced
    • Olive oil for frying

    Nutritional Breakdown

    NutrientPer Serving
    Calories703 kcal
    Protein35.96 g
    Total Fat38.62 g
    Carbohydrates54.21 g

    The lamb mince makes this recipe special. Brown the lamb well to get deep flavors. Salt the eggplant slices and let them sit for 45 minutes. This helps them cook perfectly.

    Cooking Tips

    1. Fry eggplant slices for 2-3 minutes per side
    2. Brown ground lamb for 8-10 minutes
    3. Simmer meat sauce for 20 minutes
    4. Bake at 350°F for 1 hour

    Pro tip: Let your moussaka rest for at least 30 minutes after baking. This helps the layers set and makes serving easier. Your ground lamb moussaka will serve 6-8 people. It’s great for a big family meal or a special event.

    “A true moussaka is a labor of love, combining layers of flavor that tell a story of Greek culinary tradition.” – Greek Cooking Master

    With the right ingredients and care, your moussaka will be as good as those in Greek tavernas. Enjoy your cooking adventure!

    Quick and Easy Ground Lamb Burgers

    Elevate your grilling game with delicious lamb burgers. They bring Mediterranean flavors to your backyard. These lamb patties offer a rich, distinctive taste that stands out from traditional beef burgers. Whether you’re a home cook or a grilling enthusiast, mastering lamb burgers will transform your meal preparation.

    Creating perfect lamb burgers requires understanding key techniques and flavor combinations. Ground lamb provides a unique taste profile. It pairs beautifully with various seasonings and toppings.

    Burger Seasoning Blends

    Crafting exceptional lamb burgers starts with the right seasoning. Consider these flavor-packed blends:

    • Mediterranean Blend: Ground cumin, chopped cilantro, minced garlic
    • Herb-Focused Mix: Fresh mint, rosemary, black pepper
    • Spicy Variation: Smoked paprika, cayenne, dried oregano

    Topping Combinations

    Elevate your lamb burgers with these complementary toppings:

    • Creamy tzatziki sauce
    • Crumbled feta cheese
    • Sliced cucumber
    • Pickled red onions
    Burger DetailsSpecifications
    Serving Size4 ounces
    Cooking Time4-5 minutes per side
    Internal Temperature160°F for food safety
    Nutritional Content284 calories per burger

    Pro tip: Let your lamb patties rest for a few minutes after cooking. This ensures maximum juiciness. Serve on toasted brioche buns for an extra touch of gourmet flavor.

    One-Skillet Ground Lamb Meals

    Weeknight dinners just got easier with delicious one-skillet ground lamb meals. These quick and flavorful dishes combine convenience with incredible taste. They turn lamb mince into restaurant-worthy meals in minutes.

    One-skillet ground lamb recipes are perfect for busy home cooks. They offer fast, nutritious dinners. You can make Mediterranean-inspired dishes that are simple to prepare and exciting to eat.

    Quick and Delicious Ground Lamb Skillet Ideas

    • Greek-style lamb rice bowl
    • Moroccan spiced lamb pasta
    • Mediterranean vegetable and lamb mince skillet
    • Harissa-spiced lamb with roasted vegetables

    The beauty of these ground lamb meals lies in their versatility. You can easily customize each recipe to suit your taste preferences or dietary needs.

    Nutritional Benefits

    NutrientAmount per Serving
    Calories443
    Protein20g
    Total Fat27g
    Carbohydrates31g

    When preparing ground lamb dishes, remember the USDA recommendation. Cook lamb to a minimum internal temperature of 160°F for food safety.

    Pro tip: Use fresh herbs and spices to elevate your one-skillet ground lamb meals from ordinary to extraordinary!

    With minimal cleanup and maximum flavor, these one-skillet ground lamb recipes will become your new weeknight dinner favorites.

    Traditional Shepherd’s Pie with Ground Lamb

    Shepherd’s pie is a classic comfort food that turns simple lamb mince into a hearty meal. It started in the 1800s by Irish cooks who were clever with leftovers. This dish is a tasty way to use up leftover meats and veggies.

    The best shepherd’s pie uses top-notch ground lamb. This makes the dish rich and flavorful, unlike other casseroles. Your minced lamb is the main ingredient, making the meal comforting and nutritious.

    Mastering the Layering Technique

    To make a great shepherd’s pie, layering is key. Follow these steps:

    • Brown the lamb mince well to get deep flavor
    • Make a savory base with mirepoix vegetables (onions, carrots, celery)
    • Add depth with Worcestershire sauce
    • Top with creamy mashed potatoes

    Make-Ahead Preparation Tips

    Shepherd’s pie is great for busy families and meal preppers. You can make it up to 24 hours ahead, keeping it in the fridge. Then, bake at 375°F for 25-30 minutes until it’s golden and bubbly.

    “A great shepherd’s pie is all about balancing flavors and textures in each delicious layer.” – Traditional Cooking Wisdom

    Pro tip: For a lighter version, mix some minced lamb with more veggies. Or, use mashed cauliflower as a low-carb topping.

    Mediterranean Bowl Recipes Using Ground Lamb

    Explore the world of Mediterranean-inspired ground lamb bowls. They turn simple ingredients into amazing meals. These dishes mix the rich flavor of lamb mince with fresh, healthy parts for a great dining experience.

    To make the perfect bowl, choose your ingredients wisely and layer them well. Start with a base that goes well with lamb mince:

    • Quinoa
    • Brown rice
    • Cauliflower rice
    • Mixed greens

    Use about 1 pound of ground lamb for 4 servings. Season it with Mediterranean spices like:

    • Cumin
    • Oregano
    • Garlic powder
    • Cinnamon
    Nutritional ProfilePer Serving
    Calories424
    Protein31.7g
    Total Fat29g
    Carbohydrates8.5g

    Add roasted veggies, a bit of tzatziki or herb mayo, and fresh herbs on top. This makes a meal full of nutrients and brings the Mediterranean to your table.

    Ground Lamb Pasta and Rice Dishes

    Turn your kitchen into a Mediterranean paradise with ground lamb pasta and rice dishes. These meals add explosive flavor to your table. Lamb sausages and rich lamb ragout make simple meals into gourmet dishes.

    Creating tasty ground lamb recipes means knowing the meat’s special traits. One-pot Mediterranean pasta dishes show how versatile ground lamb is. A typical recipe might include:

    • 1 pound ground lamb
    • 2 cups uncooked macaroni noodles
    • 2 cups chicken broth
    • Mushrooms and onions

    These dishes are not only delicious but also nutritious. A single serving usually has:

    • 670 calories
    • 29g protein
    • 54g carbohydrates
    • 35g fat

    “Ground lamb transforms ordinary pasta into an extraordinary culinary journey”

    When making lamb ragout, focus on deepening the flavor. Slow-cooking lets the lamb release its rich taste. For rice dishes, try Middle Eastern techniques like a flavorful pilaf or biryani. These highlight ground lamb’s bold flavor.

    Your homemade lamb sausages can be a game-changer in these dishes. By controlling the seasoning and meat blend, you’ll make meals that rival restaurant quality in your own kitchen.

    Conclusion

    Your journey through ground lamb recipes shows how versatile this protein is. From Mediterranean meatballs to hearty shepherd’s pie, minced lamb adds a rich flavor to home cooking. Each recipe shows how ground lamb can make simple meals into special dishes.

    Lamb mince is also a great source of protein, with about 24g per serving. It has omega-3 fatty acids too, making it tasty and healthy. You can cook it in many ways, from roasting at 425°F to making skillet meals. This lets you try different global cuisines while keeping it nutritious.

    Ground lamb is perfect for any meal, whether it’s a quick dinner or a big gathering. Knowing how to cook it right, store it, and pair flavors will make your dishes a hit. Let ground lamb bring new traditions and ideas into your kitchen.

    Ground lamb’s unique taste and health benefits make it exciting to cook with. Try out these recipes and see why it’s loved worldwide for so long.

    FAQ

    What is ground lamb and how is it different from other ground meats?

    Ground lamb comes from sheep and has a richer flavor than beef or chicken. It’s loved in Mediterranean and Middle Eastern dishes. Its taste is slightly gamey and more intense.

    How do I select high-quality ground lamb?

    Choose fresh ground lamb with a pink to red color and 15-20% fat. Buy from trusted butchers or stores. Avoid liquid or discoloration in packages.

    What are the nutritional benefits of ground lamb?

    Ground lamb is packed with protein, zinc, vitamin B12, and iron. It also has omega-3 fatty acids and healthy fats. A 4-ounce serving has about 20-25 grams of protein.

    How should I store ground lamb?

    Keep it in the coldest part of your fridge at 40°F or below. Use it within 1-2 days or freeze for 3-4 months. Store it in a sealed container to prevent contamination.

    Try lamb kofta kebabs, meatballs, moussaka, burgers, and pita sandwiches. These dishes highlight ground lamb’s versatility and flavor.

    What spices pair well with ground lamb?

    Use cumin, coriander, mint, oregano, garlic, cinnamon, and sumac. Mediterranean blends like za’atar and ras el hanout also enhance its flavor.

    Can I substitute ground lamb in recipes calling for other ground meats?

    Yes, ground lamb can replace beef or pork in many recipes. Its strong flavor might need seasoning adjustments. It’s great in meatballs, burgers, and casseroles.

    What is the best way to cook ground lamb to ensure it remains juicy?

    Cook ground lamb on medium-high heat without overcooking. Don’t press it too hard when forming patties or meatballs. Cook to 160°F and let it rest to stay juicy.

    Are there any low-fat options for preparing ground lamb?

    Opt for leaner ground lamb and drain excess fat after cooking. Use herbs and spices for flavor. Grilling, baking, or broiling are healthier than frying.

    How can I reduce the gamey flavor of ground lamb?

    Marinate lamb in lemon juice or yogurt, and use bold spices and fresh herbs. Grilling or adding smoky spices can also balance its flavor.

    What is your rating for the recipe?

  • Pumpkin Cream Cheese Bread

    Fall whispers through my kitchen every time I bake this incredible cheese bread. The warm, spiced aroma of pumpkin fills the air. It brings back memories of crisp autumn mornings.

    This isn’t just another baked goods recipe. It’s a sensory journey that turns simple ingredients into a comforting masterpiece.

    Pumpkin cream cheese bread is more than just a treat. It’s a celebration of seasonal flavors. The rich, moist pumpkin base swirled with tangy cream cheese creates a harmony that speaks directly to your soul.

    Each slice tells a story of tradition, warmth, and culinary creativity. Whether you’re a baking enthusiast or a novice in the kitchen, this recipe promises to elevate your autumn baking experience. Prepare to discover a cheese bread that’s not just delicious, but deeply meaningful.

    Understanding the Magic of Pumpkin Cream Cheese Bread

    Savory pastries and artisanal bread are more than food. They’re a journey into traditional baking. Pumpkin cream cheese bread is a perfect mix of seasonal flavors and baking skills.

    The Origin of Cream Cheese Swirl Breads

    Cream cheese swirl breads are a new twist on old baking ways. Home bakers found that adding cream cheese makes regular bread special. It adds richness, moisture, and a fancy texture.

    Why This Recipe Works

    This recipe’s secret is its perfect mix of ingredients. Pumpkin adds moisture, making the bread soft and unique. The cream cheese swirl adds a tangy flavor that goes well with pumpkin’s warm spices.

    • Moisture-rich pumpkin base
    • Creamy cheese swirl
    • Balanced spice profile
    • Artisanal bread texture

    Key Benefits of Homemade Bread

    Making artisanal bread at home has many perks. You pick the ingredients, change the flavors, and feel proud of your creation. This pumpkin cream cheese bread lets you play with spices and make a unique baking experience.

    BenefitDescription
    Ingredient ControlSelect high-quality, fresh ingredients
    Flavor CustomizationAdjust spices and fillings to taste
    Cost-EffectiveCheaper than bakery-purchased specialty breads

    Essential Ingredients for Perfect Cheese Bread

    Making great bread recipes starts with picking the right ingredients. Your cheese-stuffed bread will be amazing with the right mix of flavors, textures, and richness.

    Here’s what you need for the best cheese-stuffed bread:

    • 3 cups bread flour or all-purpose flour
    • 2 teaspoons salt
    • 1/2 teaspoon active dry yeast
    • 1 1/2 cups warm water
    • 1 1/4 cups shredded sharp cheddar cheese

    Adding these optional ingredients can take your bread to the next level:

    • 1/2 cup mozzarella cheese
    • 1/4 cup grated parmesan
    • 1 teaspoon garlic powder
    • 1 teaspoon Italian seasoning
    • 2 tablespoons olive oil

    Pro tip: Use full-fat cheeses for the best taste and melting. Fresh, quality ingredients really make a difference in your bread’s flavor and texture.

    Try mixing different cheeses to find your favorite. Monterey jack, fresh mozzarella, or aged parmesan can make your bread truly special.

    Kitchen Tools and Equipment Needed

    To make perfect cheesy bread, you need the right tools. The right kitchen equipment can make a big difference. It can turn a good baking experience into a great one.

    Must-Have Baking Tools

    Every home baker needs some essential tools. These tools help make delicious bread. Here are the key items you’ll need:

    • Loaf pan (8 ½ x 4 ½ inches recommended)
    • Mixing bowls with ample space for ingredients
    • Measuring cups and spoons
    • Hand mixer or whisk
    • Wire cooling rack

    Optional Equipment for Enhanced Baking

    These tools are not necessary but can improve your baking:

    • Stand mixer for more efficient mixing
    • Silicone spatulas
    • Parchment paper
    • Digital kitchen scale

    Precise Measuring Tools

    Accurate measurements are key in bread baking. Get a good set of measuring tools:

    Measuring ToolTypical Set ContentsApproximate Price
    Dry Measuring Cups1 cup, ½ cup, ⅓ cup, ¼ cup$23
    Measuring SpoonsTablespoon, teaspoon, ½ teaspoon, ¼ teaspoon$18-$22
    Digital Kitchen ScalePrecise ingredient weighing$50-$56

    Pro tip: Invest in quality measuring tools to ensure consistent results in your bread baking adventures.

    Remember, the right tools can transform your cheesy bread from good to extraordinary!

    Preparing the Pumpkin Bread Batter

    Making the perfect pumpkin bread batter is an art. It turns simple ingredients into a tasty bread. Whether you love sweet breads or want to try garlic cheese bread, getting the batter right is key.

    Start by getting your ingredients ready. You’ll need to separate your wet and dry ingredients. This makes sure your batter is smooth and well mixed.

    Wet Ingredients Preparation

    • Combine 1 cup of pumpkin puree
    • Mix in ¾ cup packed light brown sugar
    • Add ¼ cup granulated sugar
    • Pour ½ cup canola oil
    • Include ¼ cup buttermilk
    • Whisk in 2 large eggs and 1 egg yolk
    • Stir in 1 teaspoon vanilla extract

    Dry Ingredients Mixing

    • Sift 1 ⅔ cups all-purpose flour
    • Add 1 teaspoon baking powder
    • Mix in ½ teaspoon baking soda
    • Incorporate 2 teaspoons pumpkin pie spice
    • Sprinkle ½ teaspoon ground cinnamon
    • Add ¼ teaspoon salt

    The secret to great bread is gentle mixing. Slowly add dry ingredients to wet ingredients. Stir just until they’re combined. Too much mixing can make the bread tough.

    Ingredient CategoryQuantityPurpose
    Wet Ingredients1 cup pumpkin pureeMoisture and flavor
    Sweeteners1 cup total sugarSweetness and texture
    Flour1 ⅔ cupsStructure and consistency
    Spices2.5 teaspoonsAromatic depth

    Pro tip: This recipe is for pumpkin bread, but you can also make savory breads like garlic cheese. The mixing steps are the same for all breads.

    Creating the Perfect Cream Cheese Filling

    Turning a simple cheese-stuffed bread into a masterpiece starts with the cream cheese filling. The right touch can make your cheesy bread unforgettable.

    For a delicious cream cheese filling, pick top-notch ingredients and know how to prepare them. Aim for a smooth, rich layer that goes well with pumpkin bread.

    Cream Cheese Selection Tips

    For the best cheese-stuffed bread, use full-fat brick-style cream cheese. Make sure it’s at room temperature for a silky texture. Here’s what to look for:

    • Use 4 ounces of brick-style cream cheese
    • Ensure cream cheese is at room temperature
    • Avoid low-fat or whipped cream cheese varieties
    • Check for smooth, consistent texture

    Achieving the Right Consistency

    To make the perfect cream cheese filling, mix carefully. Beat the cream cheese until it’s smooth. Then, add sugar and other ingredients slowly. You want a creamy mix that looks great in your cheesy bread.

    Flavoring Options

    Add a special touch to your cream cheese filling. Try these flavors:

    • 1 teaspoon vanilla extract
    • Lemon zest for brightness
    • Ground cinnamon for warmth
    • A pinch of salt to balance sweetness

    Pro tip: Your cream cheese filling should be light and creamy. It should also contrast well with the pumpkin bread’s rich taste. Try different flavors to make your bread special.

    Mastering the Layering Technique

    Making the perfect pumpkin cream cheese bread is all about layering. It turns simple pastries into something truly special. The secret is to spread the cream cheese filling evenly in the batter.

    Your layering skill affects how your bread looks and tastes. Here’s how to do it right:

    1. Prepare your baking pan with a light grease or parchment paper
    2. Pour about one-third of the pumpkin batter into the bottom of the pan
    3. Carefully dollop cream cheese mixture in strategic spots
    4. Use a knife to create gentle swirling patterns
    5. Add the rest of the pumpkin batter on top
    6. Create final swirl patterns for visual appeal

    Experts say to use a zigzag motion when swirling. This ensures the cream cheese spreads out well. It also keeps the filling from sinking and adds a marbled look to your pastries.

    Pro tip: Make sure your cream cheese is at room temperature for easier spreading. Don’t overmix, as it can ruin the bread’s texture. Aim for smooth, elegant swirls that promise a burst of flavor in each bite.

    Baking Tips and Temperature Guidelines

    Mastering bread baking needs precision and knowing how to control temperature. Your pumpkin cream cheese bread needs careful attention for perfect results every time.

    Optimal Baking Temperature

    The right temperature is key when baking your delicious bread. For quick breads like pumpkin cream cheese, use 350°F (175°C). This temperature ensures an even, golden-brown outside and a moist inside.

    Precise Doneness Testing

    To know when your bread is perfectly baked, use these methods:

    • Insert a toothpick into the center of the bread
    • Check for a clean toothpick with no wet batter
    • Look for a golden-brown top
    • Tap the bread’s surface for a hollow sound
    Baking ParameterRecommended Value
    Oven Temperature350°F (175°C)
    Baking Time60-70 minutes
    Internal Temperature190°F-200°F (88°C-93°C)

    Professional bread baking techniques work for all types, from sweet pumpkin breads to savory parmesan bread. Learning these basics will improve your baking and make your bread consistently delicious.

    Pro tip: Always use an accurate kitchen thermometer for precise temperature readings during your bread baking adventures.

    Storage and Serving Suggestions

    Your delicious cheese bread needs the right care to keep its amazing taste and texture. Storing it correctly lets you enjoy every slice perfectly.

    Room temperature storage is ideal for this pumpkin cream cheese bread. Keep it in an airtight container for up to 7 days. Store it on the kitchen counter, away from sunlight and heat.

    Freezing Guidelines

    Freezing is great for keeping your cheese bread fresh for longer. Here’s how to do it:

    • Wrap the bread tightly in plastic wrap
    • Put it in a freezer-safe bag or container
    • Store it in the freezer for up to 6 months

    Serving Recommendations

    Enjoy your treat even more with these serving tips:

    1. Warm slices in the oven at 300°F for 5-7 minutes
    2. Pair with cream cheese spread or butter
    3. Serve with coffee or tea for a great breakfast or snack

    For the best taste, thaw frozen bread in the fridge overnight. Then, let it come to room temperature. Your pumpkin cream cheese bread will be as fresh and tasty as when you first baked it!

    Nutritional Information and Health Benefits

    Your favorite pumpkin cream cheese bread is more than just tasty. It’s also full of nutrients. Unlike many savory pastries, this bread is a healthier choice.

    A slice of pumpkin cream cheese bread has about 250-300 calories. It’s a good option for those who want to eat well but still enjoy tasty treats.

    Caloric Breakdown

    • Total Calories: 250-300 per slice
    • Protein: 4-6 grams
    • Carbohydrates: 25-30 grams
    • Fat: 15-20 grams

    Nutritional Highlights

    Pumpkin adds lots of good stuff to these breads. It’s full of vitamins and minerals that help your body.

    • Vitamin A: Good for your eyes
    • Fiber: Helps your digestion
    • Antioxidants: Protects your cells

    “Enjoying savory pastries can be part of a balanced diet when consumed mindfully.” – Nutrition Expert

    Dietary Considerations

    Even though it’s tasty, you should eat this bread in small amounts. If you have special dietary needs, you might want to try:

    • Low-fat options
    • Gluten-free adaptations
    • Reduced sugar variations

    Remember, eating well is about balance and what you eat overall.

    Seasonal Variations and Adaptations

    Changing up your pumpkin cream cheese bread recipe is a fun journey. You can make your favorite breads fit any season with a few tweaks. Cheesy bread is perfect for trying new things all year.

    Here are some tasty seasonal twists for your bread:

    • Autumn Inspiration: Swap pumpkin for roasted butternut squash
    • Winter Warmth: Add sweet potato and spices like cinnamon and nutmeg
    • Spring Freshness: Use lemon zest and lighter herbs like thyme
    • Summer Delight: Mix in fresh corn or sun-dried tomatoes

    Don’t forget to change your cream cheese filling with the seasons. Try adding:

    • Herbs de Provence for a French twist
    • Roasted garlic for a richer taste
    • Fresh chives or green onions for spring
    • Dried cranberries for winter

    Tip for bread lovers: Adjust the moisture when you change ingredients to keep the right texture. Be bold and find your go-to seasonal cheesy bread!

    Conclusion

    Pumpkin Cream Cheese Bread is more than a tasty fall treat. It’s a chance to dive into the world of bread baking. This recipe turns simple ingredients into a rich, flavorful experience. It connects you with the traditional art of making artisanal bread.

    Your journey through this recipe shows how passion and precision can make home baking special. By mastering the layering technique and understanding how ingredients work together, you’ll gain skills that go beyond this recipe. Each slice is a step towards becoming a skilled bread baker who can try new things.

    We encourage you to see this recipe as a starting point for your culinary creativity. Share your experiences, try new seasonal variations, and keep exploring the world of artisanal bread baking. Your kitchen is a canvas, and this Pumpkin Cream Cheese Bread is your first masterpiece.

    Remember, making great bread is not just about following instructions. It’s about showing your unique style and enjoying the journey. Your baking adventure begins now.

    FAQ

    Can I use canned pumpkin for this recipe?

    Yes, canned pumpkin puree works great. Just make sure it’s 100% pure, not pumpkin pie filling. This will ensure the best taste and texture for your Pumpkin Cream Cheese Bread.

    How long does Pumpkin Cream Cheese Bread stay fresh?

    At room temperature, it stays fresh for 3-4 days in an airtight container. You can refrigerate it for up to a week or freeze for 2-3 months.

    Can I make this bread gluten-free?

    Absolutely! Use a gluten-free flour blend for baking. Make sure it includes xanthan gum for structure. Also, check that all ingredients are gluten-free.

    What if I don’t have cream cheese? Are there alternatives?

    You can use mascarpone, ricotta, or Greek yogurt as substitutes. They’ll change the texture and taste a bit, but work well in the recipe.

    How can I tell if the bread is fully baked?

    Check with the toothpick test: stick it into the bread’s center. If it’s clean or has a few moist crumbs, it’s done. The top should be golden and slightly springy.

    Can I add nuts to this recipe?

    Yes! Chopped walnuts or pecans are great. Mix them into the batter or sprinkle on top before baking. Use 1/2 to 3/4 cup for the best flavor and texture.

    Is this bread suitable for meal prep?

    Definitely! It’s perfect for meal prep. Slice it and freeze individual portions for quick breakfasts or snacks all week.

    Can I make this bread vegan?

    To make it vegan, replace cream cheese with plant-based alternatives. Use flax eggs or applesauce instead of eggs and dairy-free milk. The taste might be a bit different, but it can still be tasty.

    What is your rating for the recipe?

  • Strawberry Crunch Cake

    Do you remember the ice cream truck coming to your street? The excitement of getting a Good Humor strawberry shortcake bar was unmatched. The strawberry crunch cake brings back those joyful moments. It turns a beloved frozen treat into a stunning dessert that takes you back to childhood.

    This strawberry cake recipe is more than just a dessert. It’s a trip down memory lane. Inspired by the classic ice cream bar, it turns that crumbly, fruity goodness into a beautiful layer cake. It’s ideal for celebrations, family gatherings, or just to satisfy your sweet tooth.

    The Nostalgic History of Strawberry Crunch Treats

    The journey of strawberry dessert started with a delightful twist in the early 20th century. Ice cream innovation changed the sweet treat landscape, creating classic summer cake ideas.

    The Good Humor brand was key in changing frozen desserts. In 1920, Harry Burt tried ice cream on a stick in his Ohio home. This sparked a revolution in portable treats.

    Origins of a Sweet Legacy

    By 1960, Good Humor had 85 different products. Their strawberry-flavored treats became very memorable. They won the hearts of dessert lovers across America.

    • 1920: First ice cream bar experiments
    • 1940: Widespread commercial production
    • 1960: 85 unique product varieties

    From Frozen Treats to Bakery Delights

    The move from ice cream to cake was natural. Bakers saw the strawberry crunch flavor’s appeal. They started making baked desserts with it.

    DecadeDessert Transformation
    1950sIce Cream Bars Dominate
    1970sFirst Strawberry Crunch Cakes Emerge
    2000sWidespread Bakery Popularity

    Modern Popularity

    Today, strawberry crunch treats are still loved. The mix of sweet strawberry flavor and crunchy texture still excites people. It shows that some classics will always be favorites.

    Essential Ingredients for Perfect Strawberry Crunch Cake

    Making delicious fresh strawberry cakes needs the right ingredients. These ingredients turn a simple dessert into a showstopper. The strawberry crunch cake recipe is all about using the best parts to create a perfect treat.

    To make the perfect strawberry crunch cake, you need a list of ingredients. These ingredients ensure the cake tastes amazing and feels great in your mouth:

    • 2 ½ cups all-purpose flour
    • 3 tablespoons strawberry-flavored gelatin
    • 1 cup unsalted butter
    • 2 cups granulated sugar
    • 3 large eggs
    • 1 ½ cups whole buttermilk
    • Freeze-dried strawberries
    • Golden Oreo cookies

    The key to amazing fresh strawberry cakes is choosing top-notch ingredients. Using premium butter, fresh eggs, and pure vanilla extract makes your cake stand out.

    The ingredients you pick really affect how the cake tastes and feels. The strawberry gelatin gives it a strong fruity flavor. Buttermilk makes it soft and moist. The freeze-dried strawberries and Golden Oreo cookies add a crunchy topping that everyone loves.

    Pro tip: Always measure ingredients precisely and use room temperature components for the best baking results!

    With these ingredients, you’ll make a strawberry crunch cake that will wow everyone. Each ingredient is important for making a dessert that celebrates strawberries in a big way.

    The Science Behind Strawberry Flavoring in Baking

    Making the perfect strawberry treats is more than just adding fresh berries. It’s about understanding how to extract flavors. This can turn a simple cake into a masterpiece.

    Bakers have to deal with challenges when adding strawberry flavor to cakes. Fresh strawberries can add too much moisture. This can mess up the cake’s texture and structure.

    Natural vs Artificial Flavorings

    You have two main choices for strawberry flavoring:

    • Natural Flavoring: Made from real strawberries
    • Artificial Flavoring: Man-made to taste like strawberries

    Experts suggest using Amoretti Natural Wild Strawberry Artisan Flavor. It gives a real strawberry taste without making the cake soggy.

    Why Fresh Strawberries Aren’t Always Best

    Fresh strawberries have a lot of water. This can:

    1. Weaken the cake’s structure
    2. Make the cake soggy
    3. Lessen the flavor

    Achieving the Perfect Pink Color

    To get that perfect pink color, most recipes use strawberry gelatin mix. It adds color and flavor without messing up the cake’s balance.

    Pro tip: Use 3 tablespoons of strawberry gelatin to enhance both color and taste in your strawberry desserts.

    Making the Perfect Cake Base

    Creating a great strawberry cake starts with a solid cake base. It doesn’t matter if you’re a pro or new to baking. Knowing how to prepare the base is key.

    A delicious strawberry crunch cake needs top-notch ingredients and careful mixing. The base sets the cake’s texture and taste.

    Key Ingredients for the Cake Base

    • 1 box (15.25 oz) strawberry cake mix, sifted
    • 3 large eggs
    • 3/4 cup buttermilk
    • 1/3 cup vegetable oil
    • 1 tablespoon vanilla extract
    • 1 oz package freeze-dried strawberries

    Mixing Techniques

    To get a tender crumb in your strawberry cake, follow these tips:

    1. Make sure all ingredients are at room temperature (68-72 degrees F)
    2. Cream butter and sugar for 3-5 minutes
    3. Add eggs one at a time, mixing well
    4. Sift dry ingredients to avoid lumps

    Baking Specifications

    ParameterSpecification
    Oven Temperature325°F
    Baking Pan Size13×9 inches
    Baking Time25-27 minutes
    Servings12 square slices

    Pro tip: For the best results, use a digital scale to measure ingredients exactly.

    “Baking is a science, and precision is key to creating the perfect strawberry crunch cake.” – Professional Baker

    Strawberry Crunch Cake: Step-by-Step Preparation

    Making the perfect strawberry crunch cake needs care and focus. This easy recipe will show you how to make a delicious dessert. It captures the classic taste of strawberries.

    Mixing the Batter

    First, get your ingredients ready for this strawberry crunch cake. You’ll need 2½ cups of all-purpose flour, 1½ cups of granulated sugar, and 1 tablespoon of baking powder. Mix ½ cup of unsalted butter with sugar until it’s light and fluffy. This should take about 3-4 minutes.

    • Combine dry ingredients in a separate bowl
    • Add eggs one at a time, mixing thoroughly
    • Incorporate 1 cup of milk gradually
    • Fold in 1 cup of mashed fresh strawberries

    Baking Tips and Techniques

    Heat your oven to 350°F. The secret to a great strawberry crunch cake is the right temperature and baking time. Make sure to grease your cake pans well to avoid sticking.

    1. Pour batter evenly into prepared pans
    2. Bake for 25-30 minutes
    3. Test doneness with a toothpick
    4. Look for a golden brown top

    Cooling and Assembly

    Let your cake cool for 10 minutes in the pans before taking it out. Cooling is key for the cake’s texture. Let the layers cool fully before you put them together. This stops the frosting from melting.

    Pro tip: Chill cake layers for up to 2 days before adding the crunchy topping. This makes your cake recipe even easier to prepare ahead of time.

    Creating the Signature Buttermilk Frosting

    Making the perfect buttermilk frosting is an art. It turns your fresh strawberry cakes into something special. You need to mix tangy buttermilk with creamy butter and powdered sugar. This creates a smooth, luxurious topping that goes well with the strawberry dessert.

    Your buttermilk frosting needs a few important ingredients:

    • 4 ounces softened cream cheese
    • ½ cup unsalted butter at room temperature
    • 3 cups confectioner’s sugar
    • ½ teaspoon vanilla extract
    • ½ teaspoon strawberry extract
    • 1 tablespoon milk

    The secret to a silky frosting is using room temperature ingredients. Start by beating the cream cheese and butter until they’re light and fluffy. Then, add powdered sugar slowly, mixing on low speed to avoid a mess. The strawberry extract adds a hint of fruitiness that boosts the strawberry flavor.

    When mixing, aim for the right consistency. It should be spreadable but not too thin. If it’s too thick, add a bit of milk. If it’s too thin, add more powdered sugar. Practice makes perfect!

    Pro tip for your strawberry dessert: Chill the frosting for 15-20 minutes before spreading. This makes it easier to decorate your cakes and helps it set better.

    Crafting the Crunchy Topping

    The secret to an unforgettable strawberry crunch cake lies in its crunchy cake topping. This special layer turns an ordinary dessert into a textural masterpiece. It delights your taste buds with every bite.

    Creating the perfect crunchy cake topping requires precision and the right ingredients. Your cake with streusel topping will stand out by following these key steps:

    • Select high-quality Nilla wafers for the base crumb mixture
    • Use freeze-dried strawberries for intense flavor
    • Ensure proper butter incorporation for binding

    Preparing the Crumb Mixture

    To craft an exceptional crunchy cake topping, you’ll need:

    1. 18 crushed Golden Oreos
    2. 4 tablespoons unsalted butter
    3. 1 box (3 ounces) strawberry gelatin powder

    Adding the Strawberry Element

    The strawberry component elevates your crunchy cake topping from good to extraordinary. Crush freeze-dried strawberries into fine powder to distribute vibrant flavor throughout the topping. Mix the strawberry powder thoroughly with your crumb mixture to create a uniform, delectable coating.

    When preparing your crunchy cake topping, aim for a texture that’s both crisp and slightly crumbly. The key is achieving the perfect balance between buttery richness and strawberry intensity.

    Assembly and Decoration Techniques

    Making the perfect strawberry crunch cake needs careful assembly and decoration. Your summer cake ideas can come to life with these techniques. They turn a simple dessert into a stunning centerpiece.

    Begin by preparing your cake layers well. Place the first layer on a cake stand or serving plate. Use an offset spatula to spread buttermilk frosting evenly. This makes a smooth base for your strawberry crunch cake design.

    • Ensure cake layers are completely cooled before assembly
    • Use a rotating cake stand for easier frosting application
    • Apply frosting in thin, even layers

    The crunch topping makes this cake special. Crush Golden Oreo cookies into fine crumbs and mix with freeze-dried strawberry powder. Sprinkle this mixture between layers and around the cake for a delightful texture.

    For a professional look, use a bench scraper to smooth frosting edges. Decorate the top with fresh strawberry slices or more crumb mixture. Your strawberry crunch cake will look as amazing as it tastes!

    • Pipe decorative borders using remaining frosting
    • Garnish with whole or sliced fresh strawberries
    • Sprinkle extra cookie crumbs for visual appeal

    Remember, presentation is key for memorable summer cake ideas. Take your time, be patient with each layer, and let your creativity shine in the final design.

    Storage and Serving Recommendations

    Your fresh strawberry cakes need the right care to keep their taste and texture. Storing them correctly lets you enjoy every bite for days.

    Refrigeration Guidelines

    Keep your strawberry crunch cake in an airtight container in the fridge. It stays fresh for up to 5 days. To avoid drying, wrap it loosely with plastic wrap first.

    Freezing Options

    Freezing is a great way to keep your strawberry dessert. You can freeze the whole cake or slices for up to 2 months. Pro tip: Wrap each slice in plastic wrap, then in a freezer-safe container.

    Serving Recommendations

    For the best taste, take the cake out of the fridge 30 minutes before serving. This lets it warm up, making the flavors better and the texture softer.

    Storage MethodDurationBest Practices
    RefrigeratorUp to 5 daysAirtight container, loosely wrapped
    FreezerUp to 2 monthsWrap individually, use freezer-safe container

    Nutritional Considerations

    • Total servings: 16
    • Calories per serving: 619
    • Total fat per serving: 35g

    By following these tips, your strawberry crunch cake will stay delicious from start to finish.

    Variations and Customization Options

    Creating the perfect strawberry cake recipe is a fun journey. You can make each cake special with a few tweaks. It’s all about adding your own twist.

    Size Adaptations

    When making your strawberry crunch cake, flexibility is key. You can change the recipe for different pans:

    • 8-inch square pan (deep, at least 3 inches)
    • 9-inch round pan (bakes faster)
    • 13×18-inch sheet pan for large gatherings
    • Individual cupcake portions

    Flavor Modifications

    Try new flavors to make your strawberry crunch cake even better:

    1. Lemon Infusion: Add lemon zest for bright citrus notes
    2. Replace strawberries with raspberries
    3. Incorporate chocolate chips
    4. Use alternative frostings like whipped cream
    5. Create a layered version with different fillings

    Seasonal Adjustments

    Your strawberry cake recipe can change with the seasons. In summer, use fresh strawberries. In winter, try a richer version with preserved fruits or spices.

    Remember, the secret to a great strawberry crunch cake is creativity. Don’t be afraid to try new things with your baked strawberry desserts.

    Troubleshooting Common Issues

    Making the perfect strawberry cake can be tough, even for pros. When baking easy cakes like strawberry crunch, you might face some common problems. These can affect how your dessert turns out.

    Here are some tips to fix common strawberry cake issues:

    • Dry Cake Texture: A dry cake could mean you mixed too much or baked too hot. Mix just enough and check your oven’s temperature with a thermometer.
    • Crumbly Frosting: If your frosting breaks, make sure all ingredients are at room temperature. Mix slowly for a smooth frosting.
    • Soggy Crunch Topping: Keep the crunch topping crisp by adding it just before serving. Store it separately if you’re making it ahead of time.

    Here are some specific tips for strawberry crunch cake problems:

    1. Use room temperature ingredients for better mixing
    2. Measure ingredients carefully
    3. Don’t overmix the batter
    4. Regularly check your oven’s temperature

    When baking easy cakes like strawberry crunch, be patient and keep trying. Each time you bake, you learn more about your ingredients and techniques.

    Conclusion

    Making a strawberry crunch cake turns a simple dessert into a special treat. You now know how to make a cake that brings people together. It’s filled with delicious layers and a burst of strawberry flavor.

    The strawberry season treats we’ve talked about are more than just recipes. They’re a tradition of creativity in baking. With this knowledge, you can try new things, make the cake your own, and impress everyone with your baking skills.

    This strawberry crunch cake recipe is perfect for anyone, whether you’re new to baking or have lots of experience. It combines great taste, texture, and looks. You’ll learn how to make a cake that’s both traditional and new.

    Baking is all about passion and practice. Every time you make this cake, you’ll get better and enjoy the mix of soft cake, creamy frosting, and crunchy topping even more.

    FAQ

    What makes strawberry crunch cake different from a regular strawberry cake?

    Strawberry crunch cake has a crunchy topping inspired by Good Humor strawberry ice cream bars. This topping adds texture and a nostalgic taste. It makes the cake stand out from other strawberry desserts.

    Can I use fresh strawberries in my strawberry crunch cake?

    Fresh strawberries can be tricky to use in cake batter because of their moisture. You can use freeze-dried strawberry powder for strong flavor. Or, add fresh strawberries as a garnish or between cake layers.

    How long will a strawberry crunch cake stay fresh?

    Store your cake in an airtight container in the fridge for 3-4 days. Let it come to room temperature before serving. Keep the crunchy topping separate until serving to keep it crisp.

    Can I make this cake gluten-free?

    Yes, you can! Use a gluten-free flour blend instead of all-purpose flour. Be careful with mixing and consider adding xanthan gum for structure and moisture.

    What’s the best way to achieve a strong strawberry flavor?

    For a strong strawberry taste, use high-quality strawberry extract and freeze-dried strawberry powder. Add a strawberry reduction to your frosting for even more flavor.

    Can I make this cake in advance?

    Yes, you can prepare parts of the cake ahead. Bake and freeze the cake layers for up to a month. Make the crunch topping a few days early. But frost and assemble the cake just before serving for the best texture.

    How do I prevent the crunch topping from getting soggy?

    Apply the crunch topping just before serving to keep it crisp. Store leftover crumb mixture separately. Sprinkle it over individual slices. If assembling the whole cake ahead, lightly tent it to protect the topping.

    Are there any variations I can try with this cake?

    Definitely! Try using raspberries or peaches instead of strawberries. Add flavors like almond or lemon to the base. Or make mini versions as cupcakes. The recipe is very versatile and open to creative changes.

    What is your rating for the recipe?

  • Canned Chicken Salad Recipe

    Ever found yourself craving a delicious meal but short on time? A classic canned chicken salad is your answer. It turns a simple pantry staple into a tasty dish. This easy chicken salad recipe is great for busy people who want a satisfying meal with little effort.

    With just 5 minutes of prep, you can make a versatile canned chicken salad for up to 6 people. Imagine turning a standard 12.5-ounce can of chunk chicken breast into a lunch that will wow your family and friends.

    Benefits of Using Canned Chicken for Salads

    Making tasty meals with canned chicken is easy. It’s a smart choice for quick, healthy salads with little work.

    Discovering canned chicken’s benefits can change how you cook. It’s a key ingredient for many reasons.

    Cost-Effective Protein Option

    Canned chicken is a budget-friendly protein. It has about 23.2g of protein per serving. This is a great deal compared to fresh chicken.

    • Significantly cheaper than fresh chicken
    • Provides high-quality protein
    • Perfect for budget-conscious meal planning

    Extended Shelf Life Benefits

    Make your pantry a go-to for meals. Canned chicken lasts 1-3 years if stored right. It’s a great addition to your pantry.

    Canned Chicken BrandSodium ContentProtein per Serving
    Swanson250mg13g
    Keystone100mg11g
    Bumblebee140mg13g

    Time-Saving Convenience

    Busy cooks will love canned chicken’s instant accessibility. No need to cook. Just make tasty chicken salad ingredients fast.

    • No cooking required
    • Instant protein source
    • Quick meal preparation

    Try canned chicken for your next salad. It’s convenient, nutritious, and versatile.

    Essential Ingredients for Perfect Canned Chicken Salad

    Making a tasty chicken salad begins with picking the right ingredients. Your mayo-based chicken salad will come to life with a few key components. These ingredients turn simple canned chicken into a delicious dish.

    The base of a great chicken salad is high-quality canned chunk chicken. Choose varieties packed in water for the best flavor and lowest sodium. Your main protein should be tender and easy to break apart.

    • Canned chunk chicken (2 cans, drained)
    • Mayonnaise (1 cup for creamy texture)
    • Crisp celery (2 ribs, finely chopped)
    • Green onions (3, sliced)
    • Fresh herbs (parsley or tarragon)

    Seasoning is key to making your chicken salad better. Here are some flavor boosters:

    • Dijon mustard (1 tablespoon)
    • Lemon juice (3 tablespoons)
    • Salt and black pepper to taste
    • Garlic powder
    • Paprika

    Adding optional mix-ins can make your basic recipe amazing. Try adding nuts like sliced almonds or sweet additions like quartered red grapes. They add texture and complexity to your mayo-based chicken salad.

    Pro tip: Always drain your canned chicken thoroughly to prevent a watery salad.

    Your chicken salad ingredients should balance flavor, texture, and nutrition. With these essential components, you’ll make a delightful dish. It’s perfect for sandwiches, salads, or as a standalone protein-packed meal.

    Step-by-Step Preparation Guide

    Making the perfect canned chicken salad is easier than you think. This guide will help you through each step. You’ll get a delicious meal ready in just minutes.

    Proper Draining Techniques

    The first step to a great canned chicken salad is to drain it well. Open your canned chicken and use a fine-mesh strainer to get rid of excess liquid. Then, pat the chicken dry with paper towels. This helps avoid a watery salad.

    Mixing Methods for Best Texture

    To get the right texture, mix carefully. Here are some tips:

    • Use a fork to gently break down larger chicken chunks
    • Mix ingredients slowly to prevent over-mashing
    • Aim for a consistent texture that’s neither too chunky nor too smooth

    Seasoning Tips and Measurements

    Seasoning is crucial for your canned chicken salad. Start with these basic amounts:

    IngredientQuantityPurpose
    Mayonnaise1/2 cupCreamy base
    Salt1/4 teaspoonBasic seasoning
    Black Pepper1/8 teaspoonMild heat
    Dried Herbs1 teaspoonAdditional flavor

    Pro tip: Always taste and adjust seasonings gradually. Your canned chicken might already have some salt. So, start with a small amount and add more if needed.

    Classic Mayo-Based Dressing Formula

    Making the perfect mayo-based chicken salad dressing is an art. It’s all about balancing flavor, creaminess, and texture. Start with high-quality mayonnaise as the base. Brands like Hellmann’s or Duke’s are great for that smooth consistency.

    The perfect dressing formula includes several key components. These help take your mayo-based chicken salad to the next level:

    • ⅔ cup mayonnaise
    • ¼ cup sour cream for extra tanginess
    • 1½ tablespoons fresh lemon juice
    • 1½ teaspoons Dijon mustard
    • ½ teaspoon salt
    • ½ teaspoon sugar
    • ½ teaspoon freshly ground black pepper

    Want a lighter dressing? Try using Greek yogurt instead of some mayonnaise. A half-cup of 2% Greek yogurt can cut calories while keeping it creamy. Just whisk everything together until it’s smooth and coats your chicken salad perfectly.

    Make your dressing your own by adding extra seasonings. Try onion powder, garlic powder, or fresh herbs. Each change can make your chicken salad truly special.

    Creative Mix-ins and Flavor Variations

    Turning a basic canned chicken salad into a gourmet dish is simple. Just try out different mix-ins to make your chicken salad stand out.

    Trying new flavor combinations can make your chicken salad exciting. The right mix of ingredients adds depth and texture to your dish.

    Sweet Additions: Fruits and Nuts

    Sweet ingredients can add a surprising twist to your canned chicken recipes. Here are some tasty mix-ins:

    • Red grapes (halved for perfect bite-sized pieces)
    • Diced apples for crisp sweetness
    • Dried cranberries for tangy flavor
    • Toasted pecans for crunch
    • Sliced almonds for delicate texture

    Savory Enhancement Options

    Enhance the savory taste of your chicken salad with these ingredients:

    • Crisp celery for crunch
    • Diced pickles for tang
    • Bacon bits for smoky flavor
    • Green onions for mild sharpness
    • Diced bell peppers for color and freshness

    Herb and Spice Combinations

    Take your chicken salad to the next level with these herb and spice suggestions:

    • Fresh herbs: Dill, parsley, chives
    • Smoked paprika for depth
    • Curry powder for exotic twist
    • Chopped fresh dill (2 tablespoons)
    • Lemon zest for bright notes

    The secret to a great canned chicken salad is finding the right balance of flavors and textures. Don’t hesitate to try new things and find your favorite mix!

    Serving Suggestions and Presentations

    Turn your deli-style chicken salad into a tasty meal with creative serving ideas. Chicken salad sandwiches are a fun and tasty way to enjoy this classic dish.

    Here are some exciting serving suggestions to elevate your chicken salad experience:

    • Classic chicken salad sandwiches on fresh bread
    • Elegant croissant presentations
    • Low-carb lettuce wrap alternatives
    • Crisp vegetable dipping platters
    • Gourmet crackers for light appetizers

    For a more refined approach, consider these presentation techniques:

    1. Garnish with fresh herbs like dill or parsley
    2. Use decorative serving plates
    3. Create artistic plating with complementary sides
    4. Pair with colorful vegetable accompaniments

    When making chicken salad sandwiches, pick bread that goes well with the creamy texture. Whole grain, sourdough, or artisan rolls are great choices. Add fresh lettuce, tomato slices, or cucumber for extra crunch and looks.

    Pro tip: Chill your deli-style chicken salad before serving to enhance flavor melding and texture.

    Try different serving styles to keep your meals exciting and delicious!

    Storage Tips and Food Safety Guidelines

    To keep your canned chicken salad fresh and safe, follow some key storage tips. These tips help keep your salad ingredients in top shape and avoid foodborne illnesses.

    Understanding the right storage conditions is crucial for your canned chicken salad’s safety. Food safety experts have set guidelines to ensure your dish stays delicious and safe to eat.

    Refrigeration Essentials

    Your canned chicken salad needs careful refrigeration to stay fresh. The U.S. Department of Agriculture offers clear advice:

    • Store at or below 40°F (4°C)
    • Refrigerate within 2 hours of making it
    • Use an airtight container for storage

    Maximum Storage Duration

    Knowing how long your chicken salad lasts is key for food safety. Here’s a detailed guide on storage times:

    Storage ConditionMaximum Duration
    Refrigerated Homemade Chicken Salad3-4 days
    Room Temperature Exposure2 hours maximum
    Pre-Packaged Opened Salad2-3 days

    Look out for spoilage signs like bad smells, texture changes, or color changes. If unsure, it’s best to throw out the salad to avoid food poisoning.

    Safe Handling Practices

    Follow these important food safety tips for canned chicken salad:

    1. Always wash your hands before touching it
    2. Use clean tools
    3. Write the prep date on the container
    4. Keep it refrigerated all the time

    By following these storage tips, your canned chicken salad will stay a tasty and safe meal for you and your family.

    Nutritional Information and Health Benefits

    When making a healthy chicken salad with canned chicken, knowing its nutrition is key. A standard serving of canned chicken salad has a balanced mix of nutrients. This mix can help you reach your wellness goals.

    Let’s look at the main nutrients in your favorite canned chicken recipes:

    • Protein: Each serving has 15-20 grams of protein, helping keep muscles strong and feeling full
    • Calories: It usually has 70-100 calories per serving
    • Fat Content: It’s low, with 1-3 grams per serving
    • Sodium: It has 300-500 mg, so watch your intake

    Canned chicken is a great lean protein for your salad. It’s also good for diets like low-carb and keto.

    NutrientAmount per Serving% Daily Value
    Protein15-20g30-40%
    Iron4%4%
    Calcium2%2%

    If you’re watching sodium, try rinsing the chicken or pick low-sodium options. Adding fresh veggies to your salad boosts its nutrition. This makes for a nutrient-dense meal.

    Remember, eating in moderation and choosing the right ingredients is important. This way, you can enjoy a tasty and healthy chicken salad.

    Making Your Canned Chicken Salad Healthier

    Making a healthy chicken salad doesn’t mean losing flavor. You can make your traditional recipe healthier with a few smart changes. These include swapping ingredients and using better preparation methods.

    Begin by changing your chicken salad ingredients. Swap full-fat mayonnaise for lighter options that are healthier. Here are some tips:

    • Use Greek yogurt as a creamy base for fewer calories
    • Mix light mayonnaise with Greek yogurt for a balanced taste
    • Add more vegetables for extra nutrients

    It’s easy to make your chicken salad healthier. Add diced bell peppers, grated carrots, and chopped spinach for more nutrients. Chia seeds add fiber, making your salad more filling.

    Managing sodium is important. Rinse canned chicken to cut down on salt. Choose low-sodium ingredients to keep your meal good for your heart.

    Remember, portion control is key. A 1/2 cup serving has about 180 calories and the right mix of nutrients. By making these choices, you’ll have a healthy chicken salad that helps you reach your wellness goals.

    Nutrition experts agree: lean protein and crunchy veggies are great for your health and well-being.

    Conclusion

    Your journey into easy chicken salad has shown it’s a great and easy meal. It turns simple canned chicken into a tasty dish. The classic recipe is full of nutrition and flavor, with about 15 grams of protein and only 80 calories per serving.

    Making the perfect canned chicken salad is all about being creative but simple. You’ve discovered how to make it better with fresh ingredients, exciting mix-ins, and your own dressings. It’s perfect for a quick lunch or a dish to impress at a potluck.

    Think of making chicken salad as an art form. You can control the sodium and try different veggies and spices. Now, you can make a healthy and tasty meal in under 30 minutes. Enjoy the ease and flavors, and make your chicken salad special.

    FAQ

    How long can I store homemade canned chicken salad in the refrigerator?

    Homemade canned chicken salad can stay in the fridge for 3-5 days. Make sure it’s in an airtight container and at 40°F or below. Look out for any signs of spoilage like bad smell or color change.

    Can I freeze canned chicken salad?

    Freezing mayo-based chicken salad isn’t a good idea. The mayonnaise will separate and change texture when thawed. It’s better to keep ingredients separate and mix just before serving.

    What are some low-carb serving options for chicken salad?

    Serve your chicken salad in lettuce wraps, on mixed greens, in bell pepper halves, or with cucumber slices. These are great low-carb alternatives to bread or crackers.

    How can I make my chicken salad healthier?

    Use Greek yogurt instead of mayonnaise to cut calories. Add more veggies for nutrition. Choose whole grain bread for sandwiches. Add herbs and spices for flavor without extra calories.

    Is canned chicken safe to eat without additional cooking?

    Yes, canned chicken is pre-cooked and ready to eat. Always check the can for damage and drain excess liquid before using in your salad.

    What are some unique mix-ins for chicken salad?

    Try adding diced apples, dried cranberries, chopped pecans, bacon bits, diced pickles, fresh herbs, or curry powder. These add exciting flavors to your salad.

    How can I prevent my chicken salad from becoming watery?

    Drain the canned chicken well and pat it dry. Avoid watery ingredients. If using celery, chop it finely and drain excess moisture.

    What’s the best bread for chicken salad sandwiches?

    Choose sturdy bread like sourdough, whole wheat, croissants, or multi-grain. These won’t get soggy and complement the creamy chicken salad.

    Can I make chicken salad for meal prep?

    Yes! Prepare the chicken salad base and store it in containers. Keep mix-ins separate and add them just before eating to keep everything fresh.

    Are there any dairy-free alternatives for mayonnaise in chicken salad?

    Yes, use avocado or dairy-free mayonnaise made from plant-based oils. These options are creamy and fit dietary restrictions.

    What is your rating for the recipe?

  • Swordfish Recipe

    Imagine standing on a sun-drenched Sicilian coastline. The Mediterranean Sea whispers secrets of culinary tradition. Swordfish, a true seafood delicacy, embodies the heart of this region’s rich gastronomic heritage.

    Whether you’re a seafood enthusiast or someone who typically shies away from fish, this recipe promises to transform your perception of swordfish cuisine.

    The beauty of swordfish lies in its remarkable versatility. With a steak-like texture and mild flavor, this seafood option bridges the gap between land and sea. It makes it an irresistible choice for home cooks and food lovers alike.

    Our Sicilian-inspired recipe will guide you through creating a restaurant-quality dish. It celebrates the essence of Mediterranean cooking.

    Understanding Swordfish: A Premium Seafood Choice

    Swordfish is a remarkable saltwater predator that fascinates seafood lovers and fishing experts. It’s a top choice in marine cuisine, known for its rich flavor and nutritional value.

    When it comes to premium seafood, swordfish is a standout. Its unique qualities make it a favorite among professional fishermen and chefs.

    Characteristics of High-Quality Swordfish

    Finding top-quality swordfish requires a keen eye. Look for these signs of exceptional quality:

    • Bright pink to pumpkin-colored meat
    • Tight, defined whorls in each quadrant
    • Clean, ocean-like aroma (no fishy smell)
    • Firm, meaty texture

    Nutritional Benefits and Health Considerations

    Nutritional AspectDetails
    Protein ContentHigh-quality lean protein source
    Omega-3 Fatty AcidsExcellent heart-healthy nutrients
    Mercury ConsiderationModerate levels – consume in moderation

    Selecting Fresh Swordfish at the Market

    When buying swordfish, follow these tips for the freshest catch. Wild-caught swordfish tastes best, with prices around $180.00 for a 72 oz package. Opt for sustainably sourced options to support eco-friendly fishing.

    Pro tip: Choose swordfish steaks that are vacuum-sealed and flash-frozen to maintain peak freshness and flavor.

    Essential Ingredients for Perfect Swordfish

    Creating a great seafood dish starts with top-notch ingredients. Your Sicilian-style swordfish recipe needs the right parts to make this fish shine. It’s all about using the best to make it stand out.

    The main ingredient is the swordfish steak. It’s a strong seafood choice with a meaty feel and deep taste. When picking your swordfish, look for steaks that are:

    • 1-1.5 inches thick
    • Firm and bright in color
    • Fresh with a clean ocean scent

    These key ingredients will turn your seafood star into a Mediterranean gem:

    1. Fresh Swordfish Steaks: Preferably 1-inch thick
    2. Extra Virgin Olive Oil
    3. Fresh Lemon
    4. Garlic Cloves
    5. Kosher Salt
    6. Freshly Ground Black Pepper
    7. Ripe Tomatoes
    8. Kalamata Olives
    9. Fresh Basil Leaves

    Each ingredient is vital for the dish’s flavors. Olive oil adds richness, lemon brings brightness, and garlic adds depth. Fresh herbs and Mediterranean ingredients like kalamata olives enhance the swordfish’s taste.

    Pro tip: Choose swordfish steaks with minimal browning and a mild, fresh ocean aroma for the best culinary experience.

    Preparing the Signature Lemon-Garlic Marinade

    Making a great marinade can turn your swordfish into a standout dish. A good marinade adds flavor and makes the seafood tender. This ensures a tasty meal.

    The secret to a top-notch swordfish marinade is finding the right balance of flavors. It’s also about knowing how to marinate. Your marinade will make the seafood’s natural taste even better.

    Marinade Components and Proportions

    For a perfect lemon-garlic marinade, you’ll need these key ingredients:

    • Fresh lemon zest – adds a bright, citrusy flavor
    • Minced garlic – gives depth and aroma
    • Kosher salt – boosts the overall taste
    • Freshly ground black pepper
    • High-quality olive oil

    Marinating Techniques and Timing

    Timing is everything when marinating swordfish. Experts say to marinate for 15-30 minutes. Longer times can make the fish too soft.

    Flavor Enhancement Tips

    Here are some expert tips to improve your marinade:

    1. Use fresh herbs like parsley or thyme
    2. Add a bit of honey for sweetness
    3. Score the swordfish lightly to let the marinade in
    4. Marinate in a non-reactive container

    Your aim is to boost the swordfish’s flavor without overpowering it. The best marinade should highlight the seafood’s natural taste.

    The Mediterranean Tomato-Olive Relish

    A vibrant relish can make your seafood dish stand out. This Mediterranean tomato-olive relish adds explosive flavors. It’s perfect for swordfish, inspired by the Mediterranean’s commercial fishing traditions.

    Your relish will mix fresh, zesty ingredients to enhance the seafood. Here are the key parts:

    • Ripe, diced tomatoes
    • Kalamata olives, pitted and chopped
    • Extra virgin olive oil
    • Fresh lemon juice
    • Kosher salt
    • Red pepper flakes
    • Fresh basil leaves

    Choosing high-quality ingredients is key to a great relish. Use vine-ripened tomatoes and top-notch olives for the best taste. Thanks to commercial fishing, these Mediterranean ingredients are now easier to find.

    Making the relish is easy. Just mix all the ingredients in a bowl. Let them sit for 30 minutes before serving. This time allows the flavors to mix well, making your swordfish dish unforgettable.

    Cooking Methods for Swordfish

    Learning to cook swordfish is all about mastering different techniques. Each method has its own benefits, turning a simple swordfish steak into a culinary delight.

    Choosing the right cooking method is key. It affects the flavor and texture of your swordfish. The goal is to keep its delicate taste while cooking it just right.

    Baking: A Foolproof Approach

    Baking is a gentle way to cook swordfish. Here’s how to do it perfectly:

    • Preheat the oven to 400°F
    • Use steaks about 1 inch thick
    • Bake for 15 minutes
    • Check if the internal temperature is 145°F

    Grilling: Achieving Smoky Perfection

    Grilling makes swordfish taste like it’s from a restaurant:

    • Preheat the grill to medium-high heat (400-450°F)
    • Marinate for at least 30 minutes
    • Grill for 4-5 minutes on each side
    • Finish in the oven at 300°F for 10-15 minutes

    Pan-Searing: Quick and Flavorful

    If you don’t have a grill, pan-searing is a fast option:

    • Use a heavy-bottomed skillet
    • Sear for 2-3 minutes on each side
    • Finish in a preheated oven
    • Season with kosher salt and freshly ground black pepper
    Cooking MethodTemperatureCooking Time
    Baking400°F15 minutes
    Grilling400-450°F4-5 minutes per side
    Pan-SearingHigh heat2-3 minutes per side

    Pro tip: Always use a meat thermometer to avoid overcooking. Swordfish is best when it’s moist and tender. So, it’s important to control the temperature precisely.

    Creating the Perfect Sicilian Sauce

    Making an authentic Sicilian sauce turns your seafood dish into a true Mediterranean feast. This sauce brings out the best in saltwater swordfish with its bold, fresh ingredients. It captures the heart of traditional Italian coastal cooking.

    Your Sicilian sauce will be a mix of classic Mediterranean tastes. The main ingredients are:

    • 300g cherry tomatoes, diced fresh
    • 21 kalamata olives, pitted and chopped
    • 1 tablespoon unsalted capers
    • 3 cloves of garlic, minced
    • Extra virgin olive oil
    • Optional: 1 red hot chili for spice

    The secret of this seafood sauce is its simplicity and fresh ingredients. Kalamata olives give a deep, salty taste that goes well with swordfish. Capers add a tangy kick that makes the dish even better, showing off Sicily’s coastal traditions.

    To make the sauce, sauté the garlic in extra virgin olive oil first. Then add chopped tomatoes and olives. Let it simmer for 5-7 minutes, so the flavors mix well. This makes a bright, aromatic sauce that turns your swordfish into a top-notch meal.

    “The best Sicilian sauces are made with passion and the freshest ingredients.”

    When you serve it, pour the sauce over your swordfish generously. This way, every bite is full of the Mediterranean’s vibrant flavors.

    Temperature and Timing Guidelines

    Cooking swordfish is an art that needs precision and attention to temperature and timing. The secret to a great swordfish dish is knowing how to cook it just right. This keeps its delicate texture perfect.

    Your main goal when cooking swordfish is to get it to the right internal temperature. This keeps it moist and flavorful. The recommended cooking guidelines make sure your meal is safe and delicious.

    Optimal Cooking Temperatures

    Experts say there are specific temperature ranges for cooking swordfish to perfection:

    • Grill temperature: Medium-high heat at 400°F
    • Oven baking temperature: 300-400°F
    • Target internal temperature: 145°F

    How to Test for Doneness

    Figuring out when to take swordfish off the heat is key. Here are ways to make sure it’s cooked just right:

    1. Visual inspection: The fish should be opaque in the center
    2. Use a meat thermometer to check internal temperature
    3. Gently press the fish – it should flake easily with a fork

    Cooking time depends on the swordfish steak’s thickness. A general rule is 10 minutes per inch of thickness. For a 1-inch thick steak, grill 4-5 minutes per side, then finish in the oven for 10-15 minutes more.

    Pro tip: Always let your swordfish rest for 5 minutes after cooking to enhance its flavor and juiciness.

    Remember, overcooking ruins a great swordfish dish. Keep an eye on the cooking time and use a meat thermometer to avoid dryness. Follow these guidelines to make a swordfish dish that will wow everyone.

    Serving Suggestions and Wine Pairings

    When you make your Mediterranean-style swordfish, the right sides can make it even better. Swordfish, being a prized game fish, needs careful thought in how it’s presented. It also needs flavors that match its rich, meaty taste.

    • Warm garlic bread as a classic side
    • Lemony green beans for a bright, citrusy contrast
    • Fresh herb garnish to enhance the seafood’s natural flavors

    Choosing the right wine is key to a great meal. Experts say pick wines that go well with the swordfish’s strong taste:

    Wine TypeFlavor ProfileRecommended Pairing
    Sauvignon BlancCrisp, AcidicExcellent match for grilled swordfish
    ChardonnayRich, ButteryPairs well with Sicilian-style preparations
    Light RoséFruit-forwardComplements Mediterranean flavors

    Enjoy your seafood in moderation. Swordfish is good for you, but eat it wisely because of mercury.

    “The main driving force in wine pairing is the type of fish, followed by cooking method and sauces.” – Master Sommelier George Miliotes

    Choose swordfish that’s been caught responsibly. Look for Marine Stewardship Council certification. This way, you can enjoy your meal knowing it’s good for the ocean too.

    Storage and Leftover Management

    Storing swordfish right is key to keeping it fresh and safe to eat. Your leftover catch needs special care to keep its taste and nutrients.

    Here’s how to store cooked swordfish:

    • Put it in an airtight container in the fridge within 2 hours of cooking
    • Keep it at 40℉ or below
    • Eat it within 3-4 days

    To reheat swordfish without drying it out, try these steps:

    1. Warm your oven to 275°F (135°C)
    2. Place the swordfish in a covered dish
    3. Heat for 10-15 minutes until it’s 130-135°F inside
    Storage MethodDurationQuality Preservation
    Refrigeration3-4 daysGood
    Freezing (Cooked)Up to 3 monthsModerate texture retention
    Freezing (Raw)Up to 8 monthsExcellent

    If you love fishing and preserving seafood, remember. Proper storage makes your swordfish meal last longer and keeps its nutrients.

    Pro tip: Always trust your senses. If the swordfish smells off or looks discolored, it’s best to discard it.

    Conclusion

    Your Sicilian-style swordfish recipe is more than a meal. It’s a celebration of sustainable seafood that connects you to rich maritime traditions. Swordfish offers a unique dining experience that balances nutrition and flavor.

    Preparing this dish lets you explore the flavors of Mediterranean cuisine while supporting responsible fishing. It’s important to understand swordfish’s delicate nature and treat it with respect. You’ve learned how to turn this magnificent fish into a memorable dish.

    As you try more swordfish recipes, remember each dish is a chance to appreciate the ocean’s bounty. By choosing sustainably sourced swordfish and using the techniques you’ve learned, you’re doing more than cooking. You’re helping to preserve marine ecosystems and enjoying nature’s delicious offerings.

    Your journey with swordfish is just starting. Enjoy the flavors, techniques, and traditions that make this seafood a true treasure.

    FAQ

    What makes swordfish a unique seafood choice?

    Swordfish is known for its firm texture and mild taste. It’s great for many cooking methods. As a top predator, it offers a special taste experience, unlike tuna or marlin.

    How do I select the best quality swordfish at the market?

    Choose swordfish that looks firm and has a fresh smell. It should be light pink to white, without browning or a strong smell. High-quality swordfish smells like the sea and feels firm.

    What are the nutritional benefits of swordfish?

    Swordfish is full of lean protein and omega-3 fatty acids. It also has selenium and vitamin D. But, it has mercury, so eat it in moderation, especially if you’re pregnant or have young kids.

    What are the best cooking methods for swordfish?

    Swordfish is great for grilling, baking, and pan-searing. Its firmness is perfect for high-heat cooking. Just don’t overcook it to avoid dryness.

    How long should I marinate swordfish?

    Marinate swordfish for 30 minutes to 1 hour for the best flavor. Don’t marinate too long, as it can make the fish mushy.

    Are there any sustainable fishing considerations for swordfish?

    Choose swordfish caught by sustainable fishing methods. This helps protect our oceans. Look for certifications to ensure it’s responsibly caught.

    How can I tell when swordfish is properly cooked?

    Cooked swordfish should be opaque and flaky. It should be at 145°F (63°C) inside. Avoid overcooking to keep it moist.

    What are some good side dishes to serve with Sicilian-style swordfish?

    Serve it with Mediterranean sides like lemony green beans or garlic bread. Roasted veggies or a light orzo salad also work well. They complement the fish’s flavors.

    How should I store leftover swordfish?

    Keep leftover swordfish in an airtight container in the fridge for 2 days. Reheat it gently to avoid drying out. Use a low-temperature method like oven warming or steam.

    How does swordfish compare to other similar fish like marlin or tuna?

    Swordfish has a firmer texture than tuna and is less delicate than marlin. Its mild flavor makes it versatile for many cooking styles, especially Mediterranean dishes.

    What is your rating for the recipe?

  • Cinnamon Rolls With Heavy Cream

    Every family has a special recipe that makes mornings magical. For me, it’s my grandmother’s cinnamon rolls recipe. It’s a tradition that’s been around for over 23 years.

    Imagine biting into a warm, gooey cinnamon bun. The caramel-like filling stretches between your fingers. This recipe turns breakfast into a special treat.

    The secret ingredient is heavy cream. It makes the dough incredibly delicious. These cinnamon rolls are made with love and a bit of magic that’s been passed down through generations.

    The Secret Behind Perfect Cinnamon Rolls

    Making homemade cinnamon rolls is an art that mixes science and cooking skills. These sweet treats have become very popular on social media. TikTok bakers share new ways to make traditional recipes even better.

    Understanding the Heavy Cream Magic

    Heavy cream is the secret to soft cinnamon rolls. When you pour it over the rolls before baking, it makes them extra soft. It changes the texture from just okay to amazing.

    • Creates a rich, tender crumb
    • Enhances moisture retention
    • Produces a brioche-like consistency

    Why Temperature Matters

    Temperature is key to making perfect homemade cinnamon rolls. Using warm heavy cream keeps the dough from cooling down. This helps the rolls stay soft and rise well.

    Temperature FactorImpact on Rolls
    Warm CreamMaintains dough rise
    Room Temperature IngredientsImproves yeast activation
    Precise Baking TemperatureEnsures even cooking

    The Science of Moisture and Texture

    About ½ cup of heavy cream can make a big difference. The cream gets absorbed into the dough while baking. This creates a soft, gooey texture that’s just right.

    “The key to incredible cinnamon rolls is understanding how ingredients interact during baking.” – Professional Baker

    Essential Ingredients for Cinnamon Rolls Cream

    Making the perfect cinnamon bread is all about the right ingredients. They must work together to create a delicious cinnamon swirl. Your journey to making tasty homemade rolls begins with knowing each ingredient’s role.

    For your cinnamon rolls, you’ll need a special mix of ingredients:

    • 2¾ cups all-purpose flour
    • Active dry yeast
    • ½ cup dark brown sugar
    • 1½ tablespoons ground cinnamon
    • 1 cup heavy whipping cream
    • 4 tablespoons salted butter
    • Eggs
    • Salt

    The secret to a great cinnamon swirl is using top-notch ingredients. Your flour should be fresh, and the yeast should be active and recent. Pro tip: Check the expiration date on your yeast to ensure maximum rising potential.

    “Great cinnamon rolls are a balance of science and love” – Bakery Experts

    Choose fresh, aromatic ground cinnamon for the best taste. The brown sugar adds depth and richness, making your cinnamon bread irresistible.

    Your heavy cream is key to making the rolls tender and moist. It gives them a luxurious texture and that viral TikTok look that everyone loves.

    Preparing Your Dough for Success

    Making the perfect cinnamon roll dough needs precision and care. Knowing how to prepare the dough can make your baking amazing. Let’s explore the key techniques to master this tasty pastry.

    When baking with cinnamon, the dough is key. Begin by collecting your main ingredients:

    • 2 1/2 cups King Arthur Unbleached Bread Flour
    • 2 teaspoons instant yeast
    • 2 tablespoons granulated sugar
    • 1 teaspoon table salt
    • 4 tablespoons softened unsalted butter
    • 2/3 cup cold whole milk

    Proper Kneading Techniques

    Kneading is vital for developing gluten in your dough. Knead for 5-7 minutes until it’s smooth and elastic. The dough should feel tacky but not stick to your hands. Use your heel to push and fold the dough, ensuring even texture.

    Rising Time and Temperature Control

    Yeast needs warmth to activate. Keep the temperature between 80-85 degrees Fahrenheit for best rising. Your dough will double in size in 60-90 minutes. Cover it with a clean towel and keep it in a draft-free spot.

    Working with Yeast

    Make sure the liquid is between 110-115 degrees Fahrenheit to activate yeast. Let it bloom for about 5 minutes before mixing it into the dough. Using fresh, high-quality yeast will improve your dough’s rise and texture.

    Pro tip: A digital thermometer can help you achieve precise temperatures for perfect cinnamon rolls every time!

    The Perfect Filling Combination

    Making the ultimate cinnamon swirl for your sweet breakfast pastries needs focus. The filling is key, turning simple dough into a tasty treat.

    • Softened butter (6 tablespoons)
    • Dark brown sugar (1/4 cup)
    • Granulated sugar (2 tablespoons)
    • Ground cinnamon (1 tablespoon)

    For those who love to try new things, here are some exciting filling ideas:

    1. Nutty Twist: Add chopped pecans or walnuts
    2. Fruit Burst: Sprinkle dried cranberries or raisins
    3. Chocolate Lover’s Dream: Dust with mini chocolate chips

    The secret to a great filling is getting the right mix. Make sure your butter is soft but not melted. This helps it spread well over the dough. You want a layer that’s even, so every bite is full of cinnamon goodness.

    Pro tip: Let your filling ingredients sit at room temperature for about 30 minutes before mixing to create the perfect spreadable texture.

    Heavy Cream Application Method

    To make cinnamon rolls cream extra special, you need to know how to use heavy cream right. The secret to making cinnamon buns irresistibly gooey is in the timing and method of adding heavy cream.

    Professional bakers say the right way to add cream makes cinnamon rolls go from good to amazing. It’s not just about adding cream. It’s about adding the right amount of moisture and texture.

    Timing of Cream Addition

    The best time to add cream is just before baking. Pour warm heavy cream over the rolls, making sure they’re fully covered. Here’s what to do:

    • Prepare rolls in a baking pan
    • Warm heavy cream to room temperature
    • Pour about 1 cup of cream evenly
    • Put ½ cup of cream at the bottom of the pan

    Quantity Guidelines

    The amount of cream you need depends on the number of rolls and the size of your pan. For 10 rolls, use:

    • 1 cup total heavy cream
    • ½ cup cream at the bottom of the pan
    • Adjust based on your pan’s size

    Temperature Considerations

    Temperature is key for those gooey cinnamon buns. Use warm cream, not hot. This ensures a soft, tender texture. Room temperature cream is best to avoid shocking the dough.

    “The secret is warm cream, evenly distributed—creating a brioche-like tenderness that melts in your mouth.” – Pastry Chef Recommendation

    By using these cream application tips, you’ll make your cinnamon rolls a hit. They’ll taste like they came from a bakery.

    Baking Techniques for Optimal Results

    Making the perfect homemade cinnamon rolls needs precision and care. When baking with cinnamon, getting the temperature and timing right is key. This ensures those golden-brown treats everyone loves.

    Here are the key baking tips for amazing results:

    • Preheat your oven to 375°F (190°C)
    • Position the rack in the center of the oven for even heat distribution
    • Use a 9×13 inch baking pan for consistent baking
    • Space rolls 1-2 inches apart to allow proper rising

    Baking time is usually 20-25 minutes. Watch your homemade cinnamon rolls closely in the last minutes. If they’re getting too brown, cover the pan with foil to stop burning.

    Experts say to check the rolls’ internal temperature. They should be between 190°F and 200°F for the best taste. A digital thermometer ensures consistent results.

    After baking, let the rolls cool for 5-10 minutes before frosting. This short wait helps the rolls set. It prevents the frosting from melting right away.

    Pro tip: For ultra-soft rolls, pour a quarter cup of heavy cream between the rolls just before baking. This makes them incredibly tender.

    Creating the Ultimate Cream Cheese Frosting

    Sweet breakfast pastries like cinnamon rolls need a special topping. The cream cheese frosting makes them unforgettable. Getting the right consistency is key.

    Making the perfect cream cheese frosting starts with quality ingredients. It’s all about how they work together. Your frosting will make warm cinnamon rolls even better.

    Frosting Consistency Tips

    Getting the frosting texture just right is an art. Here are some tips:

    • Use room temperature cream cheese (6 ounces) for smooth blending
    • Soften butter (6 tablespoons) to ensure easy mixing
    • Sift powdered sugar (1 1/2 cups) to prevent lumps
    • Add vanilla extract (1 teaspoon) for depth of flavor
    • Use an electric mixer for 2-3 minutes of blending

    Application Timing

    When to apply the frosting is important. Wait until your cinnamon rolls are slightly cool but still warm. This makes the frosting melt and coat them beautifully.

    Pro tip: If your frosting is too soft, chill it for 15-30 minutes. This will make it spreadable and creamy. Your homemade cinnamon rolls will love it.

    Storage and Make-Ahead Options

    Learning how to store your cinnamon rolls is key to enjoying them whenever you like. Knowing the right storage methods lets you make these treats ahead of time. This way, you can keep their amazing texture.

    Refrigeration Options

    Homemade cinnamon rolls are super flexible for making ahead. You can chill unbaked rolls overnight for easy morning baking. Just wrap them tightly in plastic wrap and keep them in the fridge for up to 12 hours.

    Storage Guidelines

    • Unbaked rolls: Refrigerate up to 12 hours
    • Baked rolls at room temperature: 2 days
    • Baked rolls in refrigerator: Up to 5 days

    Freezing Techniques

    Freezing is a great way to store your cinnamon rolls for a long time. You can freeze both unbaked and baked rolls if you wrap them properly.

    Storage MethodUnbaked RollsBaked Rolls
    Freezer Storage TimeUp to 1 monthUp to 2 months
    Recommended WrappingPlastic wrap + foilAirtight container
    Thawing MethodRefrigerator overnightRoom temperature 1-2 hours

    To reheat refrigerated or frozen rolls, warm them in the oven at 350°F for 10-15 minutes. This will bring back their fresh-from-the-oven taste. Your stored homemade cinnamon rolls will stay soft, gooey, and delicious!

    Troubleshooting Common Issues

    Making perfect gooey cinnamon buns can be tough, even for pros. Knowing common dough problems helps you make bakery-quality treats every time.

    Texture Challenges in Cinnamon Rolls

    Getting the right texture for cinnamon rolls needs care. Dense or dry rolls usually come from three main issues:

    • Insufficient kneading of the dough
    • Incorrect rising temperature
    • Overmixing ingredients

    Good kneading makes the dough smooth and elastic. It should be soft but still hold its shape well.

    Rising Difficulties

    Yeast is key for light, fluffy buns. Look out for these problems:

    ProblemSolution
    Inactive YeastUse fresh yeast, check expiration date
    Cold EnvironmentKeep rising area warm, not hot
    Inadequate SugarMake sure there’s enough sugar for yeast

    Baking Concerns

    Uneven baking can mess up your buns. Here are some tips:

    1. Use room temperature ingredients
    2. Preheat oven fully
    3. Rotate pan halfway through baking
    4. Check with a toothpick to see if they’re done

    “Perfect cinnamon rolls are about patience and understanding your ingredients.” – Experienced Home Baker

    With practice, you’ll get better at making irresistible cinnamon roll dough. You’ll get delicious results every time.

    Conclusion

    Making sweet breakfast pastries at home is now easier than ever. The heavy cream method turns ordinary cinnamon rolls into gourmet treats. You can make rolls that are soft, moist, and deliciously tasty.

    The secret to great cinnamon rolls cream is in temperature control, quality ingredients, and careful preparation. Every step, from yeast activation to frosting, adds to the flavor. With practice, you’ll become confident in making these tasty pastries that will wow everyone.

    Baking is both an art and a science. Try different fillings, adjust ingredients, and focus on details like milk temperature and rising times. Your homemade cinnamon rolls can become a special dish that shows off your baking skills and brings happiness to breakfast.

    We encourage you to share your cinnamon roll stories, new ideas, and tasty results. Your baking journey is special, and each batch is a story of creativity and passion. Happy baking!

    FAQ

    Why use heavy cream in cinnamon rolls?

    Heavy cream makes cinnamon rolls moist and tender. It also makes them gooey. This cream keeps the rolls soft and rich, unlike regular recipes.

    Can I substitute another type of milk for heavy cream?

    You can use whole milk or half-and-half, but they won’t be as rich. For the best taste, use heavy cream or full-fat cream.

    How warm should the heavy cream be when adding it to cinnamon rolls?

    The cream should be between 110-115°F (43-46°C). This warm temperature helps the yeast work well. It ensures the dough rises evenly without cooling down too much.

    How long can I store homemade cinnamon rolls?

    You can keep them at room temperature for 1-2 days. Store them in the fridge for up to 5 days or freeze for a month. Always use an airtight container to keep them fresh.

    Can I prepare the rolls the night before baking?

    Yes, you can! Prepare the rolls, cover them, and refrigerate them. Take them out 30-45 minutes before baking to let them rise again.

    What type of cinnamon works best for the filling?

    Saigon or Vietnamese cinnamon is best for its deep flavor. If you can’t find it, a good quality ground cinnamon from the store will do.

    How do I know when my cinnamon rolls are perfectly baked?

    They should have golden edges and a soft center. The inside should be about 190°F (88°C). They should spring back when touched and have an even color on top.

    Can I make these cinnamon rolls gluten-free?

    Yes, use a gluten-free flour blend for yeast baking. Follow the blend’s instructions, as gluten-free doughs need special care.

    Why did my cinnamon rolls turn out dry?

    They might be dry if you overbaked them, used too little fat, or didn’t use enough heavy cream. Make sure to follow the recipe and use warm heavy cream.

    Can I freeze unbaked cinnamon rolls?

    Yes, freeze them after the second rise. Freeze them on a baking sheet, then put them in a freezer bag. Thaw them in the fridge overnight and let them rise before baking.

    What is your rating for the recipe?

  • Make the Best Tres Leches Cake at Home

    Imagine sinking your fork into a cloud-like Mexican dessert. It turns the ordinary cake experience into something extraordinary. The tres leches cake isn’t just a dessert—it’s a culinary journey that captures the heart of Latin American baking traditions.

    This iconic tres leches cake combines delicate sponge cake with a luxurious milk bath. Every bite becomes a creamy, dreamy experience. Whether you’re a baking novice or a seasoned pastry enthusiast, mastering this Mexican dessert will elevate your culinary skills and impress everyone at your table.

    Learning to create the perfect tres leches cake means understanding the delicate balance of textures and flavors. From selecting the right ingredients to perfecting the milk soak, you’ll discover the secrets to creating a truly memorable sweet treat.

    Understanding Tres Leches Cake

    Explore the world of tres leches cake, a favorite dessert in Latin America. This sponge cake is a unique treat that has won hearts around the globe.

    Origins and Cultural Significance

    Tres leches cake comes from Nicaragua and is loved across Latin America. It shows the region’s passion for sweet, creative foods. The name “three milks” comes from its special way of being made.

    • Nicaraguan roots
    • Widespread popularity across Latin American countries
    • Symbolic of culinary creativity

    Traditional Ingredients Overview

    The magic of tres leches cake is in its milk mix. Bakers use whole milk, sweetened condensed milk, and evaporated milk. This mix turns a simple sponge cake into a special dessert.

    Milk TypeRole in Cake
    Whole MilkBase liquid for soaking
    Sweetened Condensed MilkAdds rich sweetness
    Evaporated MilkProvides creamy texture

    Why This Recipe Works

    The secret to a great tres leches cake is balance. The sponge cake soaks up the milk mix without getting soggy. Each bite is a mix of moisture, sweetness, and light texture that makes it irresistible.

    A true culinary masterpiece that transforms simple ingredients into an unforgettable dessert experience!

    Essential Ingredients for Perfect Tres Leches Cake

    To make a real tres leches cake, you need the right ingredients. They must work together to make a moist and rich dessert. Knowing each ingredient’s role is key to getting the cake’s unique taste and texture.

    The base of your cake starts with quality dry ingredients. You’ll need:

    • 1½ cups all-purpose flour
    • 1 tablespoon baking powder
    • ¼ teaspoon fine salt
    • ¼ teaspoon ground cinnamon

    Egg yolks are important for a smooth base. You’ll separate 5 large eggs, using the yolks for a creamy mix. The butter adds depth to the cake’s flavor. Mix the egg yolks with ¾ cup granulated sugar until they’re light and pale.

    Vanilla extract is crucial for the cake’s taste. Use 2 teaspoons of pure vanilla extract. It adds a warm, aromatic flavor that goes well with the sweet milk mixture.

    For the milk soak, you’ll need:

    • ½ cup whole milk
    • 1 (14-ounce) can sweetened condensed milk
    • 1 (12-ounce) can evaporated milk
    • ½ cup heavy cream

    The whipped cream topping needs more ingredients:

    • 1 pint heavy whipping cream
    • 3 tablespoons granulated sugar
    • ½ teaspoon vanilla extract

    By choosing and measuring each ingredient carefully, you’ll make a tres leches cake that’s both authentic and tasty.

    Step-by-Step Baking Instructions

    Making the perfect soaked cake needs precision and care. Your journey starts with a sponge cake base. This base is key for a delicious dessert.

    Preparing the Sponge Cake Base

    First, get your ingredients ready and preheat your oven to 350°F. A light, airy base is crucial. It must soak up the milk without getting soggy.

    • Sift together 2 cups all-purpose flour, 2 teaspoons baking powder, 1 teaspoon salt, and 1/2 teaspoon ground cinnamon
    • Separate egg whites and yolks, beating them individually for maximum volume
    • Gradually add 2 cups granulated sugar while mixing

    Mixing Techniques for Perfect Texture

    Proper mixing is key for a great soaked cake. Here are some tips for a light, fluffy texture:

    1. Mix wet ingredients on low speed for 30 seconds
    2. Increase to medium speed for 2 minutes
    3. Fold in melted butter and vanilla extract gently

    Baking Temperature and Timing

    When baking your cake base, precision is essential. Follow these steps:

    Baking DetailSpecification
    Oven Temperature350°F
    Baking Time30-35 minutes
    Pan Size13×9 inches

    “A perfectly baked soaked cake begins with attention to detail and precise techniques.” – Baking Expert

    Pro tip: Check if the cake is done by inserting a toothpick into the center. If it’s clean, it’s ready. Let the cake cool completely before soaking.

    The Secret to the Perfect Tres Leches Soak

    Making the perfect tres leches cake is all about the milk soak. You want to turn a simple sponge cake into a moist, creamy dessert. The secret is a special mix of sweetened condensed milk, evaporated milk, and whole milk.

    To get the soak just right, you need the right amounts. Here’s what you should mix:

    • Use one 14-ounce can of sweetened condensed milk
    • Add one 12-ounce can of evaporated milk
    • Pour in ½ cup of whole milk or heavy cream

    Getting ready is key for a good soak. First, let your sponge cake cool down completely. Then, poke about 100 holes in the cake with a fork. This helps the milk soak in better and prevents it from getting too wet.

    When you pour the milk mix, do it slowly and evenly. Let the cake sit for at least 30 minutes to soak up all the liquid. For the best taste, chill the cake overnight. This way, the milk soaks deep into the cake, making it moist and delicious.

    Pro tip: Refrigerate the soaked cake for 2-4 hours before serving to enhance its flavor and texture.

    Your hard work will pay off with a tres leches cake that’s tender, rich, and full of creamy flavor.

    Whipped Cream Topping and Decoration

    Turning your tres leches cake into a masterpiece is all about the whipped cream topping. A great topping makes the cake look and taste amazing. It adds a creamy touch and makes it visually stunning.

    Creating the Perfect Stabilized Whipped Cream

    To make the perfect whipped cream, you need to follow a few steps. Here are the key ingredients:

    • 1 cup heavy cream
    • 2 tablespoons powdered sugar
    • 1/2 teaspoon vanilla extract
    • Pinch of kosher salt

    Vanilla extract is important for flavor. Start with cold ingredients and a chilled bowl to get the best results.

    Decoration Techniques

    Decorating a cake can be easy and fun. You don’t need to be a pro to make it look great. Here are some simple ways to decorate:

    1. Use a piping bag with star tip for elegant borders
    2. Create smooth surface with offset spatula
    3. Sprinkle cinnamon or cocoa powder for subtle garnish

    Final Touches

    Finish your cake with garnishes that match its flavor. Try fresh berries, mint leaves, or a sprinkle of cinnamon. These add both taste and beauty.

    Topping ComponentQuantityPurpose
    Heavy Cream1 cupPrimary whipping base
    Powdered Sugar2 tablespoonsSweetness and stabilization
    Vanilla Extract1/2 teaspoonFlavor enhancement

    Your decorated tres leches cake will stay fresh for up to 3 days in the fridge. Enjoy it all week long!

    Conclusion

    Making the perfect tres leches cake is more than a recipe. It’s a fun journey that brings the rich flavors of Mexico into your kitchen. Your homemade cake will wow everyone with its creamy texture and amazing taste.

    This classic dessert is very flexible. You can try adding cocoa for a chocolate version or coconut milk for a tropical twist. The secret is the three-milk soak that makes it so special.

    Storing your cake is easy. Keep it in the fridge for up to 4 days to let the flavors grow. Serve it cold for the best taste. Making it a day or two ahead helps it soak up more milk flavors.

    Your tres leches cake is great for any celebration, from birthdays to holidays. With a little practice, you’ll become a pro at making this delicious dessert. Enjoy baking and sharing this amazing Mexican treat!

    FAQ

    What makes tres leches cake unique?

    Tres leches cake is special because it’s a sponge cake soaked in three milks. These milks are sweetened condensed, evaporated, and whole. This makes the cake incredibly moist and creamy, yet light and rich.

    Is tres leches cake difficult to make at home?

    Making tres leches cake at home is doable for those with some baking skills. It’s important to follow the recipe closely. This is especially true when making the sponge cake and soaking it in the milk mixture.

    Can I make tres leches cake ahead of time?

    Yes, making tres leches cake ahead of time is a good idea. It’s best to prepare it a day before. This allows the cake to soak up the milk mixture fully, enhancing the flavors.

    Are there any dairy-free alternatives for tres leches cake?

    You can make dairy-free versions of tres leches cake. Use milks like coconut, almond, and dairy-free condensed milk substitutes. The taste will be different, but still tasty.

    How long can I store tres leches cake?

    Store tres leches cake in the fridge for 3-4 days. Always cover it tightly. This keeps it moist and prevents odors from the fridge.

    What are the origins of tres leches cake?

    Tres leches cake is often linked to Mexico, but it actually comes from Nicaragua. Its popularity spread across Latin America in the mid-20th century.

    Can I freeze tres leches cake?

    Freezing tres leches cake is not recommended. The milk-soaked sponge can become watery and lose its texture when thawed. It’s best enjoyed fresh or refrigerated.

    What type of milk works best for the tres leches soak?

    The best mix for the soak is sweetened condensed, evaporated, and whole milk or heavy cream. This mix offers the right balance of sweetness, richness, and moisture.

    Can I add flavors to my tres leches cake?

    Yes! You can add vanilla, rum, coffee, or fruit purees to the milk mixture or batter. This creates unique variations of the classic recipe.

    How do I prevent my tres leches cake from becoming too soggy?

    To avoid sogginess, add the milk mixture slowly. Use a fork to make holes in the cake. Then, pour the milk in stages, letting it soak in fully before adding more.

    What is your rating for the recipe?

  • Grinder Sandwich Recipe

    Imagine a crisp autumn day in New England. The smell of a fresh submarine sandwich fills the air. The grinder sandwich is more than a meal; it’s a comfort food tradition.

    It’s perfect for any time, whether you want something hot or cold. The grinder sandwich turns a simple lunch into a special treat.

    This Italian sub has won the hearts of many in the U.S. Making a great grinder sandwich is an art. It combines tasty meats, creamy cheeses, and a fresh salad for a flavorful experience.

    Found in pizza shops and local delis, the grinder sandwich is a beloved favorite. It’s not just a quick meal. It shows off culinary creativity and regional pride, pleasing any appetite.

    What Makes a Grinder Sandwich Special

    The grinder sandwich is a true gem in Italian-American food culture. It has won the hearts of many in the United States. Its bold flavors and thick build make it stand out.

    Origins of the Grinder Name

    The name “grinder” comes from New England’s rich food history. There are a few theories about how it got its name:

    • Dock workers who ground their teeth while eating these big sandwiches
    • The hard chewing needed to eat such a large sandwich
    • A nickname from Italian-American communities in the northeast

    Essential Components of a Classic Grinder

    A traditional grinder has:

    1. Fresh hoagie roll or crusty Italian bread
    2. Different deli meats (ham, salami, turkey)
    3. Provolone cheese
    4. A special salad with fresh veggies

    Regional Variations and Styles

    Though the core idea stays the same, each region puts its own spin on the hoagie. From Philadelphia to New England, every place has its own twist.

    The grinder is more than just a meal – it’s a cultural culinary experience that brings people together.

    The grinder sandwich, whether hot or cold, keeps growing in popularity. Its mix of flavors and versatility make it a classic in American food.

    Essential Ingredients for Your Grinder Sandwich

    Creating the perfect cold cut combo starts with selecting high-quality ingredients for your deli sandwich. Your grinder sandwich needs the right ingredients to taste great and satisfy you.

    The foundation of an exceptional grinder begins with premium meats and cheeses. Your sandwich will shine with a carefully curated selection of Italian cold cuts.

    • Meats: Genoa salami, pepperoni, mortadella
    • Cheeses: Provolone, Havarti, Granino
    • Fresh vegetables: Iceberg lettuce, tomatoes, red onion
    • Pickled peppers: Pepperoncini, cherry peppers

    Nutritional considerations are crucial for your deli sandwich. A typical grinder packs significant nutritional value:

    NutrientAmount
    Calories576 kcal
    Protein32 g
    Total Fat31 g
    Carbohydrates39 g

    Your cold cut combo requires careful layering. Start with a sturdy roll that can support hearty meats and abundant toppings. Use about 1 pound of mixed deli meats and 8-10 cheese slices for a satisfying sandwich.

    Seasonings elevate your grinder from good to extraordinary. Sprinkle Italian seasoning, garlic powder, and freshly cracked pepper to enhance the overall flavor profile of your deli sandwich.

    The Famous Grinder Salad

    The grinder salad is the heart and soul of an authentic east coast sub. It turns a simple sandwich into a work of art. This mix of fresh ingredients and zesty dressing makes the sandwich experience unforgettable.

    Making the Perfect Dressing

    Creating the right dressing for your east coast sub is key. Here’s a simple yet tasty recipe:

    • ⅓ cup mayonnaise
    • ⅓ cup plain non-fat Greek yogurt
    • 1 tbsp red wine vinegar
    • 2 tbsp pepperoncini juice
    • ⅓ cup grated parmesan cheese
    • 1 tsp garlic powder
    • 1 tsp oregano
    • ½ tsp salt
    • ½ tsp black pepper

    Selecting and Preparing Vegetables

    Pick crisp, fresh veggies for your grinder salad. Texture and quality matter! Here are some top picks:

    • ½ head iceberg lettuce, shredded
    • 1 cup cherry tomatoes, halved
    • ½ cup banana peppers
    • ¼ cup pickled pink onions
    • ¼ cup pickled jalapeños

    Tips for Optimal Crunch and Flavor

    Here are some tips to make the perfect east coast sub salad:

    1. Chop veggies uniformly for consistent texture
    2. Dress salad just before serving to prevent sogginess
    3. Use fresh ingredients for maximum flavor
    4. Adjust seasoning to taste

    Pro tip: Let your dressing sit for 10 minutes before mixing to allow flavors to meld!

    Prep time is just 15 minutes, and the salad serves two. Follow these tips to make a grinder salad that’s as good as any east coast sub shop’s.

    Step-by-Step Assembly Instructions

    Making the ultimate long roll sandwich needs precision and care. Start by picking the right ingredients. Then, follow a step-by-step guide to turn simple parts into a tasty meal.

    1. Bread Preparation
      • Choose a fresh hoagie roll or crusty bread
      • Slice the long roll lengthwise
      • Lightly toast the bread for a crispy base
    2. Meat and Cheese Layer
      • Layer 3/4 pound of deli meats (turkey, ham, sopressata)
      • Add 6 thin slices of provolone cheese
      • Distribute meats evenly across the bread
    3. Warming Process
      • Preheat oven to 350°F
      • Bake sandwich for 5-7 minutes
      • Ensure cheese is melted and edges are crispy
    4. Final Touches
      • Add 1 cup shredded lettuce
      • Include sliced tomatoes and onions
      • Sprinkle with Kosher salt and black pepper

    “A great long roll sandwich is an art form that combines flavor, texture, and passion.”

    Your carefully made long roll sandwich is now ready to enjoy. Each layer adds to a mix of flavors that will excite your taste buds and fill your hunger.

    Pro Tips for the Best Grinder Experience

    Making the perfect meatball grinder is more than just mixing ingredients. It’s about paying attention to every detail. This can turn a simple sandwich into a work of art.

    Now, let’s explore some expert tips to make your grinder sandwich taste like it’s from a restaurant.

    Bread Selection and Preparation

    Choosing the right bread is key for a true meatball grinder. Look for these features:

    • Crusty outside with a soft inside
    • Long Italian-style roll or submarine bread
    • Fresh and slightly chewy texture

    Pro tip: Toast your bread lightly. This helps keep your grinder crisp and tasty.

    Meat and Cheese Combinations

    Meat OptionsCheese Pairings
    MeatballsProvolone
    Italian SalamiMozzarella
    PepperoniParmesan

    Storage and Make-Ahead Options

    For the best meatball grinder, follow these storage tips:

    1. Store ingredients separately to prevent sogginess
    2. Keep meat and cheese refrigerated
    3. Assemble just before serving for maximum freshness

    Tip: If preparing ahead, wrap sandwich components individually and combine when ready to eat.

    The secret to an incredible grinder is fresh ingredients and careful preparation!

    Customization Options and Variations

    Turning your classic italian sandwich into a personalized dish is exciting. The grinder sandwich is very flexible. You can try different ingredients and flavors to match your taste and dietary needs.

    • Protein Substitutions
      • Turkey for a leaner option
      • Italian sausage for a spicier profile
      • Vegetarian alternatives like grilled portobello mushrooms
    • Regional Flavor Inspirations
      • Mediterranean-style with feta and olives
      • Southwest grinder with jalapeños and pepper jack cheese
      • New England coastal variation with seafood

    The grinder sandwich is great for different diets. You can make it gluten-free, low-carb, vegetarian, or vegan. Just swap out ingredients to meet your needs.

    • Gluten-free (using special bread)
    • Low-carb (lettuce wrap instead of bread)
    • Vegetarian or vegan
    Variation TypeKey IngredientsUnique Characteristic
    Classic ItalianSalami, Prosciutto, HavartiTraditional cold cuts
    Spicy SouthwestPepperoni, Pepper Jack, JalapeñosIntense heat profile
    Vegetarian DelightGrilled Vegetables, Plant-based CheeseMeat-free option

    Being creative is key to making your ideal italian sandwich. Each twist adds something special while keeping the core taste of the grinder.

    Conclusion

    The grinder sandwich is more than a meal; it’s a journey through New England’s food history. It started with Italian American dock workers and has seen a recent rise on TikTok. This sandwich has truly stood the test of time in American cuisine.

    Whether you make a classic hot grinder or a veggie version, there’s something for everyone. The secret is in the balance of ingredients and the choice of a sturdy Italian roll. Each grinder can be a quick lunch, a game day hit, or a party favorite.

    Every region in New England adds its own twist to the grinder. From Connecticut to Rhode Island, the variations are endless. As you keep exploring and making your own grinders, remember to add passion, fresh ingredients, and a sense of adventure to your cooking.

    FAQ

    What exactly is a grinder sandwich?

    A grinder sandwich is a big, tasty East Coast submarine sandwich. It has high-quality meats, cheeses, and a special salad on a long roll. It’s known for its strong flavors and lots of filling, served hot or cold.

    Why is it called a “grinder” sandwich?

    There are a few reasons why it’s called a grinder. One story is that shipyard workers, or “grinders,” ate these big sandwiches during lunch. Another idea is that the name comes from grinding ingredients for the sandwich.

    What makes a grinder sandwich different from a regular sub?

    The main difference is the grinder salad. It’s a mix of veggies, herbs, and dressing that adds moisture and taste. Grinder sandwiches also use better ingredients and are often hot with melted cheese.

    What are the essential ingredients for a classic grinder sandwich?

    A classic grinder has a long roll, Italian cold cuts like salami and ham, and cheese. It also has fresh veggies, pepperoncini, and a special dressing with mayonnaise, vinegar, and herbs.

    Can I make a vegetarian or gluten-free grinder sandwich?

    Yes! You can use grilled veggies, tofu, or tempeh instead of meat. For gluten-free, use gluten-free rolls or make a “bowl” version with all the ingredients.

    How do I prevent my grinder sandwich from getting soggy?

    To avoid sogginess, toast the bread lightly. Add the salad just before serving. Keep wet ingredients separate until you’re ready to eat. Use cheese as a barrier between the bread and moist ingredients.

    There are many regional twists. Rhode Island has an Italian grinder with hot oil. New York has a cold cut combo. Pennsylvania might add roasted peppers or local specialties.

    How long can I store a prepared grinder sandwich?

    Eat a grinder sandwich within 24 hours for the best taste. If you make it ahead, keep parts separate and assemble just before eating. Store meats and cheeses in the fridge and keep bread at room temperature.

    What is your rating for the recipe?

  • Crunchwrap Supreme Calories

    Imagine biting into a flavor-packed Mexican fast food creation. It satisfies your hunger and taste buds in one perfect wrap. The Crunchwrap Supreme from Taco Bell is more than just another menu item. It’s a culinary experience that has captured the hearts of fast food lovers across the United States.

    When you’re craving something substantial and delicious, this iconic menu item delivers. It gives you 530 calories of pure satisfaction. Whether you’re a busy professional grabbing a quick lunch or a student looking for a filling meal, the Crunchwrap Supreme is a go-to choice for many Taco Bell enthusiasts.

    Understanding the nutritional profile of this popular Mexican fast food item can help you make informed dietary choices. You can still enjoy a meal that packs a flavorful punch. From its unique hexagonal shape to its combination of crispy and soft textures, the Crunchwrap Supreme represents more than just a quick bite. It’s a cultural food phenomenon.

    Understanding Taco Bell’s Signature Creation

    The Crunchwrap Supreme is a big hit since 2005. It’s a mix of textures and flavors that stands out. It’s different from other fast-food items.

    What Makes It Special

    Taco Bell’s Crunchwrap Supreme is special for many reasons. It has a unique blend of ingredients. This makes it more than just fast food.

    • Seasoned beef with robust flavor
    • Creamy nacho cheese sauce that adds rich depth
    • Crisp lettuce and fresh tomatoes
    • Reduced-fat sour cream for a tangy touch
    • A crunchy tostada shell for unexpected texture

    Size and Portion Information

    The Crunchwrap Supreme is a big meal. It’s made to fill you up. It has spicy fillings and lots of flavors in one package.

    Price and Availability

    The Crunchwrap Supreme costs about $5.29. It’s a great deal. Taco Bell keeps making new versions with the TBX program. This keeps the Crunchwrap Supreme exciting for everyone.

    Crunchwrap Supreme Calories and Nutritional Breakdown

    Explore the Crunchwrap Supreme, a favorite at Taco Bell. It has a beef or chicken filling in a crunchy shell. This item has a detailed nutritional profile that’s interesting to look at.

    Here are the main nutritional facts of this popular fast food:

    • Total Calories: 530 calories per serving
    • Total Fat: 21g (32% Daily Value)
    • Protein: 16g
    • Carbohydrates: 71g (24% Daily Value)
    • Sodium: 1,200mg (50% Daily Value)

    The Crunchwrap Supreme gets its calories from different parts. Here’s a quick look at where the calories come from:

    • Flour tortilla: 200 calories
    • Seasoned ground beef: 150 calories
    • Nacho cheese sauce: 80-90 calories
    • Sour cream topping: 50 calories
    • Crispy tostada shell: 60 calories

    “One Crunchwrap Supreme provides nearly a quarter of your daily carbohydrate needs and half of your recommended sodium intake,” nutrition experts note.

    If you’re watching your calories, think about how much exercise you need. Burning 530 calories is like:

    • 45 minutes of running at a moderate pace
    • 1 hour of cycling
    • 40 minutes of swimming

    For those looking for lighter options, Taco Bell has the Veggie Crunchwrap Supreme. It has about 460 calories, making it a good choice for those watching their diet.

    Core Ingredients and Customization Options

    Explore mexican fast food with the Crunchwrap Supreme. It’s a tortilla snack that mixes flavors and textures perfectly. This menu item offers a unique taste experience that’s different from regular fast food.

    Standard Ingredients Breakdown

    The Crunchwrap Supreme starts with essential ingredients for its taste:

    • Seasoned beef with rich, spicy fillings
    • Nacho cheese sauce
    • Crisp lettuce
    • Fresh tomatoes
    • Reduced-fat sour cream
    • Crunchy tostada shell

    Customization Possibilities

    You can make your Crunchwrap Supreme even better with add-ons. Here are some popular choices:

    • Extra cheese (+25 calories)
    • Jalapeño peppers (+5 calories)
    • Black beans (+50 calories)
    • Slow-roasted chicken (+60 calories)

    Vegetarian-Friendly Modifications

    Vegetarians can swap the seasoned beef for black beans. This keeps the flavor but fits plant-based diets.

    Every add-on changes the calorie count. This lets you make a mexican fast food meal that fits your taste and health goals.

    Healthier Ways to Enjoy Your Crunchwrap Supreme

    Enjoying a Taco Bell Crunchwrap Supreme doesn’t mean you have to give up on health. Smart choices can make this favorite a part of a balanced diet. By picking the right options, you can cut calories and boost nutrition.

    Here are some tips for a healthier Crunchwrap Supreme:

    • Skip the nacho cheese sauce to cut down on calories and fat
    • Replace sour cream topping with Greek yogurt for protein boost
    • Add extra vegetables for increased fiber and nutrients
    • Request a smaller portion or share with a friend

    When you order at Taco Bell, tell them what you prefer. Ask for:

    1. Less cheese or no cheese sauce
    2. Extra lettuce and tomatoes
    3. Grilled chicken instead of seasoned beef
    4. Reduced sour cream topping

    Pro tip: Portion control is key to enjoying your favorite Taco Bell meal while maintaining a balanced diet. By choosing wisely, you can make the Crunchwrap Supreme healthier. It will still taste great.

    Conclusion

    Knowing what’s in the Crunchwrap Supreme helps you choose better at Taco Bell. It’s not just a quick bite; it’s a flavorful journey. It’s all about balance when you eat it wisely.

    The Crunchwrap Supreme shows that fast food can be tasty and fit your health goals. With 540 calories, you can make it healthier. You can cut down on sodium, pick different proteins, or add veggies to make it better.

    Taco Bell keeps making the Crunchwrap better since 2005. They now have vegan and lower-calorie versions. This shows they listen to what people want: food that’s flexible and fits their needs.

    With this knowledge, you can make smart choices at Taco Bell. You can pick what you like and stay healthy. It’s all about making informed choices.

    FAQ

    What exactly is a Crunchwrap Supreme?

    The Crunchwrap Supreme is a favorite at Taco Bell. It’s a mix of textures and tastes. It has seasoned beef, nacho cheese, a crunchy shell, sour cream, lettuce, and tomatoes. All wrapped in a flour tortilla and grilled for a crispy, soft meal.

    How many calories are in a standard Crunchwrap Supreme?

    A Crunchwrap Supreme has about 540 calories. But, this can change based on what you add or change.

    Can I make a vegetarian version of the Crunchwrap Supreme?

    Yes, Taco Bell has vegetarian options. You can swap the beef for black beans. This keeps the flavor but adds protein.

    What are some ways to make the Crunchwrap Supreme healthier?

    To make it healthier, skip extra cheese and sour cream. Add more veggies or eat a smaller size. You can also ask for less sauce or choose a different protein.

    How does the Crunchwrap Supreme compare to other Taco Bell menu items?

    The Crunchwrap Supreme has a good balance of calories. It has protein, carbs, and fats. It’s a favorite for a filling meal.

    Are there different protein options for the Crunchwrap Supreme?

    The standard is seasoned beef, but you can choose chicken. Some places might have other protein options too.

    How can I incorporate the Crunchwrap Supreme into a balanced diet?

    Eat it in moderation as part of a balanced diet. Pair it with a salad and drink water. Balance your meals to keep your calorie intake in check.

    What is your rating for the recipe?