Author: zikrecipes.com

  • Sourdough Discard Cinnamon Rolls

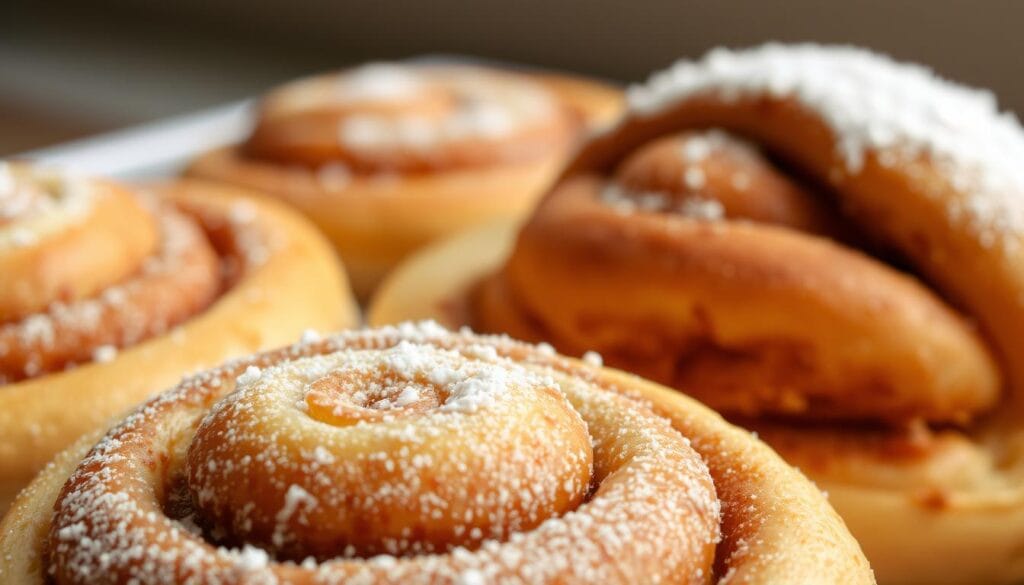
    Every weekend, my kitchen turns into a cozy haven. The smell of cinnamon rolls fills the air. These sourdough discard cinnamon rolls are more than breakfast. They’re a way to use up extra sourdough starter.

    Think about turning your sourdough discard into sweet bread rolls. It’s both useful and indulgent. These rolls mix sourdough’s tang with traditional cinnamon roll comfort. It’s a unique yet familiar treat.

    These cinnamon rolls are easy to make but oh-so-delicious. Each bite is a mix of soft dough and sweet cinnamon. It’s a joy for your taste buds.

    Why You’ll Love These Sourdough Discard Rolls

    Discover the magic of turning your sourdough discard into tasty brunch treats. These cinnamon rolls are more than just a pastry. They’re a culinary adventure that combines simplicity with extraordinary flavor.

    Quick and Simple Preparation

    Making these yeast dough delights is easy, even for beginners. You need just a few ingredients and simple steps. In 30 minutes, you can make cinnamon rolls that will wow your family and friends.

    • Minimal ingredients
    • Easy step-by-step process
    • No complex techniques required

    Delicious Tangy Flavor Profile

    The sourdough discard adds a tangy complexity to the sweet cinnamon filling. This unique flavor turns a regular cinnamon roll into a special treat. The slight sourness balances the sweet, creating a perfect taste.

    “Every bite tells a story of tradition and innovation in baking.”

    Great Way to Use Excess Starter

    Don’t waste your sourdough discard! These cinnamon rolls are a tasty way to use it up. By adding the discard to your recipe, you reduce waste and create a memorable treat that celebrates sourdough baking.

    • Reduces food waste
    • Maximizes starter potential
    • Creates delicious results

    Essential Ingredients and Tools

    To make delicious dessert rolls, you need the right ingredients and tools. Your sourdough discard cinnamon rolls will come to life with the right mix of high-quality components. These ensure your rolls have the best flavor and texture.

    Key Ingredients You’ll Need

    • Sourdough Discard: 100% hydration starter brings tangy depth to your rolled baked goods
    • Bread Flour: Provides structure and chewiness to the rolls
    • Whole Milk: Adds richness and softness to the dough
    • Unsalted Butter: Ensures precise control over salt content
    • Instant Yeast: Helps the dough rise consistently

    Your cream cheese frosting will shine with premium ingredients. The recipe needs 3½ cups of all-purpose flour, 2 large eggs, and ¼ cup of honey. These ingredients create a perfectly balanced dough.

    Essential Baking Tools

    • Large mixing bowl
    • Rolling pin
    • 9×13 inch baking pan
    • Measuring cups and spoons
    • Stand mixer (optional but helpful)

    Each ingredient is crucial in making spectacular cinnamon rolls. With careful selection and preparation, you’ll create dessert rolls that will impress everyone.

    Making Perfect Cinnamon Rolls

    Making sweet bread rolls is all about precision and passion. Your sourdough discard cinnamon rolls will be a hit with these tips. Let’s explore how to make the most irresistible baked goods that will fill your kitchen with amazing smells.

    Preparing the Dough

    Begin by activating the yeast. Mix warm water (115°F) with 1.5 tablespoons of active dry yeast. Wait 5-10 minutes for it to get foamy. Then, add your sourdough starter for a rich base.

    • Use 4 cups of all-purpose flour
    • Add 0.75 cups granulated sugar
    • Include 1 teaspoon kosher salt
    • Incorporate 1 large egg

    Creating the Filling

    The key to great cinnamon sugar filling is balance. Mix 1 cup packed light brown sugar with 0.5 cups granulated sugar and 3 tablespoons ground cinnamon. Soften 8 tablespoons of unsalted butter for spreading.

    Rolling and Shaping Techniques

    Roll the dough into a 12×24 inch rectangle. Spread the softened butter, then sprinkle the cinnamon sugar mixture. Roll it up tightly, making beautiful spirals. Cut into 12 equal pieces, each about 1½ inches wide.

    Cream Cheese Frosting Tips

    Your cream cheese frosting can make these sweet bread rolls unforgettable. Mix 8 ounces softened cream cheese with 8 tablespoons softened butter. Add 2-3 cups powdered sugar until it’s just right.

    Pro tip: For the most decadent frosting, ensure all ingredients are at room temperature before mixing.

    Storage and Make-Ahead Options

    Your delicious breakfast pastry can stay fresh with smart storage techniques. Sourdough discard cinnamon rolls offer incredible flexibility for busy home bakers preparing brunch treats or holiday baking.

    • Room Temperature Storage: Unfrosted rolls stay fresh for 2-3 days in an airtight container
    • Refrigerator Storage: Frosted rolls can be kept up to 4 days when properly sealed
    • Freezer Preservation: Extend enjoyment by freezing rolls for several months

    When freezing your cinnamon rolls, consider these professional tips:

    1. Separate rolls with parchment paper to prevent sticking
    2. Use airtight containers or freezer bags
    3. Label with the date to track freshness

    Reheating frozen or refrigerated rolls is simple. Warm them briefly in the oven at 250 degrees F for 15-20 minutes to restore their soft, fresh-baked texture. For quick enjoyment, microwave thawed rolls for 10-15 seconds.

    Pro bakers know that proper storage maintains the incredible taste and texture of these sourdough discard cinnamon rolls. This ensures you can enjoy your favorite breakfast pastry anytime.

    Conclusion

    Making sourdough discard cinnamon rolls turns your kitchen into a real bakery. These dessert rolls are more than a sweet treat. They’re a mix of tradition and modern baking.

    Your homemade cinnamon rolls will have a tangy sourdough taste. They’ll also have a flavor that’s hard to resist.

    These cinnamon rolls are very versatile. They’re great for both experienced and new bakers. The recipe lets you use your sourdough starter in a fun way.

    Each roll is a chance to get creative. You can try different fillings, frostings, and touches. This makes the recipe truly yours.

    Sourdough cinnamon rolls are more than a trend. They’re a comfort food that brings back memories. By making this recipe, you connect with a long baking tradition.

    Don’t be shy to make this recipe your own. Share your sourdough discard cinnamon rolls with loved ones. They’ll become a favorite in your home.

    FAQ

    What is sourdough discard and why use it in cinnamon rolls?

    Sourdough discard is the extra starter you remove when you maintain your sourdough. Using it in cinnamon rolls is a great way to reduce waste. It adds a tangy flavor that makes your rolls more interesting.

    It gives your sweet rolls depth and complexity. Plus, it helps you use up your sourdough starter.

    Can I make these cinnamon rolls ahead of time?

    Yes, you can! Prepare the rolls by assembling them and refrigerate them overnight. Or, freeze them unbaked for up to a month.

    When you’re ready, thaw and let them rise. Then, bake them for fresh, tasty cinnamon rolls.

    What type of flour works best for sourdough discard cinnamon rolls?

    Bread flour is best for the texture. It has more protein, which makes the rolls tender and chewy. If you can’t find bread flour, all-purpose flour works too. But the texture might be a bit different.

    How long do sourdough discard cinnamon rolls stay fresh?

    Store them in an airtight container at room temperature for 2-3 days. For longer storage, refrigerate them for up to 5 days. Always reheat gently to keep them soft.

    Can I make these rolls without active dry yeast?

    You can try using only sourdough starter. But, it might take longer to rise and could make the rolls denser. The yeast helps them be light and fluffy.

    Are sourdough discard cinnamon rolls suitable for people with dietary restrictions?

    The traditional recipe has gluten, dairy, and eggs. But, you can make it work for different diets. Use gluten-free flour, dairy-free milk, and egg substitutes. Just check the best substitutions for your needs.

    How can I achieve the perfect cream cheese frosting consistency?

    Make sure your cream cheese and butter are room temperature. Beat them until smooth, then add powdered sugar slowly. Use a little milk or cream to get the right consistency. It should be spreadable but not too thin.

    Can I freeze sourdough discard cinnamon rolls?

    Yes, you can freeze them before or after baking. For unbaked rolls, assemble and freeze on a baking sheet, then bag them. For baked rolls, cool, wrap, and freeze. Thaw in the fridge and reheat in the oven for the best taste.

    What is your rating for the recipe?

  • Chipotle Steak Recipe

    Ever dreamed of that amazing Chipotle steak from your favorite Mexican place? I have, too. Those smoky, seasoned bites make my taste buds sing. Today, I’m sharing a recipe that brings that restaurant flavor right to your kitchen.

    This recipe is more than just a meal. It’s a journey that turns simple meat into a flavor explosion. Whether it’s for a weekend dinner or to wow your guests, this chipotle steak will make your cooking shine.

    Why This Copycat Chipotle Steak Will Become Your Favorite

    Want to enjoy top-notch Mexican food at home? This amazing homemade Chipotle steak recipe will turn your kitchen into a fancy Mexican restaurant. It’s a game-changer for your taste buds.

    Restaurant Quality Results at Home

    Getting a steak as good as a restaurant’s is possible. It’s all about using the right techniques and ingredients. Knowing how to cook and marinate is key.

    • Perfect grilling temperature: 450-500°F
    • Ideal steak internal temperature: 125-130°F
    • Recommended resting time: 5-10 minutes

    Cost-Effective Homemade Version

    Imagine having a delicious Chipotle steak bowl for just $10 per serving. This recipe makes it possible. By making your own steak, you save money and control the flavors.

    Versatile Serving Options

    Your homemade Chipotle steak is more than just a meal. It can be used in many dishes, like burritos, nachos, and salads. Add corn salsa, guacamole, or cilantro lime rice for even more flavor.

    Serving OptionAdditional Toppings
    Burrito BowlBlack beans, sour cream, pico de gallo
    TacosSalsa verde, fresh cilantro, lime wedges
    SaladGrilled vegetables, avocado, queso fresco

    Essential Ingredients for Authentic Chipotle Steak

    To make a real Chipotle steak, start with the best fajita ingredients. You need to prepare a tasty marinated beef. The secret is using top-notch parts that add strong flavor to your meal.

    For a top-notch Chipotle-style steak, you’ll need:

    • 2 pounds of top sirloin steak
    • 3 cloves of fresh garlic
    • 4 ounces of chipotle peppers in adobo sauce
    • 2 tablespoons of olive oil
    • 1 tablespoon of dried oregano
    • 2 teaspoons of ground cumin

    The magic happens when you mix the right spices and seasonings. Fresh ingredients are key to getting that real restaurant taste.

    Choose high-quality beef like top sirloin or flank steak for the best results. The right cut makes the meat tender and flavorful. You want your dish to taste as good as your favorite Chipotle restaurant.

    Pro tip: Always choose fresh, high-quality ingredients to elevate your Chipotle steak from good to exceptional!

    The Perfect Marinade Recipe

    Start your protein-rich meal with a killer marinade. It turns ordinary steak into a flavor explosion. Your homemade Chipotle steak marinade will make your cooking top-notch with just a few ingredients.

    The secret to a great marinade is balancing flavors and tenderizing. Your marinade will add amazing taste and make your steak tender and juicy every time.

    Core Marinade Components

    Your perfect marinade has key ingredients for a delicious meal:

    • Olive oil (primary moisture base)
    • Apple cider vinegar
    • Lime juice
    • Chipotle peppers in adobo sauce
    • Fresh garlic

    Spice Blend Measurements

    SpiceQuantity
    Chili powder2 tablespoons
    Cumin1 teaspoon
    Oregano1 teaspoon
    Black pepper1/2 teaspoon
    Salt1 teaspoon

    Marination Time Guidelines

    Marination is key for flavor and tender meat. Here are the expert times:

    • Thin cuts (skirt/flank steak): 2-4 hours
    • Thicker cuts: Up to 8 hours
    • Maximum recommended time: 8 hours in refrigerator

    Pro tip: Always marinate in a sealed container. Never reuse marinade that touched raw meat to avoid bacteria.

    Selecting and Preparing Your Beef Cut

    Choosing the right beef cut is key for a great spicy meat dish. Your steak choice can make or break the recipe. So, let’s explore how to pick the perfect cut.

    For a Chipotle-style steak, consider these top cuts:

    • Flank steak (recommended primary choice)
    • Skirt steak
    • Flat iron steak
    • Sirloin tip

    When picking your beef, look for cuts with minimal visible fat and even thickness. A 1.5 to 2-pound cut is ideal for home cooking.

    Beef CutFlavor ProfileTenderness
    Flank SteakRich, BeefyMedium
    Skirt SteakIntense FlavorLess Tender
    Flat IronRobustVery Tender

    For your chosen cut, trim excess fat, ensure even thickness, and cut against the grain. This ensures maximum flavor and tenderness in your spicy meat.

    Pro tip: Let your steak rest at room temperature for 30-40 minutes before seasoning. This step improves flavor and ensures even cooking, making your dish restaurant-quality.

    Step-by-Step Cooking Instructions

    To make your grilled steak into a top-notch chipotle steak, you need to be precise and skilled. The right cooking method can turn your meat into a dish that will wow everyone. It’s a recipe that will impress even the pickiest eaters.

    Preparing Your Cooking Surface

    Your cooking surface is key to a perfect chipotle steak. It doesn’t matter if you’re using a cast-iron skillet or an outdoor grill. The important thing is to prepare it well:

    • Preheat your cooking surface to about 450°F
    • Make sure the surface is clean and lightly oiled
    • Use 2 teaspoons of olive oil for even heat

    Temperature and Timing Guide

    Knowing the right cooking time and temperature is crucial for a perfectly grilled steak:

    1. Cook for 4-6 minutes per side for medium/medium-well doneness
    2. Target internal temperature: 145°F
    3. Let it rest for 3 minutes after cooking

    Achieving the Perfect Sear

    The secret to a great grilled steak is a beautiful, caramelized outside and a juicy inside. Pro tip: Don’t move the steak too much while cooking. This helps create a rich, flavorful crust.

    Slice your chipotle steak into thin 1/4″ to 1/2″ pieces. This makes it tender and looks great. Each bite will be full of flavor and perfectly cooked.

    Mastering the Chipotle Steak Seasoning Blend

    Making the perfect seasoning blend is key for true mexican cuisine. Your homemade chipotle steak will shine with the right spices. These spices should bring out the best of tex-mex flavors.

    Here are the main ingredients for your seasoning blend:

    • Dried chipotle peppers – 2 tablespoons (provides smoky heat)
    • Ground cumin – 1 tablespoon (adds earthy warmth)
    • Dried oregano – 1 teaspoon (brings herbal notes)
    • Smoked paprika – 1 tablespoon (enhances depth)

    Toasting your spices before mixing can make them taste better. Just heat the spices in a skillet for 30-60 seconds until they smell great. This step makes your steak taste more vibrant.

    Adjusting the spice level is easy. For more heat, add cayenne or jalapeños. For less heat, use less chipotle pepper. Making your own seasoning blend lets you tailor it to your taste.

    Pro tip: Keep your seasoning blend in an airtight container. It will stay flavorful for 3-6 months. This way, your steak will always taste great.

    Serving Suggestions and Pairings

    Your Chipotle steak is a versatile protein that can change up your meals. It’s perfect for a quick dinner or a big weekend meal. This recipe offers many serving options that will please your taste buds.

    This steak is great because it can be used in many ways. You can make delicious dishes that go beyond just steak. Your burrito filling and fajita ingredients will shine in different dishes.

    Traditional Mexican Sides

    Make your steak even better with authentic Mexican sides. These sides bring out the rich flavors:

    • Mexican rice with cilantro
    • Refried beans
    • Grilled corn with chili lime seasoning
    • Pico de gallo salsa
    • Warm black beans

    Build-Your-Own Burrito Bowl Options

    Set up a burrito bowl station for a fun dining experience. Your guests can choose their favorite toppings:

    • Chopped fresh cilantro
    • Diced red onions
    • Sliced avocado
    • Shredded cheese
    • Sour cream
    • Lime wedges

    Your Chipotle steak can be turned into tacos, quesadillas, or a low-carb protein. The secret is to try different ways to serve it. This keeps your meals exciting and tasty.

    Storage Tips and Leftover Ideas

    Your tasty marinated beef doesn’t have to end after one meal. Storing it right can let you enjoy it for days. This way, you keep the flavor and ensure food safety.

    Here’s how to store your leftover Chipotle steak:

    • Put the steak in an airtight container
    • Refrigerate it within two hours of cooking
    • Eat it within 3-5 days for the best taste and quality

    Pro tip: Slice the steak before refrigerating. This makes reheating and serving easier.

    To reheat your leftover marinated beef, follow these steps:

    1. Heat a skillet on medium-low
    2. Cook for 2-3 minutes on each side
    3. Make sure it reaches 110°F inside

    “Leftover steak is a culinary canvas waiting to be transformed!” – Home Cooking Enthusiast

    There are many ways to use leftover steak:

    • Make steak salads with fresh greens
    • Enjoy steak and eggs for breakfast
    • Try steak tacos or quesadillas
    • Make steak sandwiches with your own sauce

    If you want to keep it longer, freeze your cooked Chipotle steak for up to 2 months. Use freezer-safe packaging to avoid freezer burn.

    Nutritional Information and Health Benefits

    Your homemade Chipotle steak is more than just tasty. It’s also packed with nutrients that help you stay fit and healthy. A serving has about 371 calories and 49 grams of protein. This makes it great for building and repairing muscles.

    The spicy meat has many nutritional benefits:

    • High-quality protein for muscle maintenance
    • Essential amino acids for body repair
    • Low carbohydrate content
    • Nutrient-dense ingredients

    Beef is full of important nutrients like zinc, iron, and vitamin B12. These help with metabolism, carrying oxygen, and keeping energy up. The spices in the marinade also have health perks, like fighting inflammation.

    For the best nutrition, try these with your Chipotle steak:

    1. Roasted vegetables
    2. Brown rice
    3. Black beans
    4. Fresh salsa

    These sides turn your protein-rich meal into a full, nutritious meal. It’s perfect for anyone looking to improve their health.

    Conclusion

    Making a chipotle steak at home is more than a recipe. It’s a journey into Mexican cuisine that brings top-notch flavors to your kitchen. With just 30-40 minutes, you can turn a simple pound of flank steak into a delicious meal for 3-4 people.

    Your homemade chipotle steak is super versatile. You can make tacos, burrito bowls, or enjoy it on its own. The mix of cumin, paprika, and chili makes every bite full of bold, vibrant flavors.

    Cooking is all about trying new things and finding what you like. You can tweak the spice, add different toppings, or change the chipotle crema to your taste. This recipe’s beauty is in how you can make it your own and enjoy the process.

    We encourage you to make this chipotle steak recipe your favorite dish. Share your creations, exchange cooking tips, and feel proud of making a restaurant-quality meal at home. Your cooking journey begins now!

    FAQ

    What cut of beef works best for Chipotle Steak?

    Flank steak is the top choice for Chipotle Steak. It has great flavor and tenderness. Skirt steak or sirloin are also good, as they soak up marinades well.

    How long should I marinate the steak?

    Marinate the steak for 2-4 hours for the best flavor. Even 30 minutes will add some taste. But, marinating overnight is best, just don’t go over 24 hours to avoid meat breakdown.

    Can I make this recipe spicier or milder?

    Yes! You can make it spicier by adding more chipotle peppers or chili powder. For a milder taste, use less spicy ingredients or mild chili powder.

    What are the best ways to serve Chipotle Steak?

    Chipotle Steak is great in burrito bowls, tacos, fajitas, quesadillas, and salads. Set up a topping bar with rice, beans, salsa, guacamole, and cheese.

    How do I store leftover Chipotle Steak?

    Keep leftover steak in an airtight container in the fridge for 3-4 days. Reheat it in a skillet with a bit of oil. You can also freeze it for up to 3 months.

    Is Chipotle Steak a healthy meal option?

    Chipotle Steak is rich in protein and can be part of a healthy diet. It’s packed with nutrients and can be made healthier with veggies and controlled portions. A serving has about 200-250 calories and 20-25 grams of protein.

    Can I use a different cooking method if I don’t have a grill?

    Yes! You can cook Chipotle Steak in a cast-iron skillet, griddle, or broiler. Just make sure to get a good sear and cook it to your liking.

    What are some good side dishes to serve with Chipotle Steak?

    Serve it with Mexican rice, black beans, pico de gallo, street corn, guacamole, and roasted veggies. These sides match the bold flavors of the steak perfectly.

    What is your rating for the recipe?

  • Steak And Potatoes Recipe

    Growing up, the sound of beef hitting a hot skillet was magical. The smell of a perfectly cooked ribeye and crispy potatoes meant a special meal was coming. Steak and potatoes is more than a meal; it’s a tradition that brings families together.

    This classic combo is not just about food. It’s a culinary journey that turns simple ingredients into a memorable dinner. Whether it’s a weeknight dinner or a special occasion, steak and potatoes are always a hit.

    From tender New York Strip to hearty beef cuts, this recipe will boost your cooking skills. You’ll make a restaurant-quality meal in your own kitchen. Get ready to learn how to make a perfectly balanced steak and potatoes dish that will wow everyone.

    Essential Ingredients for the Perfect Steak and Potatoes

    Creating a memorable steak and potatoes dish starts with selecting the highest quality ingredients. Your culinary journey begins with understanding the key components that transform an ordinary meal into an extraordinary dining experience.

    Choice Cuts of Steak

    When selecting your steak, filet mignon stands out as a premium choice. This tender cut offers exceptional flavor and a melt-in-your-mouth texture that elevates any meal. Other excellent options include:

    • Ribeye – rich and marbled
    • New York Strip – robust flavor
    • Sirloin – lean and flavorful

    Potato Varieties and Selection

    Potatoes play an equally crucial role in your dish. Whether you prefer mashed potatoes or elegant potatoes au gratin, choosing the right variety makes all the difference:

    • Yukon Gold – creamy and buttery
    • Russet – perfect for crispy edges
    • Red potatoes – waxy and firm

    Seasonings and Aromatics

    The right seasonings transform good ingredients into an unforgettable meal. Essential spices include:

    • Garlic powder
    • Kosher salt
    • Black pepper
    • Paprika
    • Fresh herbs like rosemary and thyme

    “Great cooking is about ingredients and how you combine them.” – Wolfgang Puck

    Preparing Your Meat and Potatoes for Cooking

    Getting your beef and baked potatoes ready for cooking is key. Start by letting your steak come to room temperature about 30 minutes before cooking. This ensures even cooking and a tender result.

    For the perfect beef, mix a strong seasoning blend. Use:

    • 2 teaspoons garlic powder
    • 2 teaspoons onion powder
    • 2 teaspoons Italian seasoning
    • 2 teaspoons paprika
    • 3 teaspoons salt

    When prepping baked potatoes, wash and dry them well. For a crispy exterior, try parboiling. Boil potato wedges for 5-6 minutes before seasoning. This method adds a great texture that goes well with your beef.

    Beef lovers, here’s a tip: Mix 1 tablespoon of soy sauce with olive oil for a marinade. Let your steak sit in it for at least 30 minutes. This boosts flavor. The prep time is about 45 minutes, making sure your beef and potatoes are ready to cook.

    Remember, proper preparation is the secret to a mouthwatering beef and potato dish!

    Garlic Butter Sauce: The Secret Ingredient

    Take your steak and potatoes to the next level with a delicious steak sauce. A well-made garlic butter can make your dish unforgettable. It adds depth and richness that will wow everyone.

    Making the Perfect Garlic Butter

    To make a tasty steak sauce, you need the right ingredients. Here’s a simple recipe for garlic butter that will make your steak shine:

    • 6 tablespoons unsalted butter, softened
    • 2 tablespoons fresh chopped parsley
    • 2 tablespoons minced garlic
    • 1 teaspoon coarse salt

    Herb Combinations for Enhanced Flavor

    Try different herb mixes to find your favorite steak sauce. Here are some classic options:

    • Rosemary and Thyme: Earthy and robust
    • Basil and Oregano: Mediterranean-inspired
    • Chives and Dill: Light and fresh

    Storage Tips for Compound Butter

    Storage LocationDurationRecommended Conditions
    Refrigerator1 weekWrapped in plastic wrap
    Freezer3 monthsSealed in airtight container

    Pro tip: Roll your compound butter into a log using parchment paper. This makes it easy to portion and store. Your homemade steak sauce will be ready to enhance any meal anytime.

    One-Skillet Steak and Potatoes Method

    Learning the one-skillet steak and potatoes method can make your cooking look like a pro’s. It’s great because it tastes amazing and is easy to clean up. This is perfect for those who are always on the go.

    To start, you need a 12-inch cast iron skillet. This size is best for cooking steak and potatoes just right. You’ll need to control the heat and timing to get the steak seared and the potatoes crispy.

    Cooking Steps

    1. Prep your 1.5 lbs sirloin steak by cutting into 1-inch cubes
    2. Heat 2 tablespoons of avocado oil in the skillet
    3. Sear steak for 3-4 minutes without stirring
    4. Remove steak and cook parboiled Yukon Gold potatoes
    5. Return steak to skillet and finish with garlic butter

    Cooking time is key for a perfect dish. You’ll need about 15 minutes. Steak searing takes 3-4 minutes, and potatoes browning about 8 minutes.

    Skillet Cooking Technique

    The secret to this method is cooking steak and potatoes in the same skillet. This way, the pan’s flavors enhance the taste of your food. It makes the dish richer and more complex.

    “The one-skillet method is a game-changer for home chefs looking to simplify cooking while maximizing flavor.” – Culinary Expert

    IngredientQuantityCooking Time
    Sirloin Steak1.5 lbs3-4 minutes per side
    Yukon Gold Potatoes3 medium8 minutes total
    Garlic Butter2 tablespoonsFinal 1-2 minutes

    By following these steps, you’ll make a delicious steak and potatoes dish. It’s impressive and easy to make.

    Professional Tips for Cooking Times and Temperature

    Mastering the art of cooking beef and baked potatoes requires precision and understanding of heat management. The right techniques can transform an ordinary meal into a culinary masterpiece.

    When preparing beef, temperature control is critical. Experts recommend bringing your steak to room temperature before cooking – typically 20-30 minutes on the counter. This ensures even cooking and exceptional flavor development.

    Steak Doneness Guide

    Different levels of beef doneness require specific internal temperatures:

    • Rare: 125°F
    • Medium Rare: 135°F
    • Medium: 145°F
    • Medium Well: 150°F
    • Well Done: 160°F

    Potato Cooking Techniques

    For perfectly baked potatoes, use an oven temperature between 400-425°F. Cooking times vary based on potato size, typically ranging from 45-60 minutes. Your potatoes are ready when they’re fork-tender and the skin is crispy.

    Temperature Control Tips

    Professional chefs recommend using a meat thermometer for precise results. When cooking beef, aim for high heat between 450-500°F to achieve an excellent sear. Remember that steaks continue cooking after removal from heat – a phenomenon known as carryover cooking.

    “The secret to perfect beef is patience and precision” – Chef Adrianne Calvo

    By following these professional tips, you’ll elevate your beef and baked potatoes from simple meal to restaurant-quality dining experience.

    Variations of Classic Steak and Potatoes

    Exploring new ways to make steak and potatoes can change your dinner game. Whether it’s for a quick weeknight meal or a special occasion, these creative twists will impress. They’ll also boost your cooking skills.

    Surf and turf fans can try exciting new ways to prepare their dishes. These methods mix classic tastes with fresh techniques. Here are some tasty options:

    • Steak and Potato Foil Packets: Great for camping or fast outdoor meals
    • Hearty steak and potato soup for chilly winter evenings
    • Fusion-style steak and potato tacos with fresh toppings

    Adding grilled vegetables to your steak and potatoes can make them even better. Try these tasty pairings:

    1. Grilled zucchini and bell peppers with your steak
    2. Roasted asparagus with herb-seasoned potatoes
    3. Charred corn and potato medley as a vibrant side dish

    For a taste of the world, try international seasonings and cooking methods. From Korean marinades to Mediterranean herb rubs, your steak and potatoes can take you on a global journey.

    Pro tip: Always let your steak rest for 5-10 minutes after cooking. This ensures it stays flavorful and tender.

    Serving Suggestions and Pairings

    Enhancing your steak and potatoes meal is more than just the main dish. The right sides and wine pairings can make your meal unforgettable. Choosing the best side dishes and wines will take your dining experience to the next level.

    Wine Pairing Recommendations

    Finding the right wine can really boost your steak dinner. Full-bodied red wines like Cabernet Sauvignon and Malbec match beef’s rich flavors perfectly. Here are some top wine picks:

    • Cabernet Sauvignon – perfect for ribeye steaks
    • Malbec – great with sirloin
    • Pinot Noir – excellent for leaner cuts

    Side Dish Options

    Grilled vegetables are a fantastic side for your steak and potatoes. They add nutrition and flavor:

    • Grilled Romaine Wedge with Caesar dressing
    • Smoked Corn on the Cob with wood chip infusion
    • Caprese Asparagus – ready in just 30 minutes
    • Fiesta Corn Salad with various vegetables

    For a full meal, try adding a fresh summer couscous salad or a vibrant tomato salad. These sides not only go well with your main dish but also add color and nutrients to your plate.

    Pro tip: Experiment with different grilled vegetables to find your perfect combination!

    Storage and Reheating Instructions

    Keeping your steak and potatoes tasty means storing and reheating them right. With the right steps, your leftovers can still be mouthwatering.

    Here’s how to store your steak and potatoes:

    • Use an airtight container for refrigeration
    • Store in the refrigerator for up to 3 days
    • Keep steak and potatoes separate to maintain texture

    Reheating your steak and potatoes needs care to avoid overcooking. You can use several ways to warm your meal:

    1. Stovetop Method:
      • Use an oiled pan
      • Heat over medium-low temperature
      • Warm for 8-10 minutes
    2. Oven Technique:
      • Preheat to 350°F
      • Place steak and potatoes on a baking sheet
      • Reheat for 8-10 minutes

    Pro tip: Let your steak and potatoes come to room temperature before reheating. This keeps their texture and prevents uneven heating.

    Quick transformation: Turn leftover steak and potatoes into a tasty hash or hearty salad. It’s a great way to reduce waste and enjoy a new dish.

    Nutritional Information and Portion Control

    Knowing the nutritional value of beef and potatoes is key to making smart food choices. A standard beef serving is packed with important nutrients. It also helps keep portion sizes in check.

    Beef is a great source of protein, offering many health benefits. When cooking your steak, follow these portion guidelines:

    • Adult protein portion: 90g (comparable to a deck of cards)
    • Recommended beef serving: 3-4 ounces per meal
    • Ideal potato serving: 175g (three egg-sized potatoes)

    Here’s what you get from a typical beef and potato meal:

    • Protein: About 25-30g
    • Calories: Around 365 kcal
    • Fat: 15-20g
    • Carbohydrates: 30-35g

    To eat healthily, balance beef with veggies and choose leaner cuts. Stick to portion sizes that fit your diet and fitness goals.

    Pro tip: Use a kitchen scale to measure precise portions and maintain nutritional consistency.

    Conclusion

    Perfecting your steak and potatoes recipe is all about finding the right balance. It’s about flavors, techniques, and what you like best. With just 2 pounds of sirloin steak and 4 large russet potatoes, you can make a meal that’s truly unforgettable.

    Steak and potatoes are more than just dinner. They are a classic American comfort food tradition. By trying different cooking methods and learning about temperature control, you can make dishes that taste like they’re from a restaurant. You can also make the steak to your liking, whether it’s rare, medium-rare, or well-done.

    Your journey to mastering steak and potatoes is just starting. Try new herb combinations and different cooking techniques. Don’t be afraid to add your own twist to this timeless dish. Remember, the more you practice, the better you’ll get. And with each try, you’ll grow to love this classic meal even more.

    We encourage you to use these tips and start cooking. Share your cooking stories with your loved ones. And enjoy the tasty results of your new skills.

    FAQ

    What are the best cuts of steak for this recipe?

    Ribeye and filet mignon are great for steak and potatoes. Ribeye has lots of flavor from its marbling. Filet mignon is tender and lean. Pick what you like best for taste and texture.

    How do I achieve the perfect steak doneness?

    Use a meat thermometer for the right temperature. Rare is 125°F, medium-rare 135°F, medium 145°F, and well-done 160°F. Let the steak rest for 5-10 minutes to keep it juicy and flavorful.

    What are the best potato varieties for this recipe?

    Yukon Gold, Russet, and Red potatoes are top picks. Yukon Golds are creamy, Russets are crispy, and Red potatoes are versatile. Choose based on how you like your potatoes – mashed, au gratin, or roasted.

    How can I make a simple garlic butter sauce?

    Mix softened butter with garlic, herbs, salt, and pepper. Let it sit at room temperature to blend flavors. You can make this butter ahead of time and keep it in the fridge for up to a week.

    What wines pair well with steak and potatoes?

    Full-bodied red wines are perfect. Cabernet Sauvignon, Malbec, and Syrah match beef’s rich flavors. Pinot Noir is a lighter choice for leaner cuts. Wine’s tannins enhance the meal’s richness.

    How do I store and reheat leftover steak and potatoes?

    Keep leftovers in an airtight container in the fridge for 3-4 days. Reheat in the oven at 250°F to avoid drying out. For potatoes, add butter or oil to keep them moist. Avoid microwaving to prevent toughness.

    Can I make this dish healthier?

    Yes! Choose lean cuts like sirloin or flank steak. Control portions and add more veggies. Grill or roast veggies, use herbs for flavor, and use less oil. This makes the dish healthier without losing flavor.

    What are some creative variations of steak and potatoes?

    Add shrimp or scallops for surf and turf. Try steak and potato tacos or a hearty soup. Grill in foil packets or use international flavors like chimichurri or Asian marinades. These ideas add variety to the classic dish.

    What is your rating for the recipe?

  • Blueberry Cheesecake Cake

    Every home baker dreams of making a dessert that turns a simple moment into something special. The blueberry cheesecake is that magic—a creamy treat that mixes the deep taste of cheesecake with the fresh pop of blueberries.

    Imagine a dessert with layers of pure delight: a soft white cake base, a creamy cheese center, and a blueberry swirl that excites your taste buds. It’s not just another dessert; it’s a journey of flavors waiting to start in your kitchen.

    Get ready to take your baking to the next level and make a dessert that will wow everyone. Whether it’s for a special event or just because, this blueberry cheesecake cake is your key to dessert bliss.

    The Ultimate Guide to Blueberry Cheesecake Creation

    Making the perfect blueberry cheesecake is an art. It mixes precision, passion, and tasty ingredients. Your journey starts with knowing the key parts that make this dessert special.

    Getting into baked treats means knowing ingredients and techniques. Let’s look at what makes this dessert stand out.

    Understanding the Layered Components

    A blueberry cheesecake is more than a dessert. It’s a mix of textures and tastes. The goal is to make layers that work well together:

    • Graham cracker crust foundation
    • Creamy cream cheese filling
    • Fresh blueberry layer
    • Optional crumble topping

    Essential Ingredients Overview

    Choosing top-notch ingredients is key for great results. You’ll need:

    Ingredient CategoryRecommended Quantity
    Cream Cheese24 oz (750g)
    Fresh Blueberries3 cups
    Granulated Sugar1.5 cups (300g)
    Large Eggs4 eggs

    Equipment Requirements

    You’ll need these tools for baking:

    1. 8-inch round springform pan
    2. Stand mixer or hand mixer
    3. Measuring cups and spoons
    4. Parchment paper
    5. Mixing bowls

    “Precision in baking is an art—measure twice, bake once!”

    With these basics, you’re set to start your blueberry cheesecake journey. You’ll turn simple ingredients into a dessert that wows everyone.

    A Perfect Blend of Cake and Cheesecake Textures

    Making the perfect blueberry cheesecake is all about balancing textures. It starts with knowing how each layer works together. This creates a dessert that’s unforgettable.

    The secret to this dessert’s charm is its unique texture. You’ll need to focus on two key parts:

    • Moist Blueberry Cake Layer: A soft crumb that’s a joy to bite into
    • Creamy Cheesecake Topping: Smooth and velvety, it melts in your mouth

    Getting the texture just right is crucial. The blueberry cake should be light and fluffy. Meanwhile, the cheesecake should be rich and dense. Bakers use special techniques and temperatures to achieve this.

    Layering your ingredients with care is essential. This way, every bite combines the best of both worlds. It’s a dessert that will please both cake and cheesecake fans.

    Pro tip: Let your ingredients reach room temperature before mixing to ensure the smoothest possible texture.

    By focusing on these texture details, you’ll turn a simple dessert into a masterpiece. It will wow anyone who tries it, satisfying their taste buds and impressing them.

    Essential Ingredients for Bakery-Quality Results

    To make amazing blueberry treats, picking the right ingredients is key. Your dessert’s success comes from using top-notch parts. These parts make your cream cheese delights go from good to great.

    Premium Cream Cheese Selection

    Great cheesecakes start with the best cream cheese. Choose full-fat, room-temperature blocks from trusted brands. Don’t go for low-fat or whipped types. They can mess up the texture and taste.

    • Use Philadelphia or Kraft cream cheese blocks
    • Ensure cream cheese is at room temperature (65-70°F)
    • Always use fresh, unopened packages

    Fresh vs. Frozen Blueberries Guide

    Choosing the right blueberries is crucial for taste and look. Both fresh and frozen have their perks. But, each adds something special to your cheesecake.

    Blueberry TypeProsCons
    Fresh BlueberriesVibrant color, intense flavorSeasonal availability, more expensive
    Frozen BlueberriesAvailable year-round, consistent sizeMay release more liquid during baking

    Additional Key Components

    Ingredients beyond cream cheese and blueberries are important too. They make your dessert stand out:

    1. Greek yogurt for extra creaminess
    2. Fresh lemon juice for brightness
    3. High-quality vanilla extract
    4. Granulated sugar for sweetness

    By picking each ingredient with care, you’ll create a dessert that’s truly special. It will impress everyone who tries it.

    Step-by-Step Baking Instructions

    Making the perfect blueberry cheesecake cake needs care and patience. It turns simple ingredients into a special dessert that will wow your loved ones.

    First, heat your oven to 350°F. Getting ready is important for these tasty treats. Make sure you have all your ingredients and tools ready before you start.

    1. Prepare the springform pan by greasing it thoroughly
    2. Create a graham cracker crust using 18 graham cracker sheets
    3. Mix the cream cheese filling with precise measurements
    4. Layer the cake batter and cheesecake mixture carefully

    Layering is key for a stunning marbled look. Pour the blueberry cake batter first, then add the cheesecake mixture gently. Use a knife to make soft swirls for a beautiful look.

    Baking times are very important. Bake for 65-70 minutes, watching for these signs:

    • The center should be slightly jiggly but set
    • Edges should be golden brown
    • A toothpick inserted near the center should come out mostly clean

    Let the cake cool slowly after baking. This step is crucial to avoid cracks and keep the cheesecake creamy.

    Pro tip: Let the cake rest in the oven with the door slightly cracked for 30 minutes after baking. This helps prevent cracks and keeps the cake’s texture smooth and luxurious.

    Mastering the Cream Cheese Layer

    Creating cream cheese delights needs precision and understanding. Your blueberry cheesecake cake’s success depends on perfecting the cream cheese layer. It’s a key part of creamy confections in artisanal baking.

    The secret to great cream cheese texture starts with preparing your ingredients. Make sure your cream cheese is at room temperature for at least 1 hour before mixing. This step is crucial for a smooth, lump-free mix.

    Temperature Control Tips

    • Use cream cheese at exactly 70°F (21°C)
    • Never use cold cream cheese directly from refrigerator
    • Let cream cheese sit out 60-90 minutes before mixing

    Achieving Perfect Consistency

    Beat your cream cheese with a stand or hand mixer on medium speed. Stop when it becomes silky and uniform. Be careful not to overmix, as it can lead to cracking.

    Preventing Common Issues

    1. Always scrape mixer sides to incorporate all ingredients
    2. Use gentle folding techniques
    3. Avoid rapid temperature changes

    “Patience transforms good baking into great baking” – Professional Baker’s Insight

    Remember, cream cheese layers need gentle handling. Your aim is a smooth, creamy texture. This will make your blueberry cheesecake cake stand out as a professional-quality dessert.

    Blueberry Integration Techniques

    Making the perfect blueberry treats needs careful mixing of fruit into your dessert. The right way to add blueberries can turn a simple cake into a feast for the eyes and taste buds.

    To add blueberries to your cake mix, follow these key steps:

    • Gently fold fresh or thawed blueberries into the batter
    • Coat berries lightly in flour to prevent sinking
    • Distribute berries evenly throughout the mixture
    • Reserve some berries for topping before baking

    Here are some ways to spread blueberries for the best results:

    TechniqueBenefits
    Gentle FoldingPrevents berry crushing, maintains batter structure
    Flour CoatingReduces berry sinking, ensures even distribution
    Layered PlacementCreates visually appealing berry swirls

    Pro tip: Use room temperature blueberries for best integration and minimal batter disruption. Your aim is to mix them in a way that highlights their natural beauty.

    Mastering blueberry integration elevates your dessert from simple to spectacular!

    Creating the Perfect Lemon Cream Cheese Glaze

    Take your blueberry cheesecake cake to the next level with a luxurious lemon cream cheese glaze. This finishing touch will make your dessert look and taste like it was made by a pro.

    Glaze Consistency Secrets

    Getting the glaze just right is all about precision. You need to find the right mix of liquid and powdered ingredients. This will give you a smooth, pourable glaze that makes your cake look amazing.

    • Use fresh lemon juice for the brightest flavor
    • Aim for a consistency that flows but doesn’t run completely off the cake
    • Start with small liquid additions to control thickness

    Expert Application Methods

    How you apply the glaze can really make your cake stand out. Here are some pro tips to get a stunning finish:

    1. Drizzle from the center, allowing natural drips
    2. Use a squeeze bottle for precise control
    3. Gently spread with an offset spatula
    IngredientQuantityPurpose
    Cream Cheese½ cupCreamy base
    Powdered Sugar1 cupSweetness and thickness
    Lemon Juice3-4 tablespoonsFlavor and consistency

    With these tips, you’ll make a glaze that’s not just delicious but also looks amazing. Your blueberry cheesecake cake will be a true masterpiece.

    Storage and Serving Recommendations

    Your delicious blueberry cheesecake needs careful storage to keep its amazing taste and texture. After making this sweet treat, it’s important to handle it right to keep its quality.

    Refrigeration Guidelines

    Chilling your blueberry cheesecake is key for the right consistency. Here are some important storage tips:

    • Refrigerate for at least 6 hours before serving
    • Cover tightly with plastic wrap or aluminum foil
    • Store in the coldest part of your refrigerator

    Serving Recommendations

    For the best experience, follow these serving tips:

    1. Remove cheesecake from refrigerator 15-20 minutes before serving
    2. Use a heated knife for clean, precise slices
    3. Serve on chilled plates for optimal temperature

    Storage Duration

    Storage LocationMaximum Duration
    RefrigeratorUp to 5 days
    Freezer (Individual Slices)Up to 3 months

    Pro tip: Always store your blueberry cheesecake in an airtight container. This prevents it from absorbing fridge odors and keeps its flavor perfect.

    Troubleshooting Common Baking Challenges

    Making the perfect blueberry cheesecake cake can be tough, even for pros. Knowing the common problems in baking helps you tackle them with ease.

    When baking, texture and temperature issues can pop up. Learning how to fix these problems will make your baked goods always taste great.

    Texture Challenges and Solutions

    • Cracked cheesecake surface: Use a water bath during baking to maintain consistent moisture
    • Dry cake layers: Ensure precise measuring of ingredients and avoid overbaking
    • Runny cheesecake filling: Check baking powder freshness and use room temperature ingredients

    Baking powder is key for the right texture. Did you know that baking powder loses effectiveness after 6-12 months? Always replace it to get the best results in your desserts.

    Temperature control is vital in baking. Cheesecakes should bake at 350ºF for 45-55 minutes. Preheating your oven right helps leavening agents work well.

    Baking ChallengeSolution
    Uneven bakingRotate pan midway through baking
    Ingredient clumpingSift dry ingredients thoroughly
    Overmixing batterMix just until ingredients are combined

    Understanding these common issues will help you make amazing baked treats every time.

    Conclusion

    Making the perfect blueberry cheesecake is an art that needs both skill and love. You’ve learned how to turn simple ingredients into a beautiful dessert. This dessert will surely wow your family and friends.

    The key to success is balancing textures and flavors. The graham cracker crust, creamy filling, and blueberry sauce all matter. Remember, the more you bake, the better you’ll get.

    Baking is a journey filled with learning and tasty finds. Whether it’s for a big event or a cozy weekend treat, you’re ready. Use your new skills, try new things, and most of all, enjoy making something amazing.

    FAQ

    How long does it take to make a Blueberry Cheesecake Cake?

    Making this cake takes about 2 to 3 hours. This includes time for preparation, baking, and cooling. It ensures the cake and cheesecake layers set properly.

    Can I use frozen blueberries instead of fresh ones?

    Yes, frozen blueberries work well. Just thaw and drain them well to avoid extra moisture. Don’t thaw them completely to prevent color bleeding. Also, toss them in flour to stop them from sinking.

    How do I prevent my cheesecake layer from cracking?

    To avoid cracks, make sure your cream cheese is room temperature. Don’t overmix and bake in a water bath. Cool it slowly by turning off the oven and leaving the door open for an hour. This helps prevent sudden temperature changes.

    How long can I store the Blueberry Cheesecake Cake?

    Store it in an airtight container in the fridge for 3-5 days. For the best taste, eat it within 2-3 days. Always cover it to keep it fresh and prevent odors.

    Can I make this cake ahead of time?

    Absolutely! Bake the layers and prepare the cheesecake filling a day before. Assemble and glaze it, then refrigerate. Many find the flavors better after a day.

    Is it possible to make this cake gluten-free?

    Yes, use a gluten-free flour blend instead of regular flour. Make sure it includes xanthan gum. Use gluten-free ingredients and be careful to avoid cross-contamination.

    What can I do if my blueberries sink to the bottom of the cake?

    To stop blueberries from sinking, toss them in flour before adding to the batter. Fold them in gently and distribute them evenly. Using smaller berries can also help.

    Can I substitute the cream cheese with a low-fat alternative?

    Low-fat cream cheese can be used, but it changes the texture and flavor. Full-fat cream cheese is best for taste and texture. If you want to reduce calories, use reduced-fat cream cheese, but avoid fat-free.

    How do I know when the cake is perfectly baked?

    Check for these signs: the edges should pull away from the pan, the top golden, and a toothpick with a few moist crumbs. The cheesecake should be set but still slightly jiggly.

    Can I freeze the Blueberry Cheesecake Cake?

    Yes, freeze it for 1-2 months. Wrap it in plastic wrap and foil. Thaw in the fridge before serving. The texture of blueberries and glaze might change after freezing.

    What is your rating for the recipe?

  • Cream Of Wheat Recipes

    Imagine starting your day with a warm, comforting bowl of hot cereal. Cream of Wheat is more than just a breakfast porridge. It’s a journey of flavor, nutrition, and comfort that connects us across generations.

    Cream of Wheat is a canvas for culinary creativity. It’s perfect for a sweet treat or a savory dish. This versatile hot cereal easily adapts to your taste preferences.

    From classic to innovative recipes, Cream of Wheat is a nutritious base. Its smooth texture and ability to absorb flavors make it a favorite in kitchens everywhere.

    Understanding the History and Origins of Cream of Wheat

    The story of Cream of Wheat starts in North Dakota. It’s where farming and innovation came together to change breakfast forever. First made in 1893, it marked a big moment in American food history.

    At the World’s Columbian Exposition in Chicago, Cream of Wheat was first shown to Americans. Emery Mapes, a forward-thinking marketer, helped make it a hit across the country.

    North Dakota: The Birthplace of a Breakfast Icon

    In the late 1800s, North Dakota was the home of this new breakfast food. Despite facing big challenges, like the 1893 financial panic, the company kept going. Their first shipment to New York City was so exciting that they got orders for 50 more cases just 12 hours later.

    • Launched in 1893 at the World’s Columbian Exposition
    • Originated in North Dakota’s wheat-rich region
    • Pioneered by innovative food producers

    Evolution into a Breakfast Staple

    Soon, Cream of Wheat became a favorite across the nation. The brand’s smart marketing in magazines like Ladies Home Journal helped it become a staple in American homes.

    Nutritional Enhancement Through the Years

    The product kept getting better, adding enriched wheat farina for more nutrients. Big steps included “Enriched Quick Cream of Wheat” in 1939, which cooked faster, and Instant Cream of Wheat in 1958, ready in just 30 seconds.

    A breakfast innovation that changed American mornings forever!

    Essential Ingredients for Basic Cream of Wheat

    Making the perfect wheat cereal is all about choosing the right ingredients. These ingredients turn simple wheat semolina into a tasty breakfast. Your basic Cream of Wheat recipe needs a few key parts for a creamy, healthy meal.

    The main ingredients for a classic Cream of Wheat are:

    • Enriched wheat semolina
    • Whole milk or alternative milk options
    • Kosher salt
    • Pure vanilla extract (optional)
    • Unsalted butter

    Picking the right wheat cereal is key. Freshly milled flour has 75% more minerals than refined grains. This makes your choice important for nutrition. The type of wheat semolina affects the dish’s texture and taste.

    “The quality of ingredients determines the soul of your breakfast” – Culinary Wisdom

    When making your wheat cereal, think about these ingredient options:

    1. Traditional wheat semolina for a classic texture
    2. Instant wheat cereal for quick preparation
    3. Stone-ground options for a more rustic flavor

    Your milk choice is also important. Whole milk adds richness, but almond or oat milk can give unique flavors. A bit of salt and vanilla extract can make your Cream of Wheat truly special.

    Step-by-Step Cooking Instructions

    Making the perfect instant hot cereal needs care and focus. Whether you’re new to cooking or have experience, these steps will guide you to a smooth, tasty bowl of Cream of Wheat every time.

    Liquid-to-Cereal Ratio Mastery

    The secret to great instant hot cereal is the right liquid-to-cereal ratio. Here’s a simple guide:

    • Use 1 cup of liquid (water or milk) for every 3-4 tablespoons of Cream of Wheat
    • For a single serving, measure 3-4 tablespoons of instant hot cereal
    • Adjust liquid slightly for desired thickness

    Smooth Consistency Techniques

    It’s important to avoid lumps for a creamy instant hot cereal. Follow these stirring tips:

    1. Add salt to your liquid before introducing the cereal
    2. Pour Cream of Wheat gradually while continuously stirring
    3. Whisk constantly to break up potential clumps

    Temperature Control Strategies

    Controlling the heat is key for perfect instant hot cereal:

    Cooking MethodTotal TimeHeat Level
    Stovetop1-2.5 minutesMedium
    Microwave2-2.5 minutesHigh (with intervals)

    “The secret to perfect instant hot cereal is patience and constant attention.” – Breakfast Experts

    Pro tip: Stir at 30-second intervals during microwave cooking to distribute heat evenly and prevent scorching. Your instant hot cereal will emerge creamy, smooth, and ready to enjoy!

    Classic Sweet Toppings and Mix-ins

    Turn your breakfast porridge into a delightful treat with classic sweet toppings. These toppings make cream of wheat go from simple to spectacular. Finding the right mix of flavors can make your morning meal unforgettable.

    Here are some delicious mix-ins to make your cream of wheat irresistible:

    • Brown Sugar Bliss: Sprinkle 1-2 tablespoons of rich brown sugar for a caramel-like sweetness
    • Maple Magic: Drizzle pure maple syrup for a classic breakfast flavor
    • Fresh Fruit Fusion: Top with seasonal berries or sliced bananas
    Topping CategoryRecommended QuantityFlavor Profile
    Nuts1/4 cupCrunchy texture, nutty flavor
    Dried Fruits2-3 tablespoonsSweet, concentrated fruit flavor
    Spices1 teaspoonWarm, aromatic enhancement

    For extra nutrition, try adding chia seeds or Greek yogurt. These not only add flavor but also boost protein in your breakfast porridge.

    Creative cooks can try unique combinations like:

    1. Cinnamon and diced apples
    2. Cocoa powder and sliced almonds
    3. Honey and toasted coconut flakes

    The secret to great cream of wheat is balancing flavors. Keep the cereal’s smooth texture. Start with small amounts of toppings and adjust to your taste.

    Savory Cream of Wheat Variations

    Turn your usual hot cereal into a tasty journey with savory Cream of Wheat options. These dishes show how versatile whole grain wheat is. They offer exciting tastes that can make your meal better.

    Savory Cream of Wheat lets you get creative in the kitchen. You can make a filling and healthy meal with a few new ingredients.

    Cheese and Herb Combinations

    Add savory touches to your Cream of Wheat for more flavor. Here are some tasty mixes:

    • Cheddar cheese with fresh chives
    • Parmesan and rosemary blend
    • Goat cheese with thyme

    Protein-Rich Additions

    Make your Cream of Wheat more nutritious with protein-rich ingredients:

    1. Scrambled eggs mixed directly into the cereal
    2. Diced chicken or turkey
    3. Crumbled bacon or ham

    International Flavor Inspirations

    Try dishes from around the world to spice up your hot cereal:

    • Mexican-style: Add jalapeños, cotija cheese, and cilantro
    • Mediterranean: Incorporate olive oil, feta, and sun-dried tomatoes
    • Asian-inspired: Mix in soy sauce, green onions, and a soft-boiled egg

    Remember, Cream of Wheat is a great base for your creativity. Whether you like mild or strong flavors, these savory options will change how you enjoy hot cereal.

    Fresh Milled Wheat Alternative Recipe

    Making cream of wheat from fresh wheat semolina makes breakfast healthier. Using whole wheat berries keeps more nutrients in your food.

    Choosing the right wheat berries is key for great farina. Each wheat type has its own protein level:

    Wheat TypeProtein Content
    Einkorn18.2%
    Hard Red Spring15.4%
    Kamut14.7%
    Durum13.6%

    Your fresh milled wheat recipe needs just a few ingredients:

    • 1/2 cup whole wheat berries
    • 2 cups whole milk
    • 1/4 teaspoon salt

    Milling wheat requires careful settings. Use coarseness level 8 for the right semolina texture. Cook it slowly, stirring often to avoid lumps.

    Remember, freshly milled flour loses 45% of nutrients within 24 hours, so prepare and consume quickly!

    Add butter, maple syrup, or fresh fruits to make it even better.

    Dietary Modifications and Substitutions

    Enjoying enriched wheat farina doesn’t mean you have to limit your diet. If you have health concerns or want to try new things, Cream of Wheat can fit your needs.

    Those with special dietary needs can still enjoy this classic cereal. By making smart swaps, you can make a delicious breakfast that’s just for you.

    Gluten-Free Alternatives

    For those who can’t have gluten, there are great options:

    • Cream of Rice® cereal
    • Quinoa flakes
    • Corn-based hot cereals
    • Certified gluten-free oatmeal

    Dairy-Free Options

    Even without dairy, you can still enjoy great flavors. Try these milk substitutes:

    • Oat milk
    • Almond milk
    • Coconut milk
    • Soy milk

    Sugar-Free Variations

    Want to cut down on sugar? Try these natural sweeteners:

    • Stevia
    • Monk fruit extract
    • Cinnamon
    • Fresh fruit purees

    With these changes, you can make your enriched wheat farina your own. You keep its comforting taste and health benefits.

    Storage and Reheating Guidelines

    Keeping your breakfast porridge fresh is easy with the right storage tips. Leftover instant hot cereal stays delicious when stored correctly. Follow these simple steps to keep it fresh.

    For storing Cream of Wheat, pick an airtight container. This keeps out moisture and prevents contamination. Refrigeration is crucial to keep it fresh and safe. Your porridge stays good for up to five to seven days in the fridge.

    • Use glass or plastic containers with tight-fitting lids
    • Cool the cereal completely before refrigerating
    • Store in portions for easier reheating
    • Label containers with the date of preparation

    To reheat your cereal, warm it gently to keep it creamy. Pro tip: Add a bit of milk or water to avoid dryness and get the right consistency.

    Microwave reheating is convenient. Here’s how to do it:

    1. Place the cereal in a microwave-safe dish
    2. Add 1-2 tablespoons of liquid
    3. Heat in 30-second intervals
    4. Stir between each heating cycle
    5. Check temperature before serving

    Stovetop reheating is also great. Just warm it over low heat, stirring often and adding liquid as needed.

    Always ensure your reheated instant hot cereal reaches a safe temperature of 165°F to prevent any potential foodborne illness.

    Conclusion

    Your journey through Cream of Wheat recipes shows how versatile this hot cereal is. It can change your morning meals in amazing ways. With only 120 calories per serving, it’s a healthy start to your day.

    It’s packed with iron and calcium, making it a tasty and nutritious breakfast. Whether you like it sweet or savory, Cream of Wheat fits right in. It’s perfect for those watching their sugar intake and wanting a nutritious meal.

    Bodybuilders love it for its complex carbs. Families enjoy how easy it is to make it their own. Cream of Wheat is a go-to for breakfast, offering endless possibilities.

    Try the classic recipes or mix in international flavors. Cream of Wheat is always a reliable choice. Its quick prep, health benefits, and endless options mean you’ll never get tired of it.

    Start trying out different recipes and find your favorite way to enjoy it. We encourage you to share your unique Cream of Wheat creations. Join a community of food lovers who cherish this timeless breakfast tradition.

    FAQ

    What exactly is Cream of Wheat?

    Cream of Wheat is a hot cereal made from ground wheat semolina, also known as farina. It’s a smooth, creamy porridge-like breakfast food. It provides a warm, comforting meal rich in nutrients and is easily digestible for people of all ages.

    Is Cream of Wheat a healthy breakfast option?

    Yes, Cream of Wheat is a nutritious choice. It’s an enriched wheat farina that contains essential vitamins and minerals. These include iron, calcium, and B vitamins. The whole grain wheat base provides complex carbohydrates and can be a good part of a balanced diet.

    What’s the difference between instant and traditional Cream of Wheat?

    Traditional Cream of Wheat takes longer to cook and has a coarser texture. Instant Cream of Wheat is pre-cooked and processed into quick-cooking packages. The instant version cooks in 1-2 minutes, while traditional varieties require 5-10 minutes.

    Can I make Cream of Wheat without dairy milk?

    Absolutely! You can use various alternatives like almond milk, soy milk, oat milk, or water to prepare Cream of Wheat. Each alternative will slightly modify the taste and nutritional profile of your hot cereal.

    How long can I store prepared Cream of Wheat?

    Prepared Cream of Wheat can be refrigerated for 3-4 days in an airtight container. When reheating, you may need to add a little liquid to restore its original creamy consistency.

    Is Cream of Wheat gluten-free?

    No, Cream of Wheat is not gluten-free as it’s made from wheat. For those with gluten sensitivities, alternatives like Cream of Rice or gluten-free oatmeal are recommended.

    What are some creative ways to serve Cream of Wheat?

    You can enjoy Cream of Wheat both sweet and savory. Try topping it with fresh fruits, nuts, honey, or cinnamon for a sweet version. For a savory twist, add cheese, herbs, or even a poached egg.

    Can children eat Cream of Wheat?

    Yes, Cream of Wheat is an excellent food for children. It’s easy to digest, nutritionally fortified, and can be prepared with various toppings to make it appealing to kids.

    How can I prevent lumps when cooking Cream of Wheat?

    To prevent lumps, gradually whisk the Cream of Wheat into boiling liquid while stirring constantly. Maintain consistent stirring during the cooking process and add the cereal slowly to ensure a smooth texture.

    Can I prepare Cream of Wheat in advance?

    Yes, you can meal prep Cream of Wheat. Prepare a batch and store it in individual containers in the refrigerator. When ready to eat, reheat with a splash of milk to restore its creamy consistency.

    What is your rating for the recipe?

  • Gipfeli Recipe

    Every morning, the Swiss Alps wake up to the sun’s first light. Bakeries across Switzerland fill the air with the scent of fresh gipfeli. These pastries are more than just butter croissants. They are a key part of Swiss baking tradition.

    Imagine making these flaky, golden crescents in your kitchen. You can turn simple ingredients into a masterpiece. The gipfeli is not just a pastry; it’s a way to connect with Swiss baking history.

    This guide will show you how to make authentic Swiss pastry. You’ll learn the secrets of the perfect gipfeli. It will take your taste buds on a journey to the Swiss countryside.

    Introduction to Swiss Pastry Making

    Swiss viennoiserie is a delightful culinary tradition. It turns simple ingredients into extraordinary pastries. Your journey into traditional Swiss breakfast cuisine starts with understanding the rich heritage of these treats.

    The world of Swiss pastry making is fascinating. It’s a mix of technique, culture, and passion. Gipfeli, a key part of Swiss cuisine, shows the precision and artistry in Swiss baking.

    History of Swiss Viennoiserie

    Viennoiserie goes back to the 13th century. The kipferl was the early version of today’s croissants. Swiss bakers improved these techniques, making pastries that are now loved for breakfast.

    • 13th century: Kipferl emerges as an early pastry prototype
    • 1839: First documented croissant introduction in European bakeries
    • Late 19th century: Swiss bakers perfect lamination techniques

    Cultural Significance in Swiss Cuisine

    Gipfeli is more than a breakfast item. It’s a symbol of Swiss culinary excellence. These crescent-shaped pastries show the careful craftsmanship and attention to detail of Swiss food traditions.

    Regional Variations Across Switzerland

    Every Swiss region has its own twist on viennoiserie. From Zurich’s butter-rich pastries to Geneva’s delicate versions, these variations highlight the diversity of Swiss baking.

    The art of Swiss pastry making is a testament to culinary precision and cultural heritage.

    Essential Ingredients for Perfect Gipfeli

    Making great baked goods needs precision and top-notch ingredients. Gipfeli, a Swiss treat, requires picking the right parts for its flaky texture and deep taste.

    The key to amazing Gipfeli is choosing the best ingredients. Knowing each part’s role is crucial for making these tasty pastries.

    Key Ingredients Breakdown

    • High-protein flour (500 grams)
    • European-style cold butter (250 grams)
    • Active dry yeast (2 teaspoons)
    • Warm milk (250 ml)
    • Sugar (50 grams)
    • Salt (1 teaspoon)

    Ingredient Quality Matters

    Professional bakers know that ingredient quality makes all the difference. European-style butter, with more fat, gives Gipfeli its unique layers.

    IngredientQuantityPurpose
    Flour500gProvides structure and texture
    Butter250gCreates flaky, rich layers
    Yeast2 tspEnables dough rising

    Choosing high-quality ingredients is key for real Swiss bakery products. Your focus on picking the right ingredients will affect your Gipfeli’s taste and texture.

    Precision in ingredient selection is the secret to extraordinary pastry making.

    Optional Flavor Enhancers

    • Almond paste (100 grams)
    • Nutella (100 grams)
    • Seasonal fruit preserves

    Knowing each ingredient’s role turns your Gipfeli into a true masterpiece. Invest in quality ingredients, and your Swiss pastry will be filled with authentic flavor and perfect texture.

    Understanding Lamination Techniques

    Creating flaky pastry is all about mastering lamination. This process turns simple ingredients into amazing treats. It’s about how butter and dough layers create that perfect flaky texture.

    Professional bakers see lamination as both a science and an art. They fold butter into dough to make layers. These layers are what make pastries flaky and delicious.

    Butter Block Preparation

    Getting the butter block right is key for flaky pastry. Here are some important tips:

    • Use butter with 82-86% butterfat content
    • Chill butter block to 52-61°F before use
    • Shape butter into a uniform rectangular block
    • Refrigerate butter block for 20-30 minutes before lamination

    Folding Methods and Tips

    Learning to fold is crucial for better pastries. Different folds create different layer counts:

    1. 3-fold technique creates 9 layers
    2. 4-fold technique develops more complex layering
    3. 5-fold technique results in intricate layer structures

    Temperature Control Guidelines

    Temperature control is vital in lamination. Precise temperature control ensures your dough remains workable and your butter stays firm. Keep dough between 36-43°F and maintain proofing temperatures around 75-78°F for optimal results.

    The magic of flaky pastry lies in the delicate balance between butter and dough temperature.

    With practice and attention to detail, you’ll turn simple ingredients into amazing, layered pastries. These will impress even the most discerning bakery enthusiasts.

    Step-by-Step Gipfeli Preparation

    Making the perfect Swiss pastry needs care and patience. Start by getting top-notch ingredients and setting up a workspace for handling dough. Making Swiss pastry is like an art, turning simple things into a tasty treat.

    1. Prepare the Dough
      • Mix 500g all-purpose flour with active dry yeast
      • Add lukewarm milk, sugar, and salt
      • Knead for 8-10 minutes until smooth
    2. Lamination Process
      • Create a butter block using 250g cold butter
      • Perform 3 precise folding techniques
      • Chill dough between each fold for 30 minutes
    3. Shaping Techniques
      • Roll dough to 40cm diameter
      • Cut into 12 precise triangles
      • Shape each triangle into classic crescent form

    For the best gipfeli, control the temperature and use the right techniques. Keep the area cool during lamination for flaky layers. Let the dough rest between folds for a tender texture.

    Pro tip: Brush your shaped gipfeli with egg wash for a gorgeous golden finish. Let the pastries proof for 30-45 minutes. Then, bake at 200°C (390°F) for 15-18 minutes until golden.

    Mastering the Shaping Process

    Making the perfect butter croissant needs skill and care. Shaping the dough into a crescent is key. It’s an art that bakers practice to get right.

    • Roll the dough to 1/8 inch thick
    • Cut triangles with a base of 3-4 inches
    • Make sure each triangle is 6-7 inches long
    • Stretch the dough to form the curve

    Creating the Perfect Crescent

    Begin by rolling the triangle from the wide base to the point. Stretch the dough slightly to get the curves right. Keep the tension even for even baking.

    Common Shaping Mistakes

    Watch out for these common mistakes:

    1. Don’t overwork the dough to avoid toughness
    2. Make sure to roll tightly
    3. Stretch evenly to avoid misshapen pastries
    4. Give the dough enough rest time

    Professional Finishing Touches

    Enhance your Gipfeli with these expert tips. Brush with egg wash for a golden look. Let it rest for 30 minutes before baking for the best rise and texture.

    Pro tip: Cold butter and precise folding are the secrets to creating extraordinarily flaky Gipfeli.

    Proofing and Baking Guidelines

    Mastering proofing and baking is key to making top-notch bakery products. The success of your Gipfeli depends on controlling temperature and timing well during these stages.

    For proofing, aim for an ideal environment with certain conditions:

    • Temperature: Keep it between 75°F to 80°F
    • Humidity: Aim for 85%
    • Proofing time: It should be 1 hour 40 minutes to 1 hour 50 minutes

    To get the best results at home, make a warm proofing spot. Place your shaped Gipfeli in a place without drafts. You can use a makeshift proofing box by putting a pan of hot water (around 150°F) in the oven. This creates steam and keeps the area warm.

    Baking your Gipfeli needs careful attention to temperature and timing:

    • Preheat oven to 365°F
    • Space pastries 3-4 inches apart on baking sheet
    • Bake for about 25 minutes
    • Look for a golden-brown color

    Professional bakers suggest adding steam in the first 5-10 minutes of baking. This method helps get a crisp outside and a light, flaky inside. It makes your Gipfeli have that special delicate crunch.

    Pro tip: Seasonal kitchen temperatures can affect proofing times, so adjust your approach based on ambient conditions.

    Sweet and Savory Filling Options

    Exploring filling options can transform your traditional Swiss breakfast experience with Gipfeli. While classic versions are delightful on their own, experimenting with sweet and savory fillings adds exciting dimensions to this beloved Swiss cuisine staple.

    Traditional Swiss Fillings

    Swiss bakers have long embraced classic fillings that celebrate local ingredients. Traditional options include:

    • Nussgipfel: A rich filling made with ground hazelnuts, sugar, and cinnamon
    • Homemade fruit preserves like apricot or cherry jam
    • Swiss cheese and cold cuts for a savory twist
    • Butter and honey combinations

    Modern Flavor Combinations

    Contemporary Gipfeli fillings push culinary boundaries, offering innovative taste experiences. Exciting modern combinations include:

    • Smoked salmon with fresh chives
    • Pesto and roasted turkey
    • Raspberry and almond frangipane
    • Lemon and blueberry compote

    Seasonal Variations

    Seasonal ingredients breathe new life into Gipfeli, making them perfect for different times of year. Christmas versions might feature warm spices like cinnamon and nutmeg, while Easter variations tend to be sweeter and more buttery.

    Embrace the versatility of Gipfeli by experimenting with fillings that reflect the season and your personal taste preferences.

    Storage and Reheating Methods

    Keeping your homemade baked goods fresh is key. Your Gipfeli can stay tasty for days with the right storage and reheating. Follow these tips for your continental breakfast treats.

    Storage Techniques

    For the best taste, store your Gipfeli this way:

    • Room temperature storage: Keep in an airtight container for up to 2 days
    • Refrigerator storage: Wrap tightly and store for up to 1 week
    • Freezer storage: Place in a resealable freezer bag for up to 1 month

    Reheating Methods

    Bring back the fresh taste of your Gipfeli with these methods:

    Reheating MethodTemperatureTime
    Conventional Oven350°F5-7 minutes
    Toaster Oven350°F10 minutes
    Air Fryer300°F3-4 minutes
    MicrowaveLow Power20-30 seconds

    Pro tip: Watch your Gipfeli while reheating to avoid overcooking and keep their soft texture.

    Thawing Frozen Gipfeli

    For thawing frozen Gipfeli, follow these steps:

    1. Refrigerator thawing: Allow 12 hours
    2. Room temperature thawing: Approximately 1 hour
    3. Direct oven reheating from frozen: Add 2-3 extra minutes to standard reheating time

    By using these storage and reheating tips, your baked goods will stay delicious. They’ll be perfect for a fancy continental breakfast.

    Troubleshooting Common Issues

    Making perfect flaky pastry takes skill and practice. Even skilled bakers face challenges with making Gipfeli. This guide will help you solve common problems and improve your baking.

    Knowing about potential issues can make your baking better. It helps you make amazing Swiss pastries.

    Texture Challenges in Flaky Pastry

    Getting the right texture for your Gipfeli can be hard. Here are some tips to fix common texture issues:

    • Keep butter very cold while preparing
    • Use precise folding techniques
    • Keep the dough temperature consistent
    • Rest the dough between folding steps

    Baking Precision Techniques

    Baking needs careful attention. Common problems include:

    1. Uneven browning
    2. Undercooked centers
    3. Excessive spreading
    IssueSolution
    Uneven browningRotate baking sheet midway
    Undercooked centersLower oven temperature, extend baking time
    Excessive spreadingChill dough before baking

    Lamination Mastery

    Lamination is key for flaky pastry texture. Important things to remember include:

    • Maintain butter block temperature
    • Use consistent folding methods
    • Rest dough between turns
    • Avoid overworking the dough

    By using these troubleshooting tips, you’ll get better at making Gipfeli. You’ll make top-quality bakery products.

    Conclusion

    Your journey into Gipfeli has been a fun trip through Swiss pastry making. You’ve learned how to make these delicate crescents. This connects you to Swiss bakers for generations.

    Making Swiss pastry is more than just a recipe. It’s about getting the right mix of ingredients and techniques. You’ve learned how to make these pastries special, adding Swiss elegance to your kitchen.

    Keep practicing to get better at making Gipfeli. Each batch will help you improve. You’re now part of a tradition that values precision, flavor, and homemade joy.

    Keep exploring Swiss pastry with new fillings and techniques. Your Gipfeli journey is just starting. The possibilities are endless and delicious.

    FAQ

    What is the difference between Gipfeli and a traditional croissant?

    Gipfeli is a Swiss pastry similar to a croissant but with subtle differences. Both are flaky and buttery, but Gipfeli have a unique shape. They are made with a Swiss technique that sets them apart from French croissants.

    How difficult is it to make Gipfeli at home?

    Making Gipfeli is challenging, especially for beginners. It requires advanced baking skills in lamination techniques. With practice and patience, you can master making these delicate Swiss pastries at home.

    What type of butter works best for Gipfeli?

    European-style butter with a high fat content is best for Gipfeli. Look for butter with 82-85% fat content. This helps create the flaky layers and rich flavor of authentic Swiss pastries.

    Can Gipfeli be made in advance?

    Yes, you can prepare Gipfeli dough in advance. Store it in the refrigerator or freezer. Properly wrapped, the dough can be kept for several days. This allows for quick fresh-baked pastries.

    Are there gluten-free options for making Gipfeli?

    Making gluten-free Gipfeli is challenging. The specific protein structure needed for lamination is hard to replicate with gluten-free flours. However, some bakers experiment with alternative flours for similar results.

    What are some traditional Gipfeli fillings?

    Traditional Swiss Gipfeli are often served plain. But, they can be filled with jam, chocolate, or almond paste. Savory options include ham, cheese, or herbs that complement the buttery pastry.

    How do I store homemade Gipfeli?

    Store freshly baked Gipfeli in an airtight container at room temperature for 1-2 days. For longer storage, wrap them individually and freeze for up to a month. Reheat in an oven to restore their crispy texture.

    What is the key to achieving perfect flaky layers?

    The secret to perfect flaky layers is the lamination process. This involves creating thin layers of butter and dough through precise folding and rolling. It’s important to maintain consistent temperature and handle the dough minimally.

    Can I make Gipfeli without a stand mixer?

    While a stand mixer makes the process easier, you can make Gipfeli by hand. Traditional bakers often prefer hand-mixing for more control over the dough’s texture.

    What is the origin of Gipfeli in Swiss cuisine?

    Gipfeli originated in Switzerland as part of the viennoiserie tradition, influenced by Austrian baking. They became a staple of Swiss breakfast culture, representing the country’s rich culinary heritage.

    What is your rating for the recipe?

  • Snow Cream Recipe

    Winter turns ordinary snow into a magical canvas for creating a delightful frozen dessert. Imagine stepping outside after a fresh snowfall. Gather pristine white flakes and turn them into a delicious homemade ice cream in just 5 minutes. Snow cream isn’t just a recipe—it’s a childhood memory waiting to be rekindled.

    This simple snow cream recipe combines just 5 ingredients and 8 cups of fresh snow. It creates a delightful frozen treat that captures winter’s playful spirit. Whether you’re a kid or just young at heart, this homemade ice cream promises to turn a snowy day into a sweet adventure.

    What is Snow Cream and Its Origin

    Snow cream is a no-churn ice cream made from fresh winter snow. It’s a sweet treat that has amazed people for centuries. It turns natural snow into a magical dessert, all without eggs.

    The history of snow-based desserts is rich and varied. It spans hundreds of years, with roots in many cultures. Let’s dive into how this treat evolved from a simple snow mix to a winter favorite.

    Traditional Winter Dessert History

    Records show that snow-based desserts have a long history:

    • Whipped cream was called “snow cream” until the 17th century
    • Recipes for snow desserts date back to the 16th century in European cuisines
    • Early versions included dairy, sugar, and flavorings

    Cultural Significance in Different Regions

    Snow cream is more than a dessert. It’s a celebration of winter’s gifts. Each region has its own way of making these frozen treats.

    RegionSnow Cream VariationUnique Characteristic
    RussiaAir PieMade with egg whites, sugar, fruit purée
    EuropeApple SnowOriginally served hot, now enjoyed cold
    MediterraneanCitrus SnowIncorporates lemon and orange juice

    From Snow to Sweet Treat Evolution

    The journey from snow to dessert is a true display of culinary creativity. What started as a simple snow and sweetener mix has turned into a no-churn ice cream. It’s a treat that brings joy to people of all ages.

    Today’s snow cream recipes blend old traditions with new twists. They create an egg-free ice cream that’s both nostalgic and fresh.

    Essential Ingredients for Perfect Snow Cream

    Making the perfect snow cream starts with picking top-notch ingredients. These turn fresh snow into a tasty dairy-free treat. Your winter dessert journey begins with knowing the key parts that make this vegan dessert yummy and easy to make.

    The base of a great snow cream recipe needs the right ingredients:

    • Fresh, clean snow (8 cups)
    • Milk or dairy-free alternative
    • Sweetener (sugar or maple syrup)
    • Vanilla extract
    • Optional flavor enhancers

    Your choice of milk is key for the snow cream’s texture and taste. For a vegan dessert, try these plant-based options:

    • Almond milk
    • Coconut milk
    • Oat milk
    • Soy milk
    IngredientQuantityNotes
    Fresh Snow8 cupsClean, freshly fallen
    Milk/Dairy Alternative3/4 – 1 cupDetermines creaminess
    Sweetener3-5 tablespoonsAdjustable to taste
    Vanilla Extract1 teaspoonEnhances flavor

    Pro tip: Try different milk alternatives to find your favorite dairy-free treat. Each one adds a special flavor to your snow cream. This makes it a fun and versatile dessert for all.

    The secret to amazing snow cream is using quality ingredients and preparing them with care. Whether you want a quick vegan dessert or a fun winter activity, these ingredients will make a memorable treat.

    Gathering and Preparing Fresh Snow

    Starting your summer refreshment journey begins with clean, fresh snow. Your adventure is just outside, but safety and quality are key.

    Collecting snow needs careful attention. Not all snow is good for snow cream. The right type is crucial.

    Safety Tips for Collecting Clean Snow

    • Collect snow from areas away from potential contamination
    • Avoid snow near roads, buildings, or animal tracks
    • Use a large, clean bowl or container for collection
    • Wear clean gloves during snow gathering

    Best Snow Conditions for Making Snow Cream

    The best snow for your treat is fresh and clean. Look for these signs:

    1. Fluffy and light texture
    2. Completely covering the ground
    3. No visible dirt or debris
    4. Fresh fallen within the last few hours

    “Clean snow is the secret ingredient to a perfect easy frozen snack!” – Snow Cream Enthusiasts

    Storage and Temperature Considerations

    Temperature is key when making snow cream. Work fast to keep it cold. A batch needs 6-8 cups of snow and takes 5 minutes to make.

    • Collect snow when temperatures are below 32°F
    • Prepare snow cream immediately after collection
    • Keep mixture cold during preparation
    • Consume within 30 minutes for best taste

    Follow these tips to turn fresh snow into a tasty summer treat. It’s fun and delicious.

    Basic Snow Cream Recipe Steps

    Making your own creamy icy delight is simple! It starts with basic ingredients and a few easy steps. Get ready to turn fresh snow into a tasty winter treat.

    • 1 cup of cold milk
    • 1/3 cup granulated sugar
    • 2 teaspoons vanilla extract
    • A pinch of fine sea salt
    • 12 cups of clean, fresh snow

    Here’s how to make your snow cream:

    1. In a large mixing bowl, combine milk, sugar, vanilla extract, and salt
    2. Whisk the ingredients until the sugar completely dissolves
    3. Collect fresh, clean snow from a pristine area
    4. Gradually add snow to the mixture, stirring gently
    5. Continue adding snow until you reach your desired creamy icy delight consistency

    Pro tip: The secret to perfect snow cream is using fresh, clean snow and mixing quickly. Work fast to avoid melting. Enjoy your creamy icy delight right away – it doesn’t freeze well!

    Quick and fun: This entire process takes just 5 minutes from start to finish!

    Want to make it special? Add optional mix-ins like chocolate chips, crumbled cookies, or cocoa powder. This will make your snow cream extra special.

    Variations of Snow Cream Flavors

    Exploring different snow cream flavors turns this simple treat into a fun journey. Each flavor adds a unique taste that can please many. It makes your snow cream experience even more exciting.

    Snow cream is very flexible for mixing flavors. You can make it your own or match it with the season.

    Chocolate Snow Cream Delight

    Chocolate fans will love making this rich snow cream. Here’s how:

    • Add 1 heaping tablespoon of unsweetened cocoa powder
    • Mix well into the milk before adding snow
    • Adjust sugar to balance the cocoa’s taste

    Vanilla Bean Special

    Make your snow cream special with premium vanilla:

    • Use high-quality vanilla bean extract
    • Replace regular extract with vanilla bean seeds
    • More vanilla means a deeper flavor

    Fruit-Infused Options

    Add fresh fruits for colorful snow cream:

    • Puree strawberries or raspberries
    • Mix in mashed bananas for creaminess
    • Add citrus zest for a bright taste

    Your snow cream journey is only limited by your creativity. Try new ingredients and find your favorite mix!

    Tips for Perfect Snow Cream Consistency

    Making perfect homemade ice cream from snow needs special techniques. Your journey to no-churn ice cream starts with knowing the right mix of ingredients and texture.

    To get the best snow cream consistency, prepare carefully and mix quickly. Here are key tips for a perfect frozen treat:

    • Collect clean, fresh snow from a deep pile after several hours of snowfall
    • Use approximately 8 cups of lightly packed snow for a standard recipe
    • Add liquid ingredients gradually to prevent over-saturating the snow
    • Stir mixture quickly to maintain the fluffy texture

    Pro tip: The snow should be light and powdery, not wet or compacted. Mixing too slowly can cause your no-churn ice cream to become runny.

    “The secret to perfect snow cream is speed and precision!” – Snow Cream Enthusiasts

    When making your homemade ice cream, keep these consistency factors in mind:

    IngredientRecommended QuantityImpact on Consistency
    Snow8 cupsBase texture
    Sweetened Condensed Milk14 oz (1 can)Sweetness and binding
    Vanilla Extract1 tablespoonFlavor enhancement

    Remember, snow cream melts fast, so serve it right away. Aim for a light, fluffy texture that brings winter’s magic to every spoonful.

    Creative Toppings and Mix-ins

    Make your egg-free ice cream a special treat with fun toppings and mix-ins. These add-ons can make a simple snow cream into a fancy dessert. Try different things to find your favorite.

    Sweet Add-ons and Sprinkles

    Add some fun to your snow cream with colorful and tasty toppings. Here are some great choices:

    • Rainbow sprinkles
    • Chocolate chips
    • Crushed candy pieces
    • Marshmallow bits

    Nuts and Crunchy Elements

    Give your egg-free ice cream a crunchy twist with these nuts:

    • Chopped almonds
    • Crushed pecans
    • Toasted coconut flakes
    • Crushed graham crackers

    Sauce and Syrup Options

    Enhance your dairy-free treat with these tasty sauces:

    Sauce TypeFlavor Profile
    Chocolate SyrupRich and decadent
    Caramel SauceSweet and buttery
    Fruit CompoteFresh and tangy
    Maple SyrupWarm and natural

    Pro tip: Mix and match these toppings to create your own unique snow cream masterpiece! The secret to great snow cream is being creative and following your taste.

    Common Mistakes to Avoid

    Making the perfect snow cream can be challenging. It’s especially true when you want it to be vegan or a summer treat. Knowing the common mistakes helps you make a tasty frozen dessert every time.

    • Snow Quality Matters: Don’t use dirty or wet snow. It can ruin the taste and safety of your vegan dessert.
    • Don’t over-mix. It can turn your summer treat into a liquid disaster.
    • Watch out for too much liquid. It can make your dessert too runny.

    Keeping the temperature right is key when making snow cream. Use cold ingredients and handle them carefully. This ensures your dessert is smooth and creamy, making your taste buds happy.

    MistakeConsequenceSolution
    Using Wet SnowWatery, Bland TextureCollect Only Clean, Dry Snow
    Over-MixingMelted DessertGentle Folding Technique
    Excess LiquidRunny ConsistencyAdd Liquids Gradually

    If you’re looking for a vegan dessert, plant-based milks are great in snow cream. When snow is scarce, shaved ice is a perfect substitute for your summer cravings.

    Pro tip: Always use fresh, clean snow and work quickly to preserve the delicate texture of your frozen treat!

    Storage and Serving Recommendations

    Making the perfect easy frozen snack is more than just mixing ingredients. Your creamy icy delight needs special care for storage and serving. This keeps its texture and flavor just right.

    Snow cream tastes best right after you make it. Its texture changes fast, so timing is key. Serve it in chilled bowls to keep it cold and stop it from melting too quickly.

    Storage Guidelines

    • Enjoy within 30 minutes for the best taste
    • Store in an airtight container if you can’t serve right away
    • Put it in the coldest part of your freezer
    • Use plastic wrap to stop ice crystals

    Freezing Considerations

    Freezing changes snow cream’s texture a lot. It goes from smooth to hard and icy. If you must freeze it, here’s what to do:

    1. Use a shallow, freezer-safe container
    2. Press plastic wrap right onto the surface
    3. Don’t store it for more than 2 hours
    4. Let it sit at room temperature for 5-10 minutes before serving

    Serving Suggestions

    Make your easy frozen snack fancy with creative serving ideas. Add fresh berries, chocolate shavings, or powdered sugar on top. This makes your creamy icy delight even more special.

    Serving RecommendationDetails
    Portion Size1 cup per serving
    Ideal Serving TemperatureImmediately after preparation
    Garnish OptionsFresh berries, chocolate chips, mint leaves
    Storage DurationBest within 30 minutes, max 2 hours in freezer

    The secret to great snow cream is freshness. Serve it fast, enjoy it right away, and enjoy every bite of your homemade winter treat.

    Alternative Options for No-Snow Days

    Even without snow, you can still make a tasty snow cream. You don’t need fresh snow to enjoy a frozen treat. You can make a delicious dessert in your kitchen using other ingredients.

    Your snow cream journey doesn’t end with no snow. Creative dessert fans can turn simple ingredients into a special frozen treat. It’s like traditional snow cream but made differently.

    Using Shaved Ice Techniques

    Shaved ice is a great snow substitute for your favorite dessert. Here’s how to get the perfect snow cream texture:

    • Use a high-quality ice shaver to create fine, powdery ice crystals
    • Blend ice cubes in a powerful blender until they reach a snow-like consistency
    • Crush ice using a food processor for uniform, light texture

    Crushed Ice Methods

    Crushed ice is another great choice for snow cream. Try these methods for a smooth, creamy dessert:

    1. Wrap ice in a clean kitchen towel
    2. Gently pound the wrapped ice with a rolling pin
    3. Sift the crushed ice to remove larger chunks

    When making your snow cream, keep the right ice to dairy mix. A typical recipe has 8 cups of finely shaved or crushed ice, 1 cup of sweetened condensed milk, and 1 tablespoon of vanilla extract. Try different milks like coconut or heavy cream to find your favorite.

    Conclusion

    Snow cream is a fun homemade ice cream that turns winter’s snow into a tasty treat. Making this no-churn ice cream shows how easy it is to make special memories with loved ones.

    The charm of snow cream is in its flexibility and ease to make. You can use classic ingredients or try dairy-free options. Each batch lets you show off your creativity, making snowfall into a chance to try new flavors.

    As you try out different flavors and toppings, remember snow cream is more than dessert. It connects us to our past, from Southern U.S. traditions to ancient Persian treats. It’s a way to make your own winter tradition.

    So, get your snow ready, gather your ingredients, and start your snow cream journey. This homemade treat promises to bring joy and warmth to even the coldest days.

    FAQ

    What exactly is snow cream?

    Snow cream is a simple treat made from fresh snow, sweeteners, and flavorings. It’s a quick, no-churn dessert that captures winter’s magic. It’s a fun alternative to ice cream.

    Is it safe to make snow cream?

    Yes, but only if you use clean, fresh snow. Avoid snow near roads or in urban areas. Use snow from untouched, pristine surfaces.

    Can I make snow cream if I’m vegan?

    Absolutely! Use dairy-free milk like almond or coconut milk. Replace traditional sweeteners with plant-based ones for a vegan dessert.

    How long does snow cream last?

    Enjoy it right away for the best taste. It melts fast, so serve within 30 minutes. If you must store it, the texture might change.

    What if I don’t have access to fresh snow?

    Use shaved or crushed ice as a substitute. The texture will be different, but you can still make a tasty treat.

    What are the basic ingredients for snow cream?

    You’ll need fresh snow, milk (dairy or non-dairy), sweetener, and vanilla. Customize these ingredients to your liking.

    Can children help make snow cream?

    Yes! It’s a fun activity for kids. It’s easy to make and requires little cooking skill. Just watch younger kids when they help.

    Are there any common mistakes to avoid?

    Don’t use wet or dirty snow. Avoid adding too much liquid and over-mixing. Work fast and use clean snow for the best results.

    How can I add more flavors to my snow cream?

    Try adding chocolate powder, fruit purees, or extracts. Mix in chocolate chips or fruit pieces for extra flavor and texture.

    Is snow cream nutritionally different from regular ice cream?

    Snow cream is often lighter and less calorie-dense. It has fewer ingredients and can be made with low-fat or plant-based milk. It’s a healthier alternative to ice cream.

    What is your rating for the recipe?

  • Strawberry Cheesecake Cake

    Imagine cutting into a dessert that combines the ultimate comfort of a classic cheesecake with the vibrant sweetness of a strawberry cake. The strawberry cheesecake cake isn’t just a baked dessert—it’s a culinary experience. It transforms ordinary moments into extraordinary memories.

    This indulgent creation marries two beloved desserts into one spectacular treat. Rich, creamy cheesecake layers intertwine with soft, fruity cake. This creates a symphony of flavors that dance across your palate. Whether you’re celebrating a special occasion or simply craving something extraordinary, this strawberry cheesecake cake promises to elevate your dessert game.

    What Makes This Strawberry Cheesecake Cake Special

    Get ready for a treat that mixes a classic strawberry cake with creamy cheesecake. This dessert turns simple baking into a special experience. It will excite your taste buds and wow your guests.

    A Perfect Blend of Two Classic Desserts

    Imagine a dessert that blends the fruity taste of strawberry cake with the creamy texture of cheesecake. This cake brings together two classics in a way that’s truly amazing.

    • Combines strawberry cake layers with cheesecake filling
    • Uses fresh strawberries for maximum flavor
    • Provides a luxurious texture in every bite

    Rich and Creamy Texture Profile

    The cake’s success comes from its amazing texture. The creamy cheesecake filling adds a smooth layer that contrasts with the strawberry cake’s softness. Every bite is a mix of textures that will delight your taste buds.

    IngredientQuantityPurpose
    Strawberry Cake Mix15.25 ozProvides fruity base
    Cheesecake Pudding Mix3.4 ozCreates creamy filling
    Whole Milk2 cupsEnsures smooth texture

    Visual Appeal and Presentation

    Your guests will love the cake’s stunning layers of pink cake, white cheesecake, and fresh strawberries. It’s not just a dessert; it’s a masterpiece that makes any event unforgettable.

    With only 15 minutes of prep and 25-28 minutes of baking, you can make this impressive cake. It serves 12 people and stays fresh in the fridge for up to 3 days.

    Essential Ingredients for the Perfect Cake

    To make the ultimate strawberry cheesecake cake, you need the right ingredients. These ingredients should work together to create a fantastic dessert. Start by picking high-quality items that will make the cream cheese filling and graham cracker crust stand out.

    Here are the key ingredients you’ll need to craft this delightful dessert:

    • Graham Cracker Crust Base
      • 2¼ cups graham cracker crumbs (375 grams)
      • ½ cup unsalted butter, melted
      • ¼ cup granulated sugar
    • Cream Cheese Filling
      • 3 packages full-fat cream cheese (24 oz total)
      • 1 cup powdered sugar
      • 1 teaspoon vanilla extract
      • 1 cup heavy whipping cream
    • Additional Key Ingredients
      • 7 large egg whites
      • Freeze-dried strawberry powder (34g)
      • Optional pink food coloring (3-5 drops)

    The graham cracker crust gives your cake a crunchy base. It pairs well with the creamy filling. Make sure to use fresh, quality ingredients for the best taste and texture. Choose full-fat cream cheese for the richest filling.

    Pro tip: Let all ingredients come to room temperature before mixing. This will help you get a smooth filling and a consistent cake texture.

    The Art of Creating the Graham Cracker Crust

    Making the perfect graham cracker crust is key for your strawberry cheesecake cake. It’s the base that makes your dessert amazing. It will make your taste buds happy and impress your guests.

    Creating a great graham cracker crust needs focus and care. The right steps can turn a simple dessert into a masterpiece.

    Gathering Your Ingredients

    For a top-notch graham cracker crust, you’ll need:

    • 1 2/3 cups graham cracker crumbs
    • 6 tablespoons unsalted butter
    • 1/4 cup granulated sugar
    • 1/2 teaspoon kosher salt

    Mixing Techniques for the Perfect Texture

    When making your crust, consistency is key. Crush the graham crackers finely. Mix the dry stuff first, then add melted butter slowly. It should feel like wet sand.

    Pre-Baking Tips for Crisp Perfection

    Pre-baking your crust makes it crisp and strong. Here’s how:

    1. Preheat oven to 350°F
    2. Press the crust mix into the pan
    3. Bake for 10-12 minutes
    4. Let it cool completely before adding the filling
    IngredientQuantityPurpose
    Graham Cracker Crumbs1 2/3 cupsBase texture
    Unsalted Butter6 tablespoonsBinding agent
    Granulated Sugar1/4 cupSweetness
    Kosher Salt1/2 teaspoonFlavor enhancement

    Remember, a well-made graham cracker crust can make your strawberry cheesecake cake go from good to amazing!

    Preparing the Cream Cheese Filling

    Making the cream cheese filling is key to a great strawberry cheesecake cake. It’s the heart of the dessert, adding rich flavor and creamy texture to each bite.

    To make your creamy cheesecake filling, you’ll need a few important ingredients:

    • 115 grams full-fat cream cheese (room temperature)
    • 115 grams butter (room temperature)
    • 80-120 grams confectioners’ sugar
    • Fresh strawberry puree
    • Vanilla extract

    The secret to a smooth filling is in the preparation. Make sure all ingredients are at room temperature. This ensures a velvety texture without lumps. Softened cream cheese makes the filling creamy.

    Here are some expert tips for mixing your filling:

    1. Beat cream cheese until smooth
    2. Gradually add confectioners’ sugar
    3. Incorporate strawberry puree gently
    4. Avoid overmixing to prevent a dense texture

    Your filling will make about 200 grams, ideal for a 6-inch cake with 4 layers. It takes just 20 minutes to prepare, making it a quick and fun part of your cake.

    Pro tip: Adjust the sugar to control sweetness and texture. More sugar makes the filling firmer, while less keeps it softer and spreadable.

    Strawberry Cheesecake Cake: Step-by-Step Instructions

    Making the perfect strawberry cheesecake cake needs care and patience. It combines different techniques for a stunning look that will wow your guests and satisfy your sweet cravings.

    Mixing the Batter

    First, get your ingredients ready at room temperature. For the strawberry cake batter, do the following:

    • Cream butter and sugar until light and fluffy
    • Gradually add eggs, mixing thoroughly
    • Incorporate fresh strawberry puree for intense flavor
    • Fold in dry ingredients gently to maintain air

    Layering Techniques

    Layering is key for your strawberry cheesecake cake. Follow these steps carefully:

    1. Begin with a graham cracker crust base
    2. Pour a thin layer of cheesecake filling
    3. Add a strawberry cake layer
    4. Repeat layers for visual appeal
    5. Ensure even distribution of filling

    Baking Temperature and Timing

    Precise baking is crucial for your strawberry cheesecake cake. Here’s a detailed breakdown:

    • Preheat oven to 350°F (175°C)
    • Bake crust for 22-25 minutes
    • Reduce temperature to 300°F (150°C) for cheesecake layer
    • Bake cheesecake for 2 hours total
    • Allow 3-4 hours cooling time

    Pro tip: Use a water bath to prevent cracking and ensure even baking of your strawberry cheesecake cake. The total preparation time is about 6 hours and 10 minutes, but the result is well worth the effort!

    Creating the Perfect Strawberry Topping

    The strawberry topping makes a cheesecake special. Choosing the right fresh strawberries is key. It makes the topping delicious and beautiful, taking your cheesecake to the next level.

    Start by picking the freshest strawberries. Look for bright red, firm berries without bruises or soft spots. You’ll need about 2 pounds for the perfect topping.

    Ingredients for Strawberry Topping

    • 1 pound fresh strawberries
    • 1/2 cup white sugar
    • 1 tablespoon fresh lemon juice
    • 2 teaspoons vanilla extract
    • 2 teaspoons cornstarch
    • 1/2 cup cold water

    Preparation Techniques

    To make a luxurious strawberry topping, follow these steps:

    1. Wash and hull the fresh strawberries carefully
    2. Slice half the strawberries for the sauce
    3. Reserve the other half for garnishing the top of the cake
    4. Combine sugar, cornstarch, and water in a saucepan
    5. Cook the mixture until it thickens into a glossy glaze

    Your strawberry topping will be perfect for the cheesecake. It takes about 35 minutes to prepare, making 1.5 cups of delicious sauce.

    Storage and Serving Tips

    You can store the topping in the fridge for up to a week. Freeze it for up to three months for longer storage. Drizzle it over the cheesecake just before serving for the best look.

    NutrientAmount per Serving
    Calories280 kcal
    Total Carbohydrates70 g
    Protein2 g
    Vitamin C182 mg

    Pro tip: For the best flavor, use ripe, in-season fresh strawberries and adjust the sugar to taste.

    Tips for Achieving the Right Texture and Consistency

    Making the perfect creamy cheesecake needs focus and care. The success of your dessert depends on mastering key techniques. These ensure a smooth, delicious texture.

    Creating an amazing cheesecake is about finding the right mix of ingredients and baking methods. The right steps can turn your dessert from good to great.

    Master Temperature Control

    Temperature is key for the perfect cheesecake texture. Here are some important tips:

    • Preheat your oven to exactly 350ºF
    • Use room temperature ingredients for smooth mixing
    • Utilize a water bath to ensure even baking

    Moisture Management Techniques

    Keeping moisture in check is crucial for a creamy cheesecake:

    • Seal springform pan bottom with aluminum foil
    • Avoid greasing pan before adding crust
    • Use graham cracker crust with proper moisture content

    Perfecting the Setting Process

    The final texture comes from careful cooling and setting:

    • Allow cheesecake to cool in oven for one hour after baking
    • Chill for at least 8 hours before serving
    • Refrigerate for optimal texture development

    Professional bakers say patience is the secret to a flawless creamy cheesecake. By controlling temperature, managing moisture, and allowing proper setting time, you’ll make a dessert that will wow everyone.

    Storage and Make-Ahead Instructions

    Keeping your delicious baked dessert fresh is key. Your strawberry cheesecake cake stays good with the right storage. It’s perfect for making ahead of time, especially for summer.

    • Refrigerate in an airtight container
    • Maintain consistent cool temperature
    • Protect from direct air exposure

    The cake’s freshness depends on how you store it. Refrigeration keeps the cake fresh for up to 5 days. Freezing can keep it longer.

    Storage MethodDurationRecommended Technique
    RefrigerationUp to 5 daysWrap tightly in plastic wrap
    FreezingUp to 2 monthsWrap individual slices in freezer paper

    “Proper storage is the secret to maintaining your cake’s delightful texture and flavor.” – Baking Experts

    For the best taste, thaw frozen cake slices in the fridge overnight. When reheating, use gentle methods. Microwave individual portions briefly or warm in an oven at 350°F for about 30 minutes, covered with aluminum foil.

    Remember, your summer dessert needs careful handling. This ensures it stays delicious and fresh.

    Serving Suggestions and Presentation Ideas

    Turn your strawberry cheesecake cake into a showstopper with these creative ideas. It’s a perfect choice for summer gatherings, impressing everyone with its beauty.

    Here are some pro tips to enhance your presentation:

    • Garnish with fresh strawberries placed around the cake
    • Add delicate mint leaves for a green pop
    • Sprinkle edible flowers for elegance

    For individual slices, try these plating ideas:

    1. Make strawberry sauce swirls on the plate
    2. Place a dollop of whipped cream beside each slice
    3. Dust with powdered sugar for a pro finish

    Pair your dessert with the right drinks. Consider these options:

    • Chilled champagne
    • Earl Grey tea
    • Light espresso

    Your dessert can fit any event, from family dinners to fancy parties. It’s all about the details and how you present it. Your strawberry cheesecake cake will be unforgettable.

    Troubleshooting Common Issues

    Baking a perfect strawberry cheesecake can be tough. Even skilled bakers face problems that can ruin the dessert. Knowing how to fix these issues will help you make a flawless cheesecake every time.

    Making the perfect cheesecake needs careful attention. Common problems include:

    • Surface cracking
    • Uneven texture
    • Overly sweet or bland flavor
    • Structural inconsistencies

    Preventing Cracks in Your Cheesecake

    Cracks can come from many things during baking. To avoid cracks in your cheesecake:

    1. Use room temperature ingredients
    2. Avoid overmixing the batter
    3. Implement a water bath technique
    4. Cool the cheesecake gradually

    Fixing Texture Problems

    A grainy or dense cheesecake can come from wrong mixing or cold ingredients. Make sure your cream cheese is smooth and at room temperature before mixing.

    Texture IssuePotential CauseSolution
    Grainy FillingCold Cream CheeseBring to room temperature
    Dense TextureOvermixingMix ingredients gently
    Watery ConsistencyExcess LiquidDrain excess moisture

    Adjusting Sweetness Levels

    Getting the sweetness right is key for a great dessert. Taste your batter before baking and adjust the sugar as needed. You can also try different sweeteners or use less sugar to taste.

    Remember, the more you bake, the better you’ll get. Every try brings you closer to making an amazing creamy cheesecake.

    Conclusion

    Your strawberry cheesecake cake is more than a dessert. It’s a masterpiece that combines rich flavors and textures. You’ve learned how to make a dessert that will wow everyone at any event.

    Remember, practice is key to making this cake perfect. With each bake, you’ll get better and understand the cake and cheesecake layers better. Be patient, precise, and open to trying new things.

    Baking is like art, bringing people together with delicious treats. Your strawberry cheesecake cake can become a family favorite, making memories with every bite. It’s perfect for any celebration or a cozy weekend treat.

    Don’t be afraid to be creative and trust your baking skills. Most importantly, enjoy making this amazing dessert. Your strawberry cheesecake cake is waiting for you—happy baking!

    FAQ

    What makes the Strawberry Cheesecake Cake different from a regular cheesecake?

    This dessert is special because it combines a moist strawberry cake with creamy New York-style cheesecake. It’s a mix of flavors and textures in one slice, making it more indulgent.

    How long does it take to prepare this Strawberry Cheesecake Cake?

    It takes about 2-3 hours to prepare, bake, cool, and assemble. After that, it needs 4-6 hours or overnight to chill. This ensures the best taste and texture.

    Can I use frozen strawberries instead of fresh ones?

    Yes, frozen strawberries work too. Just thaw and drain them well to avoid extra moisture. But, fresh strawberries give the best flavor and look, especially in summer.

    How should I store the Strawberry Cheesecake Cake?

    Keep it in an airtight container in the fridge for up to 5 days. For longer, freeze it for a month. Wrap it well in plastic and foil to prevent freezer burn.

    What type of cream cheese works best for the filling?

    Use full-fat, Philadelphia-style cream cheese at room temperature for the best filling. Low-fat or non-fat cream cheese can make the filling less rich and creamy.

    How can I prevent cracks in the cheesecake layer?

    To avoid cracks, keep ingredients at room temperature and don’t overmix. Bake in a water bath and cool slowly. Avoid sudden temperature changes and overmixing.

    Can I make this cake gluten-free?

    Yes, you can. Replace the graham cracker crust with gluten-free graham crackers or almond flour. Make sure all ingredients are gluten-free.

    What are some alternative toppings for the Strawberry Cheesecake Cake?

    Try strawberry compote, whipped cream, chocolate shavings, mint leaves, or powdered sugar. Each topping adds a special touch to the cake.

    Is this cake suitable for special occasions?

    Absolutely! It’s perfect for birthdays, anniversaries, or summer parties. It’s a stunning and delicious treat that will impress everyone.

    What is your rating for the recipe?

  • Steelhead Trout Recipe

    Growing up near the Pacific Northwest, I discovered the magic of steelhead trout. It was before I became a passionate home cook. The first time I tasted it, it was like unlocking a secret culinary treasure. It changed my understanding of seafood.

    Rainbow trout’s elegant cousin, the steelhead trout, offers an extraordinary dining experience. It combines nutrition and flavor in every succulent bite. This versatile fish brings restaurant-quality cuisine directly to your kitchen. It promises a meal that’s both healthy and incredibly delicious.

    Whether you’re a seasoned chef or a curious home cook, this guide will help you. You’ll learn everything you need to know about preparing the perfect steelhead trout. From selecting the freshest fillets to mastering cooking techniques, you’ll soon be creating restaurant-worthy dishes. These dishes will impress your family and friends.

    Understanding Steelhead Trout

    Steelhead trout is a fascinating salmonid species that captivates both seafood enthusiasts and marine biologists. This unique fish represents a remarkable example of anadromy. It thrives in both freshwater and saltwater environments.

    The remarkable characteristics of steelhead trout set it apart from other fish species. Here are some key features that make this fish extraordinary:

    • Can weigh between 2.5 and 42 lbs
    • Measures 18 to 43 inches in length
    • Spends early life in freshwater for 2-3 years
    • Migrates to ocean for additional growth

    What Makes Steelhead Trout Special

    Unlike typical river-bound trout, steelhead demonstrates an impressive ability to adapt to different water environments. Its anadromous nature allows it to transition seamlessly between freshwater and saltwater. This creates a unique life cycle that supports its remarkable growth and survival.

    Nutritional Benefits and Health Value

    Steelhead trout offers an impressive nutritional profile. It’s a smart choice for health-conscious seafood lovers. Rich in protein and omega-3 fatty acids, this fish provides essential nutrients. These support heart and brain health.

    Comparison to Salmon

    While similar to salmon, steelhead trout has a milder flavor and less fatty composition. It delivers excellent taste with a lighter texture. This makes it a versatile option for various culinary preparations.

    Steelhead trout: Nature’s adaptation master, swimming between freshwater and ocean with remarkable resilience.

    Essential Ingredients for Perfect Steelhead Trout

    To make a tasty steelhead trout dish, you need to pick the best ingredients. Whether you love cooking at home or enjoy fly fishing, knowing the right ingredients makes a big difference.

    Main Components

    The key to your dish is the steelhead trout. Choose fish from sustainable fisheries that care about the environment. A good serving size is 7 oz (198 g), which gives you:

    • 41.5 g of protein
    • 25.6 g of total fat
    • Only 1.4 g of carbohydrates

    Seasonings and Aromatics

    Season your steelhead trout right to bring out the flavors. Here’s a great mix:

    1. 4 cloves of fresh garlic
    2. 2 tbsp olive oil
    3. 1 tbsp fresh parsley
    4. 1 tbsp fresh chives
    5. 1 tsp sea salt
    6. 1/4 tsp black pepper

    Optional Ingredients and Substitutions

    Feel free to add these extras to your dish:

    • Lemon slices for a zesty taste
    • Capers for a salty kick
    • Herbs like dill or thyme
    • Butter instead of olive oil

    Choosing local, sustainable ingredients from fly fishing communities makes your dish better for the planet and your taste buds.

    Preparation Methods and Techniques

    Cooking steelhead trout needs careful attention to technique and preparation. Whether you got your fish from a local hatchery or caught it during a spawning run, knowing the right cooking methods is key. It can turn this delicious fish into a gourmet meal.

    Try different cooking approaches to find your favorite. Here are the main techniques for preparing steelhead trout:

    • Baking: Ideal for achieving a tender, flaky texture
    • Grilling: Creates a delightful smoky flavor
    • Broiling: Provides a crispy exterior
    • Pan-searing: Delivers a quick and delicious result

    Here are some key preparation tips to master cooking steelhead trout:

    1. Always pat the fish dry before cooking
    2. Season generously with herbs and spices
    3. Cook until the internal temperature reaches 135-140°F
    4. Let the fish rest for 3-5 minutes after cooking

    “The secret to perfect steelhead trout is respecting its delicate nature and avoiding overcooking.” – Professional Chef

    When preparing trout from a hatchery, remember that farm-raised fish might have a slightly different texture. This is compared to wild-caught fish from a spawning run. Adjust your cooking time accordingly, typically 12-18 minutes depending on the fillet’s thickness.

    Pro tip: Use a meat thermometer to ensure perfect doneness every time.

    Baked Steelhead Trout Recipe at 400°F

    Turning a fresh steelhead trout into a tasty dinner needs care and precision. This baked recipe highlights the fish’s rich flavors. It shows the journey from smolt to dinner.

    Steelhead trout is a treat for your taste buds and health. This recipe is easy to follow, making a healthy and tasty fish dish.

    Pre-Cooking Preparation

    Start by getting your ingredients ready and setting up your kitchen. You should:

    • Thaw the steelhead trout completely if frozen
    • Pat the fish dry with paper towels
    • Bring the fish to room temperature (about 15 minutes)
    • Preheat your oven to exactly 400°F

    Seasoning Process

    For a great-tasting crust, choose your seasonings wisely. Here are some options:

    • Classic herb blend with salt and pepper
    • Lemon and dill combination
    • Garlic and butter mixture
    • Cajun-style spice rub

    Cooking Time and Temperature Guide

    When baking steelhead trout, be precise. Follow these steps:

    • Baking temperature: 400°F
    • Cooking time: 16-22 minutes
    • Check internal temperature: 145°F
    • Fish should flake easily with a fork

    Pro tip: Check the fish early to avoid overcooking. It should be opaque and flake easily. Serve it right away for the best taste and texture.

    Grilled Steelhead Trout Variation

    Grilling steelhead trout makes it smoky and flavorful. It’s a great way to enjoy this fish. Unlike rainbow trout, steelhead trout is firmer, perfect for grilling.

    To grill steelhead trout well, you need to be careful. This ensures it doesn’t stick and turns out great. Here are some important steps:

    • Preheat the grill to medium heat (around 375-400°F)
    • Clean and oil the grill grates thoroughly
    • Pat the steelhead trout dry with paper towels
    • Brush the fish with olive oil to prevent sticking

    Marinades can make your grilled steelhead trout even better. Try these:

    1. Lemon and herb marinade
    2. Garlic and butter blend
    3. Citrus and soy sauce combination

    Grilling steelhead trout takes about 8-10 minutes. It’s done when it’s 135°F inside and flakes with a fork.

    Grilling MethodTemperatureCooking Time
    Direct Heat375-400°F8-10 minutes
    Indirect Heat350°F10-12 minutes

    Pro tip: Use a fish spatula for easy flipping and transfer to prevent breaking the delicate steelhead trout fillet.

    Flavor Combinations and Sauce Options

    Turning your steelhead trout into a masterpiece starts with the right sauce. This salmonid species, known for its anadromy, is a blank canvas for chefs. The right sauce can make your dish unforgettable.

    Choosing the perfect sauce can really bring out the flavors of your steelhead trout. Each sauce has its own unique taste that complements the fish’s delicate texture and rich flavor.

    Classic Lemon-Caper Sauce

    This sauce is bright and tangy, matching the steelhead’s clean taste. You’ll need:

    • 2 tablespoons capers
    • 1 fresh lemon, zested and juiced
    • 2 tablespoons extra virgin olive oil
    • 1 tablespoon fresh parsley, minced
    • Sea salt and black pepper to taste

    Dijon Mustard and White Wine Sauce

    This sauce adds a rich, sophisticated touch to your steelhead trout. Mix together:

    • 3 tablespoons Dijon mustard
    • 1/4 cup dry white wine
    • 1 tablespoon butter
    • Minced shallots
    • Fresh thyme leaves

    BBQ Glazed Option

    For a smoky flavor, try this BBQ glaze. It adds bold tastes to your dish. You’ll need:

    • 1/4 cup BBQ sauce
    • 1 tablespoon honey
    • 1 teaspoon smoked paprika
    • Dash of hot sauce

    Each sauce takes about 5-7 minutes to prepare. It turns your steelhead trout into a dish fit for a restaurant, highlighting its unique anadromy and flavor.

    Best Side Dish Pairings

    When you’re cooking steelhead trout, picking the right side dishes can make your meal better. Think about using local, seasonal ingredients that go well with the trout’s light taste. This way, you’re also supporting fly fishing sustainability.

    Your trout dinner needs sides that match its texture and taste. Here are some great options:

    • Roasted Asparagus
    • Sautéed String Beans
    • Wilted Spinach
    • Roasted Mushrooms
    • Smashed Potatoes
    • Quinoa Salad

    The catch and release idea isn’t just for fishing. It’s also about making meals with care. By picking veggies and grains that bring out the trout’s flavor, you’re making a complete meal.

    Side Dish CategoryRecommended OptionsPreparation Time
    VegetablesRoasted Asparagus, Sautéed Green Beans10-15 minutes
    StarchesSmashed Potatoes, Quinoa15-20 minutes
    SaladsFresh Herb Quinoa Salad10 minutes

    Pro tip: Pick side dishes that cook in about the same time as your trout. This way, everything will be hot and ready to eat.

    Storage and Leftover Guidelines

    Keeping the flavor of steelhead trout fresh is key. Whether it’s a new catch or leftovers, right storage is essential. This way, you can enjoy your meal safely and with great taste.

    • Refrigerate cooked fish within 2 hours of cooking
    • Store in an airtight container
    • Keep refrigerator temperature between 32°F to 38°F
    • Consume within 3-4 days

    Refrigeration Best Practices

    Your cooked steelhead trout can stay fresh in the fridge for 3-4 days. Wrap it tightly in plastic wrap or use a sealed container. This keeps it moist and prevents bad smells from other foods.

    Reheating Instructions

    Reheating your leftover steelhead trout needs gentle care to avoid drying it out:

    1. Preheat oven to 275°F
    2. Place fish in an oven-safe dish
    3. Add a splash of water or lemon juice
    4. Cover with foil to retain moisture
    5. Heat for 10-15 minutes until warmed through

    Pro tip: Avoid microwaving when possible, as it can quickly dry out the fish and compromise its delicate texture.

    Whether it’s from a local hatchery or a spawning run, these storage tips will keep your meal fresh. You’ll enjoy it with its original flavor and quality.

    Conclusion

    Exploring steelhead trout is more than just cooking. It’s about learning about a remarkable fish and its life cycle. From the start of a smolt’s journey to adulthood, these fish show us resilience and adaptability in the water.

    Your cooking journey with steelhead trout connects you to a rich ecosystem. It also supports sustainable food practices.

    The recipes and techniques in this guide do more than teach you how to cook. They show how steelhead trout is a nutritional powerhouse. It’s full of omega-3 fatty acids, protein, and essential nutrients.

    Whether you’re grilling, baking, or trying new flavors, each method celebrates the fish’s versatility and health benefits.

    Choosing sustainably sourced steelhead trout helps conservation and local fishing communities. Knowing the fish’s journey from its redd to adulthood makes your meal more meaningful. With the techniques and insights here, you can make a memorable meal that honors the fish’s natural history and nutritional value.

    Dive into steelhead trout cooking with confidence. You’re not just making a meal. You’re part of a bigger story of ecological awareness and culinary excellence.

    FAQ

    What is the difference between steelhead trout and rainbow trout?

    Steelhead trout are a type of rainbow trout that goes to sea. Rainbow trout stay in freshwater. Steelhead migrate to the ocean and then back to freshwater to spawn. They look similar but have different lives and migration patterns.

    Is steelhead trout a healthy fish to eat?

    Yes! Steelhead trout is full of protein, omega-3s, and nutrients. It has less mercury than many fish. Eating it can help your heart and reduce inflammation.

    How can I tell if steelhead trout is fresh?

    Fresh steelhead trout is bright and firm. It should smell like the ocean, not fishy. Its eyes are clear, and its gills are red. Check the catch date if buying from a hatchery or market.

    What are the best cooking methods for steelhead trout?

    You can bake, grill, broil, or pan-sear steelhead trout. Don’t overcook it to keep it moist. Cook until it reaches 145°F for a flaky texture.

    Can I practice catch and release with steelhead trout?

    Yes, especially during their spawning run. It helps keep the fish population healthy. Use barbless hooks and handle the fish gently.

    How long can I store cooked steelhead trout?

    Cooked trout can last 3-4 days in the fridge. Cool it down first and keep it at 40°F or below. This keeps it fresh and prevents bacteria.

    What makes steelhead trout different from salmon?

    Steelhead trout tastes milder and less oily than salmon. They’re similar in nutrients but steelhead is lighter. The texture of steelhead is also more delicate.

    How does the life cycle of a steelhead trout work?

    Steelhead trout start as smolt in streams, then go to the ocean. They mature there and return to spawn. This unique life cycle is fascinating to many.

    What is your rating for the recipe?

  • Smoked Meatloaf Recipe

    Growing up, I loved our weekend barbecues. They were special because we turned simple ingredients into amazing meals. The smoked meatloaf is more than food; it’s a celebration of American comfort food with a smoky twist.

    Think of the classic meatloaf from your childhood, but with a smoky flavor. This smoked meatloaf is a journey that mixes old cooking ways with new barbecue skills.

    Whether you’re a pro at BBQ or just starting, this recipe will change how you see comfort food. It combines seasoned meat, wood chips, and a BBQ glaze. This mix makes a dish that’s both familiar and new.

    Essential Ingredients for Perfect Smoked Meatloaf

    To make great ground beef recipes, you need to know the right ingredients for meatloaf. Your smoked meatloaf starts with top-notch parts that promise amazing flavor and texture.

    The base of any great meatloaf is the meat itself. Experts say to use an 80/20 ground beef blend. This mix gives the best balance of lean meat and fat.

    Quality Meat Selection

    Your meat choice greatly affects the final dish. The 80/20 blend ensures:

    • Optimal moisture retention
    • Rich, robust flavor
    • Preventing dry, tough texture

    Seasonings and Aromatics

    To turn basic meatloaf into something special, you need the right seasonings. Think about adding:

    1. Garlic powder
    2. Onion powder
    3. Fresh herbs like parsley
    4. Black pepper

    Binding Ingredients

    The right binding agents keep your meatloaf together. Key ingredients include:

    • 2 large eggs
    • ½ cup cracker or breadcrumbs
    • ¼ cup BBQ sauce

    “The secret to perfect meatloaf is balance – between meat, seasonings, and binding ingredients.”

    By picking and mixing these ingredients carefully, you’ll make a smoky, tasty meatloaf. It will wow even the pickiest eaters.

    Equipment and Smoker Setup

    Getting the right gear is key to mastering smoking techniques. The right smoker and tools can greatly improve your smoked meatloaf’s taste and texture.

    When setting up your smoking station, consider these key equipment recommendations:

    • Choose a smoker that maintains consistent temperatures
    • Use a grill topper or vented tray for optimal smoke penetration
    • Avoid traditional loaf pans that block smoke circulation
    • Invest in a reliable meat thermometer

    Different smoker types offer unique advantages for your smoking techniques:

    Smoker TypeTemperature ControlSmoke Flavor Intensity
    Electric SmokerPreciseMild
    Charcoal SmokerModerateStrong
    Pellet SmokerConsistentBalanced

    For the best results, keep your smoker at 250°F. Preheat your smoker well. Also, use a grill topper that lets smoke flow freely around the meatloaf.

    “The right equipment transforms a good meatloaf into an extraordinary smoked culinary experience.”

    Preparing Your Meatloaf Mixture

    Creating the perfect ground beef recipes for meatloaf variations starts with understanding the essential mixing techniques. Your smoked meatloaf mixture needs careful preparation for a tender and flavorful result.

    When preparing your meatloaf mixture, you’ll want to gather these key ingredients:

    • 2 pounds ground beef (80/20 lean-to-fat ratio)
    • 1 large egg
    • 1/3 cup breadcrumbs
    • 3/4 cup milk
    • 1 tablespoon Worcestershire sauce

    Mixing Techniques

    The secret to tender meatloaf lies in gentle mixing. Overmixing can lead to a tough, dense texture. Use a light touch when combining ingredients. Beat the egg slightly in a large mixing bowl before adding other components.

    Gently fold the ground beef into the mixture, ensuring even distribution without compressing the meat too much.

    Shaping Methods

    Explore different meatloaf variations by experimenting with shapes. While the traditional loaf is classic, you can also try:

    1. Classic rectangular loaf
    2. Individual meatloaf muffins
    3. Free-form oval shape
    4. Wrapped bacon-style log

    Pre-smoking Preparation

    Before smoking, let your meatloaf mixture rest for 15-20 minutes. This allows the ingredients to bind together and enhances flavor absorption. For added moisture, consider brushing a light layer of barbecue sauce or glaze before placing in the smoker.

    Pro tip: Use a meat thermometer to ensure perfect doneness and food safety.

    By following these mixing and shaping techniques, you’ll create a mouthwatering smoked meatloaf that’s sure to impress your family and friends.

    Smoking Techniques and Temperature Control

    Mastering smoking techniques is key to a tasty smoked meatloaf. You need to know about temperature control and airflow. These are important in your smoker.

    The vents on your smoker control the temperature. The intake damper is at the bottom, and the outtake damper is at the top. These vents help you adjust the temperature. Opening the intake vent lets in more oxygen, raising the temperature. Closing it reduces heat by limiting airflow.

    • Preheat your smoker to 225°F for optimal smoking
    • Aim to maintain a consistent temperature throughout cooking
    • Use a reliable meat thermometer to monitor internal temperature

    When smoking meatloaf, aim for an internal temperature of 160°F. This usually takes 3-4 hours, depending on your smoker and meatloaf size. Be patient and manage the temperature carefully.

    Pro tip: Avoid opening the smoker too frequently, as this can cause temperature fluctuations and extend cooking time.

    Choosing the right wood chips is also important for smoky flavor. Soak your wood chips for 30 minutes before use. This ensures they smolder slowly and provide consistent smoke. Woods like hickory or apple can add great flavor to your meatloaf.

    Remember, different smokers might need slight adjustments in technique. Learn your specific equipment’s unique characteristics for the best results.

    Creating the Perfect BBQ Glaze

    Turning your smoked meatloaf into something amazing needs a killer BBQ glaze. A great glaze can make your barbecue dishes taste like they’re from a restaurant. It adds depth and complexity to your glazed meatloaf.

    The secret to a fantastic BBQ glaze is finding the right mix of sweet, tangy, and savory flavors. Your homemade glaze will be the highlight of your smoky dish.

    Essential Glaze Ingredients

    For a perfect BBQ glaze, you’ll need these key ingredients:

    • 1.5 cups Ketchup
    • 1.5 cups Brown sugar
    • 1/2 cup Honey
    • 1/4 cup Apple cider vinegar
    • 1/4 cup Worcestershire sauce
    • 2 tablespoons Yellow mustard
    • 1 tablespoon Hot sauce

    Glaze Application Technique

    When you apply your BBQ glaze to smoked meatloaf, timing is everything. Pro tip: Put the first layer on during the last 20-30 minutes of smoking. This way, the glaze caramelizes without burning, giving you a perfect sticky-sweet outside.

    For the best flavor, save some glaze to serve on the side. This lets your guests add their own touch to their glazed meatloaf. It also adds more deliciousness to your barbecue dishes.

    Remember: A great glaze can turn an ordinary meatloaf into a memorable meal!

    Smoked Meatloaf: Step-by-Step Process

    Making the perfect smoked meatloaf needs focus and care. This guide will help you turn a simple meatloaf into a smoky treat. Follow these steps to elevate your grilling game.

    1. Smoker Preparation: Heat your smoker to 225°F (107°C). This low heat helps the meat soak up more flavor.
    2. Meatloaf Placement: Place your meatloaf on the smoker grates. Make sure it’s in the middle for even heat.
    3. Temperature Monitoring: Put a meat temperature probe in the meatloaf. This helps you keep an eye on the temperature.

    Choose wood chips that match the meat’s flavor. Hickory or oak chips add a rich, smoky taste.

    Smoking StageDurationTemperature
    Initial Smoking2 hours225°F
    Glazing Stage1 hour275°F

    When the meat hits 120°F (49°C), slather it with BBQ glaze. Keep smoking until it’s safe at 160°F (71°C), about 3 hours.

    “Patience is key in smoking – let the low temperature work its magic!” – Pitmaster’s Wisdom

    Once it’s done, let the meatloaf rest for 10-15 minutes. This step makes sure each slice is juicy and full of flavor.

    Tips for Achieving Optimal Smokiness

    Mastering the art of smoking meatloaf is all about choosing the right wood and managing smoke. Your techniques can turn a simple meatloaf into a masterpiece. It will have a smoky flavor that will make your taste buds dance.

    Creating the perfect smoky flavor is more than just throwing meat in a smoker. It’s a precise process that requires understanding your ingredients and equipment.

    Choosing the Right Wood Chips

    Your wood chip choice is key to the smoky flavor. Different woods give different tastes:

    • Hickory: Bold, bacon-like smoky flavor
    • Cherry: Sweet, mild smoke with a slight fruitiness
    • Mesquite: Intense, strong smoke profile
    • Apple: Subtle, sweet smoke ideal for lighter meats

    Smoke Management Techniques

    It’s important to control the smoke’s intensity to avoid bitter flavors. Keep the temperature between 225°F and 250°F for best results. Look for thin, blue smoke. This means the smoke is clean and enhancing your meatloaf’s flavor.

    Pro tip: Don’t put too many wood chips in your smoker. Add a handful every 45 minutes. This gives enough smoke without overpowering the meat’s taste.

    Serving Suggestions and Side Dishes

    Make your smoked meatloaf a standout with the right side dishes. These can turn a simple meal into a special event. The perfect sides can make your dinner unforgettable.

    Classic Side Dish Recommendations

    • Creamy Mashed Potatoes: Enriched with cream cheese and butter for ultimate richness
    • Garlic Green Beans: Quick 15-minute preparation that complements smoky flavors
    • Air Fryer Baked Potato: Crispy exterior with a tender interior
    • Lemon Roasted Asparagus: Fast 10-minute cooking time

    Unique Flavor Pairings

    Your smoked meatloaf needs sides that match its bold taste. Try these unique dishes to wow your guests and make your meals special.

    Side DishPreparation TimeUnique Feature
    Cauliflower Gratin25 minutesDecadent yet health-conscious
    Collard Greens30 minutesEnhanced with smoked turkey
    Corn Soufflé20 minutesUses convenient boxed mix

    Smoked Companion Dishes

    Use your smoker to cook side dishes with your meatloaf. Brown sugar baked beans are a great choice. They take 2-3 hours to smoke and balance the meat’s savory taste with sweetness.

    When you serve, cut your meatloaf neatly. Arrange the sides to make the dish look good. You want to show off the smoky meat and its tasty sides.

    Conclusion

    Your smoked meatloaf adventure turns a classic comfort food into something special. You’ve learned to keep smoking temperatures between 225-240°F. Also, make sure the meat reaches 160°F inside for the best taste.

    Storing your smoked meatloaf is easy. Just keep leftovers in an airtight container for up to 3 days. You can make tasty sandwiches or try new ways to serve it. With about 25 grams of protein per serving, it’s both tasty and healthy.

    Every time you smoke, you can try something new. Use different woods like hickory, mesquite, or cherry to add your own flavor. Remember, the more you practice, the better you’ll get.

    Start exploring the world of smoking and try different flavors. Most importantly, enjoy making your own perfect smoked meatloaf. Your kitchen is now a place where you can create amazing meals for your loved ones.

    FAQ

    What type of ground beef is best for smoked meatloaf?

    For smoked meatloaf, use an 80/20 ground beef mix. The 20% fat keeps it moist and flavorful. This ratio ensures the meatloaf stays juicy and tastes great.

    Can I use a different type of meat in my smoked meatloaf?

    Absolutely! Try mixing ground beef with pork, turkey, or veal. Each adds a unique taste. Just keep the fat content similar to maintain moisture.

    What type of smoker works best for making meatloaf?

    Many smokers work well, like electric, charcoal, and pellet smokers. The key is a consistent 225°F temperature and good smoke flow. Pellet smokers are great for beginners because they control temperature well.

    How long does it take to smoke a meatloaf?

    Smoking a meatloaf takes 2-3 hours at 225°F. Size and thickness affect the time. Always check with a meat thermometer to ensure it reaches 160°F for safety.

    What wood chips work best for smoking meatloaf?

    Hickory, cherry, and apple woods are top choices. Hickory gives a strong BBQ taste, while cherry and apple add a sweet, milder flavor. Mixing woods can create a unique taste.

    Can I prepare the meatloaf in advance?

    Yes, prepare the mix up to 24 hours before smoking. This lets the flavors blend. Let it come to room temperature before smoking for even cooking.

    How do I prevent my smoked meatloaf from becoming dry?

    Use 80/20 ground beef and avoid overmixing. Don’t overcook it. A meat thermometer and glaze during smoking help keep it moist and flavorful.

    What side dishes pair well with smoked meatloaf?

    Try mashed potatoes, roasted veggies, and coleslaw. Grilled corn, mac and cheese, or a garden salad also pair well. The smoky flavor complements various sides.

    How should I store leftover smoked meatloaf?

    Store it in an airtight container in the fridge for 3-4 days. Reheat at 350°F, covered. Freeze for up to 3 months, wrapped tightly to prevent freezer burn.

    Can I make a gluten-free version of smoked meatloaf?

    Yes, use gluten-free alternatives like almond flour or gluten-free breadcrumbs. Make sure all ingredients, including glaze and seasonings, are gluten-free.

    What is your rating for the recipe?