Author: zikrecipes.com

  • Strawberry Cheesecake Dump Cake

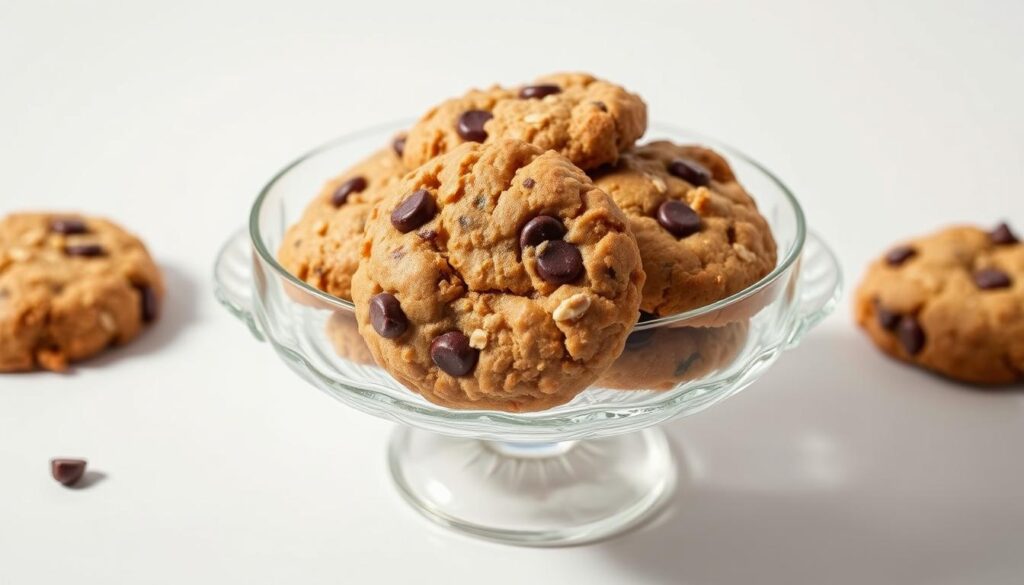
    Imagine a dessert that’s easy to make yet so tempting. It turns your kitchen into a magical place with little effort. The strawberry cheesecake dump cake is your secret to making a delicious treat that looks like it took hours to make.

    This dessert breaks all the usual baking rules. It mixes the classic tastes of strawberry cheesecake with a super simple way to make it. No need for mixing bowls or hard techniques—just pure, tasty simplicity.

    The dump cake revolution is here, changing how we see desserts. With just five ingredients and a few easy steps, you’ll make a stunning strawberry cheesecake dump cake. Everyone will want your recipe.

    What Makes a Dump Cake Special

    Discover the magic of dump cakes, a revolutionary baking method. It turns simple ingredients into a delicious dessert. This easy method combines convenience and taste, making a new york-style cheesecake-inspired treat easy to make.

    Understanding the Dump Cake Concept

    A dump cake is the ultimate shortcut for home bakers. Unlike traditional baked cheesecakes, dump cakes are easy. They require no mixing, just layering ingredients without stirring. This results in a rustic, mouthwatering dessert that looks and tastes homemade.

    • No complicated mixing required
    • Minimal preparation time
    • Foolproof for beginner bakers
    • Creates a unique texture

    Benefits of No-Mix Baking

    The no-mix approach saves time and reduces cleanup. It still makes a delicious dessert that wows family and friends. The ingredients layer and mix during baking, making a crumbly top and gooey interior.

    “Dump cakes prove that great desserts don’t require complicated techniques!” – Baking Enthusiasts Magazine

    The History Behind Dump Cakes

    Dump cakes started as a quick solution for busy cooks. They began in mid-20th century American kitchens. These recipes were loved for their simplicity and flexibility. Now, they inspire creative variations like our strawberry cheesecake dump cake.

    CharacteristicDump CakeTraditional Cake
    Mixing Time0-5 minutes15-30 minutes
    Ingredient ComplexityMinimalMultiple steps
    Skill Level RequiredBeginnerIntermediate to Advanced

    Essential Ingredients for Success

    Making the perfect strawberry cheesecake dump cake starts with top-notch ingredients. Your success depends on picking each part carefully. This turns simple ingredients into a tasty cream cheese dessert.

    The base of this tasty dessert is a classic graham cracker crust. You’ll need to gather these key ingredients:

    • Yellow cake mix
    • Strawberry pie filling
    • Cream cheese (32 ounces)
    • Unsalted butter
    • Fresh strawberries

    Your graham cracker crust needs the right mix to be perfect. Precision is key when mixing these foundational ingredients.

    IngredientQuantityPurpose
    Graham Cracker Crumbs1 3/4 cupsCrust Base
    Granulated Sugar5 tablespoonsSweetness
    Melted Butter6 tablespoonsBinding Agent

    For your strawberry topping, mix fresh and frozen strawberries. This mix gives a rich, vibrant flavor. It makes your cream cheese dessert even better.

    Pro tip: Room temperature ingredients blend more smoothly and create a more consistent texture in your dump cake.

    By choosing and mixing these ingredients well, you’ll make a strawberry cheesecake dump cake that’s both impressive and delicious.

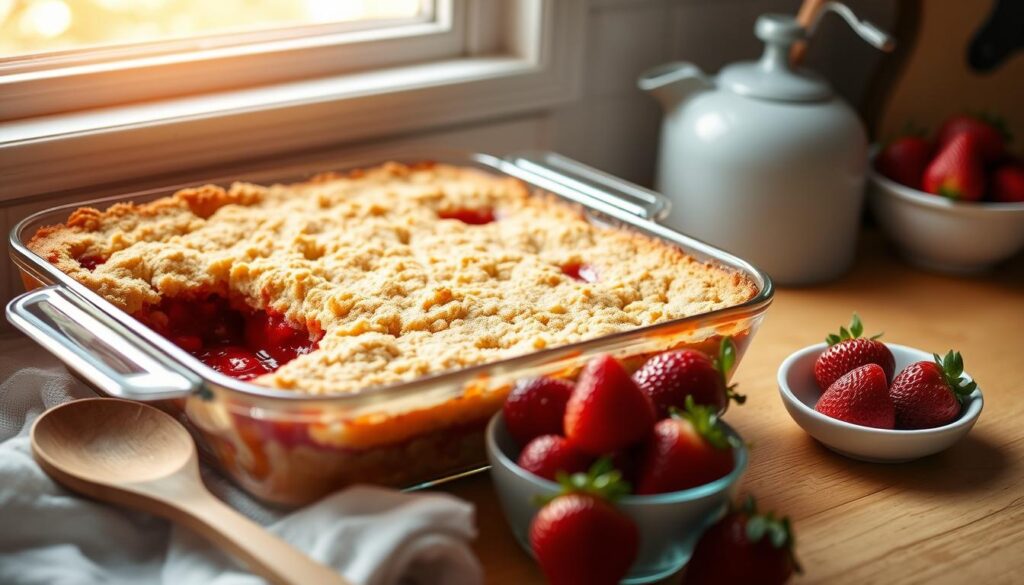
    Step-by-Step Preparation Guide

    Making the perfect summer dessert needs precision and care. This layered dessert will turn your kitchen into a baking paradise. It promises a decadent treat that will wow your family and friends.

    Preparing Your Baking Dish

    Begin by picking a 13×9-inch baking dish. The right pan is key for even cooking and texture. Grease the dish well to avoid sticking and make serving easy.

    • Choose a sturdy, light-colored baking dish
    • Use butter or non-stick cooking spray
    • Ensure even coating of the dish

    Layering Techniques

    The secret to a great dump cake is in its layering. Follow these steps for a delicious result:

    1. Preheat the oven to 350°F
    2. Spread strawberry pie filling as the first layer
    3. Sprinkle half of the cake mix evenly
    4. Add cream cheese in small dollops
    5. Cover with remaining cake mix
    LayerIngredientQuantity
    1st LayerStrawberry Pie Filling1 can (21 oz)
    2nd LayerCake MixHalf of the package
    3rd LayerCream Cheese8 oz, softened
    4th LayerRemaining Cake MixRest of the package

    Adding the Final Touches

    The last step is key for a golden-brown crust. Drizzle melted butter evenly over the top layer. This will make the crust crispy and delicious, taking your summer dessert to the next level.

    Bake for 45-50 minutes until the top is golden. Let the cake cool on a wire rack for 15 minutes before serving.

    Strawberry Cheesecake Flavor Profile

    Explore the world of fruity cheesecake and discover a flavor that excites your taste buds. The strawberry flavor adds a sweet burst that matches the creamy texture of this dessert. Every bite is a mix of sweet strawberries and creamy cheese, creating a perfect balance.

    This strawberry cheesecake dump cake offers a unique taste experience. It’s more than just a dessert. You’ll find a mix of:

    • Tangy strawberry fruit filling
    • Velvety cream cheese undertones
    • Crisp cake top with a rustic charm
    • Delicate balance of sweet and rich flavors

    Looking at the nutrition, this dessert is a treat. Each serving is full of flavor:

    Nutritional AspectPer Serving
    Total Calories468
    Total Fat37g
    Total Sugars16g
    Protein5g

    The magic happens when it’s baked. The creamy texture reaches its peak. As it bakes at 350°F, the strawberry flavor gets stronger. It creates a perfect mix of classic cheesecake and rustic charm.

    A dessert that proves simplicity can be the ultimate sophistication in baking.

    Baking Tips and Techniques

    Mastering the art of baked cheesecake needs precision and detail. Your Strawberry Cheesecake Dump Cake needs expert techniques for that golden crust and creamy texture.

    Perfect baking starts with knowing the key elements. These elements turn a good dessert into an amazing one. Let’s explore the essential techniques to make your cheesecake stand out.

    Temperature Control Secrets

    Keeping the oven at the right temperature is key for your cheesecake. Follow these expert tips:

    • Preheat the oven to exactly 350°F
    • Use an oven thermometer to check the temperature
    • Don’t open the oven door too often while baking

    Timing Considerations

    Baking time is crucial for your cheesecake. Here are the exact times to follow:

    1. Bake for 45-50 minutes
    2. Look for the top to turn slightly golden
    3. Check if the center jiggles a bit

    Visual Cues for Perfect Doneness

    Knowing when your cheesecake is done needs careful observation. Look for these signs:

    • Edges should be set but the center soft
    • The top should have a light golden crust
    • The surface should look slightly puffy

    Your goal is a cheesecake that looks and tastes amazing. With these techniques, you’ll make a dessert that looks like it was made by a pro.

    Creative Variations and Adaptations

    Unlock the potential of your cheesecake variations with these exciting customizable recipe ideas! Your Strawberry Cheesecake Dump Cake can transform into a delightful canvas for culinary creativity.

    Explore these fruit desserts adaptations that will elevate your baking experience:

    • Blueberry Blast: Swap strawberry filling with fresh blueberry compote for a vibrant twist
    • Peachy Keen: Replace strawberries with canned peach pie filling for a southern-inspired version
    • Chocolate Lover’s Dream: Sprinkle chocolate chips between layers for decadent richness

    Enhance your cream cheese base with these flavor-boosting techniques:

    1. Add vanilla extract for deeper complexity
    2. Incorporate lemon zest for bright, citrusy notes
    3. Dust with powdered sugar for extra sweetness

    “Creativity is intelligence having fun in the kitchen!” – Unknown Pastry Chef

    Experiment with different cake mix flavors like vanilla or chocolate fudge to create unique texture profiles. Your dump cake can become a personalized dessert masterpiece with just a few simple modifications.

    Serving and Presentation Ideas

    Make your Strawberry Cheesecake Dump Cake stand out with these creative presentation tips. The right way to serve it can turn your homemade dessert into a memorable treat.

    Garnishing Options

    Enhance your dessert with these garnish ideas. They add both flavor and visual appeal:

    • Fresh strawberry slices arranged in a delicate fan pattern
    • Dollops of fresh whipped cream with mint leaves
    • Dusting of powdered sugar for elegant contrast
    • Drizzle of strawberry compote for intense fruity notes

    Temperature Recommendations

    Serve your Strawberry Cheesecake Dump Cake warm, about 10-15 minutes after baking. This ensures a perfect mix of a crisp top and a warm, gooey center.

    Plating Suggestions

    Make your dessert look stunning with these plating tips:

    1. Use white porcelain plates to highlight the cake’s vibrant colors
    2. Serve individual portions in small glass dessert cups
    3. Pair with a scoop of vanilla bean ice cream
    4. Garnish with a delicate chocolate curl or fresh berry

    Pro tip: For an extra touch of elegance, serve your Strawberry Cheesecake Dump Cake with a chilled Riesling or a smooth cappuccino.

    Storage and Make-Ahead Options

    Making a dessert like this Strawberry Cheesecake Dump Cake ahead of time is super convenient. You can prepare it early, so you always have tasty treats ready.

    There are great ways to store leftovers to keep the cake delicious:

    • Refrigerator Storage: Keep your cake in an airtight container for up to 7 days
    • Freezer Storage: Wrap carefully and freeze for up to 3 months
    • Portion Control: Slice before storing for easier individual servings

    To reheat your dessert, follow these steps to keep it tasty:

    1. For individual portions, microwave 20-30 seconds
    2. For whole cake, warm in oven at 350°F for approximately 30 minutes
    3. Allow cake to rest at room temperature for 10 minutes before serving
    Storage MethodDurationRecommended Technique
    RefrigeratorUp to 7 daysAirtight container, cover with plastic wrap
    FreezerUp to 3 monthsWrap tightly in freezer-safe packaging

    Pro tip: Always bring your refrigerated or frozen cake to room temperature before serving to enjoy its full flavor profile.

    Conclusion

    Your Strawberry Cheesecake Dump Cake is more than a dessert. It’s an easy recipe that brings joy to your kitchen. With little effort, you can make a dessert that impresses everyone with its rich flavors.

    This cake is great for making your own special version. Whether you’re new to baking or experienced, this recipe is simple yet delicious. It’s all about layering ingredients, baking, and enjoying the result.

    Every slice of this cake tells a story of creativity in cooking. It combines the classic taste of cheesecake with the ease of a dump cake. By learning this recipe, you’ll have a special dessert to share that suits many tastes and needs.

    Baking is all about having fun and sharing with others. Your Strawberry Cheesecake Dump Cake is more than a treat. It’s a way to bring people together, one delicious bite at a time.

    FAQ

    What exactly is a dump cake?

    A dump cake is a simple dessert. You just “dump” ingredients into a baking dish without mixing them. For this Strawberry Cheesecake Dump Cake, layer ingredients in the pan for a delicious dessert with little effort.

    Can I use fresh strawberries instead of canned filling?

    Absolutely! Fresh strawberries work great instead of canned filling. Just slice them and mix with a bit of sugar for moisture and sweetness.

    How long does this dump cake take to prepare?

    Dump cakes are quick to prepare. This Strawberry Cheesecake Dump Cake is ready in 10-15 minutes of prep. Then, it bakes for 35-45 minutes.

    Can I make this dessert ahead of time?

    Yes! Prepare the dump cake in advance and store it in the fridge for 3-4 days. Reheat it in the oven to get its crispy top and warm center.

    Are there any dairy-free alternatives for this recipe?

    Yes, you can use dairy-free cream cheese and butter substitutes. This makes the recipe lactose-free.

    What’s the best way to serve this dump cake?

    Serve warm with vanilla ice cream or whipped cream. The cold topping contrasts well with the warm cake, enhancing the flavor.

    Can I freeze this dump cake?

    Yes, freeze it for up to 2-3 months. Wrap it tightly in plastic wrap and foil. Thaw in the fridge and reheat in the oven.

    What if I don’t have a rectangular baking dish?

    Use a similar-sized square dish or deep-dish pie pan. The key is to match surface area and depth for even baking.

    How do I know when the dump cake is fully baked?

    It’s fully baked when the top is golden, edges bubble, and the crust is crisp. A toothpick inserted in the center should come out mostly clean.

    Can I add other fruits to this recipe?

    Definitely! Try blueberries, peaches, or mixed berries. Each fruit adds a unique flavor, making different variations.

    What is your rating for the recipe?

  • Ditalini Pasta Recipe

    I remember the first time I found ditalini pasta in my grandmother’s pantry. These short pasta tubes caught my eye with their fun shape and versatility. They are a key part of authentic Italian cooking, making meals that families love.

    Ditalini pasta is more than just a simple ingredient. It’s a tradition that makes meals special. Whether you’re making a hearty soup or a creamy pasta dish, ditalini adds a unique charm. It connects you to Italy’s rich flavors.

    Understanding Ditalini Pasta

    Ditalini is a special small tubular pasta loved by many. It adds a unique touch to your cooking, making simple dishes stand out. This pasta is a favorite among both home cooks and chefs.

    What Makes Ditalini Unique

    Ditalini is known for its unique shape. These small tubular pasta pieces look like tiny thimbles, about 1/4 inch long. Their small size is great for many dishes, like:

    • Hearty soups
    • Creamy pasta salads
    • Casserole dishes
    • Quick weeknight meals

    Origins and Traditional Uses

    Ditalini pasta comes from Italy and is deeply rooted in traditional cooking. The name “ditalini” means “little thimbles” in Italian, fitting its small shape. It’s been a key ingredient in dishes like minestrone and pasta e fagioli for years.

    Dish TypeTraditional Use
    SoupsMinestrone, Pasta e Fagioli
    SaladsCold pasta salad ingredients
    CasserolesBaked pasta dishes

    Nutritional Benefits

    Ditalini is not just tasty but also nutritious. It’s made from durum wheat flour, offering important nutrients. A serving has about:

    • 200 calories
    • 41g carbohydrates
    • 7g protein
    • 2g dietary fiber

    Ditalini pasta is perfect for any meal, adding nutrition and fun to your dishes.

    Essential Ingredients for Perfect Ditalini Pasta

    Making tasty ditalini pasta dishes begins with picking top-notch ingredients. Ditalini, being a versatile italian pasta shape, needs the right ingredients for great taste and texture.

    When making ditalini, you’ll need:

    • High-quality durum wheat pasta
    • Fresh Parmesan cheese (grated from a wedge)
    • Extra virgin olive oil
    • Kosher salt
    • Fresh herbs (optional)

    For quick-cooking pasta like ditalini, the quality of ingredients is key. Fresh ingredients make your dish go from good to great. Getting authentic Italian Parmesan makes a big difference in taste.

    Here are some tips for choosing ingredients:

    1. Go for pasta made from 100% durum wheat
    2. Use freshly grated Parmesan cheese
    3. Choose extra virgin olive oil with a strong flavor
    4. Use kosher or sea salt for better taste

    If you have dietary restrictions, there are options. You can find gluten-free ditalini, plant-based cheese, and vegan olive oil. This way, everyone can enjoy this wonderful pasta.

    Kitchen Tools and Equipment Needed

    Preparing delicious ditalini pasta dishes requires the right kitchen tools. Whether you’re recreating childhood pasta favorites or experimenting with new recipes, having the proper equipment makes cooking easier and more enjoyable. Your pasta salad ingredients will come to life with these essential kitchen tools.

    Cooking ditalini pasta is a straightforward process when you have the right equipment at your disposal. Professional and home chefs alike understand the importance of well-selected kitchen tools.

    Essential Cookware

    • Large stainless steel pot (4-6 quart capacity)
    • Non-stick skillet for sauce preparation
    • Heavy-bottom cooking pan
    • Ceramic or cast-iron Dutch oven

    Measuring Tools

    ToolPurposeRecommended Size
    Measuring cupsDry ingredient measurement1/4, 1/2, 1 cup sizes
    Liquid measuring cupLiquid ingredient precision2-cup glass measurement
    Digital kitchen scalePrecise ingredient weighingUp to 11 pounds capacity

    Additional Utensils

    1. Sharp chef’s knife
    2. Cutting board
    3. Wooden mixing spoon
    4. Colander for draining
    5. Silicone spatula

    Investing in quality kitchen tools transforms your pasta cooking experience. These essentials will help you create memorable meals that bring back the warmth of childhood pasta favorites.

    Basic Cooking Method for Ditalini Pasta

    Cooking ditalini pasta right is all about precision and knowing the Italian way. This small pasta from Puglia needs careful cooking to get it just right.

    Before you start, make sure you have what you need:

    • Large cooking pot
    • Colander
    • Wooden spoon
    • Measuring cup

    Here’s how to cook ditalini pasta perfectly:

    1. Fill a large pot with water
    2. Add 1 tablespoon of salt per pound of pasta
    3. Bring water to a rolling boil
    4. Add ditalini pasta
    5. Cook for 8-9 minutes, stirring occasionally

    The secret to great ditalini is getting it just right. Check it by tasting a piece around 8 minutes. It should be tender but still have some bite.

    Pasta TypeCooking TimeWater Ratio
    Ditalini8-9 minutes4 quarts water per 1 pound pasta

    Pro tip: Cooking ditalini in soup broth is a great trick. It soaks up flavors and makes the dish more like traditional Italian cooking.

    Creamy Garlic Parmesan Ditalini Recipe

    Discover a luxurious ditalini pasta dish that turns this classic Italian pasta shape into a creamy, indulgent meal. This recipe adds rich flavors and simple ingredients. It will impress your dinner guests.

    Ingredient Lineup

    • 8 oz ditalini pasta
    • 8 cloves garlic, sliced
    • 1 cup heavy cream
    • 2 cups low-sodium vegetable broth
    • 2 oz Pecorino Romano or Parmesan cheese
    • 1/2 cup extra-virgin olive oil
    • 2 tsp garlic powder
    • 1 tsp smoked paprika
    • 1 Tbsp white miso paste
    • 1 Tbsp unsalted butter
    • 2 tsp thinly sliced chives

    Cooking Method

    Creating this creamy ditalini pasta needs precision and patience. Start by heating olive oil and sautéing garlic until golden, which takes about 3-4 minutes. Toast the ditalini pasta for 1-2 minutes to develop a light, blistered texture.

    Gradually add vegetable broth and cream, stirring consistently. The cream mixture will thicken in 8-10 minutes. Incorporate miso paste and continue cooking for an additional 6-8 minutes.

    Chef’s Professional Tips

    1. Stir pasta every 30 seconds to prevent sticking
    2. Add extra broth if the sauce becomes too thick
    3. Adjust seasoning with additional Parmesan cheese
    Nutrition Facts (Per Serving)Amount
    Calories757
    Carbohydrates47g
    Protein13g
    Fat31g

    This ditalini pasta recipe turns a simple Italian pasta shape into a restaurant-quality dish. Serve hot with extra Parmesan and enjoy the rich, creamy flavors!

    7-Ingredient Ditalini with Peas

    Discover a quick and delightful pasta dish that turns short pasta tubes into a mouthwatering meal in just 17 minutes. This ditalini pasta salad ingredients recipe is perfect for busy home cooks. It’s a simple yet satisfying dinner option.

    The beauty of this recipe is its simplicity and versatility. You’ll make a delicious pasta dish with just seven key ingredients. Short pasta tubes like ditalini are perfect for capturing the creamy sauce and sweet peas in every bite.

    • Prep Time: 5 minutes
    • Cook Time: 12 minutes
    • Total Time: 17 minutes
    • Servings: 4 people

    Here’s what you’ll need for this delectable dish:

    • ½ pound ditalini pasta
    • 1 cup frozen peas
    • 1 cup diced onion
    • 2 tablespoons butter
    • 2 tablespoons olive oil
    • 1 cup Parmesan cheese
    • Salt and pepper to taste

    Nutritional highlights make this pasta salad a smart choice. Each serving has 420 calories and key macronutrients to fuel your day. The mix of protein, carbohydrates, and healthy fats ensures a satisfying meal that keeps you energized.

    Pro tip: For extra flavor, try toasting the Parmesan cheese slightly before adding it to the pasta.

    This versatile recipe can be easily customized by adding your favorite proteins or swapping vegetables. Whether you’re preparing a quick weeknight dinner or a casual lunch, these short pasta tubes with peas will become a go-to recipe in your cooking repertoire.

    One-Pot Chicken Ditalini Recipe

    Discover the ultimate comfort food that turns miniature pasta tubes into a delightful one-pot meal. This quick-cooking pasta type recipe brings convenience and flavor together in a single dish. It will become your new weeknight favorite.

    One-pot meals have surged in popularity, with a 25% increase in online recipe searches. This Chicken Ditalini recipe captures the essence of easy, delicious cooking that home chefs crave.

    Marinade Preparation

    To elevate your chicken, create a simple yet flavorful marinade:

    • Boneless chicken thighs
    • Minced garlic
    • Olive oil
    • Salt and pepper
    • Dried herbs

    Cooking Process

    The magic of this one-pot wonder lies in its streamlined cooking method. Sauté chicken and vegetables for 8-10 minutes. This creates a rich flavor base for your miniature pasta tubes.

    IngredientQuantityPreparation
    Chicken thighs2 piecesCubed
    Ditalini pasta1 cupUncooked
    Onions1/2 cupDiced
    Garlic2 clovesMinced

    Finishing Touches

    Complete your dish with fresh spinach and a sprinkle of Parmesan cheese. These final additions transform your quick-cooking pasta type into a restaurant-worthy meal.

    Pro tip: Let the dish rest for 5 minutes before serving to allow flavors to meld perfectly.

    Nutritional highlights per serving include 17g of protein and only 193 calories. This makes it a balanced and satisfying meal.

    Sauce Variations and Combinations

    Exploring sauce options can turn your ditalini pasta into a special dish. Authentic Italian cuisine offers many tasty combinations. These can remind you of your favorite childhood pasta dishes.

    Find the perfect sauce pairings to make your ditalini pasta even better:

    • Classic Marinara Sauce: A traditional tomato-based option that captures the essence of Italian cooking
    • Creamy Pesto: Basil-rich sauce that adds a vibrant green color and fresh flavor
    • Sundried Tomato and Garlic Blend: Intense, concentrated flavor profile

    Cheese lovers will enjoy these delicious combinations:

    Cheese TypeFlavor ProfileBest Pairing
    ParmesanSharp and nuttyCream-based sauces
    FetaTangy and crumblyMediterranean-style dishes
    AsiagoRich and complexLighter olive oil sauces

    When picking a sauce for your ditalini pasta, think about the texture and flavor. Lighter sauces are best for this small pasta. They let each bite enjoy the sauce fully. Whether you’re making dishes from your childhood or trying new Italian flavors, these sauce options will spark your creativity.

    Storage and Reheating Guidelines

    Keeping your small tubular pasta dishes tasty and fresh is key. Whether it’s a creamy pasta salad or a hearty ditalini recipe, proper storage and reheating are crucial. These steps can greatly enhance your meal.

    Proper Storage Methods

    Here are the must-knows for storing pasta salad ingredients or leftover ditalini:

    • Cool pasta completely before storing to prevent moisture buildup
    • Use airtight containers to maintain freshness
    • Refrigerate within two hours of cooking

    Refrigeration Specifics

    Pasta TypeRefrigeration TimeStorage Conditions
    Cooked Ditalini3-5 daysAirtight container at 40°F or below
    Fresh Uncooked Pasta2-3 daysSealed package in refrigerator
    Dried Pasta1-2 yearsCool, dry pantry

    Reheating Instructions

    To keep your small tubular pasta in top shape when reheating:

    1. Add a splash of water or broth to prevent dryness
    2. Use low to medium heat
    3. Stir frequently to distribute heat evenly
    4. Heat until the internal temperature reaches 165°F

    Pro tip: Avoid microwaving pasta for extended periods, as this can make it tough and rubbery.

    Freezing Guidelines

    Freezing cooked ditalini pasta is a great option for long-term storage:

    • Use freezer-safe containers
    • Add a light coating of oil to prevent sticking
    • Freeze for up to 2 months
    • Thaw in the refrigerator overnight before reheating

    Common Substitutions and Alternatives

    Don’t panic if you’re out of ditalini pasta! Many alternatives can replace these small shapes in your dishes. It’s important to know each pasta’s unique traits and how it cooks.

    Here are some top substitutes for ditalini in soup pasta varieties:

    • Orzo: A rice-shaped pasta that cooks quickly and works wonderfully in soups
    • Tubetti: Slightly wider pasta shape with similar cooking time
    • Elbow macaroni: Provides a comparable texture and absorption
    • Acini de pepe: Tiny round pasta perfect for soups

    Your choice of substitute depends on the recipe and texture you want. Consider these nutritional alternatives to boost your dish:

    Pasta TypeCooking TimeProtein ContentFiber Level
    Whole Wheat Pasta8-10 minutesHighHigh
    Quinoa Pasta8-9 minutesVery HighModerate
    Vegetable-Based Pasta7-9 minutesHighHigh

    When substituting, adjust cooking times and liquid ratios. Each pasta shape absorbs liquid differently. So, watch your dish closely to get the perfect consistency.

    Recipe Cost and Portion Planning

    Cooking tasty meals doesn’t have to cost a lot. Quick-cooking pasta types like ditalini help you make affordable dishes. These dishes remind you of your favorite childhood pasta while saving money.

    Let’s look at the cost of ditalini pasta recipes. Each serving costs between $2 to $3. For a big family meal, you’ll spend about $10 to $15 on ingredients.

    Portion Planning Strategies

    • Allocate approximately 1 cup of cooked pasta per serving
    • This translates to about 2 ounces of dry pasta per person
    • 1 cup of uncooked ditalini yields roughly 2 cups when cooked

    To save money, consider these tips:

    1. Buy pasta in bulk
    2. Choose ingredients that are versatile
    3. Plan meals that use similar ingredients

    Pro tip: Ditalini pasta is very flexible. It lets you make many meals from one batch of ingredients. This makes it great for saving money on meals.

    When cooking for different numbers of people, remember. A recipe can serve 4 to 10 people. Always adjust the ingredients to avoid waste and save on groceries.

    Conclusion

    Ditalini pasta is a versatile and delightful ingredient. It can turn simple meals into amazing dishes. This small pasta shape from Italy offers endless possibilities for home cooks.

    With the techniques from this guide, you can make everything from hearty soups to creamy pasta dishes. The shape of ditalini pasta absorbs sauce perfectly. It adds a delightful texture that makes simple recipes taste like they’re from a restaurant. Don’t be afraid to try new ingredients and techniques to find your own style.

    Ditalini pasta is great for any meal, whether it’s a weeknight dinner or a special event. It cooks quickly, is easy to use in many recipes, and has a rich Italian heritage. It’s perfect for both beginners and experienced cooks who want to add a bit of Italy to their kitchen.

    Now that you know more about ditalini pasta, you can explore new flavors and recipes. Trust your instincts and enjoy the tasty results of your cooking adventures with this amazing pasta shape.

    FAQ

    What exactly is ditalini pasta?

    Ditalini pasta is a small, short pasta shape that looks like tiny tubes. It’s about 1/4 inch long. This makes it great for soups, salads, and Italian dishes. It cooks quickly and blends well with other ingredients.

    Where did ditalini pasta originate?

    Ditalini pasta comes from Italy, known for its pasta-making skills. The name “ditalini” means thimble in Italian, describing its shape. It’s loved in southern Italy and is a key ingredient in many soups.

    How do I cook ditalini pasta perfectly?

    To cook ditalini pasta, boil a large pot of salted water. Add the pasta and cook for 8-10 minutes until it’s al dente. Check the pasta as it cooks to keep it firm. Drain and rinse with cold water for salads or add to hot sauce.

    What are the best dishes to make with ditalini pasta?

    Ditalini pasta is versatile and works well in many dishes. It’s great in minestrone soup, pasta salads, mac and cheese, and one-pot meals. It’s especially good in Italian wedding soup, cold salads, and creamy casseroles.

    Is ditalini pasta nutritionally beneficial?

    Ditalini pasta is a good source of carbs and some protein. A serving has about 200 calories and B vitamins and minerals. Whole wheat varieties have more fiber and nutrients. Choose whole grain ditalini or pair it with protein for a healthier meal.

    How should I store leftover ditalini pasta dishes?

    Store leftovers in an airtight container in the fridge for 3-5 days. Keep pasta and sauce separate for better quality. When reheating, add a bit of water or broth to prevent drying. Creamy dishes should be gently reheated on the stovetop, while dryer dishes can be microwaved.

    Can I use ditalini pasta in gluten-free recipes?

    Yes, there are gluten-free ditalini pasta options made from rice, corn, or chickpea flour. They have similar texture and cooking properties to traditional pasta. Always follow the specific cooking instructions on the packaging.

    What are some budget-friendly ditalini pasta recipes?

    Ditalini pasta is very affordable. You can make minestrone soup, pasta with canned tomatoes and herbs, or mac and cheese for under $10. Use affordable ingredients like frozen veggies, canned beans, and basic seasonings to save money.

    What is your rating for the recipe?

  • Salmon Sushi Bake Recipe

    Imagine a warm casserole dish filled with creamy salmon sushi. It turns your home cooking into a Japanese cuisine experience. The salmon sushi bake is more than a meal; it’s a celebration of flavors that brings people together.

    Picture sharing this dish with friends and family. Each bite tells a story of culinary creativity. This dish turns traditional sushi into a comforting, shareable casserole that’s both elegant and easy to make.

    Whether you’re a seasoned home cook or just starting out, this recipe will take your cooking to the next level. It introduces you to a modern twist on classic flavors.

    What is Salmon Sushi Bake?

    Sushi bake is a tasty twist on sushi rolls. It turns them into a warm, inviting dish. This modern take on Japanese food has won over food lovers everywhere, offering a fresh way to enjoy old favorites.

    Origins and Evolution of the Dish

    The salmon sushi bake started as a fun twist on sushi rolls. It began in Asian-inspired kitchens and quickly became a global hit. Chefs and home cooks turned sushi rolls into a shareable, baked dish.

    • Inspired by traditional sushi ingredients
    • Developed as a social sharing-friendly dish
    • Combines familiar seafood flavors in a new format

    Why This Recipe Became a Social Media Sensation

    Social media, like TikTok and Instagram, made the salmon sushi bake famous. Visual appeal was key, with its colorful layers and ingredients grabbing attention.

    Traditional Sushi vs Sushi Bake

    Traditional sushi rolls need careful rolling. Sushi bake, however, is easier to make. The main differences are:

    • Preparation method: Baked vs hand-rolled
    • Serving style: Communal dish vs individual pieces
    • Texture: Warm and creamy vs cold and compact

    Your salmon sushi bake combines traditional Japanese tastes with modern cooking. It offers a unique dining experience that’s both comforting and excitingly new.

    Essential Ingredients for Perfect Sushi Bake

    Making a tasty sushi bake begins with picking top-notch ingredients. The key to a great dish is using sushi grade fish and fresh catch. These ingredients are crucial for the final taste.

    • Base Ingredients:
      • 1 1/2 cups sushi rice
      • 1/4 cup rice vinegar
      • 1 teaspoon salt
    • Protein and Seafood:
      • 1 1/2 lbs fresh catch salmon
      • 8 oz cream cheese
      • 1 cup imitation crab
    • Flavor Enhancers:
      • 1/4 cup sriracha mayo
      • 4 tablespoons furikake seasoning
      • Optional: sesame seeds

    Choose sushi grade salmon for the best taste and safety. The freshness of your catch greatly affects the dish’s flavor.

    Ingredient CategoryQuantityPurpose
    Sushi Rice1 1/2 cupsBase foundation
    Salmon1 1/2 lbsPrimary protein
    Cream Cheese8 ozCreamy texture
    Furikake4 tablespoonsFlavor enhancement

    Pro tip: Always choose the freshest ingredients. Your sushi bake will be amazing in taste and texture!

    Preparing the Perfect Sushi Rice Base

    Making an amazing sushi bake starts with the base: perfect sushi rice. It might seem easy, but making rice for sushi needs precision and skill.

    Your journey to great sushi rice starts with the right ingredients and knowing how to prepare them. Real sushi rice needs special care to turn simple grains into a tasty base.

    Rice Selection and Washing Techniques

    Choosing the right rice is key for your sushi bake. Pick short-grain Japanese rice labeled “sushi rice” for the best taste.

    • Select only short-grain Japanese rice
    • Rinse rice 2-3 times until water runs clear
    • Use cool water during rinsing
    • Drain rice thoroughly before cooking

    Seasoning the Rice

    The secret to real flavor is in the seasoning mix. Japanese methods mix rice vinegar, sugar, and salt for a perfect balance.

    IngredientQuantity for 1½ cups Rice
    Rice Vinegar4 tablespoons
    Sugar2 tablespoons
    Salt1 teaspoon

    Proper Rice Cooling Methods

    After cooking, spread your rice in a wide dish to cool fast. Gently fold in the seasoning mixture while it’s still warm. This ensures even flavor without mashing the rice.

    “Perfect sushi rice is about technique, not just ingredients” – Japanese Culinary Tradition

    Cooling takes 10-15 minutes. Your rice should cool to room temperature before using in your bake. This keeps its texture and prevents it from getting soggy.

    Salmon Selection and Preparation

    Choosing the right salmon is key for a great sushi bake. Look for fresh, high-quality fish with bright pink or orange flesh. This recipe needs cooked salmon for its rich, tender flavor.

    Your salmon should have these qualities:

    • Bright, uniform color without gray or yellow patches
    • Firm flesh with fine white marbling
    • Clear, bulging eyes (for whole fish)
    • Fresh, mild ocean scent

    For the best results, pick salmon fillets about 1 inch thick. Wild-caught Pacific salmon gives the best flavor, but farm-raised works too. Pro tip: Always buy salmon from trusted sources for safety and quality.

    Preparing it is easy. Season the salmon with salt and pepper. Then, cook it using one of two ways:

    1. Air Fryer Method: Cook at 400°F for 10-12 minutes
    2. Oven Baking: Roast at 375°F for 15-17 minutes

    Cooking it right makes the salmon a tasty sushi bake centerpiece. It ensures both safety and amazing flavor.

    Creating the Creamy Seafood Mixture

    Making the perfect seafood mixture is key to your salmon sushi bake. It turns simple ingredients into a dish full of omega-3 flavors.

    Combining Salmon with Complementary Ingredients

    Begin by preparing your salmon. You’ll need to shred about 1.5 pounds into small pieces. The secret to a great mix is balancing textures and tastes.

    • Shred 8 ounces of imitation crab meat
    • Add 8 ounces of softened cream cheese
    • Incorporate 1 cup of Kewpie mayonnaise
    • Season with 2 teaspoons of soy sauce

    Spicy Mayo Preparation

    Making a spicy mayo adds a zesty touch. Mix 3 tablespoons of Sriracha with mayonnaise for a kick. Pro tip: Adjust Sriracha to your preferred heat level.

    Texture and Consistency Tips

    Getting the right consistency is important. Fold ingredients gently for a creamy yet light mix. Don’t overmix, as it can make the mix dense.

    The perfect seafood mixture should be creamy, flavorful, and hold together without being too compact.

    Your aim is a mix that highlights the salmon’s richness. It should be luxurious and spreadable, making your sushi bake irresistible.

    Layering Techniques for Salmon Sushi Bake

    Making the perfect salmon sushi bake is all about layering. It turns sushi rolls into a tasty baked dish. Each layer is built with care and purpose.

    Start with sushi rice that’s cooked just right. Spread it in a 9×13 inch baking dish. Press it down to make a solid base, just like sushi rolls.

    • First layer: Sushi rice (2 cups uncooked)
    • Second layer: Furikake seasoning
    • Third layer: Salmon and crab mixture
    • Final layer: Creamy spicy mayo

    Next, sprinkle furikake over the rice for extra flavor. Then, add the salmon and crab mix, spreading it evenly. Finally, top it off with creamy spicy mayo for a rich finish.

    LayerIngredientsQuantity
    BaseSushi Rice2 cups uncooked
    SeasoningFurikake2-3 tablespoons
    ProteinSalmon & Crab Mix1.5 pounds salmon
    ToppingSpicy Mayo1/2 cup

    Pro tip: Use a spatula to smooth each layer. This makes sure everything bakes evenly. The goal is to make a dish that’s like sushi rolls but easy to share.

    Baking Instructions and Temperature Guide

    To turn your salmon sushi bake into a warm seafood treat, you need to bake it just right. The right temperature and timing are key. They help you get a crispy top without overcooking the dish.

    Start your salmon sushi bake journey with careful prep and smart baking tricks. Getting that golden-brown top is an art. It’s all about controlling the temperature and timing.

    Optimal Oven Settings

    For the best seafood dish, follow these important baking tips:

    • Preheat your oven to 450°F
    • Use the middle rack for even heat
    • Put the baking dish in the center

    Timing and Doneness Indicators

    To bake perfectly, watch the time and look for visual signs:

    1. Bake for 12-15 minutes
    2. Look for a golden, bubbly top
    3. Check that the salmon is opaque and caramelized
    Baking ParameterRecommended Setting
    Temperature450°F (230°C)
    Baking Time12-15 minutes
    Doneness IndicatorGolden top, opaque salmon

    Pro tip: Every oven is unique. So, start checking your dish at 10 minutes to avoid overcooking. Aim for a caramelized top and a moist, tasty inside.

    Essential Toppings and Garnishes

    Take your salmon sushi bake to the next level with traditional Japanese toppings. These toppings add flavor, texture, and beauty. They make your dish unforgettable.

    • Furikake: A classic Japanese seasoning that adds umami
    • Toasted sesame seeds for a nutty crunch
    • Chopped green onions for a fresh, sharp bite
    • Sriracha mayo for a creamy, spicy kick

    Want to make your sushi bake even better? Try these gourmet garnishes:

    • Tobiko (flying fish roe) for vibrant color and smoky flavor
    • Microgreens for a delicate, nutritious touch
    • Pickled ginger to cleanse the palate
    • Yuzu kosho for a zesty, peppery accent

    Pro tip: Toast your sesame seeds briefly to unlock their full nutty potential and add an extra layer of flavor to your salmon sushi bake.

    The secret to a great salmon sushi bake is balance. Mix and match these toppings to make a dish that’s both personal and traditional. It will celebrate Japanese cuisine and your taste buds.

    Serving Suggestions and Presentation

    Take your salmon sushi bake to the next level with expert serving tips. These techniques turn a tasty dish into a feast for the eyes and taste buds. With sushi grade ingredients, presentation is key.

    Plating Techniques That Impress

    Make your dish stand out with these plating ideas:

    • Choose simple white platters to show off your sushi bake’s colors
    • Add fresh herbs like shiso leaves or microgreens for garnish
    • Place portions in individual ceramic spoons for a fancy look
    • Top with toasted sesame seeds for texture and beauty

    Perfect Accompaniment Recommendations

    Pair your salmon sushi bake with these great choices:

    1. Enjoy chilled sake or crisp white wine
    2. Add pickled ginger for a Japanese touch
    3. Try wasabi for a spicy twist
    4. Balance rich flavors with a light cucumber salad

    Serve your salmon sushi bake warm, scooping it onto mini nori sheets. This makes for a fun, interactive meal. Aim for a serving temperature of about 350°F to keep it warm and welcoming.

    Pro tip: Let guests make their own sushi bake rolls for a fun, engaging meal!

    Storage and Reheating Tips

    Keeping your salmon sushi bake fresh is key. After you make it, you’ll want to keep it tasty and safe. Here’s how to do it right.

    Storing your dish properly is essential. Here are some important tips:

    • Store in an airtight container
    • Refrigerate within 2 hours of preparation
    • Keep for maximum 3-4 days in the refrigerator
    • Separate rice from fish when possible

    There are several ways to reheat your salmon sushi bake:

    1. Oven Method: Preheat to 325°F, heat for 4 minutes per side
    2. Air Fryer: Set at 325°F, cook 4 minutes per side
    3. Microwave: Use medium heat, 10-second intervals (maximum 3 bursts)

    Remember these safety tips for storing and reheating:

    • Never leave sushi at room temperature for more than 2 hours
    • Check for signs of spoilage before consuming
    • Consume within recommended time frames

    By following these tips, your salmon sushi bake will stay delicious. It will keep the quality of your fresh catch.

    Health Benefits and Nutritional Information

    Salmon Sushi Bake is a tasty way to get a meal full of nutrients. It combines the health perks of omega-3 rich salmon with a great taste. Knowing what’s in this dish helps you choose better foods.

    • Calories: 649
    • Fat: 50g
    • Carbohydrates: 25g
    • Protein: 25g

    Omega-3 Powerhouse

    Salmon is a top source of omega-3 fatty acids. These fats are great for your health. They help:

    • Reduce chronic inflammation
    • Keep your heart healthy
    • Possibly lower risks of:
      • Cancer
      • Diabetes
      • Heart disease
      • Stroke

    Raw Fish vs. Cooked Salmon

    Raw fish sushi has its own health benefits. But cooked salmon offers similar omega-3s with less risk of getting sick. The American Heart Association says eat fish at least twice a week for these benefits.

    When making your Salmon Sushi Bake, pick high-quality salmon. This ensures you get the most nutrients and flavor. Cooking salmon also gets rid of bacteria risks from raw fish while keeping important nutrients.

    Conclusion

    Your journey with salmon sushi bake is more than a recipe. It’s a dive into modern cooking creativity. This dish turns traditional salmon sushi into a tasty, shareable delight. It brings family and friends together at dinner.

    Salmon sushi bake lets you play with ingredients and flavors. It’s perfect for both seasoned cooks and curious foodies. This recipe makes it easy to enjoy salmon sushi’s rich flavors in a new way.

    Cooking is all about making it your own. Feel free to change spice levels, swap out ingredients, and make it yours. The most important thing is to have fun and enjoy the process.

    We encourage you to share your salmon sushi bake on social media. Tag @onehappybite and use #onehappybite. This way, you can connect with others who love to cook and share delicious meals.

    FAQ

    What is a Salmon Sushi Bake?

    A Salmon Sushi Bake is a new twist on sushi. It combines baked salmon, seasoned rice, and creamy seafood in a casserole. This dish is warm, easy to make, and perfect for gatherings.

    Is Salmon Sushi Bake safe to eat?

    Yes, it’s safe when made right. Unlike raw sushi, this version uses cooked salmon. Use fresh, high-quality fish and cook it well for safety.

    Can I use different types of fish for this recipe?

    Yes! You can try tuna, crab, or imitation crab. Just pick fresh, quality fish that goes well with the creamy mix and rice.

    How long does Salmon Sushi Bake last in the refrigerator?

    It lasts 3-4 days in the fridge if stored right. Eat it within 2 days for the best taste. Always reheat it well before serving.

    Is Salmon Sushi Bake healthy?

    Yes, it’s very healthy. Salmon has omega-3s for heart and brain health. It’s a good mix of protein, fats, and carbs, making it a nutritious meal.

    Can I make Salmon Sushi Bake ahead of time?

    You can prep parts of it ahead. Cook the rice and salmon mix separately and store them. Assemble and bake just before serving for the best taste.

    What are the best toppings for Salmon Sushi Bake?

    Try furikake, nori, sesame seeds, and green onions for a Japanese touch. Add spicy mayo or sriracha for extra flavor.

    Can I make a vegetarian version of Sushi Bake?

    Yes, use tofu, roasted veggies, or plant-based seafood. Keep the rice and creamy mix for the dish’s essence.

    What’s the difference between Sushi Bake and traditional sushi?

    Traditional sushi is raw fish on rice, often hand-rolled. Sushi Bake is baked, layered, and served with nori for wrapping. It’s easier to make at home.

    Do I need special equipment to make Salmon Sushi Bake?

    No special gear is needed. Just a baking dish, rice cooker or pot, and basic tools. Use an oven or air fryer for baking.

    What is your rating for the recipe?

  • Pancake Recipe For One

    Every weekend morning is a chance to make your kitchen a cozy brunch spot. I love quiet mornings and tasty breakfasts. So, I’ve learned to make the best single-serving pancake recipe that fills both your belly and heart.

    Making pancakes for one is more than just mixing ingredients. It’s about enjoying a special moment just for you. Whether you’re a busy person, a student, or just enjoying a solo morning, this pancake recipe will make your breakfast better.

    Picture golden, fluffy pancakes that are easy to make but super satisfying. This guide will show you how to make the perfect single-serving pancake. It’s quick, delicious, and just the right size for your morning hunger.

    Understanding the Basics of Solo Pancake Making

    Making weekend breakfast pancakes for one is all about clever kitchen tricks. Whether it’s for yourself or to perfect family recipes, learning to make single-serving pancakes can change your morning. It’s a game-changer.

    Essential Kitchen Tools for Single Serving

    For solo pancake cooking, you need specific tools. They make your cooking smooth and efficient:

    • Small 8-inch non-stick skillet
    • Compact mixing bowl (1-2 quart capacity)
    • Measuring cups and spoons
    • Whisk or fork for mixing
    • Spatula for flipping

    Perfect Portion Guidelines

    When cooking pancakes for one, precision is key. Your batter should make about 2-3 medium pancakes. Pro tip: Use 1/2 cup of flour and adjust the liquid ingredients accordingly for the perfect batch.

    Time Management Tips

    Make your weekend breakfast prep easier with these tips:

    1. Prepare dry ingredients the night before
    2. Measure wet ingredients in advance
    3. Let batter rest for 5-10 minutes before cooking
    4. Use a timer to track cooking duration

    By mastering these techniques, you’ll whip up delicious, just-right pancakes. They’ll make your solo breakfast both tasty and stress-free.

    Simple Ingredients for Your Solo Stack

    Making tasty pancakes begins with knowing your batter ingredients. For a single pancake, you need a few basic items. These items turn simple parts into a delicious breakfast.

    Your must-have ingredients for a solo pancake are:

    • 50g plain flour (or self-raising flour)
    • ½ tsp baking soda
    • 1 large egg
    • 150ml milk
    • Optional: 1 tsp vanilla extract
    • Pinch of salt

    Family recipes often share the secret to great pancakes. The trick is using top-notch ingredients that blend well. Wild Oats has great flour choices, like traditional, gluten-free, and wholegrain, for all diets.

    When picking milk, think about plant-based options like almond, oat, or coconut milk. They bring special tastes and fit many diets. For one serving, you’ll need about 400ml of your favorite milk.

    Pro tip: Fresh ingredients make the most delicious pancakes!

    Remember to check your baking soda’s freshness. For the best pancakes, replace it every 6 months. This ensures your pancakes will rise just right.

    The Science Behind Fluffy Pancakes

    Making the perfect pancake is a mix of science and cooking skills. Knowing the chemical reactions and exact methods can turn your pancakes from flat to fluffy.

    The secret to fluffy pancakes is understanding key science. The batter’s mix and how you prepare it greatly affect the outcome.

    Role of Baking Powder

    Baking powder is the key to air pockets in pancakes. Use 1 to 1.5 teaspoons of baking powder per cup of flour for the best results. It releases carbon dioxide bubbles, making pancakes light and airy.

    • Baking powder makes up about 8% of dry ingredients
    • Creates tiny air bubbles that expand during cooking
    • Helps achieve a soft, pillowy pancake interior

    Importance of Proper Mixing

    Mixing is crucial for pancake texture. Overmixing makes pancakes tough and rubbery. Aim for 8 to 10 big swooping stirs to mix just enough.

    Mixing ApproachResult
    OvermixingDense, tough pancakes
    Minimal mixingLight, fluffy pancakes
    Lumpy batterBetter texture and height

    Temperature Control Techniques

    The cooking temperature greatly affects pancake texture. Keep the heat between 250°F to 325°F. This ensures even cooking and prevents burning, allowing the batter to rise well.

    • Preheat your cooking surface
    • Use medium heat for golden color
    • Allow batter to rest 5-10 minutes before cooking

    Step-by-Step Pancake Recipe

    Making the perfect pancake recipe begins with the right ingredients and mixing. This method for making one pancake at a time will teach you how to make a fluffy, golden stack every time.

    Ingredients Breakdown

    • 1 1/2 cups all-purpose flour
    • 1 tablespoon granulated sugar
    • 2 teaspoons baking powder
    • 1 teaspoon kosher salt
    • 1 1/3 cups whole milk
    • 1 large egg
    • 1 teaspoon pure vanilla extract
    • 2 tablespoons unsalted butter, melted

    Mixing Instructions

    Start by mixing dry ingredients in a medium bowl. Then, whisk wet ingredients in another container until they’re well mixed. Gently fold the wet ingredients into the dry ones, making sure the batter is smooth but not overmixed.

    It’s important to avoid overmixing to get perfect pancakes. Your batter should still be a bit lumpy. This helps make the pancakes light and tender. Let the batter rest for 5-10 minutes before cooking.

    Cooking Process

    1. Heat a non-stick skillet or griddle over medium heat
    2. Lightly grease the surface with butter
    3. Pour 1/4 cup of batter for each pancake
    4. Cook until bubbles form on the surface (2-3 minutes)
    5. Flip and cook the other side until golden brown

    Your single-serving pancake recipe will make about 10 delicious pancakes. They’re perfect for a tasty breakfast or brunch.

    Mastering the Perfect Batter Consistency

    Making the perfect pancake batter is an art. It can turn your breakfast into something special. You need to pay attention to the ingredients and how you mix them.

    The key to great pancakes is the batter’s mix and how you prepare it. You want a smooth batter for light, fluffy pancakes every time.

    Signs of Over-mixing

    Mixing the batter needs a gentle touch. Too much mixing can make the batter tough. Look out for these signs:

    • Batter becomes tough and elastic
    • Visible streaks of flour disappear completely
    • Mixture looks completely smooth with no lumps

    Proper Resting Time

    Letting your batter rest is important. It helps with flavor and texture. Here’s what experts suggest:

    1. Rest batter for 10-15 minutes
    2. Cover the bowl with a clean kitchen towel
    3. Let ingredients hydrate and gluten relax

    Texture Troubleshooting

    If your batter isn’t right, try these fixes:

    • Too thick: Add milk or water gradually
    • Too thin: Sprinkle in sifted flour
    • Lumpy: Gently whisk or use a sifter

    Remember, the more you make pancakes, the better you’ll get. Each batch teaches you something new about achieving that fluffy texture.

    Essential Cooking Techniques

    Learning cooking techniques is key to making the best weekend breakfast pancakes. The right method can turn your pancake-making into a special event.

    Getting the temperature right is crucial for golden-brown pancakes. Your pan should be just the right temperature – not too hot, not too cold. Chefs say to test the pan with water. If water droplets quickly evaporate, your griddle is ready.

    • Use a large skillet or non-stick griddle for even cooking
    • Maintain medium heat to prevent burning
    • Wait for bubbles to form before flipping

    Flipping pancakes takes practice. Slide your spatula gently under the pancake, lift slightly, and flip with a quick wrist motion. Don’t press down on the pancake, as it will lose its fluffiness.

    Cooking TechniqueKey Tip
    Pan Temperature200-225 degrees F
    Batter Resting Time10-15 minutes
    Recommended Butter4 tablespoons per batch

    For a great weekend breakfast, remember patience is key. Let your batter rest, watch for bubbles, and practice flipping. Your perfectly cooked pancakes will be worth all the effort.

    Customizing Your Single-Serving Pancakes

    Turn your simple pancake recipe into a special treat for family and brunch. Try new ingredients to make your pancakes stand out.

    Fresh Fruit Additions

    Fresh fruits bring flavor and health to your pancakes. Here are some great choices:

    • Blueberries: Add 1 ounce of fresh or freeze-dried blueberries
    • Banana slices: Sprinkle on top or mix into the batter
    • Strawberries: Chop and spread them out

    Flavor Variations

    Try new flavors to keep your pancakes exciting:

    • Chocolate chip pancakes
    • Cinnamon swirl batter
    • Lemon zest for a bright twist
    • Malted milk powder for deeper flavor

    Dietary Modifications

    Make your pancakes fit different diets:

    • Gluten-free: Use almond or coconut flour
    • Dairy-free: Use almond or oat milk
    • Vegan: Replace eggs with flax eggs or mashed banana
    • Low-carb: Try protein powder or almond flour

    Remember, being creative is key to making your pancakes special for family and brunch!

    Classic Topping Combinations

    Creating the perfect brunch menu starts with mastering pancake toppings. These toppings can turn a simple stack into something amazing. The secret is to mix flavors and textures just right.

    Culinary experts say the best maple syrup toppings include creamy, sticky, crunchy, and fruity options. This mix creates a complex flavor that will wow your taste buds.

    Classic Topping Combinations

    • Creamy Classics:
      • Butter
      • Whipped cream
      • Greek yogurt
    • Sticky Sweet Options:
      • Real maple syrup
      • Honey
      • Caramel sauce
    • Crunchy Additions:
      • Chopped walnuts
      • Coconut flakes
      • Mini chocolate chips
    • Fruity Delights:
      • Fresh berries
      • Banana slices
      • Mixed berry compote

    “The perfect pancake is a canvas waiting for your creative topping masterpiece.” – Breakfast Enthusiast

    Pro tip: For a protein-packed option, try combining full-fat Greek yogurt, fresh strawberries, and a drizzle of honey. This mix is balanced, nutritious, and satisfies your pancake cravings.

    Storage Tips for Leftover Batter

    Don’t worry if you have leftover pancake mix. It’s common when making pancakes for the weekend. Learning how to store it right can save you time and help avoid waste.

    Leftover pancake batter is great for quick breakfasts. The trick is knowing how to keep it fresh and tasty.

    Refrigeration Best Practices

    Here’s how to store pancake batter in the fridge:

    • Use an airtight container to prevent contamination
    • Store batter for a maximum of 48 hours
    • Keep the container sealed to prevent flavor absorption

    Reheating and Usage Guidelines

    When you want to use refrigerated pancake batter, handle it gently. Stir the batter well before cooking. This helps if ingredients have separated.

    Storage MethodMaximum DurationRecommended Action
    Refrigerator48 hoursStir before use, check consistency
    Freezer3 monthsThaw in refrigerator, mix thoroughly

    “Proper storage is the secret to maintaining the perfect pancake texture for your family recipes.” – Breakfast Cooking Expert

    Pro tip: Mark your container with the date you made it. This helps keep track of freshness for the best weekend breakfast.

    Common Mistakes to Avoid

    Making the perfect pancake needs careful cooking techniques. Many home cooks accidentally ruin their pancakes by making simple mistakes. These mistakes can turn a great breakfast into a disappointing meal.

    Some key errors to avoid include:

    • Overmixing the batter, which develops excess gluten and creates tough pancakes
    • Using incorrect pan temperature that leads to uneven cooking
    • Flipping pancakes too early or too late
    • Neglecting to let the batter rest before cooking

    Your baking powder is key for a fluffy pancake. Old or expired baking soda can dramatically reduce your pancakes’ rise and overall quality. Make sure to replace your baking soda every six months for the best results.

    Temperature control is also crucial. Medium heat is best – too high, and the outside burns before the inside is cooked. A cast iron pan heats evenly, helping you get perfect pancakes.

    Pro tip: Always cook a test pancake to determine the right pan temperature before making your entire batch!

    By knowing and avoiding these common mistakes, you’ll get better at making pancakes. You’ll enjoy deliciously fluffy breakfast treats every time.

    Nutritional Information and Serving Size

    Knowing the nutritional facts of your homemade pancakes is key. It helps make tasty breakfast foods that match your diet. Each serving of these single-serving pancakes is a balanced choice for your brunch.

    Calorie Breakdown

    A single pancake has about 158 calories. A full serving has 240-247 calories. Here’s a detailed nutritional breakdown:

    NutrientAmount per Serving% Daily Value
    Total Fat9-10g12%
    Saturated Fat2-5g12%
    Cholesterol51-67mg17%
    Sodium262-804mg35%
    Carbohydrates33-34g12%
    Protein7g14%

    Dietary Considerations

    When making pancakes for breakfast, think about these changes:

    • Low-Carb Option: Use almond or coconut flour instead of all-purpose flour
    • High-Protein Variant: Add protein powder or Greek yogurt for more protein
    • Gluten-Free: Choose a gluten-free flour blend instead of wheat flour

    Your brunch menu can meet different dietary needs while staying tasty and nutritious. Try new ingredients to make pancakes that fit your health goals.

    Conclusion

    Your pancake recipe adventure is just starting. You’ve learned how to make delicious breakfast foods for one. This opens up a world of culinary creativity, making your weekend breakfast special.

    The beauty of single-serving pancake recipes is their flexibility. You can try different grains, like rye or whole wheat. Or, you can use yogurt instead of buttermilk. You can even add gourmet toppings like caramelized bananas. Each pancake can be your own unique creation.

    As you keep practicing, you’ll find joy and creativity in making pancakes. Start with the basics, then try new ingredients. Most importantly, enjoy the journey. Your perfect pancake is waiting for you, one morning at a time.

    FAQ

    How can I ensure my single-serving pancakes turn out fluffy?

    To make fluffy pancakes, use fresh baking powder. Avoid overmixing the batter. Let it rest for 5-10 minutes before cooking.

    The key is to mix just until ingredients are combined. This creates light air pockets that help your pancakes rise beautifully.

    Can I make pancakes if I have dietary restrictions?

    Absolutely! You can modify the recipe for gluten-free, dairy-free, or vegan diets. Use almond flour, oat milk, or flax eggs to make pancakes that meet your dietary needs without losing taste or texture.

    How long can I store pancake batter in the refrigerator?

    Homemade pancake batter can be stored in an airtight container in the fridge for up to 2 days. Before using, give it a gentle stir as some separation may occur.

    What’s the best way to prevent pancakes from sticking to the pan?

    Use a non-stick skillet or griddle. Lightly grease it with butter or cooking spray before adding batter. Preheat the pan to medium heat for a perfect golden-brown exterior without burning.

    How can I add extra flavor to my pancakes?

    Try mix-ins like chocolate chips, blueberries, or cinnamon. Add vanilla extract to the batter or spices like nutmeg or cardamom for a unique twist.

    What’s the ideal batter consistency for pancakes?

    The perfect pancake batter is slightly lumpy and thick like heavy cream. It should pour easily but not be too runny. Adjust with milk or flour as needed.

    Can I freeze pancake batter or cooked pancakes?

    Cooked pancakes can be frozen for up to 1 month in an airtight container or freezer bag. Raw batter is not recommended for freezing as it can affect the texture and rising properties.

    How do I know when to flip my pancakes?

    Look for small bubbles on the surface and slightly dry edges. This usually takes 2-3 minutes on medium heat. When you see these signs, it’s time to flip your pancake.

    Are pancakes nutritionally balanced?

    While delicious, traditional pancakes are high in carbohydrates. To balance your meal, add protein-rich toppings like Greek yogurt. You can also add protein powder to the batter or serve with eggs or lean protein.

    What’s the best pan for making single-serving pancakes?

    A small non-stick skillet or griddle is best for single-serving pancakes. An 8-inch skillet is ideal, allowing you to make perfectly sized pancakes without waste or complicated cooking.

    What is your rating for the recipe?

  • Protein Cookie Recipe

    Ever wanted a sweet treat that won’t ruin your fitness goals? Welcome to protein cookies – the snack that makes healthy treats exciting. Imagine a cookie that’s as tasty as a dessert but also gives you important nutrients.

    This recipe is perfect for anyone looking to add more protein to their diet. It’s quick, with only 19 minutes of prep time and just 5 ingredients. You’ll get 14 grams of protein in each cookie. These are great for fitness lovers, busy people, or anyone who cares about their health.

    Understanding the Power of Protein Cookies

    Protein cookies have changed the game for fitness fans. They’re a tasty way to meet your nutritional needs. These treats are perfect for after a workout, pleasing your taste buds and body.

    By adding protein, cookies become a nutritional powerhouse. Here are some key facts:

    • Protein cookies have 10-20 grams of protein per serving
    • 30% of people pick protein snacks for muscle recovery
    • 75% link high-protein snacks with wellness

    Benefits of Protein-Enhanced Baking

    Your body needs good nutrition, and protein cookies provide it. They offer a big protein boost over regular cookies:

    Cookie TypeProtein (g)Sugar (g)Calories
    Traditional Cookies1-220-25150-200
    Protein Cookies10-202-8150-250

    Why Choose Homemade Over Store-Bought

    Homemade protein cookies let you control what goes into them. You can skip artificial stuff and tailor them to your diet.

    Nutritional Advantages

    Protein cookies are more than a snack—they’re a smart nutrition choice. They help with muscle recovery, give lasting energy, and are guilt-free. They’re a balanced way to eat.

    Whether you’re into sports, fitness, or just want a healthier snack, protein cookies are a tasty choice for your goals.

    Essential Ingredients for Perfect Protein Cookies

    Making the ultimate muscle-building dessert means picking the right ingredients. These ingredients turn a regular cookie into a snack that’s good for you. Start your protein cookie journey by learning about the key parts that make these treats tasty and healthy.

    Core Ingredients for Success

    To make the perfect protein cookie, you need to choose your ingredients carefully. Here are the main things you’ll need:

    • High-quality protein powder
    • Oat flour
    • Natural nut butter
    • Non-dairy milk
    • Sweetener options
    • Optional mix-ins like chocolate chips

    Protein Powder Selection Guide

    Choosing the right protein powder is crucial. Look for powders that mix well and have a smooth texture.

    Protein TypeTextureMuscle-Building Potential
    Whey ProteinSmoothHigh
    Casein ProteinThickModerate
    Plant-Based ProteinGrainyModerate

    Binding Agents and Sweeteners

    Your snack needs the right stuff to stick together. Natural sweeteners like maple syrup or stevia add flavor without too many calories.

    Pro tip: Try different protein powders and sweeteners to find the perfect mix. Aim for a cookie that tastes great and helps you reach your fitness goals.

    Step-by-Step Baking Instructions

    Making the perfect high-protein snack is all about precision and care. This recipe will make your baking journey easy and rewarding. You’ll create tasty cookies that are also good for you in just 20 minutes.

    First, get all your ingredients ready. Your protein cookie journey starts with these essential items:

    • ½ cup grass-fed beef isolate protein powder
    • 3 tablespoons gluten-free oats
    • 4 tablespoons natural peanut butter
    • 2 tablespoons maple syrup
    • 2 tablespoons almond milk
    • 1 tablespoon vanilla extract

    Here’s how to prepare your high-protein snack:

    1. Preheat your oven to 350°F (177°C)
    2. Line a baking sheet with parchment paper
    3. Mix dry ingredients first: protein powder, oats, baking powder, and sea salt
    4. Blend wet ingredients: peanut butter, maple syrup, almond milk, vanilla extract
    5. Combine wet and dry mixtures until a consistent dough forms
    6. Shape dough into 3 large or 6 regular-sized cookies
    7. Place cookies 2 inches apart on the baking sheet
    8. Bake for 10-12 minutes until edges are semi-firm

    Here are some tips for making great protein cookies: let cookies cool for 5 minutes after baking to set them perfectly. Your homemade high-protein snack is now ready to enjoy!

    Storing your protein cookies is easy. Keep them at room temperature for up to 3 days, or refrigerate for two weeks. For longer storage, freeze the baked cookies or raw dough.

    Creating the perfect texture for protein cookies is all about precision and understanding. With a few expert techniques, your protein cookies can go from ordinary to extraordinary. This ensures a guilt-free cookie experience that pleases both your taste buds and your health goals.

    Getting the perfect cookie texture is all about managing several factors. Temperature control and moisture balance are key. They help make protein-packed treats that stay deliciously consistent.

    Temperature Control Strategies

    The baking temperature greatly affects your protein cookie’s texture. Follow these tips for consistently tasty results:

    • Preheat the oven to 350℉ for optimal cookie development
    • Bake cookies for 9-12 minutes
    • Remove cookies when edges are slightly golden
    • Allow cookies to cool on the baking sheet for 5-10 minutes

    Moisture Balance Techniques

    Keeping the right moisture is crucial for soft, chewy protein cookies. Try these methods:

    • Use ground flaxseed (2 tablespoons) mixed with water as a binding agent
    • Incorporate almond butter for additional moisture
    • Chill dough for 30 minutes before baking to enhance texture

    Achieving Consistent Texture

    The texture of your protein cookies depends on the right ingredients and preparation. A balanced mix of protein powder, flour, and binding agents is key for the best results.

    IngredientQuantityTexture Impact
    Vanilla Protein Powder32 grams (1 scoop)Provides structure
    Gluten-Free Flour1/4 cupEnsures proper consistency
    Almond Flour1 cupAdds moisture and richness

    Pro tip: Don’t overbake your cookies. They continue cooking while cooling, which helps maintain a soft, chewy texture for your nutritious baked goods.

    Flavor Variations and Mix-In Options

    Make your fitness fuel exciting with new protein cookie flavors. These changes turn healthy snacks into a fun food journey. Your taste buds will love these tasty and nutritious options.

    Find five delicious protein cookie flavors to change your baking:

    • Oatmeal Raisin Classic: A nostalgic twist with added protein punch
    • Decadent Nutella Swirl: Chocolate lovers’ dream cookie
    • Celebratory Birthday Cake: Festive and fun protein treat
    • White Chocolate Macadamia: Luxurious and creamy flavor combination
    • Snickerdoodle Sensation: Cinnamon-spiced protein delight

    Add these mix-in options to boost flavor and nutrition:

    • 1-2 tablespoons chocolate chips
    • 1 tablespoon shredded coconut
    • Natural peanut butter swirls
    • Peppermint extract for a refreshing twist
    • Salted caramel-flavored syrup

    “Protein cookies are not just about nutrition – they’re about creating a delicious experience that fuels your body and delights your palate.”

    Pro tip: Try different protein powder flavors for unique tastes. Switching vanilla to chocolate can change your cookie’s taste while keeping it healthy.

    Explore the nutritional benefits of your homemade protein cookie. Knowing the macros helps you make better food choices. Plus, it’s a tasty snack that’s good for you.

    Complete Nutritional Breakdown

    Your protein cookie is a nutritional powerhouse. Each 59-gram serving has impressive macronutrients. These support your fitness goals:

    • Calories: 240 per cookie
    • Protein: 15 grams (muscle-building essential)
    • Total Fat: 17 grams
    • Carbohydrates: 19 grams
    • Dietary Fiber: 9 grams

    Protein Content Analysis

    The 15 grams of protein in each cookie is impressive. It’s a great choice for building muscle. Brands like Quest and Legion have 7-15 grams per serving. But your homemade cookie gives you more protein.

    Calorie Considerations

    NutrientAmount% Daily Value
    Total Fat17g22%
    Saturated Fat10g50%
    Cholesterol35mg12%
    Sodium210mg9%

    Your snack is balanced and nutritious. It has 21% protein, 53% fat, and 26% carbs. This mix helps with muscle recovery and keeps you energized.

    Storage Tips and Shelf Life

    Keeping your homemade protein cookies fresh is key. They should stay tasty and nutritious. Knowing how to store them right is important.

    Here are some tips for storing your protein cookies:

    • Room temperature storage: Keep cookies in an airtight container for 2-3 days maximum
    • Refrigerator storage: Extends freshness up to 1 week
    • Freezer storage: Preserve cookies for up to 3 months

    It’s important to package your cookies well. Wrap each one in plastic wrap and then put them in a container that won’t let moisture in. This keeps them from getting freezer burn and keeps their texture good.

    Temperature is very important for keeping cookies fresh. Heat can damage the protein and make the cookies less good. Keep them in a cool, dry place, away from sunlight.

    Here are signs your cookies might be too old:

    • Unusual odor
    • Visible mold
    • Significant texture changes
    • Off-color appearance

    Pro tip: Write the date you made them on the container. This helps you know how long they’ve been there. When you’re ready to eat them, let them thaw at room temperature for the best taste and texture.

    Common Baking Mistakes to Avoid

    Making the perfect protein cookie needs care and focus. Even skilled bakers face issues when baking these treats. Knowing common mistakes helps you make tasty and healthy protein cookies.

    Baking protein cookies has its own set of challenges. Spotting and fixing these problems can make your baking better and your cookies amazing.

    Getting the right temperature is key for the perfect cookie texture. Wrong oven temperatures can ruin your cookies:

    • Too high heat causes rapid moisture evaporation
    • Low temperatures prevent proper spread and caramelization
    • Inconsistent oven temperatures create uneven baking

    Ingredient Ratio Precision

    Protein cookies need exact amounts of ingredients. Small changes can greatly affect your cookies:

    IngredientPotential IssueRecommended Solution
    FlourToo little causes flat cookiesUse weight measurements
    Protein PowderExcessive amounts create dry textureBalance with binding ingredients
    Liquid IngredientsIncorrect moisture contentAdd liquids gradually

    Texture Troubleshooting

    Getting the right texture for protein cookies is important:

    1. Avoid over-mixing dough to prevent tough cookies
    2. Use a cookie scoop for uniform sizes
    3. Chill dough 1-2 hours before baking
    4. Monitor baking time closely

    By following these tips, you’ll get great protein cookies that are both tasty and healthy.

    Dietary Modifications and Substitutions

    Making a guilt-free cookie for different diets is easy. You can change your protein cookie recipe to fit various needs. If you can’t have nuts, use sun-butter or oatmeal butter instead. They keep the cookie’s texture and protein level the same.

    For those who prefer plant-based options, swap whey protein with pea or hemp protein powder. Plant-based proteins soak up more liquid, so adjust your recipe carefully. Start by adding only 1/4 of the flour as protein powder to keep the cookie right.

    Gluten-free bakers can use special oats and flour mixes. Adding 3-4 tablespoons of cacao nibs boosts nutrition without sugar. Maple syrup is a better choice for those watching sugar intake, as it’s lower on the glycemic index.

    Try different protein powders to find the perfect mix. Whey and casein proteins together offer great texture and moisture. Bake your cookies a bit sooner to avoid dryness, ensuring they’re tasty and fit your diet.

    FAQ

    What are protein cookies?

    Protein cookies are a healthy snack that tastes like regular cookies. They have lots of protein to help build muscles. They’re perfect for those who love cookies but want a nutritious treat.

    Homemade protein cookies can have 8-15 grams of protein each. This makes them great after working out. They help with muscle recovery and meet your nutrition needs.

    Can I make protein cookies if I have dietary restrictions?

    Yes, you can make protein cookies for any diet. You can make them gluten-free, vegan, or without nuts. This way, everyone can enjoy them while staying true to their diet.

    What type of protein powder works best for baking cookies?

    Whey protein isolate or casein protein are best for baking. They help the cookies stick together well. Whey protein concentrate works too, but might change the cookie’s texture a bit.

    How long can I store homemade protein cookies?

    Homemade protein cookies last 4-5 days in an airtight container. You can keep them fresh for a week in the fridge or freeze them for 3 months. They stay nutritious and delicious.

    Are protein cookies actually healthy?

    Yes, protein cookies can be a healthy choice. They have extra protein, less sugar, and support fitness goals. Just remember to eat them as part of a balanced diet.

    Can I make protein cookies without protein powder?

    You can use other protein sources like almond flour or Greek yogurt. But, the cookies will taste and feel different. Protein powder is usually the best choice for a good texture.

    How can I prevent my protein cookies from becoming dry?

    To keep cookies moist, add Greek yogurt or mashed banana. Don’t overbake them. Using ingredients that keep moisture helps them stay soft and chewy.

    What is your rating for the recipe?

  • Chicken And Yellow Rice Recipe

    Every family has a special recipe that makes any evening feel like a celebration. For me, chicken and yellow rice, or arroz con pollo, is that dish. It’s more than just food; it’s a tradition and a warm welcome from my kitchen.

    This classic recipe brings together the flavors of Latin America. It’s perfect for busy parents or anyone who loves trying new dishes. Arroz con pollo will soon become your go-to dish in the kitchen.

    Understanding Traditional Yellow Rice with Chicken

    Pollo guisado is a journey through Spanish and Latin American food. It’s a dish called arroz con pollo, filled with stories of culture and tradition. These stories have traveled far and wide.

    Origins of Arroz con Pollo

    The history of spanish rice with chicken goes back to medieval Spain. The Moors brought saffron and new cooking ways. They made simple foods into delicious meals.

    • Originated in medieval Spanish kitchens
    • Influenced by Moorish culinary traditions
    • Spread throughout Latin American regions

    Cultural Significance in Spanish Cuisine

    Arroz con pollo is more than food. It’s about family and community. In Spanish homes, it’s a sign of celebration, bringing everyone together.

    Traditional vs Modern Preparations

    Old recipes of pollo guisado stay true to their roots. But, chefs today mix in new flavors. They keep the dish’s heart: tender chicken and flavorful rice.

    A timeless recipe that bridges generations and cultures

    Every version of this dish has its own tale. It shows how different places and families add their own twist. This makes arroz con pollo a true culinary wonder.

    Essential Ingredients for Perfect Yellow Rice

    To make authentic saffron rice or yellow rice, you need to know the key ingredients. These ingredients add vibrant color and rich flavor. They turn simple rice into a dish that’s a true masterpiece.

    • Saffron: The traditional Spanish way uses delicate saffron threads
    • Annatto: A Latin American choice for a golden-yellow color

    Choosing the right rice is key for the perfect texture. Basmati and long-grain white rice are the best for yellow rice. The right spices can make your dish go from good to amazing.

    Ingredient CategoryKey ComponentsFlavor Profile
    Coloring AgentsSaffron, AnnattoVibrant Yellow
    Rice VarietiesBasmati, Long-grain WhiteFluffy Texture
    Essential SpicesTurmeric, Cumin, PaprikaDepth of Flavor

    “The right ingredients transform a simple rice dish into a culinary journey.” – Chef Maria Rodriguez

    Try out these ingredients to make a yellow rice recipe that’s true to Spanish and Latin American traditions. Your kitchen will fill with the aroma of spices and the golden color of the rice. It promises a meal that’s both delicious and memorable.

    Choosing the Right Chicken Cuts and Preparation

    Starting with the right chicken cuts is key to a great Cuban chicken and rice dish. The type of chicken you choose can greatly affect the taste and texture of your meal.

    There are several chicken cut options that work well for Cuban chicken and rice:

    • Chicken thighs (most flavorful)
    • Chicken breasts (leaner option)
    • Chicken drumsticks
    • Boneless or bone-in varieties

    Best Chicken Parts Selection

    Chicken thighs are the best choice for flavor. They have more fat, which means they taste richer and are more tender. Boneless thighs cook fast and soak up flavors well.

    Proper Seasoning Techniques

    Seasoning is key for authentic Cuban chicken and rice. Mix together:

    • 1 tablespoon ground cumin
    • 1 teaspoon sea salt
    • ½ teaspoon black pepper
    • 2 tablespoons tamari

    Pre-cooking Preparation Tips

    Before cooking, pat the chicken dry and let it sit at room temperature for 15 minutes. This helps it cook evenly and get a nice golden-brown color.

    Sautéing the chicken takes about 8 minutes. Add another 5 minutes for the sauce to blend in. Make sure the chicken is cooked to 165°F for safety.

    Spices and Aromatics That Make the Difference

    Latin chicken and rice gets its magic from a mix of spices and aromatics. These ingredients turn a simple dish into a feast for the senses. Each spice and aromatic adds its own special touch to the flavor.

    • Turmeric: Provides the signature yellow color and earthy undertones
    • Cumin: Adds deep, warm complexity
    • Paprika: Introduces a subtle smoky flavor
    • Garlic: Delivers intense aromatic depth

    Fresh aromatics are key to building rich flavors. Diced onions and minced garlic lay the base. Adding chopped cilantro and parsley at the end brightens the dish.

    SpiceQuantityFlavor Profile
    Turmeric¾ teaspoonEarthy, slightly bitter
    Cumin¼ teaspoonWarm, nutty
    Paprika¼ teaspoonSmoky, sweet

    For a special touch, toast pine nuts and sprinkle them on top. This adds a crunchy texture and a nutty taste that pairs well with the spices.

    Step-by-Step Chicken and Yellow Rice Recipe

    Making the perfect chicken rice dish needs attention to detail. This recipe turns simple items into a tasty meal that will wow your loved ones. We’ll guide you through each step to ensure a delicious result.

    • 2 cups cooked shredded chicken
    • 10 oz yellow rice mix
    • 1 cup chicken broth
    • 1 cup shredded cheddar cheese
    • 1/2 cup sour cream
    • Seasonings: garlic powder and onion powder

    Rice Preparation Method

    Begin by preparing your yellow rice. Rinse the rice well to get rid of extra starch. In a big skillet, mix the rice with chicken broth. Let it simmer gently for 20 minutes until the rice is soft and has soaked up all the liquid.

    Cooking the Chicken

    While the rice cooks, get your chicken ready. If you have a rotisserie chicken, shred it into small pieces. Season the chicken with garlic and onion powder to boost its taste. Make sure the chicken is well seasoned and warm.

    Combining Components

    The last step is to mix everything together. Add the shredded chicken to the yellow rice. Sprinkle cheddar cheese on top and let it melt a bit. Finish with a dollop of sour cream for creaminess. Your chicken rice dish is now ready to serve!

    Pro tip: Let the dish rest for 5 minutes before serving to allow flavors to meld together perfectly.

    Nutritional Highlights

    Each serving of this chicken rice dish offers:

    • 444 calories
    • 24g protein
    • 46g carbohydrates
    • 18g fat

    Tips for Achieving Perfect Rice Texture

    Making perfect cilantro lime rice needs care and focus. The right rice texture can turn a simple meal into a work of art.

    Start by learning key techniques for fluffy, tasty rice. Here are some tips to improve your rice cooking:

    • Always rinse rice thoroughly to remove excess starch
    • Use the correct water-to-rice ratio
    • Select the right cooking vessel
    • Control heat during cooking

    Professional chefs share their secrets for the best cilantro lime rice texture:

    1. Measure water precisely – typically 2 cups water per 1 cup rice
    2. Let rice rest after cooking for 5-10 minutes
    3. Fluff with a fork to separate grains
    4. Avoid lifting lid during cooking process
    TechniqueImpact on Rice Texture
    RinsingRemoves excess starch, prevents clumping
    Water RatioEnsures proper moisture and tenderness
    Resting PeriodAllows even moisture distribution

    Pro tip: Invest in a quality rice cooker for consistent results every time.

    Variations and Customization Options

    Your chicken and yellow rice recipe is super versatile. It lets you add your own twist to make it special. You can change it up to add more nutrition, adjust the spice, or try new flavors.

    Customizing your arroz con pollo opens up a world of delicious possibilities. Here are some exciting ways to make the dish uniquely yours:

    Vegetable Enhancements

    Make your chicken and yellow rice healthier by adding more veggies. Try these tasty additions:

    • Bell peppers for crunch and color
    • Carrots for natural sweetness
    • Spinach for extra iron and nutrients
    • Zucchini for a subtle, tender texture
    • Mushrooms for an earthy depth

    Spice Level Adjustments

    Change the heat to your liking by adjusting the spices in your yellow rice recipe:

    • Mild: Use minimal paprika and skip hot peppers
    • Medium: Add red pepper flakes
    • Spicy: Include chopped jalapeños or cayenne pepper

    Regional Flavor Explorations

    Arroz con pollo varies across different Spanish-speaking regions. Each place adds its own special touch to this beloved dish:

    • Cuban version: Often includes olives and pimentos
    • Puerto Rican style: Typically uses sofrito as a base
    • Colombian approach: May incorporate beer in the cooking liquid

    “The beauty of chicken and yellow rice is its incredible adaptability – make it your own!” – Traditional Cooking Wisdom

    The secret to a great arroz con pollo is finding the right balance of flavors. Stay true to its comforting essence. Don’t be afraid to try new things and make it your own!

    Serving Suggestions and Pairings

    Your spanish rice and pollo guisado needs a stunning presentation. It should wow both your eyes and taste buds. The right sides can turn this classic dish into a memorable meal that wows everyone.

    When serving your chicken and yellow rice, consider these complementary side dishes:

    • Fresh green salad with citrus vinaigrette
    • Roasted vegetables like bell peppers and zucchini
    • Black beans with fresh cilantro
    • Avocado slices
    • Warm plantains

    For drinks, light and refreshing options are best with pollo guisado. Try:

    • Chilled white wine
    • Sparkling water with lime
    • Light beer
    • Tropical fruit mocktail

    “A great meal is about creating harmony between flavors and presentation” – Chef Maria Rodriguez

    Nutritional tip: Your spanish rice dish has about 422 calories per serving. It’s a balanced meal with 24g of protein and 36.3g of carbs. Add fresh herbs like parsley or cilantro to boost nutrition and add color.

    Remember, a great dining experience is not just about taste. It’s also about how you present your pollo guisado. Take time to arrange your dish thoughtfully. Watch as your guests are impressed by both flavor and appearance.

    Storing and Reheating Leftovers

    Keeping your Cuban chicken and rice fresh is key. The USDA has rules to keep your food safe and tasty. These guidelines help avoid foodborne illnesses.

    Here’s how to store your Cuban chicken and rice:

    • Cool the dish quickly after cooking
    • Place in an airtight container
    • Refrigerate within 2 hours of preparation
    • Store in the refrigerator for up to 3-4 days

    Freezing is a great way to keep your dish longer. You can freeze it for 3-4 months in a sealed container.

    Reheating needs care to keep the taste and texture right:

    1. Thaw frozen rice in the refrigerator overnight
    2. Add 1-2 tablespoons of water per cup of rice
    3. Reheat to an internal temperature of 165°F
    4. Use microwave (3-4 minutes) or stovetop methods

    Pro tip: When microwaving, cover the dish and stir occasionally to ensure even heating and prevent dried-out rice.

    Food safety is crucial with leftovers. Always check the internal temperature. Discard any food left at room temperature for more than 2 hours to avoid food poisoning.

    Conclusion

    Your journey into the world of Latin chicken and rice is now complete. This dish is more than just a meal. It’s a culinary adventure that connects you to rich Spanish cooking traditions.

    With just 40 minutes of total preparation time, you can make a vibrant, nutritious feast for four people. The beauty of this recipe lies in its flexibility. Whether you’re a seasoned home cook or a kitchen novice, you can easily adapt the Latin chicken and rice to suit your taste preferences.

    Experiment with different spices, add your favorite vegetables, or adjust the heat level. This way, you can create a personalized version that reflects your culinary style. Remember that practice makes perfect. Each time you prepare this chicken rice dish, you’ll become more confident in your cooking skills.

    The key is to embrace the process, enjoy the aromas, and most importantly, share the delicious results with family and friends. Your homemade Arroz con Pollo is not just a meal. It’s a celebration of flavor, culture, and home cooking.

    We invite you to make this recipe your own. Share your experiences, tag us in your culinary creations, and continue exploring the wonderful world of Spanish-inspired cuisine. Buen provecho!

    FAQ

    What is Arroz con Pollo?

    Arroz con Pollo is a dish from Spain and Latin America. It means “chicken with rice.” It’s a flavorful meal with chicken, rice, and spices. This mix gives it a vibrant color and rich taste.

    What makes yellow rice yellow?

    Yellow rice gets its color from saffron in Spain or annatto in Latin America. These spices not only color the rice but also enhance its flavor.

    What are the best chicken cuts to use for this recipe?

    You can use chicken thighs, breasts, or a whole chicken cut into pieces. Thighs are best for their rich flavor and moist texture.

    Can I make this dish vegetarian?

    Yes, you can make it vegetarian. Use tofu, tempeh, or more vegetables instead of chicken. Adjust the spices to keep the flavor right.

    How do I prevent my rice from becoming mushy?

    To avoid mushy rice, rinse it first and use the right water ratio. Don’t stir too much while cooking. Long-grain rice and the right temperature help too.

    How long can I store Chicken and Yellow Rice?

    Store it in the fridge for 3-4 days in a sealed container. Freeze it for up to 3 months. When reheating, add a bit of water to keep the rice moist.

    Are there regional variations of this dish?

    Yes, different places have their own Arroz con Pollo. Cuban, Puerto Rican, and Colombian versions have unique spices and ingredients.

    What are good side dishes to serve with Chicken and Yellow Rice?

    Try black beans, plantains, salad, avocado, and lime wedges. A cilantro-lime garnish adds a fresh touch.

    Can I make this recipe spicy?

    Absolutely! Add jalapeños, hot sauce, or cayenne pepper for more heat. Start with a little and adjust to your liking.

    Is saffron necessary for the recipe?

    Saffron is traditional but can be pricey. You can use turmeric, safflower, or annatto for a similar yellow color and flavor.

    What is your rating for the recipe?

  • Salmon Poke Recipe

    My first taste of a salmon poke bowl in Honolulu was unforgettable. The colors, flavors, and textures were amazing. It changed how I see Hawaiian cuisine. This dish is more than food; it’s a journey to Hawaii’s coastal traditions.

    Salmon poke is a feast for the senses. It celebrates fresh ingredients and the ocean’s bounty. You can make this Hawaiian dish in just 30 minutes. It brings the taste of the Pacific islands right to your kitchen.

    Understanding Sushi-Grade Salmon for Poke

    Making a tasty salmon poke starts with picking the right fish. Sashimi-grade fish is key for great taste and safety in raw seafood dishes. Not all salmon is the same, and knowing what makes it safe for raw eating is vital for a great poke bowl.

    What Makes Salmon Sushi-Grade

    Sushi-grade salmon gets special treatment to remove health risks. The main thing is freezing it very cold to kill parasites. Seafood experts freeze salmon to these levels:

    • Frozen at -4°F (-20°C) for 7 days
    • Frozen at -31°F (-35°C) until solid
    • Stored at -31°F (-35°C) for 15 hours

    Proper Storage and Handling

    Raw seafood needs careful handling for safety. Keep your salmon:

    1. Refrigerated at 40°F (4°C) or below
    2. Stored in airtight containers
    3. Consumed within 24 hours of making

    Pro tip: Always buy sashimi-grade fish from trusted fishmongers or specialty seafood markets.

    Where to Buy Sushi-Grade Salmon

    Finding top-notch raw seafood is important. Look for salmon at:

    • Specialty fish markets
    • Japanese grocery stores
    • High-end supermarket seafood counters
    • Online seafood retailers specializing in sushi-grade fish

    Remember: Fresh, high-quality salmon is the base of an amazing poke bowl.

    Essential Ingredients for Authentic Salmon Poke

    To make a real salmon poke, you need the right ingredients. Start with top-notch, sushi-grade salmon. It’s the main attraction of your poke bowl.

    Here are the must-haves for a tasty salmon poke:

    • 1 pound sushi-grade salmon, cubed
    • 2 tablespoons soy sauce for umami dressing
    • 1 teaspoon sesame oil
    • 1 tablespoon rice wine vinegar
    • Fresh green onions, diced
    • Optional ahi tuna as an alternative protein

    Salmon is the main protein, but Hawaiian poke also uses ahi tuna. The secret to a great poke bowl is mixing flavors well. This makes the umami dressing stand out.

    Your marinade should boost the fish’s taste. Soy sauce, sesame oil, and rice vinegar mix to create a deep flavor. This turns simple ingredients into a special meal.

    Pro tip: Always use the freshest ingredients possible to maximize the authentic island flavors of your poke bowl.

    Every ingredient is important for the poke’s unique taste. Choosing the best ingredients makes your poke bowl both tasty and healthy.

    The Perfect Poke Marinade Ingredients

    Making a Hawaiian marinade turns marinated seafood into a work of art. The right mix of ingredients makes your salmon poke a gourmet delight.

    The heart of a great poke marinade is in its ingredients. They create layers of umami dressing. Knowing these ingredients is key to a memorable dish.

    Base Sauce Components

    The marinade’s core is made up of several key ingredients. They set the flavor profile:

    • Soy sauce (2 tablespoons): Provides deep, salty undertones
    • Sesame oil (1 teaspoon): Adds nutty complexity
    • Rice vinegar (½ tablespoon): Introduces subtle tanginess

    Optional Flavor Enhancers

    Make your marinade your own with these exciting additions:

    1. Sriracha (1.5 teaspoons): For heat lovers
    2. Mayonnaise: Creates creamy texture
    3. Maple syrup: Adds gentle sweetness

    Traditional Hawaiian Additions

    Add authentic Hawaiian touches to your marinated seafood:

    IngredientQuantityPurpose
    Green onions1 tablespoonFresh, sharp flavor
    Sesame seeds1 teaspoonNutty garnish
    Sweet onion¼ cupAromatic depth

    Pro tip: Always taste and adjust your marinade. Let each ingredient blend for the best Hawaiian cuisine experience.

    Step-by-Step Salmon Poke Preparation

    Making a tasty raw fish salad like salmon poke needs attention to detail. Start by picking the freshest sushi-grade salmon you can find. You’ll also need certain techniques and ingredients to make this healthy dish.

    First, prepare your salmon with care:

    1. Thaw sushi-grade salmon in the fridge
    2. Pat salmon dry with paper towels
    3. Cut salmon into uniform 1/2-inch cubes
    4. Make sure your cutting surface is clean and sanitized

    Next, get your marinade ingredients ready:

    • 2-3 tablespoons liquid aminos
    • 1 tablespoon toasted sesame oil
    • 2 teaspoons rice vinegar
    • 1-3 teaspoons sriracha
    • 2 teaspoons sesame seeds

    When mixing your marinade, gently combine ingredients. This helps keep the salmon’s texture intact. Let the fish marinate for 10-15 minutes to keep its fresh taste.

    IngredientQuantityPurpose
    Sushi-grade salmon1 lbPrimary protein
    Sesame oil1 tablespoonFlavor enhancement
    Green onions2 stalksFresh garnish

    Pro tip: Keep your salmon cold during prep and serve it right away. This ensures the best taste and food safety in your homemade poke bowl.

    Creating the Perfect Poke Bowl Base

    Making a great poke bowl starts with the right base. Your bowl will show off island flavors with the right ingredients. Let’s explore how to make a tasty and healthy base for your poke bowls.

    Rice Selection and Preparation

    The base of a good poke bowl is the rice. You can choose from several tasty options:

    • Sushi rice: Traditional and perfectly seasoned
    • Brown rice: A fiber-rich, nutritious alternative
    • Quinoa: A high-protein, gluten-free option

    Fresh Vegetable Components

    Add fresh veggies to your poke bowl for extra nutrition and flavor. Here are some great choices:

    VegetableNutritional Benefit
    CucumberAdds crisp texture and hydration
    AvocadoProvides healthy fats and creamy texture
    EdamameBoosts protein content
    Shredded CarrotsIntroduces bright color and crunch

    Traditional Toppings

    Add authentic island flavors with these classic toppings:

    • Furikake seasoning
    • Nori seaweed strips
    • Toasted sesame seeds
    • Sliced green onions

    Pro tip: Let your rice cool a bit before adding the salmon. This way, your poke bowl will have the right mix of flavors, textures, and nutrition. It will feel like a trip to Hawaii with every bite.

    Customizing Your Salmon Poke

    Explore Hawaiian cuisine by making your salmon poke bowl your own. This dish is versatile, letting you try new flavors and make it special.

    Begin by trying different flavor mixes to enhance your poke:

    • Sweet Tropical Twist: Add diced mango or pineapple chunks for a burst of sweetness
    • Spicy Kick: Incorporate jalapeños or sriracha for heat lovers
    • Texture Variety: Mix in crunchy vegetables like cucumber, radishes, or edamame

    Think about using different bases to make your bowl stand out. Try:

    • Cauliflower rice for a low-carb option
    • Mixed greens for added nutrition
    • Quinoa for a protein-packed alternative

    Choosing the right sauce can change your poke’s taste. Here are some tasty options:

    • Spicy Mayo: Traditional sriracha-infused sauce
    • Ponzu: Citrusy soy-based dressing
    • Wasabi Aioli: Creamy and zesty condiment

    Remember, the secret to a great salmon poke is finding the right balance of flavors. Don’t be afraid to get creative!

    Safety Tips and Best Practices

    Preparing raw seafood needs careful attention to food safety. When working with sashimi-grade fish, knowing how to handle it right is key to staying safe.

    Raw seafood preparation must follow strict safety rules to avoid foodborne illnesses. Parasites and bacteria can be harmful if you don’t take the right precautions.

    Critical Food Handling Guidelines

    • Always use clean, sanitized cutting surfaces and utensils
    • Wash hands thoroughly before and after handling raw fish
    • Keep raw seafood refrigerated at 40°F (4°C) or below
    • Consume poke within 1-2 days of preparation

    Parasitic Infection Risks

    ParasitePotential Health EffectsPrevention Method
    AnisakisStomach pain, nausea, vomitingFreeze at -4°F for 7 days
    DiphyllobothriumNutrient deficiencies, weight lossDeep freeze at -31°F for 15 hours
    Nanophyetus salmincolaFever, diarrheaProper freezing techniques

    Storage Recommendations

    When storing sashimi-grade fish, follow these critical guidelines:

    1. Keep fish refrigerated immediately after purchase
    2. Store in the coldest part of your refrigerator
    3. Use airtight containers to prevent cross-contamination
    4. Discard fish if any off-odors or discoloration are detected

    Special caution: High-risk groups like pregnant women, young children, and individuals with compromised immune systems should avoid raw seafood entirely.

    The key to enjoying salmon poke safely is understanding and implementing rigorous food safety practices.

    Serving Suggestions and Presentation Ideas

    Turn your salmon poke into a stunning healthy bowl that shows off Hawaiian cuisine. Presentation is key. With a few simple steps, you can make your poke bowls stand out.

    Begin by picking a clear glass bowl to display your poke’s vibrant layers. This clear container lets each ingredient shine, pleasing both your eyes and taste buds.

    • Base Layer: Spread cooked Japanese rice evenly as your foundation
    • Protein Placement: Arrange salmon cubes in a neat, artistic pattern
    • Color Contrast: Add colorful vegetables like red cabbage and mango
    • Garnish Generously: Sprinkle black sesame seeds and sliced green onions

    Your poke bowl should be a mix of textures and colors. Slice cucumber and avocado thinly for delicate layers. These add interest to your bowl. Here are some creative ways to serve:

    1. Classic Hawaiian-style bowl with traditional toppings
    2. Deconstructed poke salad on a bed of mixed greens
    3. Appetizer-style presentation with crispy wonton chips

    The secret to a great poke bowl is balance. Aim for a mix of colors, textures, and flavors. This makes your bowl both healthy and beautiful.

    Common Mistakes to Avoid When Making Salmon Poke

    Making the perfect raw fish salad needs precision and careful technique. When you’re making salmon poke, many home cooks make big mistakes. These mistakes can ruin the dish’s quality and safety.

    Choosing the wrong fish is a major error. Always pick sashimi-grade fish to make sure your marinated seafood is safe to eat. Bad fish can cause serious health problems.

    • Fish Selection: Choose only sushi-grade salmon from reputable sources
    • Temperature Control: Keep fish chilled below 40°F during preparation
    • Marination Time: Limit marinating to 15-30 minutes maximum

    How you cut the fish is also key. Use a sharp knife to cut the salmon into 1/2-inch cubes. This ensures even seasoning and texture. Avoid rough cuts that can mess up the dish’s look and taste.

    Seasoning is an art in salmon poke. Too much marinade can overpower the fish’s flavor. Too little makes it taste bland. You want to find a balance that brings out the salmon’s taste without hiding it.

    Pro tip: Always taste your marinade before adding the fish to ensure the perfect flavor balance.

    Remember, food safety is crucial when working with sashimi-grade fish. Keep your area clean, use separate cutting boards, and refrigerate ingredients right away. This stops bacteria from growing.

    Conclusion

    Making the perfect salmon poke bowl is more than cooking. It’s a way to enjoy real Hawaiian food at home. You learn how to prepare sushi-grade salmon and mix flavors. This turns a simple meal into a feast for your taste buds.

    Salmon poke is great for those who care about their health. Each serving has about 489 calories and 25 grams of protein. You can try different toppings and marinades to make it your own.

    Good salmon poke starts with quality ingredients and safe food handling. It also needs time to marinate. Your homemade poke bowl can impress anyone, whether it’s for lunch or dinner.

    Be creative and respectful when making your poke bowl. It’s a chance to explore Hawaiian cuisine. Your salmon poke journey is just starting, and the fun is endless.

    FAQ

    What is salmon poke?

    Salmon poke is a dish from Hawaii. It’s made with raw, cubed salmon marinated in a tasty sauce. It’s served over rice with toppings. It’s a healthy, quick, and tasty dish that highlights fresh seafood and island flavors.

    Is it safe to eat raw salmon in poke?

    Yes, it’s safe to eat raw salmon in poke if it’s sushi-grade. This means it’s been frozen to kill parasites and handled safely. Always buy from trusted seafood markets or fish suppliers.

    How long can I marinate salmon for poke?

    Marinate salmon for poke for 10-15 minutes max. Longer marinating can “cook” the fish and ruin its texture and flavor. The goal is to enhance, not overpower, the fish’s natural taste.

    Can I make poke with something other than salmon?

    Absolutely! Salmon is great, but traditional poke uses ahi tuna. You can also try yellowtail, trout, or tofu for a veggie option. The key is using fresh, high-quality protein.

    What are the essential ingredients for salmon poke?

    Essential ingredients include sushi-grade salmon, soy sauce, sesame oil, and rice vinegar. You’ll also need green onions and optional extras like furikake, sesame seeds, and avocado. A good marinade balances umami, sweet, and tangy flavors.

    How do I store leftover poke?

    Store leftover poke in an airtight container in the fridge for up to 24 hours. Keep fish, rice, and veggies separate to maintain texture. Always refrigerate immediately and never leave raw fish at room temperature for more than two hours.

    What are good base options for a poke bowl?

    Traditional bases are sushi rice and brown rice. But you can also use cauliflower rice, mixed greens, or quinoa. The base should complement the salmon and the marinade while being nutritious.

    Can I make poke spicy?

    Yes! Add heat with sriracha, wasabi, chili oil, or finely chopped jalapeños in the marinade. Start with small amounts and adjust to your spice level without overpowering the salmon.

    What is your rating for the recipe?

  • Blueberry Bagel Recipe

    Every kitchen has a story, and today, yours is about to become a blueberry bagel sanctuary. Imagine waking up to the irresistible aroma of freshly baked blueberry breakfast treats. Each bite promises a perfect blend of sweet berries and soft, chewy texture.

    Creating your own blueberry bagels isn’t just cooking—it’s crafting a morning experience. Whether you’re using fresh or frozen blueberries, this recipe transforms simple ingredients into a culinary masterpiece. It will elevate your breakfast game.

    In the next few steps, you’ll discover how to make blueberry bagels that rival any bakery, right in your own kitchen. Get ready to impress your family and tantalize your taste buds with a homemade breakfast sensation.

    Understanding Blueberry Bagels: A Breakfast Favorite

    Blueberry bagels have become a favorite in American bagel bakeries. They mix the chewy texture of bagels with the sweet taste of blueberries. This makes them a unique treat that many love for breakfast.

    History of Bagels in American Cuisine

    The story of bagels in the U.S. is fascinating. Jewish immigrants brought them in the late 19th century. They started as a special food in New York City. Now, bagels are a favorite breakfast item for everyone.

    Benefits of Adding Blueberries to Baked Goods

    Blueberries add more than taste to baked goods. They are packed with nutrients:

    • High in antioxidants
    • Rich in vitamin C
    • Low in calories
    • Provides natural sweetness

    What Makes a Perfect Bagel

    Creating the perfect bagel involves several key points:

    CharacteristicDescription
    TextureChewy inside with a crispy outside
    FlavorBalanced, with clear blueberry taste
    AppearanceSmooth, golden-brown surface
    SizeConsistent, around 109 grams per bagel

    If you love bagels or want to try baking them, knowing these points is key. It will help you make exceptional blueberry bagels at home.

    Essential Ingredients for Blueberry Bagels

    Making delicious blueberry bagels starts with the right ingredients. You need to know the key parts that make a simple mix into a tasty breakfast treat.

    The main ingredients for your blueberry bagel recipe are:

    • Bread flour (4½ cups)
    • Active dry yeast (1.5 tablespoons)
    • Granulated sugar (¼ cup)
    • Kosher salt (2 teaspoons)
    • Warm water (1.5 cups)
    • Fresh or frozen blueberries (1.5 cups)

    Choosing between fresh or frozen blueberries is your first decision. Fresh ones add a burst of flavor and texture. Frozen blueberries are easy to use and give consistent results. Both options can make your bagels a hit.

    “The secret to perfect fresh baked goods is using high-quality ingredients and understanding their roles in the recipe.”

    Adding honey can make your bagels sweeter and give them a golden crust. Each ingredient is important for the bagel’s taste and texture.

    Required Kitchen Equipment and Tools

    To make homemade blueberry bagels, you need the right tools. Setting up your kitchen with the right equipment turns it into a mini bagel bakery. This makes baking smooth and fun.

    Must-Have Baking Tools

    Every bagel baker needs a basic set of tools. Here are the key ones:

    • Large mixing bowl (6-8 quart capacity)
    • Digital kitchen scale
    • Measuring cups and spoons
    • Baking sheet with parchment paper
    • Large pot for boiling (3-4 quart size)
    • Slotted spoon
    • Kitchen towels

    Optional Equipment for Enhanced Results

    These tools can make your bagel baking better:

    • Stand mixer with dough hook
    • Bench scraper
    • Silicone baking mat
    • Proofing basket
    • Thermometer for precise temperature monitoring

    Preparation Surface Requirements

    Your work surface is key for bagel making. Choose a clean, big countertop for kneading and shaping. Wooden or granite surfaces are best for dough. Make sure it’s dust-free and well-lit for precise baking.

    Preparing Your Sourdough Starter

    Creating a sourdough starter is key to making tasty blueberry bagels. Your starter will add rich, complex flavors to your breakfast treat.

    To start, you’ll need a few basic ingredients:

    • Unbleached all-purpose flour
    • Filtered water
    • A clean glass jar
    • Kitchen scale

    For a great sourdough starter, keep feeding it and be patient. Mix equal parts flour and water to make a thick batter. Put it in a warm place, about 75°F, to wake up the wild yeasts.

    Your starter needs regular care to stay healthy:

    1. Feed it daily with fresh flour and water
    2. Throw away half before each feeding
    3. Look for bubbles and a nice, sour smell
    4. Keep a regular feeding schedule

    Pro tip: A healthy starter will grow in 4-8 hours after feeding. This means it’s ready for your blueberry bagel recipe.

    It usually takes 7-10 days for your starter to get strong. When it’s ready, it will give your bagels a tangy flavor that’s hard to resist.

    Mixing and Kneading the Bagel Dough

    Making the perfect blueberry bagel begins with mastering dough preparation. Your fresh baked goods rely on careful mixing and kneading. These steps turn simple ingredients into a tasty treat.

    Proper Kneading Techniques

    Kneading your blueberry bagel dough needs precision and patience. You must develop gluten strength through consistent technique:

    • Use a stand mixer with a dough hook for 8 minutes
    • Hand-knead for approximately 25 minutes
    • Look for a smooth, elastic texture
    • Ensure the dough is firm but not overly stiff

    Identifying Well-Developed Dough

    A perfectly developed dough for your blueberry bagel has specific characteristics:

    1. Windowpane test: Stretch a small piece – it should become thin enough to see light through
    2. Smooth surface with no visible lumps
    3. Springs back when gently pressed
    4. Maintains elasticity without tearing

    Incorporating Blueberries Effectively

    When adding blueberries to your bagel dough, follow these crucial steps:

    • Gently fold 150 grams of fresh blueberries into the dough
    • Use 70 grams of dried blueberries for additional flavor
    • Avoid overmixing to prevent crushing the fruit
    • Distribute blueberries evenly throughout the dough

    Your goal is creating a uniform blueberry bagel dough. This dough promises delicious fresh baked goods with every bite.

    First Rise and Dough Development

    Making the perfect blueberry bagel takes time. This stage turns simple ingredients into a tasty, airy dough. It’s a key part of your brunch menu. The first rise lasts 6-8 hours at room temperature, letting the sourdough starter work its magic.

    To help your dough grow, keep the room temperature between 70-75°F. Use a damp cloth to cover it and keep it away from drafts.

    Key Factors in Dough Development

    • Temperature impacts fermentation speed
    • Consistent moisture prevents drying
    • Proper environment encourages flavor development

    Look for these signs of a well-developed dough:

    1. Doubled in size
    2. Bubbles throughout the surface
    3. Slight increase in tanginess

    Your blueberry bagel dough needs time to develop complex flavors. Sourdough fermentation is a 6,000-year-old tradition that turns simple ingredients into a culinary masterpiece.

    Dough Development StageDurationKey Characteristics
    First Rise6-8 hoursDoubles in volume, develops flavor
    Overnight Fermentation10+ hoursEnhanced tanginess, deeper complexity
    Final Rise1-3 hoursBecomes puffy, ready for next steps

    Remember, temperature and humidity can change how your dough develops. In warmer kitchens, it rises faster. In cooler ones, it takes longer. Your patience during this stage is crucial for a delicious blueberry bagel that will wow at any brunch.

    Shaping Your Blueberry Bagel

    Making the perfect blueberry bagel needs skill and care. Experts at bagel bakeries know that shaping is key. It makes the bagels round and with a hole in the middle. With the right steps, your homemade bagels will look just as good.

    Step-by-Step Shaping Guide

    Here’s how to shape your blueberry bagel dough:

    1. Divide the dough into equal parts (about 120 grams each)
    2. Roll each part into a smooth ball
    3. Press your thumb through the ball’s center
    4. Stretch the hole to make it wide and even
    5. Make sure all bagels are the same size for even baking

    Common Shaping Mistakes to Avoid

    When making blueberry bagels, avoid these mistakes:

    • Uneven dough portions cause uneven baking
    • Stretching too much makes the dough thin
    • Not making the center hole wide enough
    • Handling the dough too hard

    Your aim is to make bagels like those from a pro bakery. Practice makes perfect. So, don’t worry if your first tries aren’t perfect.

    Shaping TechniqueKey Considerations
    Portion Size120 grams per bagel
    Total Bagels per Batch8 bagels
    Resting Time Before Boiling30-60 minutes

    Consistent shaping means your blueberry bagels will bake evenly and look great.

    The Boiling Process

    Making authentic blueberry bagels involves a key step: boiling. This method turns regular dough into the chewy, shiny bagels everyone loves. It’s what makes them stand out from other baked goods.

    To start, fill a big pot with water and add a tablespoon of baking soda. The baking soda gives the bagels their shine and golden color. Now, your dough is ready for a magical change.

    • Bring water to a rolling boil
    • Add 1 tablespoon of baking soda to the water
    • Boil each bagel for 30-45 seconds per side
    • Use a slotted spoon to carefully transfer bagels

    Boiling time is key for the right texture. 1-2 minutes total is usually best. After boiling, your bagels will have a special texture that sets them apart.

    Boiling ParameterRecommended Setting
    Water TemperatureRolling boil
    Boiling Time per Side30-45 seconds
    Baking Soda Addition1 tablespoon

    After boiling, place your bagels on a baking sheet. The boiling step creates a skin that makes them shiny when baked. Your homemade bagels are now oven-ready, promising a delicious breakfast.

    Baking Perfect Blueberry Bagels

    Making the perfect blueberry breakfast treat needs care and detail. Your dough will turn into golden, tasty bagels with the right steps.

    The last part of making blueberry bagels is mastering the baking setup. Get your oven ready for a delicious result that will make your breakfast better.

    Temperature and Timing Guidelines

    Here are the key baking tips for perfect blueberry bagels:

    • Preheat the oven to 425°F (218°C)
    • Bake for 20-25 minutes
    • Position rack in the middle of the oven
    • Use a baking stone or parchment-lined sheet for best results

    Visual Cues for Doneness

    Knowing when your bagels are done is easy with visual signs:

    1. Golden brown exterior
    2. Firm, crisp crust
    3. Deep, rich color around blueberry spots
    4. Slight resistance when gently pressed

    Your blueberry breakfast bagels are done when they look shiny and sound hollow. Let them cool for 15-20 minutes before slicing. This lets the inside set just right.

    Storage and Freezing Tips

    Keeping your homemade blueberry bagels fresh is key. The right storage and freezing methods help. This way, your bagels stay delicious for longer.

    Room Temperature Storage

    Let your bagels cool down completely before storing. You can wrap them in a clean towel or use an airtight container. This way, they stay fresh for up to 5 days.

    Freezing Blueberry Bagels

    Freezing is a great way to keep your bagels fresh longer. Here’s how to do it right:

    • Cool bagels completely before freezing
    • Wrap each bagel in plastic wrap
    • Put wrapped bagels in a freezer-safe bag
    • Remove air to avoid freezer burn

    Your bagels can stay frozen for up to 3 months. They’ll still taste great and feel soft.

    Thawing and Reheating

    Ready to enjoy a frozen bagel? Here’s what to do:

    1. Thaw at room temperature for 30 minutes
    2. To get a crispy bagel, toast it
    3. Or warm it in the oven at 350°F for 5-7 minutes
    Storage MethodDurationBest Practices
    Room TemperatureUp to 5 daysUse airtight container, keep cool
    Freezer StorageUp to 3 monthsIndividually wrap, remove air

    Pro tip: Always let your bagels cool completely before storing. This prevents moisture buildup and keeps them perfect.

    Serving Suggestions and Toppings

    Your homemade blueberry bagels are ready to take your breakfast to the next level. They’re perfect for adding a special touch to your brunch. Try pairing them with classic cream cheese for a sweet match, or get bold with new toppings.

    For a simple yet tasty choice, go for butter or blueberry cream cheese. Add some protein with scrambled eggs, smoked salmon, or turkey. If you’re vegan, almond butter or plant-based cream cheese are great alternatives.

    Be creative and turn your bagel into a gourmet sandwich. Add goat cheese, avocado, and fresh berries for a fancy twist. For those with a sweet tooth, Nutella, sliced bananas, or maple syrup are perfect. The goal is to find the perfect mix that excites your taste buds.

    Don’t forget to toast your bagel lightly. This step keeps it crispy and prevents it from getting soggy. Whether it’s a quick breakfast or a weekend brunch, these bagels are a blank canvas for your culinary dreams.

    FAQ

    Can I use frozen blueberries in my bagel recipe?

    Yes, frozen blueberries work well in blueberry bagels. Just gently fold them in and don’t thaw them first. This keeps their color and shape.

    How long do homemade blueberry bagels stay fresh?

    Homemade blueberry bagels last 2-3 days at room temperature in an airtight container. You can also freeze them for up to 3 months. This keeps them fresh and tasty.

    Do I need a stand mixer to make blueberry bagels?

    No, you can make blueberry bagels by hand. Hand-kneading helps you feel the dough’s texture better. It’s a traditional method.

    Can I make gluten-free blueberry bagels?

    Yes, you can make gluten-free blueberry bagels. Use a gluten-free flour blend for bread. The texture might be different from regular bagels.

    What is the difference between traditional and sourdough blueberry bagels?

    Sourdough blueberry bagels have a tangy flavor from natural fermentation. They’re denser and more artisanal than traditional bagels made with yeast.

    How do I prevent blueberries from sinking in the dough?

    Toss blueberries in flour before adding them to the dough. Fold them gently after kneading. Avoid overmixing to keep them evenly distributed.

    Are blueberry bagels healthy?

    Blueberry bagels can be healthy with whole grain flour and fresh blueberries. Blueberries add antioxidants and vitamins. But, enjoy them in moderation.

    Can I make bagels without boiling them?

    Boiling is key for authentic bagels. It gives them a chewy exterior and shiny surface. Without boiling, they’ll be more like bread.

    What is your rating for the recipe?

  • Swamp Soup Recipe

    Growing up in Louisiana, I remember the rich aroma of swamp soup in our kitchen. It was more than a meal; it was a link to our family’s past. The savory mix of ingredients told tales of bayou strength and warmth.

    Swamp soup is more than a recipe. It’s a lively tribute to Southern cooking, filled with Kielbasa sausage, tender beans, and fresh greens. Each bite brings you closer to the rich Southern cooking heritage.

    This swamp soup is easy to make, needing just 10 minutes to prepare and about 1.5 hours to cook. It turns simple ingredients into a memorable meal. Whether you’re an experienced cook or just starting out, this recipe will take you to the heart of Southern cuisine.

    Understanding Swamp Soup Origins

    Explore the rich culinary world of the Southern United States. Cajun stew is more than food; it’s a story of cultural heritage. Bayou bouillabaisse comes from Louisiana’s diverse cooking traditions. It mixes Native American, French, African, and Spanish cuisines.

    Roots of Bayou Cuisine

    Swamp soup’s origins go back to cooks who made do with what they had. Southern Louisiana’s unique environment offered seafood, game, and local veggies. These ingredients shaped special cooking ways.

    • Native American influence: One-pot cooking methods
    • French Creole techniques: Complex flavor layering
    • African culinary traditions: Spice blends and stew preparations

    Cultural Significance in Southern Cooking

    Swamp soup is about community and survival. Each ingredient has a story of adaptation, resilience, and creativity. It’s a tradition passed down through generations, bringing families together through food.

    Cultural InfluenceCulinary Contribution
    Creole CultureSophisticated seasoning techniques
    Cajun SettlersOne-pot meal innovations
    Indigenous TribesLocal ingredient utilization

    Evolution of the Recipe

    The cajun stew has grown from a survival dish to a celebrated art. Today, it keeps its roots while adding new cooking methods and flavors.

    Bayou bouillabaisse keeps changing, showing the lively nature of Southern cuisine. It’s a delicious sign of cultural strength and culinary creativity.

    Essential Ingredients for Authentic Swamp Soup

    To make a real swamp soup, you need the right ingredients. They add depth and character to this Southern classic. Start by learning about the key parts that make a simple meal unforgettable.

    Choosing the Right Sausage

    Andouille sausage is key to a true swamp soup. It brings a bold flavor that makes the dish stand out. You can also try:

    • Kielbasa
    • Smoked pork sausage
    • Spicy Louisiana-style sausage

    Fresh vs Canned Vegetables

    Choosing your veggies is crucial for a great swamp soup. Fresh veggies taste better and feel nicer in your mouth. But, canned options are handy for saving time.

    IngredientFresh OptionCanned Alternative
    GreensTurnip greensCanned seasoned greens
    BeansCannellini beansGreat Northern white beans
    TomatoesRoasted fresh tomatoesFire-roasted diced tomatoes

    Seasoning Blend Guide

    The secret to a great swamp soup is in its seasoning. Your spice mix should mix Cajun and Creole flavors. Here are some important seasonings:

    • Big D’s Q Steak Out seasoning
    • Cajun spice mix
    • Fresh minced garlic
    • Ground black pepper

    Pro tip: Mix your seasonings well to get the true taste of Louisiana. Don’t let them overpower your ingredients.

    Kitchen Equipment and Preparation Steps

    Making an authentic swamp soup needs the right tools and a plan. You’ll need a big soup pot, at least 8 quarts, for a rich broth.

    Here’s what you’ll need for your swamp soup adventure:

    • Large 8-quart soup pot
    • Sharp chef’s knife
    • Cutting board
    • Wooden spoon
    • Measuring cups and spoons

    Be precise when chopping your ingredients. Cut sausage and veggies the same size for even cooking. This helps your broth taste great.

    Cooking the soup takes about 30 minutes. Start with a little salt and pepper. Then, add more to taste.

    Try adding small pasta like ditalini for more substance. Add beans and greens slowly to keep the soup perfect.

    A well-prepared soup is essentially a “liquid meal” – your broth quality determines the entire dish’s success.

    This recipe is flexible. Swap white beans for Great Northern beans. Try different greens like turnip greens or kale.

    The Perfect Roux-Based Broth Foundation

    Making a real swamp soup starts with a roux-based broth. This base gives your crawfish étouffée its depth and character. It mixes traditional Cajun cooking with rich flavors.

    Creating a great roux takes patience and skill. Cajun cooking is all about slowly cooking flour and fat. This makes a rich, nutty flavor that changes the dish.

    Making the Base

    Your roux needs careful attention. Start with these key ingredients:

    • Unsalted butter or oil
    • All-purpose flour
    • Chicken broth
    • Canned tomatoes
    • Filé filé powder

    Seasoning Techniques

    Seasoning is key for a true Southern taste. The “holy trinity” of Cajun cooking – green bell pepper, onion, and celery – is essential. They give your broth its flavor.

    Seasoning ComponentQuantityPurpose
    Cayenne Pepper1-2 tspAdds moderate heat
    Filé Powder1 tbspThickens and flavors
    Garlic2-3 clovesEnhances depth

    Proper Consistency Tips

    Getting the right broth consistency is an art. Stir constantly for a smooth, velvety texture. Your crawfish étouffée should be rich but not too thick. This lets the flavors stand out.

    Mastering the Art of Swamp Soup

    Making a great catfish courtbouillon is more than just a recipe. It’s about passion, technique, and understanding flavors. Start your journey by being patient and paying close attention to details.

    Here are some key techniques for perfecting your swamp soup:

    • Developing a rich, dark roux as the flavor foundation
    • Selecting fresh, high-quality catfish for authentic taste
    • Layering ingredients to build complexity
    • Managing cooking temperatures precisely

    Timing is everything when making catfish courtbouillon. It simmers for about an hour, blending flavors together. Professional chefs say browning proteins like sausage first adds to the flavor depth.

    The secret to a great swamp soup is in the order and technique of ingredients. Begin with a strong roux, then add vegetables and proteins slowly. Keep adjusting the seasoning as you go, tasting and adjusting until it’s just right.

    “A great courtbouillon tells a story of Louisiana’s culinary heritage with every spoonful.” – Gulf Coast Chef

    Keep the heat steady and stir carefully to avoid burning. Your aim is to make a dish that’s hearty, flavorful, and truly satisfying.

    Vegetable and Bean Components

    Making a tasty cajun stew means picking the right veggies and beans. They add flavor and health to your meal. The right mix can turn a simple soup into a rich southern treat.

    Selecting Fresh Greens

    Your cajun stew shines with the right greens. Here are some top picks:

    • Turnip greens (traditional favorite)
    • Kale (robust alternative)
    • Collard greens (rich in nutrients)
    • Mustard greens (adds spicy kick)

    Bean Variety Options

    Beans bring protein and texture to your cajun stew. Here are some favorites:

    Bean TypeFlavor ProfileTexture
    Great Northern BeansMild, nuttyCreamy
    Black-Eyed PeasEarthy, slightly sweetFirm
    Cannellini BeansButtery, delicateSmooth

    Proper Cooking Times

    Getting the cooking time right is key for veggies and beans in your cajun stew. Overcooking can make them mushy, while undercooking makes them tough.

    1. Turnip greens: 20-30 minutes
    2. Great Northern Beans: 45-60 minutes
    3. Black-Eyed Peas: 30-45 minutes
    4. Kale: 10-15 minutes

    Adjust cooking times based on the freshness or type of your ingredients.

    Seasoning and Spice Guidelines

    Making the perfect okra gumbo is all about the spices. They turn a simple soup into a true masterpiece. Knowing how to season is key to making your dish stand out.

    For a real okra gumbo, you’ll need these spices:

    • Cajun seasoning blend
    • Hot sauce
    • Garlic powder
    • Smoked paprika
    • Fresh ground black pepper

    The trick to amazing flavor is to layer your spices. Start with strong spices that add depth and character to your gumbo.

    SpiceQuantityFlavor Profile
    Cajun Seasoning2-3 tablespoonsSpicy, complex heat
    Garlic Powder1 teaspoonWarm, pungent undertones
    Smoked Paprika1/2 teaspoonSmoky, rich essence

    Pro tip: Start with small amounts of spice. You can always add more, but it’s hard to take it away once it’s added.

    “Seasoning is the soul of great cooking” – Southern Chef Wisdom

    Remember, your gumbo’s flavor grows as it cooks. Keep tasting and adjusting the spices. This lets each spice shine and blend well with the rest.

    Serving Suggestions and Pairings

    Your southern wetland cuisine adventure doesn’t end with cooking the perfect swamp soup. Pair it with classic Southern sides to elevate your dining. Warm cornbread or crusty French bread is perfect, soaking up the rich broth.

    Serve the swamp soup over steamed white or brown rice for a complete meal. The rice absorbs the flavors, adding substance. Top with Parmesan cheese or fresh herbs like parsley for a vibrant finish.

    Choose beverages that complement the soup’s bold flavors. A crisp white wine or light beer balances the spiciness. Sweet tea or sparkling water with lemon is great for non-alcoholic options. This soup serves 12 and has a 4.5-star rating, perfect for gatherings.

    Store leftovers in the fridge for up to 4 days or freeze for 3 months. Reheat gently to keep the soup’s texture and flavor. Your southern wetland cuisine masterpiece will delight with every serving.

    FAQ

    What exactly is swamp soup?

    Swamp soup is a hearty dish from the South. It combines Cajun and Creole flavors. It has a roux-based broth, meats like andouille sausage, fresh veggies, and bold spices.

    How long does it take to prepare authentic swamp soup?

    Making traditional swamp soup takes about 1-2 hours. Most time is spent on making the roux and letting flavors mix.

    Can I make swamp soup vegetarian?

    Yes, you can make a veggie version. Use beans, okra, and vegetable stock instead of meat.

    What’s the most important ingredient in swamp soup?

    The roux is key. It gives the soup its deep, rich flavor that’s unique to Southern soups.

    How spicy is traditional swamp soup?

    It’s usually quite spicy. You can adjust the heat with cayenne pepper and hot sauce.

    What are the best side dishes to serve with swamp soup?

    Serve it with cornbread, white rice, French bread, and a green salad. These help balance the soup’s rich taste.

    How should I store leftover swamp soup?

    Keep it in an airtight container in the fridge for 3-4 days. The flavors get better overnight. Reheat slowly to keep the soup’s texture and flavor.

    What type of pot works best for making swamp soup?

    Use a heavy-bottomed cast-iron Dutch oven or large stockpot. They distribute heat evenly and enhance the soup’s complex flavors.

    What is your rating for the recipe?

  • Pistachio Cream Recipe

    The first time I found pistachio cream, it felt like discovering a secret treasure. Imagine putting a smooth, green pistachio paste on warm toast. The smell of nuts fills your kitchen, bringing comfort.

    This pistachio cream is more than just a nut butter. It’s a flavor celebration that makes simple recipes special.

    Whether you love baking at home or just enjoy trying new foods, making pistachio cream is simple. This spread can make any dish, from breakfast to desserts, better. It’s a key item for any kitchen.

    Understanding Pistachio Cream Origins and Popularity

    Pistachio cream has a long history, starting as a local treat and becoming loved worldwide. It’s a special vegan cream that adds a new twist to old favorites.

    Traditional Italian Crema al Pistacchio

    Sicily is where pistachio cream first came to life. Local makers have made it a dairy-free delight. The Bronte pistachios used are known as “green gold” for their quality and taste.

    • Originated in Sicily, Italy
    • Uses locally grown premium pistachios
    • Deeply rooted in traditional Italian cuisine

    Modern Global Appeal

    Today, pistachio cream is more popular than ever. People are searching for it online more and more. This is true in the U.S. and around the world.

    RegionMarket Interest
    United StatesHigh and Growing
    EuropeEstablished Demand
    Global MarketExpanding Rapidly

    Artisanal vs. Homemade Variations

    While Italian brands are found in stores, many are making their own pistachio cream at home. This spread is perfect for trying new recipes, from breakfast to desserts.

    Pistachio cream: A delicious journey from traditional Italian kitchens to global cuisine!

    Essential Ingredients for Perfect Pistachio Cream

    To make the perfect pistachio nut butter, you need the right ingredients. These ingredients should work together to give you a great taste and texture. Understanding these key components is the first step to making delicious pistachio filling.

    The base of any great pistachio cream is high-quality raw pistachios. These green nuts are the main ingredient that affects the cream’s taste and color. Choose fresh, unsalted pistachios for the best flavor.

    • Raw, unsalted pistachios (1 1/4 cups or 125g)
    • White chocolate (4 oz or 1 cup when chopped)
    • Whole milk or cream (3/4 cup or 190ml)
    • Unsalted butter (2 tablespoons or 30g)
    • Confectioner’s sugar (2 tablespoons)
    • Kosher salt (1/4 teaspoon)

    White chocolate is key for the right cream consistency. It adds sweetness and makes the cream smooth and creamy. Milk or cream makes it rich, and butter adds extra richness.

    IngredientQuantityPurpose
    Pistachios125gPrimary flavor and color source
    White Chocolate4 ozSweetness and texture
    Whole Milk190mlCreamy consistency
    Butter30gRichness and smooth texture

    Adding vanilla or almond extract can make your pistachio filling even better. It adds depth to the flavor. Remember, the quality of your ingredients matters a lot, so pick the best ones you can find.

    Choosing the Right Pistachios for Your Cream

    Creating the perfect pistachio cream starts with picking the right nuts. The type of pistachios you choose can change the flavor, color, and quality of your pistachio spread.

    Pistachios come in different types, each with its own special qualities. Knowing these differences will help you make a top-notch cream.

    California vs. Turkish Pistachios

    When picking pistachios, you’ll usually find two main types:

    • California Pistachios: Larger, bright green, with a milder flavor
    • Turkish Pistachios: Smaller, more intense green color, richer taste

    Raw vs. Roasted Options

    Your choice of pistachios greatly affects the cream’s taste:

    1. Raw Pistachios: Keep natural flavor, less intense
    2. Roasted Pistachios: Deeper, nuttier taste, more complex flavor

    Quality Indicators

    Here are the key quality markers to look for in pistachios:

    • Vibrant green color
    • Uniform nut size
    • Fresh, nutty aroma
    • No visible moisture or mold

    Pro tip: The Bronte region in Sicily is famous for its top-quality pistachios. They are known for their amazing flavor and quality.

    Required Equipment and Tools

    To make perfect pistachio cream, you need some key kitchen tools. A high-powered food processor or blender is your main tool. It turns whole pistachios into a creamy texture that’s perfect for pistachio cream.

    Here are the must-have tools for your pistachio cream adventure:

    • High-powered food processor or blender
    • Measuring cups and spoons
    • Rubber spatula
    • Airtight storage containers
    • Saucepan (for optional chocolate melting)

    The right equipment makes a big difference in your pistachio cream’s quality. A top-notch food processor gives you smooth pistachio paste without lumps. Choose one with at least 600 watts to efficiently grind pistachios.

    You can still make tasty pistachio cream with basic tools. The key is patience and technique. If your food processor isn’t super powerful, process pistachios in small batches. Scrape down the sides often to keep the texture even.

    Pro tip: Get a digital kitchen scale for exact measurements. It helps your pistachio cream taste the same every time.

    Professional pastry chefs agree: Quality tools transform good recipes into extraordinary culinary experiences.

    Optional accessories can make your pistachio cream even better:

    • Silicone spatulas for smooth scraping
    • Fine-mesh strainer for removing pistachio skins
    • Kitchen towel for additional skin removal

    Creating great pistachio cream is about knowing your tools and ingredients. Whether you’re cooking at home or dreaming of being a pastry chef, the right tools are crucial. They help you make a smooth, rich pistachio paste.

    Preparing Pistachios for Processing

    Creating the perfect nut butter or vegan cream begins with careful pistachio preparation. Your success depends on selecting and processing these delicate green nuts. This ensures a smooth, vibrant final product.

    Preparing pistachios needs precision and attention to detail. The right techniques can turn raw nuts into a delicious nut butter or vegan cream. This product will have exceptional flavor and texture.

    Efficient Shelling Techniques

    • Use a nutcracker designed specifically for pistachios
    • Gently crack shells without damaging the nut meat
    • Select fully opened pistachios for easier shelling
    • Work on a clean, flat surface to catch loose nuts

    Advanced Skin Removal Methods

    Removing pistachio skins is key for a smooth vegan cream or nut butter. The blanching method is the most effective way to remove skins.

    1. Boil pistachios for 1-2 minutes
    2. Immediately transfer to an ice bath
    3. Gently rub nuts in a clean kitchen towel
    4. Watch skins slip off effortlessly

    Pre-Processing Preparation Steps

    StepDescriptionTime Required
    SortingRemove damaged or discolored nuts5-10 minutes
    RoastingEnhance flavor at 350°F8-10 minutes
    CoolingAllow nuts to reach room temperature15-20 minutes

    Pro tip: Always use fresh, high-quality pistachios for the best nut butter and vegan cream results.

    Proper preparation is the secret to transforming simple pistachios into a luxurious culinary experience.

    Step-by-Step Pistachio Cream Making Process

    Making pistachio nut butter is all about precision and patience. It turns simple ingredients into a rich, plant-based cream. This cream will take your cooking to the next level.

    1. Prepare the Pistachios
      • Shell 1 cup of fresh pistachios
      • Blanch in boiling water for 5 minutes
      • Remove skins carefully
    2. Create Pistachio Paste
      • Blend pistachios in a food processor
      • Process for 20 minutes until smooth
      • Scrape down sides periodically
    3. Prepare Chocolate Mixture
      • Chop 3 oz white chocolate
      • Melt with ½ cup heavy cream
      • Stir until completely smooth
    4. Final Blending
      • Combine pistachio paste with chocolate mixture
      • Blend for additional 5 minutes
      • Add 1 tablespoon powdered sugar
      • Mix in a pinch of salt

    To get perfect pistachio nut butter, keep your room temperature above 75°F (24°C). This helps achieve the right consistency and smoothness.

    IngredientQuantityPurpose
    Pistachios1 cupBase of cream
    White Chocolate3 ozAdds sweetness
    Heavy Cream½ cupCreates smooth texture
    Powdered Sugar1 tbspEnhances sweetness

    Pro tip: For a dairy-free plant-based cream, substitute coconut cream and use dairy-free white chocolate.

    Your homemade pistachio cream will last up to a week in an airtight container in the fridge. Let it come to room temperature before serving for the best taste and texture.

    Storage Tips and Shelf Life

    Storing your homemade pistachio filling is key to keeping it fresh and tasty. It can last up to 18 months if stored right. This means you can enjoy it for a long time.

    To keep your pistachio cream in top shape, follow these important tips:

    • Use an airtight glass container with a tight-fitting lid
    • Store in the refrigerator at temperatures between 35-40°F
    • Keep away from direct sunlight and heat sources
    • Avoid cross-contamination by using clean utensils

    Your pistachio filling will stay fresh for about 5 days in the fridge. If you want to keep it longer, freezing is a great choice. You can freeze it in a zip-lock bag or airtight container for up to 2 months.

    Watch out for these signs that it’s gone bad:

    • Unusual odor
    • Mold growth
    • Significant color changes
    • Watery or separated consistency

    Pro tip: Label your container with the date you made it. This helps you know when it’s at its best flavor.

    Creative Ways to Use Pistachio Cream

    Your pistachio cream is a versatile treasure that makes any dish special. It’s perfect as a pistachio condiment, adding a rich, nutty flavor to breakfast, desserts, and savory meals. You can spread it on toast or make a decadent frosting for cakes.

    Breakfast fans will love Pistachio Toast, Waffles, and Overnight Oats. Dessert lovers can try 13 unique pistachio desserts like gluten-free cakes and cheesecakes. You can also make 9 frozen treats, like Pistachio Ice Cream, or try 5 types of pistachio chocolates.

    Pistachio cream is not just for sweets. It’s great in savory dishes too. Try Pistachio Pesto Chicken or make unique cocktails with vodka, gin, or rum. With over 100 uses, from energy bars to pastries, your pistachio cream will impress and inspire in the kitchen.

    FAQ

    What is pistachio cream and where does it originate?

    Pistachio cream is a rich spread from Sicily, Italy. It’s called crema al pistacchio. It’s made from ground pistachios and white chocolate for a creamy taste.

    Can I make pistachio cream if I’m vegan or lactose-intolerant?

    Yes! You can make it vegan by using coconut cream or almond milk. This way, you can enjoy it while sticking to your diet.

    What type of pistachios work best for making pistachio cream?

    Use high-quality Turkish or California pistachios. They should be bright green and have a strong flavor. Roasted nuts taste deeper than raw ones.

    How long can homemade pistachio cream be stored?

    Keep it in an airtight container in the fridge for 2-4 weeks. Always check for any signs of spoilage before eating.

    What equipment do I need to make pistachio cream at home?

    You’ll need a strong food processor or blender. Also, a kitchen scale, spatula, and airtight containers are helpful.

    Can pistachio cream be used in both sweet and savory dishes?

    Yes! It’s very versatile. Use it on toast, in pastries, on desserts, or as a sauce for veggies or meats.

    How do I remove pistachio skins for a smoother cream?

    Rub roasted pistachios between a clean towel. This makes the cream smoother and greener.

    Are there any tips for achieving the perfect pistachio cream consistency?

    Be patient. Process pistachios slowly and add liquids little by little. If it’s too thick, add oil or milk.

    Is homemade pistachio cream more cost-effective than store-bought?

    Making it at home can save money. You control the quality and flavors, making it fresher and more affordable.

    Can I adjust the sweetness of my pistachio cream?

    Yes! Use honey, maple syrup, or sugar to adjust sweetness. Start with a little and add more as needed.

    What is your rating for the recipe?